Publicité
Les langues disponibles
Les langues disponibles
Liens rapides
Please read carefully before
installation and use.
To the fitter:
Check that the product is suitable
for the intended application, follow
installation instructions and ensure
operating instructions are passed
on to the user.
To the user:
Read the following instructions
carefully (see parts diagram).
Application:
This bilge pump is designed to
exhaust standing water.
The system must have a vented
loop.
Not suitable for pumping flammable
liquids, diesel, chemicals etc.
Suitable for bilge water only.
NOTE: Bilge pump capacities may
not be sufficient to prevent flooding
from rapid accumulation of water
due to storms, rough weather and/
or rapid leaks created by hull
damaged and or unsafe naviga-
tional conditions.
Output capacity depends on instal-
lation conditions and pumping rate.
Users should be aware that
capacity may not be sufficient to
cope with rapid influx of water.
If it is intended for use for any other
purpose or with any other liquid, it
is the users' responsibility to ensure
that the pump is suitable for the
intended use and, in particular, that
the materials are fully compatible
with the liquids to be used.
With all applications, it is important
that a system of safe working
practice is applied to installation,
use and maintenance.
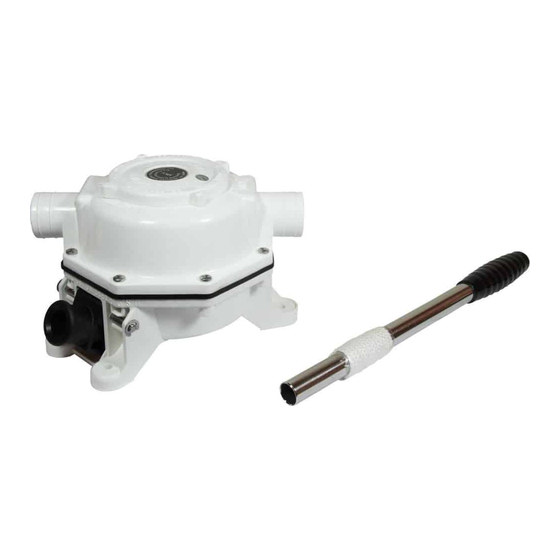
Mk 5 Universal
Mounting instructions
1. Select a suitable position where
the pump can be operated
efficiently and comfortably with the
full movement of the handle
obtainable. The top cover should
be readily accessible in case of
choking. The flow direction can be
changed, as overleaf, to increase
the options available.
2. Mark off and drill 4 holes for the
mounting bolts.
3. Complete the installation using 6
mm (¼") bolts.
4. Attach 38 mm (1½") hose to the
inlet and outlet branches making
sure that an airtight seal is made.
5. The suction pipe should be
arranged so that it will not suck
against any flat surface. A Whale
strumbox is available for this
purpose and to help clear the last
drop of water.
6. The outlet pipe should be termi-
nated at a skin fitting well above
the water line preferably in the
transom. It is considered advisable
that a sea cock is incorporated in
the line to eliminate the risk of
syphoning back.
7. Test the installation for air leaks,
correct priming and discharge.
Underdeck model with handle
seal Deckplate Kit (DP9906)
required
Mounting instructions
1. Mark off and drill the large hole
and 8 small holes. (If the handle
seal is not required drill 4 holes for
the mounting bolts and cut a slot to
clear the rocker arm).
2. Complete the installation using 8
x 6 mm (¼") countersunk screws.
Fit 2 screws through seal, bulkhead
and pump. Fit 4 screws through
seal and bulkhead. Fit 2 screws
through bulkhead and pump.
The rubber seal should fit lightly
over the pump rocker arm.
To change the direction of flow
Remove the 8 assembly screws,
and reassemble the pump as
required. The valves should not be
removed from the body. The outlet
should not be put in line with the
handle of the U/D & B/H MK5
Sanitation pump versions.
To change the rubber parts
Service Kit (AK8050) required
1. First remove the top cover, the
body and the rocker arm nut.
2. The old diaphragm can now be
replaced and the rocker arm nut
put on finger tight. (Both diaphragm
plates should have the rounded
edge towards the diaphragm).
3. Remove the old inlet valve and
plate and replace with new.
4. Unscrew the 4 screws around
the outlet branch, remove the old
valve then replace with new,
securing it with the 4 screws
provided.
5. Reassemble the body on to the
rear cover and fully tighten the 8
assembly screws and rocker arm
nut.
6. Remove the old seal from the
top cover, replace with new and
screw firmly on to the body.
Note: The outlet valve can be
replaced without removing the
pump body.
Publicité

Sommaire des Matières pour Whale Mk 5 Universal
- Page 3 1. Enlevez d’abord le couvercle mauvaises conditions de navigation Une crépine Whale est disponible à supérieur, le corps et l’écrou de la cet effet et pour aider à aspirer la chape.
- Page 4 Les pompes de cale manuelles fournies. avec la pompe. Whale sont garanties 5 ans (hormis les parties en caoutchouc) à partir 5. Remontez le corps sur le support Pièces détachées de la date d'achat, pièces et main arrière et serrez bien les 8 vis...


