
Manuels Connexes pour Fagor FG508


Sommaire des Matières pour Fagor FG508
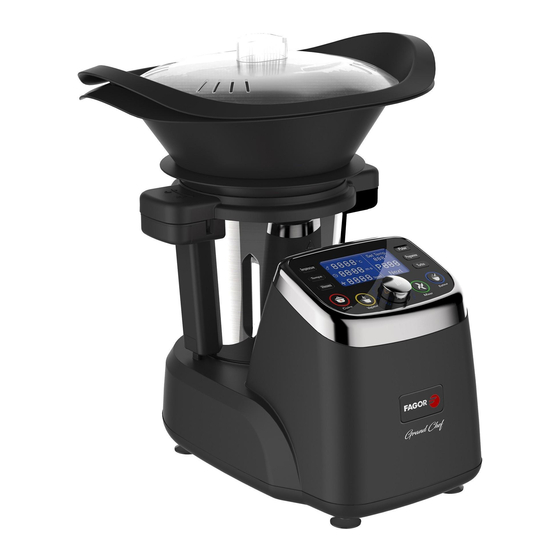
- Page 1 ROBOT DE CUISINE MULTIFONCTIONS Réf. du modèle: FG508 220-240V 50/60Hz Chauffage: Moteur 1000W 500W...
- Page 2 Important: 1. Avant d'utiliser cet appareil, lisez attentivement cette notice et reportez-vous aux schémas explicatifs. 2. Conservez cette notice pour vos besoins futurs. 3. Vérifiez que la tension indiquée sur l'appareil correspond bien à celle de votre foyer, avant de connecter l'appareil.
-
Page 3: Nom Des Pièces
NOM DES PIÈCES: A. verre doseur N. Cuit vapeur (Plateau) B. Couvercle du bol 0. Cuit vapeur C. Bague étanche 1 P. Couvercle du récipient à soupe D. Lame 1 Q. Élément en plastique à l'intérieur du cuit vapeur (PP) E. - Page 4 L. Appareil principal M. Couvercle Panneau de commandes Bouton "Temperature" (Température) Appuyez sur le bouton "Temperature" puis faites pivoter le bouton "Start/Stop/Reset" (Arrêt/Réinitialisation) pour “ ” régler la température de votre choix: Pour augmenter la valeur, utilisez le bouton , pour la faire diminuer, “–“...
- Page 5 Cuisson En mode "Veille", appuyez sur le bouton "CUIRE", le témoin lumineux s'allume (dans les autres modes appuyer sur ce bouton est inutile). La durée par défaut est de 20 minutes (l'utilisateur peut modifier cette valeur) à vitesse 2. et une température de 100°C Remarques: la vitesse et la température ainsi que la température configurée sont affichées sur l'écran LCD lorsque l'appareil fonctionne.
- Page 6 Bouton "PULSE" “ ” Maintenez le bouton Pulse enfoncé, l'appareil peut atteindre la vitesse 12 en quelques secondes, jusqu'à quitter le programme, et revenir au statut initial. Si la température est égale ou inférieure à 60°C, appuyer sur ce bouton ne donne rien. Bouton "Programme"...
- Page 7 Affichage de la durée: … Si vous réglez la durée, l'écran LCD affiche la durée et compte à rebours ( 5 4 3 2 1); Si vous ne réglez pas la durée, l'écran LCD affiche la durée et compte normalement (1,2,3,4,5...) Affichage de la température: L'écran LCD affiche la température réelle à...
- Page 8 la clé de l'autre. La lame est très coupante! Manipulez-la avec précaution. Attention: Logo "HOT SURFACE" (Surface chaude) installé sur le bol. Indique que l'élément peut devenir très chaud et que vous devriez donc le manipuler avec précaution et ne pas le toucher.
- Page 9 Placez le bol Vérifiez que les lames ont été placées à l'intérieur du bol. 1. Placez le bol sur sa base. Assurez-vous que le goulot est tournée vers l'avant. 2. Faites pivoter le couvercle du bol dans le sens antihoraire pour bloquer le bol en place. 3.
- Page 10 2. Installez le bol sur l'appareil. 3. Placez le couvercle sur le bol. 4. Branchez l'appareil et enclenchez l'interrupteur. 5. Réglez la durée de votre choix, ainsi que la vitesse. Appuyez sur le bouton "START/STOP/RESET" pour lancer l'appareil. 6. Vous entendrez un BIP au bout de 30 secondes, lorsque l'appareil aura arrêté de fonctionné automatiquement.
- Page 11 7. Après avoir utilisé le robot, éteignez-le. Retirez le couvercle du bol. 8. Retirez les aliments du bol. Attention: 1. Ne touchez pas les éléments métalliques du bol ni la lame lorsque ceux-ci sont chauds! 2. Tenez le bol par sa poignée et ne le touchez jamais directement. 3.
- Page 12 Astuces: Vérifiez que la bague étanche (C) est installée correctement sur le couvercle du bol, puis fermez le bol avec le couvercle. Cuisson à la vapeur "2" (cuit vapeur intérieur) Installez le cuit vapeur à l'intérieur Installez la lame sur le bol Installez le bol sur l'appareil Ajoutez de l'eau (min.
- Page 13 les 15 minutes. 7. La spatule permet de retirer les aliments du bol sans vous brûler. N'utilisez pas la spatule lorsque les lames fonctionnent! Extraction du cuit vapeur 1. Utilisez la spatule pour libérer le cuit vapeur. Utilisation de l'accessoire mélangeur (Papillon) Le fouet mélangeur permet d'obtenir de meilleurs résultats pour vos crèmes fouettées mayonnaises et blancs en neige.
- Page 14 1. Maintenez l'extrémité en forme de boule du fouet mélangeur. 2. Insérez le fouet sur la partie supérieure de la lame. (Voir le schéma ci-dessus) Si vous voulez retirer le fouet mélangeur de la lame, maintenez simplement l'extrémité à forme de boule du fouet et retirez-la en le faisant pivoter dans les deux sens.
- Page 15 1. Maintenez l'extrémité arrondie du cache-lame. 2. Insérez le cache-lame sur la partie supérieure de la lame. (Voir le schéma ci-dessus) Si vous voulez retirer le cache-lame de la lame, maintenez simplement l'extrémité arrondie et retirez-la en le faisant pivoter dans les deux sens. 3.
- Page 16 3. ou couvercle mal installé. 1. Les ingrédients sont présents en trop grande quantité ou la vitesse réglée est trop faible, ce qui 1. Réduisez la quantité d'ingrédients ou empêche le moteur de fonctionner correctement. réglez la vitesse sur une valeur plus 2.
- Page 17 4. Dévissez la vis de fixation et retirez toutes les pièces. Ne nettoyez pas le bol métallique ni les lames au lave-vaisselle! 5. N'utilisez pas d'objets pointus pour nettoyer l'appareil, car cela pourrait endommager les pièces et rendre le système dangereux. 6.
- Page 18 MULTIFUNCTIONAL KITCHEN MACHINE Model No.: FG508 220-240V 50/60Hz Heating: 1000W Motor: 500W...
- Page 19 Important: 18. Before using the appliance, Read these instructions and illustrations carefully. 19. Keep these instructions for use for future reference. 20. Check if the voltage indicated on the appliance corresponds to the local mains voltage before you connect the appliance. 21.
-
Page 20: Parts Name
PARTS NAME: A. Measuring cup N. Food steamer (Tray) B. Bowl lid O. Steamer C. Airproof ring 1 P. Soup storage lid D. Blade 1 Q.plastic inside steamer(PP) E. Blade 2 R. Bowl F. Blade cover S. Spatula G. Airproof ring 2 T. - Page 21 J. LCD K. Control panel L.Main appliance M.lid Control Panel Temperature button Press temperature button then Rotate Start/Stop/Reset knob can setting temperature you want:clockwise rotation is “+”, contra rotate is “–“. Temperature range: 20 ℃ - 120 ℃.The tem perature increases by 1℃. Timer button For the timer: (Timer range: 1 second-100minutes ‘99:60’) Press timer button then Rotate Start/Stop/Reset knob can setting time you want:clockwise rotation is “+”, contra...
- Page 22 contra rotate is “–“. Speed range: 1-12. Cook Under standby mode, press “Cuire” button by hand, indicator light, appliance will work in the following way(in other work mode by pressing the button is invalid) default time is 20 minutes.(users can also change the time setting) with blending by 2 speeds ℃...
- Page 23 Keep press “Pulse” button by hand, appliance can reach to maximum 12 speeds in seconds, until loosen exit ≧60℃, press the button is no working mode, recover former status. If temperature Programme button Press this button you can select the automatic program you want. 32 kinds of programs: Turbo button Keep press “Turbo”...
- Page 24 LCD will display the real temperature of bowl inner. Set temperature display LCD will display the set temperature Speed display: Speed range: 1-12 How to assemble the blade 4. Push the blade through the opening in the bottom of the bowl, ensure blade lock buckle in correct position.(See above figure) 5.
- Page 25 Bowl Caution: “Hot surface” logo marked on the bowl To indicate that the marked item can be hot and should not be touched without taking care! Maximum capacity: 3 liters Using capacity: 2 liters. Take care: Never exceed maximum capacity (2L) limit of the bowl to ensure safe usage. How to assemble/remove the bowl Place the bowl Make sure that the blades have been placed inside the bowl.
- Page 26 WARNING! The appliance is fitted with a safety lock between the bowl and the main unit. The appliance will not work unless the lid has been closed properly. Danger of the burns from the projection of food, never try and force open the lid of the bowl. Open the lid of the bowl only after the food prepared has stopped mixing.
- Page 27 16. Take out the processed food from the bowl. Caution: 6. The blade is very sharp. Handle it with care! 7. Only hold the upper part of the blade! 3. For processing the hard food such as coffee beans and almond, don’t chop it longer than 40 seconds. And rest the appliance at least 10 minutes before the next operation! 4.
- Page 28 appliance will arrive the target speed slowly and the heating will be closed . Mode 4- Steaming 1(outside steamer) The steamer is perfectly suited for preparing some food such as vegetables with meat, sausages, steamed bread, steamed fish etc. You can use the steamers in either of the following two combinations: Combination 1: Lid+ steamer (Tray) (M) + Steamer (N) Use this combination for cooking different foods.
- Page 29 Install the inside steamer Assemble the blade to the bowl Assemble the bowl to the main unit Add the water (0.5L≤water≤2L) in the bowl. (Caution: The water in the bowl should be more than 0.5 liter. 0.5L water can be used for steaming food for 30 minutes.) Then cover the bowl lid.
- Page 30 1. Use the spatula take out the inside steamer. How to use stirring attachment (Butterfly) The butterfly will help you to achieve the best results while whisking cream, beating mayonnaise or egg white. Install/remove the butterfly...
- Page 31 3. Hold the ball-shaped end of the butterfly. 4. Insert the butterfly on the upper part of the blade. (See the above figure) If you want to remove the butterfly from the blade, just hold the ball-shaped end and pull it out with rotations in both directions.
- Page 32 3.Please don't use the blade cover if stirring the liquid foods. Fault code: Code Explanation Solution When machine heating the temperature detector open circuit ,or meaning the NTC open circuit. Maintenance department to repair Machine failures Return to seller and repair 2.
- Page 33 Machine failures Return to seller and repair Machine failures Return to seller and repair Noted: if all of solutions still not working, please return to seller and repair. Cleaning 11. Before you clean the appliance, switch the appliance off and remove the plug from the socket. 12.
- Page 34 guarantee does not apply without the original packaging. Warranty: Your device has one year warranty. The warranty does not cover wear and breakage following a wrong use of the product.
- Page 35 Distribué par EUROMENAGE ZI Paris Nord II 120 Allée des Erables 93420 Villepinte France...