Publicité

Les langues disponibles
  • FR

Les langues disponibles

Liens rapides

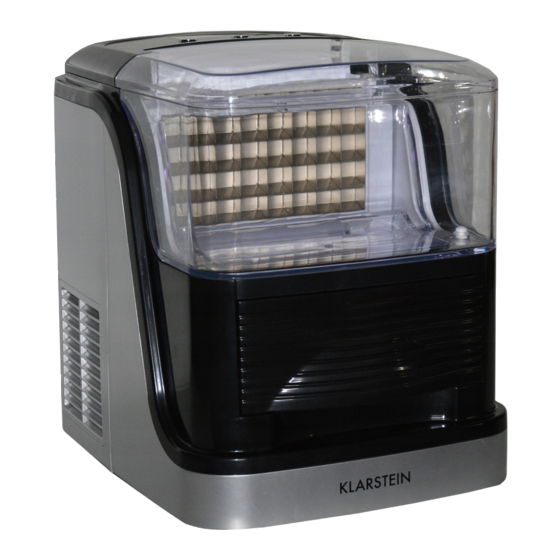
KRISTALL XL
Eiswürfelmaschine
Ice Cube Maker
Máquina de hielo
Machine à glaçons
Fabbricatore di cubetti di ghiaccio
10034515
www.klarstein.com

Publicité

Table des Matières
loading

Sommaire des Matières pour Klarstein KRISTALL XL

  • Page 1 KRISTALL XL Eiswürfelmaschine Ice Cube Maker Máquina de hielo Machine à glaçons Fabbricatore di cubetti di ghiaccio 10034515 www.klarstein.com...
  • Page 3: Table Des Matières

    Sehr geehrter Kunde, wir gratulieren Ihnen zum Erwerb Ihres Gerätes. Lesen Sie die folgenden Hinweise sorgfältig durch und befolgen Sie diese, um möglichen Schäden vorzubeugen. Für Schäden, die durch Missachtung der Hinweise und unsachgemäßen Gebrauch entstehen, übernehmen wir keine Haftung. Scannen Sie den folgenden QR-Code, um Zugriff auf die aktuellste Bedienungsanleitung und weitere Informationen rund um das Produkt zu erhalten.
  • Page 4: Sicherheitshinweise

    SICHERHEITSHINWEISE • Schließen Sie das Gerät nur an geerdete Steckdosen an, die der Spannung des Geräts entsprechen. • Wenn Sie das Gerät bewegen benutzen Sie die Griffe. • Stellen Sie das Gerät auf einen ebenen Untergrund. • Benutzen Sie das Gerät nur in Innenräumen. •...
  • Page 5 WARNUNG Gefahr durch Feuer/brennbare Materialien. Bitte beachten Sie die örtlichen Vorschriften zur Entsorgung von Geräten mit brennbaren Kältemitteln und Gasen. • Halten Sie Lüftungsöffnungen im Gerätegehäuse frei von Hindernissen. • Beschädigen Sie nicht den Kältemittelkreislauf. • Verwenden Sie keine mechanischen Vorrichtungen oder anderen Mittel, um den Auftauprozess oder den Eisgewinnungsprozess zu beschleunigen.
  • Page 6: Geräteübersicht

    GERÄTEÜBERSICHT 1 Hintere Abdeckung 9 Schwimmer-Schalter 2 Kondensator 10 Wassertemperatur-Sensor 3 Deckel 1 1 Sockelleiste 4 Wasserablauf 12 Kompressor 5 Vernebler 13 Netzkabel 6 Transparenter Wassertank 14 Wassertankabdeckung 7 Eis-Leiste 15 Bedienfeld 8 Eisbox...
  • Page 7: Inbetriebnahme Und Bedienung

    INBETRIEBNAHME UND BEDIENUNG Aufstellung Stellen Sie das Gerät aufrecht auf einen ebenen Untergrund. Um sicherzustellen, dass das Gerät ausreichend belüftet wird, ist es wichtig dass sie um das Gerät 150 mm Platz zu allen Seiten lassen. Stellen Sie das Gerät nicht neben den Backofen, eine Heizung oder ähnliche Wärmequellen.
  • Page 8: Bedienung

    Bedienung Öffnen Sie den Deckel, nehmen Sie den transparenten Tank heraus und geben Sie Wasser hinein. Setzen Sie den Tank dann wieder ein und setzen Sie den Deckel auf. Hinweis: Über dem Wassertank befindet sich ein Wasseraustrittsloch. Das eingefüllte Wasser sollte diese Position nicht überschreiten. Wenn mehr Wasser zugeführt wird, läuft das überschüssige Wasser automatisch ab.
  • Page 9: Fehlerbehebung

    FEHLERBEHEBUNG Problem Mögliche Ursache Lösungsansatz Das Gerät ist Die Stromspannung ist zu Stoppen Sie das Gerät und außergewöhnlich niedrig. schließen Sie das Gerät an laut und summt. eine Steckdose an, die der angegebenen Spannung entspricht. Die Wasser- Es befindet sich zu wenig Füllen Sie Wasser nach.
  • Page 10: Hinweise Zur Entsorgung

    Wichtige Hinweise • Es ist normal, dass der Kompressor und die Kondensatoroberfläche während dem Betriebes Temperaturen zwischen 70 °C und 90 °C erreichen und die umgebenden Bereiche sehr heiß sein können. • Durch schnelles Einfrieren können Eiswürfel trübe erscheinen. Das passiert durch Lufteinschlüsse beeinträchtigt die Qualität und den Geschmack der Eiswürfel nicht.
  • Page 11: Technical Data

    Dear Customer, Congratulations on purchasing this device. Please read the following instructions carefully and follow them to prevent possible damages. We assume no liability for damage caused by disregard of the instructions and improper use. Scan the QR code to get access to the latest user manual and more product information.
  • Page 12: Safety Instructions

    SAFETY INSTRUCTIONS • Check that the mains voltage corresponds to the rating of the appliance before operating. • Use handles or knobs when moving. Place on a flat stable surface for use. Do not use outdoors. • Do not use near or in the immediate vicinity of a bath or swimming pool or any source of liquid.
  • Page 13 WARNING Danger from fi re/fl ammable materials. Please observe the local regulations for the disposal of units with fl ammable refrigerants and gases. • Keep ventilation openings in the unit housing free of obstacles. • Do not damage the refrigerant circuit. •...
  • Page 14: Product Overview

    PRODUCT OVERVIEW 1 Rear Cover 9 Floater switch 2 Condenser 10 Water Temperature Sensor 3 Top Cover 1 1 Baseboard 4 Water Drain 12 Compressor 5 Evaporator 13 Power Cord 6 Transparent Water Box 14 Transparent Water Box Cover 7 Ice board 15 Control Panel 8 Ice Basket...
  • Page 15: Commissioning And Operation

    COMMISSIONING AND OPERATION Installation The machine should be upright to place on the horizontal plane. To ensure the machine ventilate normally, it is important to set 150 mm room on top, sides and back. Do not place the machine next to the roast oven, radiate or other heat objects. Control Panel Buttons and Indicator Lights Connect the power, the machine switches to standby mode, and the...
  • Page 16: Cleaning And Care

    Operation Open the lid, remove the transparent tank and add water. Replace the tank and replace the lid. Note: There is a water outlet hole above the water tank. The filled water should not exceed this position. If more water is added, the excess water will drain off automatically.
  • Page 17 TROUBLESHOOTING Problem Possible cause Suggested solution The device is The voltage is too low. Stop the unit and plug it into exceptionally loud an outlet that has the specified and humming. voltage. The water indicator There is too little water in Top up with water.
  • Page 18: Disposal Considerations

    Important Notes • It is normal for the compressor and condenser surface to reach temperatures between 70°C and 90°C during operation and surrounding areas may be very hot. • Due to fast freezing, ice cubes may appear “Cloudy”. This is air trapped in the water and will not affect quality or taste of ice.
  • Page 19: Datos Técnicos

    Estimado cliente: Le felicitamos por la adquisición de este producto. Lea atentamente el siguiente manual y siga cuidadosamente las instrucciones de uso con el fin de evitar posibles daños. La empresa no se responsabiliza de los daños ocasionados por un uso indebido del producto o por haber desatendido las indicaciones de seguridad.
  • Page 20: Indicaciones De Seguridad

    INDICACIONES DE SEGURIDAD • Conecte el aparato solamente a tomas de corriente con toma de tierra que se adecuen a la tensión del mismo. • Si desea desplazar el aparato, utilice las asas. • Coloque el aparato en una superficie plana y estable. •...
  • Page 21 ADVERTENCIA Peligro por fuego/materiales infl amables. Tenga en cuenta las normas locales para la eliminación de aparatos que contengan refrigerantes y gases infl amables. • Mantenga las aberturas de ventilación de la carcasa del aparato libres de obstáculos. • No dañar el circuito de refrigeración. •...
  • Page 22: Vista General Del Aparato

    VISTA GENERAL DEL APARATO 1 Rear cover 9 Interruptor del flotador 2 Condenser 10 Sensor de temperatura del agua 3 Cover 1 1 Zócalo 4 Water outlet 12 Compresor 5 Nebulizer 13 Cable de alimentación 6 Transparent water tank 14 Tapa del depósito de agua transparente 7 Cooling bar 15 Panel de control 8 Ice container...
  • Page 23: Puesta En Funcionamiento

    PUESTA EN FUNCIONAMIENTO Instalación Coloque el aparato erguido en una superficie plana. Para garantizar que el aparato tiene suficiente ventilación, es importante que deje un espacio mínimo de 150 mm a todos los lados. No coloque el aparato cerca de hornos, radiadores ni fuentes de calor similares.
  • Page 24: Limpieza Y Cuidado

    Puesta en marcha Abra la tapa, retire el depósito transparente y añada agua. Vuelva a introducir el depósito y coloque la tapa. Atención: Debajo del depósito de agua se encuentra una salida del agua. El agua añadida no debe superar esta marca. Si añade más agua, el exceso de agua se drenará...
  • Page 25: Resolución De Anomalías

    RESOLUCIÓN DE ANOMALÍAS Anomalía Posible causa Posible solución El aparato hace El voltaje es demasiado Detenga el aparato y conéctelo demasiado ruido bajo. a una toma de corriente que se y vibra. adecue a la tensión indicada. El indicador de No hay agua suficiente en Añada más agua.
  • Page 26: Retirada Del Aparato

    Indicaciones importantes • Es normal que el compresor y la superficie de condensación alcancen temperaturas de funcionamiento entre 70 °C y 90 °C y las zonas cercanas estén muy calientes. • Con una congelación muy rápida, los cubitos de hielo pueden parecer opacos. Esto ocurre por los orificios de ventilación, sin embargo, no afecta a la calidad ni al sabor del cubito de hielo.
  • Page 27: Fiche Technique

    Cher client, Toutes nos félicitations pour l’acquisition de ce nouvel appareil. Veuillez lire attentivement les instructions suivantes de branchement et d’utilisation afin d’éviter d’éventuels dommages. Le fabricant ne saurait être tenu pour responsable des dommages dus au non-respect des consignes de sécurité et à la mauvaise utilisation de l’appareil.
  • Page 28: Consignes De Sécurité

    CONSIGNES DE SÉCURITÉ • Brancher uniquement l’appareil à une prise de terre dont la tension correspond à celle de l’appareil. • Utiliser les poignées pour déplacer l’appareil. • Placer l’appareil sur une surface plane. • Utiliser l’appareil uniquement en intérieur. •...
  • Page 29 MISE EN GARDE Danger d‘incendie/de matières infl ammables. Veuillez respecter les réglementations locales concernant l‘élimination des appareils contenant des fl uides frigorigènes et des gaz infl ammables. • Veillez à ce que les ouvertures de ventilation dans le boîtier de l‘appareil soient libres d‘obstacles.
  • Page 30: Aperçu De L'appareil

    APERÇU DE L‘APPAREIL 1 Cache arrière 9 Interrupteur à flotteur 2 Condensateur 10 Capteur de température d'eau 3 Couvercle 1 1 Bas du socle 4 Evacuation d'eau 12 Compresseur 5 Nébuliseur 13 Câble d'alimentation 6 Réservoir d'eau transparent 14 Couvercle du réservoir d'eau 7 Service de glace 15 Panneau de commande 8 Bac à...
  • Page 31: Mise En Marche Et Utilisation

    MISE EN MARCHE ET UTILISATION Installation Placez l‘appareil verticalement sur une surface plane. Pour assurer une ventilation adéquate de l‘appareil, il est important de laisser un espace de 150 mm autour de l‘appareil de tous les côtés. Ne placez pas l‘appareil près d‘un four, d‘un appareil de chauffage ou de sources de chaleur similaires.
  • Page 32: Utilisation

    Utilisation Ouvrez le couvercle, sortez le réservoir transparent et versez-y de l'eau. Puis replacez le réservoir et replacez le couvercle. Remarque : au-dessus du réservoir d'eau se trouve un trou de sortie d'eau. L'eau remplie ne doit pas dépasser cette position. Si vous mettez trop d'eau, l'excès s'écoule automatiquement.
  • Page 33: Résolution Des Problèmes

    RÉSOLUTION DES PROBLÈMES Problème Cause possible Solution L'appareil est La tension est insuffisante. Arrêtez l'appareil et connectez- exceptionnellement le à une prise de courant bruyant et correspondant à la tension bourdonne. spécifiée. L'indicateur d'eau Il n'y a pas assez d'eau Rajoutez de l'eau.
  • Page 34: Informations Sur Le Recyclage

    Remarques importantes • Il est normal que le compresseur et la surface du condenseur atteignent des températures comprises entre 70 ° C et 90 ° C pendant le fonctionnement et que les zones environnantes soient très chaudes. • La congélation rapide peut rendre les glaçons troubles. la présence de poches d‘air n‘affecte pas la qualité...
  • Page 35: Dati Tecnici

    Gentile cliente, La ringraziamo per aver acquistato il dispositivo. La preghiamo di leggere attentamente le seguenti istruzioni per l’uso e di seguirle per evitare possibili danni tecnici. Non ci assumiamo alcuna responsabilità per danni scaturiti da una mancata osservazione delle avvertenze di sicurezza e da un uso improprio del dispositivo.
  • Page 36: Avvertenze Di Sicurezza

    AVVERTENZE DI SICUREZZA • Collegare il dispositivo solo a prese elettriche con messa a terra e con tensione corrispondente a quella del dispositivo. • Utilizzare le impugnature quando si sposta il dispositivo. • Posizionare il dispositivo su un fondo piano. •...
  • Page 37 AVVERTENZA Pericolo di incendio/materiali infi ammabili. Osservare le norme locali per lo smaltimento di apparecchi contenenti refrigeranti e gas infi ammabili. • Mantenere libere da ostacoli le aperture di ventilazione nell‘alloggiamento dell‘apparecchio. • Non danneggiare il circuito frigorifero. • Non utilizzare dispositivi meccanici o altri mezzi per accelerare lo sbrinamento o il recupero del ghiaccio.
  • Page 38: Descrizione Del Dispositivo

    DESCRIZIONE DEL DISPOSITIVO 1 Copertura posteriore 9 Interruttore galleggiante 2 Condensatore 10 Sensore di temperatura dell’acqua 3 Coperchio 1 1 Asse del basamento 4 Scarico dell’acqua 12 Compressore 5 Nebulizzatore 13 Cavo di alimentazione 6 Serbatoio trasparente 14 Copertura serbatoio 7 Barra del ghiaccio 15 Pannello di controllo 8 Cestello del ghiaccio...
  • Page 39: Messa In Funzione E Utilizzo

    MESSA IN FUNZIONE E UTILIZZO Posizionamento Posizionare il dispositivo in verticale su un fondo piano. Per assicurare una ventilazione sufficiente, è importante lasciare 150 mm di spazio intorno al dispositivo. Non posizionare il dispositivo vicino a forni, riscaldamento o fonti di calore simili. Pannello di controllo Tasti funzione e indicazioni Collegare il dispositivo all’alimentazione.
  • Page 40: Avvertenze Importanti

    Utilizzo Aprire il coperchio, togliere il serbatoio trasparente e riempirlo d’acqua. Riposizionare il serbatoio e il coperchio. Avvertenza: sopra al serbatoio c’è un foro di uscita. L’acqua non deve superare questa posizione. Se si aggiunge più acqua, quella in eccesso viene scaricata automaticamente.
  • Page 41: Correzione Degli Errori

    CORREZIONE DEGLI ERRORI Problema Possibile causa Soluzioni Il dispositivo è La tensione è troppo Arrestare il dispositivo e insolitamente bassa. collegarlo a una presa elettrica rumoroso ed emette con tensione corrispondente a un ronzio. quella indicata. L’indicazione Acqua insufficiente nel Aggiungere acqua.
  • Page 42: Smaltimento

    Avvertenze importanti • È normale che compressore e superfici del condensatore raggiungano temperature tra 70 e 90 °C durante il funzionamento e che le zone adiacenti possano essere estremamente bollenti. • Un congelamento troppo rapido causa la presenza di torbidità nei cubetti. Questo è...

Ce manuel est également adapté pour:

10034515

Table des Matières