Table des Matières
Publicité
Liens rapides
PLEASE CONTACT MOEN FIRST
For Installation Help, Missing or Replacement Parts
(USA)
1-800-BUY-MOEN (1-800-289-6636)
WWW.MOEN.COM
(Canada)
1-800-465-6130
WWW.MOEN.CA
POR FAVOR, CONTÁCTESE PRIMERO CON MOEN
Para obtener ayuda de instalación, piezas faltantes o de
recambio
01-800-718-4345
WWW.MOEN.COM.MX
VEUILLEZ D'ABORD CONTACTER MOEN
en cas de problèmes avec l'installation, ou pour obtenir
toute pièce manquante ou de rechange
1-800-465-6130
WWW.MOEN.CA
HELPFUL TOOLS
HERRAMIENTAS
ÚTILES
For safety and ease
of faucet
Para que el cambio
replacement, Moen
de la llave sea fácil
recommends the
y seguro, Moen
use of these helpful
le recomienda
tools.
usar estas útiles
herramientas.
ROBINET DE CUISINE À BEC RÉTRACTABLE
OUTILS UTILES
Par mesure de
sécurité et pour
faciliter l'installation,
Moen suggère
l'utilisation des
outils suivants.
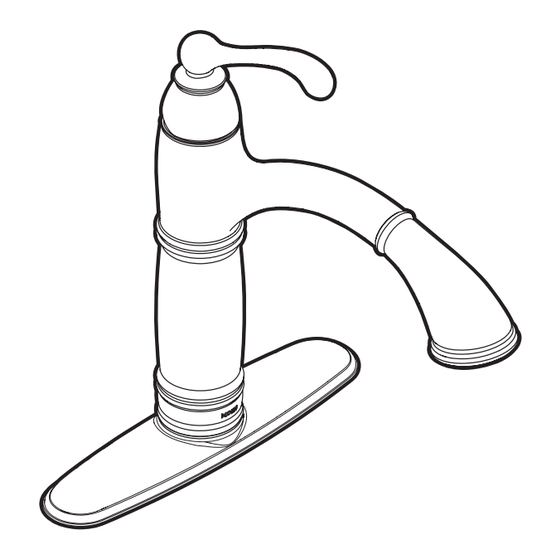
ONE HANDLE PULLOUT KITCHEN FAUCET
MEZCLADORA MONOMANDO RETRÁCTIL
Soap dispenser included with some models
Dosificador de jabón incluido con algunos modelos
Le distributeur de savon est inclus avec certains modèles.
Image is for reference only
(Style varies by model)
La imagen es sólo como referencia
(El estilo varía por el modelo)
Cette image n'est offerte qu'à titre indicatif seulement
(Le style varie selon le modèle)
Record Purchased Model Number:
Registro del número de modelo comprado:
Consigner ici le numéro du modèle acheté :
_______________________
(Save instruction sheet for future reference)
(Guarde la hoja de instrucciones para futura referencia)
(Garder ces directives pour référence ultérieure)
Register Online:
Regístrese en línea:
S'enregistrer en ligne :
www.moen.com/product-registration
INS10601B - 2/18
PARA COCINA
ET UNE POIGNÉE
Publicité
Table des Matières

Sommaire des Matières pour Moen CA87550SRSSD
- Page 1 1-800-BUY-MOEN (1-800-289-6636) ET UNE POIGNÉE WWW.MOEN.COM (Canada) 1-800-465-6130 WWW.MOEN.CA POR FAVOR, CONTÁCTESE PRIMERO CON MOEN Para obtener ayuda de instalación, piezas faltantes o de recambio 01-800-718-4345 WWW.MOEN.COM.MX Soap dispenser included with some models Dosificador de jabón incluido con algunos modelos Le distributeur de savon est inclus avec certains modèles.
-
Page 2: Parts List
Parts List A. Installation Tool H. Hose Weight O.* Deck Plate Gasket B. Deck Gasket Faucet Body C. Outlet Hose J. O-ring & Screen Not available for all D. Supply Line Hot K Spray Wand models Mounting Bracket L. Pullout Hose F. - Page 3 INS10601B - 2/18 Three Hole Installation Option - Two Piece Single Hole Installation Option Opción de instalación con tres agujeros – Dos piezas Opción de instalación con un solo agujero Option pour installation sur une ouverture Option pour installation sur trois ouvertures - 2 pièces For 3 Hole Applications: Install Faucet Body (I) into opening.
- Page 4 CHECK MOVEMENT CONTROLE EL MOVIMIENTO VÉRIFIER LE DÉPLACEMENT 50º - 60º 1. Install Mounting Bracket (E) onto shank of Faucet Body (I). Secure Mounting Bracket (E) Verify that the faucet rotates properly. with Mounting Nut (F). Verifique que la mezcladora gire correctamente. 2.
- Page 5 INS10601B - 2/18 Discard Descarte Jeter 1. Thread the Hose Protector (G) on to the end of the shank as shown. 1. Remove and discard protective cap from Spray Wand (K). 2. Verify that Screen and O-Ring (J) are located in the Spray Wand (K). 2.
- Page 6 Discard Descarte Jeter Go to step 9B1. Go to step 9A. Vaya al paso 9B1. Vaya al paso 9A. Passer à l'étape 9B1. Passer à l'étape 9A. Go to step 10 Vaya al paso 10 Passer à l’étape 10 1. Remove and discard plastic cap from end of Pullout Hose (L). 2.
- Page 7 INS10601B - 2/18 Go to step 10 Vaya al paso 10 Passer à l’étape 10 Cold Frio Froid Caliente Chaud Install zone Zona de instalación Zone d'installation 1. Attach Supply Line Hot (D) and Supply Line Cold (M) to shut off stops. IMPORTANT - Install Hose Weight (H) between bottom of loop curvature and white tape of Pullout Hose (L).
- Page 8 Clean Screen as shown by rinsing it for a few seconds to remove any possible debris. Turn off 1. Unscrew Spray Wand (K) assembly. water before reinstalling Screen and O-ring. 2. Remove the O-ring and Screen (J). Limpie el filtro como se muestra, enjuagándolo por unos segundos para remover cualquier 1.
- Page 9 Pour améliorer le rendement de votre bec rétractable ou bec de limpieza, etc. Vea la ilustración. pulvérisation, Moen o re le guide-tuyau 159060 pour isoler le tuyau des • Observe periódicamente para cerciorarse que no hayan entrado conduites de plomberie et d'autres articles sous l'évier de cuisine.
- Page 10 1. Remove Liquid Dispenser Head (P) from Dispenser Base (Q). 1. Attach Dispenser Nut (S) to Dispenser Base (Q). 2. Insert Dispenser Base through Dispenser Washer (R). 2. Tighten by hand. 1. Retire la cabeza del dosificador de líquidos (P) de la base del dosificador (Q). 1.
-
Page 11: Cleaning Instructions
Nickel Finishes: dable Spot Resist™: Spot Resist™: Moen recommends cleaning the Spot Resist finish with a mild soap, Moen recomienda limpiar el acabado Spot Resist con un jabón Moen recommande de nettoyer le fini Spot Resist avec du savon rinsing thoroughly with warm water and drying with a clean, soft suave, enjuagarlo cuidadosamente con agua tibia y secarlo con doux puis de rincer soigneusement à... -
Page 12: Garantie À Vie Limitée De Moen
é crire à Moen inc. à l’adresse indiquée ci-dessous, pour include proof of purchase and your name, address, area code estado a otro o de una provincia o nación a otra. Moen lo asesorará expliquer le défaut, d’inclure une preuve d’achat, d’inscrire son and telephone number.


