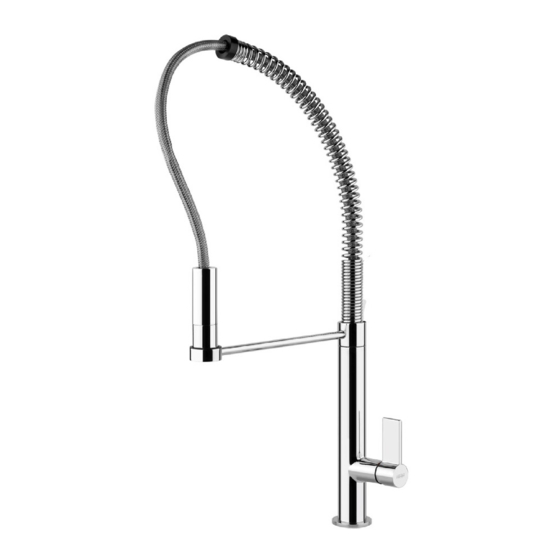
Sommaire des Matières pour Franke FFPD2000
- Page 1 INSTALLATION GUIDE / GUIDE D’INSTALLATION Pull-Out Spray Faucet - FFPD2000 - FFPD2080...
-
Page 2: Technical Data / Caractéristiques Techniques
TECHNICAL DATA / CARACTÉRISTIQUES TECHNIQUES Maximum water flow: 1.75 gpm - 60 psi. Consommation maximum d'eau: 1.75 gpm - 60 psi. Recommended pressure range: 15-75 psi - Over 75 Intervalle conseillé de pression: 15-75 psi - Au-delà 75 psi PRV required. psi est recommendèe un reducteur de flux. - Page 3 INSTALLATION INSTRUCTIONS / DIRECTIVES D'INSTALLATION Before installation and start-up Attention! For best results, Franke recommends that this faucet be installed by a licensed, professional plumber. Please read over the instructions before beginning installation. Make sure to observe all local plumbing and building codes during installation.
- Page 4 INSTALLATION INSTRUCTIONS / DIRECTIVES D'INSTALLATION - Avoid cleaning braided hoses with harsh chemicals, as this may cause damage to the hoses. - Le contact prolongé avec des substances même peu agressives peut provoquer la détérioration de la tresse et l’éclatement conséquent du flexible. 2 x Ø...
- Page 5 INSTALLATION INSTRUCTIONS / DIRECTIVES D'INSTALLATION First be sure the water supply is turned off. Fig. 1 Before inserting the single lever faucet in the hole of the sink, make sure that the base gasket is properly positioned in its seat and that the flexible hoses are well tightened to the body of the faucet.
- Page 6 USAGE / UTILISATION Open the handle to the right to start water supply; the more Fig. 4 the handle is opened the more water is supplied. Push the handle back for cold water, pull it forward for hot water. The mixer supply spout allows 360° rotation. Ouvrir la poignée vers droite pour ouvrir l’eau;...
-
Page 7: Maintenance, Entretien
MAINTENANCE / ENTRETIEN SPARE PARTS: PIÈCES DE RECHANGE: 1 - Complete lever - G29349* 1 - Levier complet - G29349* 2 - Metal ring - G29350* 2 - Virole de fixation cartouche - G29350* 3 - Cartridge - G29329 3 - Cartouche - G29329 4 - Fastening set - GR0356 4 - Set de fixage - GR0356 5 - Handshower - GR3374*... -
Page 8: Substitution De La Cartouche
MAINTENANCE / ENTRETIEN CARTRIDGE REPLACEMENT Before carrying out this operation make sure that water supply is turned off. Remove the finish plug paying attention not to damage it and unscrew the screw (A) to extract the handle (B).Lift the finishing ring nut (C) using the reference notch. Take away the indicator ring (D) and, using the wrench (E) supplied, unscrew the fastening ring nut (F) and remove the damaged cartridge (G) from the body of the mixer. -
Page 9: Nettoyage / Substitution De L'aerateur
MAINTENANCE / ENTRETIEN AERATOR CLEANING / REPLACING Before carrying out this operation make sure that water supply is turned off. If the water flow is clogged, or inconsistent, unscrew the aerator using the wrench supplied and remove it from its seat. If the aerator is clogged just rinse it with running water, without using detergents. - Page 10 MAINTENANCE / ENTRETIEN FLEXIBLE HOSE REPLACEMENT REMPLACEMENT FLEXIBLE POUR LA DOUCHETTE 9/16” [14 mm] 13/16” [20 mm] 3/8” [10 mm] 9/16” [14 mm] 1/8” [3 mm] 5/16” 5/16” [8 mm] [8 mm]...
-
Page 11: Further Information
Damage caused by impurities or acts beyond our control are not covered. Any product or part which has been repaired or altered in any manner outside of Franke’s factory, unless previously authorized in writing by Franke, will void warranty. Any replacement excludes transportation and any labor re-installation costs. -
Page 12: Conditions De Garanties À Vie
La garantie se réfère à tous les éléments liés au bon fonctionnement du produit. Franke, se réserve le droit, de réparer ou substituer le produit ou les éléments nécessaire à rétablir le bon fonctionnement de ce dernier. Franke se réserve également de droit d’inspecter le produit avant de procéder à...


