Table des Matières
Publicité
Les langues disponibles
Les langues disponibles
Liens rapides
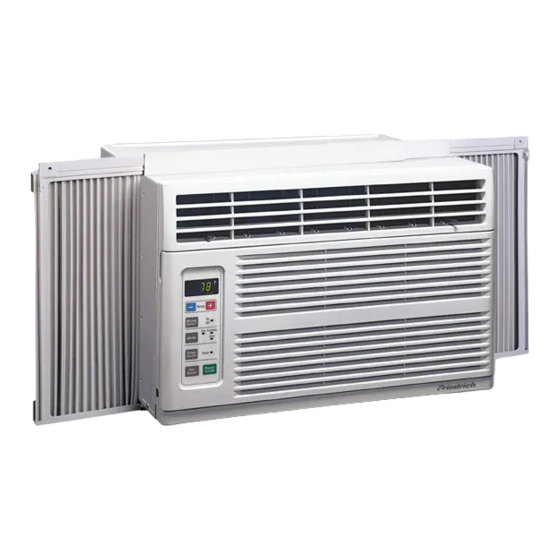
Room Air Conditioner
Installation and Operation
Manual
CP Line
115 Volts
Registering Your Room Air Conditioner
Model information can be found on the name plate located on the
side of the unit near the control panel. Please complete and mail
the owner registration card furnished with this product or register
on-line at www.friedrich.com (USA only). For your future
convenience, record the model information here.
MODEL NUMBER
920-152-00 (12/04)
CP05
SERIAL NUMBER
CP06
PURCHASE DATE
Publicité
Chapitres
Table des Matières

Manuels Connexes pour Friedrich CP05


Sommaire des Matières pour Friedrich CP05
- Page 1 Model information can be found on the name plate located on the side of the unit near the control panel. Please complete and mail the owner registration card furnished with this product or register on-line at www.friedrich.com (USA only). For your future convenience, record the model information here. MODEL NUMBER...
-
Page 2: Table Des Matières
Congratulations! Thank you for choosing Friedrich. Your Friedrich unit is designed for maximum comfort and quietness. Table of Contents Introduction ..................3 Safety Precautions...............4 How to operate your Friedrich ...........6 Features and Installation.............8 Installation Instructions...............9 Troubleshooting Tips..............13 Warranty..................14... -
Page 3: Introduction
TIME DELAY MODEL FUSE VOLT NEMA NO. Figure 1 CP05 5-15P CP06 For the Best Cooling Performance and Energy Efficiency Keep the filter clean Make sure that your air conditioner is always in top performing condition by cleaning the filter regularly. -
Page 4: Safety Precautions
• If the power cord is damaged, it must due to heat generation. generation. be replaced by the manufacturer or a Friedrich-certified service agent. Do not modify power cord Do not operate with wet Do not direct air flow directly length. - Page 5 When the air filter is to be Do not clean the air When the unit is to be conditioner with water. cleaned, switch the unit off, removed, do not touch the and unplug it. metal parts of the unit. • They are sharp and may cause •...
-
Page 6: How To Operate Your Friedrich
How to operate your Friedrich The controls will look like the following. Control and Remote Control Operations TEMPERATURE SETTING • These buttons control the temperature of the room. The temperature can be set within a range of 60°F to 86°F, in increments of 1°F. -
Page 7: Air Direction
(condensor coil) should be checked periodically and cleaned if clogged with soot or dirt from the atmosphere. Consult a certified Friedrich service agent for more information. Fig. 3 • HOW TO REMOVE THE FRONT GRILLE 1. Pull the inlet grille forward. -
Page 8: Features And Installation
Features and Installation Learning the key components will help you properly install the unit. Features 1. CABINET 6. AIR FILTER 2. HORIZONTAL AIR DEFLECTOR 7. CONTROL BOARD 3. COOL AIR DISCHARGE 8. AIR INTAKE 4. FRONT GRILLE 9. UPPER GUIDE 5. -
Page 9: Installation Instructions
Installation Instructions Window Requirements NOTE: All supporting parts should be firmly secured to wood, or metal. 1. This unit is designed for installation in standard double hung windows with actual opening widths of 22" to 36". The upper and lower sash must open sufficiently to allow a clear vertical opening of 14" from the bottom of the sash to the window sill. - Page 10 A. BEFORE INSTALLATION 1. Insert the guide panels into the guides of the air conditioner. Fasten the curtains to the unit with TYPE A screws (TYPE A) as shown Fig. 6. 2. Cut the adhesive-backed seal strip (TYPE D) to match the window width.
- Page 11 WINDOW FRAME b. While steadying the air conditioner, carefully bring the UPPER GUIDE SEAL window sash down behind the upper guide of the air conditioner, as shown in Fig. 11. ABOUT 1/4" 4. SECURE THE GUIDE PANELS BOTTOM Extend the guide panels (TYPE F) to fill the window GUIDE opening using 4 screws (TYPE B) to secure them, as shown in Fig.
-
Page 12: Electrical Safety
Electrical Safety Electrical Data 115V~ 115V~ Power cord includes a current interrupter device. A test and reset button is provided on the plug case. The device should be tested on a periodic basis by first pressing the TEST button and then the RESET button. If the TEST button does not trip or if the RESET button will not stay engaged, discontinue use of the air conditioner and contact a qualified service technician. -
Page 13: Troubleshooting Tips
Troubleshooting Tips Troubleshooting Tips save time and money! Review the chart below first and you may not need to call for service. Normal Operation • You may hear a pinging noise caused by water being picked up and thrown against the condenser on rainy days or when the humidity is high. -
Page 14: Warranty
FIRST YEAR ANY PART: If any part supplied by FRIEDRICH fails because of a defect in workmanship or material within twelve months from date of original purchase, FRIEDRICH will repair the product at no charge, provided room air conditioner is reasonably accessible for service. -
Page 15: Enregistrement De Votre Climatiseur De Pièce
Veuillez remplir et poster la carte d'enregistrement fournie avec l'appareil ou enregistrez-vous en ligne à www.friedrich.com (USA uniquement). Veuillez consigner l'information à l'emplacement ci-dessous pour référence ultérieure. NUMÉRO DU MODÈLE NUMÉRO DE SÉRIE... - Page 16 Félicitations! Merci d'avoir choisi Friedrich. Votre unité Friedrich est conçue pour vous offrir le confort et le silence maximums. Table des matières Introduction ..................3 Mesures de sécurité..............4 Instructions de Fonctionnement ..........6 Instructions d'installation............8 Guide d'installation..............9 Avant de placer un appel de service........13...
-
Page 17: Introduction
FUSIBLE NO. NEMA VOLT (Nati o nal El e ctri c al Manufacturers Associ a ti o n) Schéma CP05 5-15P CP06 Pour obtenir le meilleur rendement énergétique et de refroidissement Maintenez le filtre propre Afin de maintenir le rendement de votre climatiseur à son meilleur niveau, nettoyez régulièrement le filtre. -
Page 18: Mesures De Sécurité
Mesures de Sécurité Pour éviter des accidents corporels ou des dommages matériels, suivez ces instructions. Un mauvais fonctionnement dû à l’ignorance de ces instructions peut provoquer des préjudices corporels ou des dommages. AVERTISSEMENT Ce symbole signale un risque de blessure grave, voire mortelle. ATTENTION Ce symbole signale un risque limité... - Page 19 ATTENTION! Lorsque le filtre à air doit Ne pas nettoyer le Quand l'unité devrait être être retiré, ne pas toucher les climatiseur avec de l'eau. nettoyée, change l'unité de, et le parties métalliques de débrancher. l'appareil. • L'eau peut s'infiltrer dans •...
-
Page 20: Instructions De Fonctionnement
Instructions de Fonctionnement Les commandes ressembleront l'une des suivantes. Fonctionnement des commandes et de la télécommande RÉGLAGE DE LA TEMPÉRATURE • Ces touches contrôlent la température de la pièce. La température peut être réglée dans la fourchette de 60°F à 88 °F, avec des augmentations de 1°F. MONEY SAVER Le ventilateur s'arrête lorsque le compressur cesse de refroidir. -
Page 21: Nettoyage Et Entretien
Commandes suppléntaires et renseignements importants. La Direction de L'air • POUR AJUSTER LA DIRECTION DE L'AIR À L'AIDE DE LA COMMANDE DE DIRECTION HORIZONTALE DE L'AIR Envous servant des languettes de contrôle, vous pouvez diriger la circulation d'air vers la gauche, la droite, droit devant ou n'importe quelle Control Tabs combinaison de ces directions. -
Page 22: Instructions D'installation
Instructions d'installation Apprendre le nom des pièces avant l'installation vous aidera à mieux comprendre le processus d'installation Caractéristiques 1. BOÎTIER 6. FILTRE À AIR 7. TABLERO DE CONTROL 2. DÉFLECTEUR D'AIR HORIZONTAL 8. PRISE D'ADMISSION 3. DÉCHARGE D'AIR FROID 9. GUIDE SUPÉRIEUR 4. - Page 23 Instructions d'installation REMARQUE: Toutes les pièces de d'appui doivent être fermement fixées à une structure en bois, métal..1. Cet appareil a été conçu pour être installé dans des fenêtres doubles à guillotine dont la largeur d'ouverture varie entre 22 po.et 36 po. Le châssis du haut et celui du bas dovient s'ouvrir suffisamment pour permettre une ouverture verticale de 14"...
-
Page 24: Commencez L'installation Aintenant
A. AVANT L' INSTALLATION 1. Insérez les panneaux coulissants dans les guides du climatiseur, Attechez les panneaux coulissants à TYPE A l'appareil en vous servant des vis de type A, tel qu'illustré au Schéma 6. 2. Coupez le bourrelet avec adhésif (Type D) de manière à... - Page 25 CADRE DE b. Pendant que vous stabilisez le climatiseur, LA FENÊTRE BANDE D'ÉTANCHÉITÉ descendez tranquilement la glissière de la fenêtre en CADRE DE arrière du guide supérieur du climatiseur, tel LA FENÊTRE qu'illustré au Schéma 11. 4. ATTACHEZ LES PANNEAUX COULISSANTS APPROXI- MATIVEMENT 1/4"...
-
Page 26: L'utilisation De Cordons Prolongateurs
Electrical Safety Instructions d' installation 115~ Le cordon d'alimentation inclut un dispositif de coupure. Un bouton TEST et un bouton RESET (rétablir) sont fournis dans le boitier de la fiche. Ce dispositif doit être périodiquement testé en appuyant d'abord sur le bouton TEST et ensuite sur le bouton RESET. -
Page 27: Avant De Placer Un Appel De Service
Avant de placer un appel de service... Quelques conseils pour vous dépunner: Epargnez temps et argent! Révisez le tableau ci-dessous et vous éviterez peut-être un appel de service coûteux. Fonctionnement normal • Il se peut que vous entendiez un cliquettement causé par l'eau qui est soulevée et projetée contre le condensateur lors des jours de pluie ou lorsque le taux d'humidité... -
Page 28: Garantie
FRIEDRICH est défectueux à cause d’un défaut de main d’oeuvre ou de matériau dans les 60 mois à compter de la date d’achat initial, FRIEDRICH paiera une allocation pour les frais de main d’oeuvre et les pièces nécessaires pour réparer le système de réfrigération étanche. - Page 29 Complete y en envíe por correo la tarjeta de registro de propietario que se entrega con este producto, o bien regístrese por Internet en www.friedrich.com (sólo para EE.UU.) Para su conveniencia en el futuro, registre aquí la información sobre su modelo.
- Page 30 ¡Felicidades! Gracias por elegir Friedrich. Su unidad Friedrich está diseñada para lograr la máxima comodidad y silencio. Contenidos Introducción..................3 ........4 Precauciones Importantes de Seguridad ..........6 Instruccionnes de Funcionamiento .............8 Requerimientos de la Ventana Instrucciones para la instalación ..........9 Antes de avisar al Servicio Técnico .........13...
-
Page 31: Introducción
TIEMPO DE RETARDO MODELO FUSIBLE VOLT NEMA NO. Figura 1 CP05 5-15P CP06 Para un mejor rendimiento del enfriador y eficiencia energética Mantenga limpio el filtro Asegúrese que su acondicionador de aire esté en su condición óptica de rendimiento limpiando regularmente el filtro. -
Page 32: Precauciones Importantes De Seguridad
Precauciones Importantes de Seguridad Siga estas instrucciones para que no se produzcan daños en la propiedad ni daños personales. Se pueden producir daños si se utiliza el aparato de forma incorrecta al desconocer las instrucciones. ADVERTENCIA Este símbolo indica la posibilidad de lesiones mortales o graves. Este símbolo indica la posibilidad de lesiones o daños PRECAUCION materiales. - Page 33 PRECAUCION Cuando se vaya a quitar el No limpie el acondicionador Cuándo la unidad deberá ser filtro de aire no toque las de aire con agua. limpiada, cambia la unidad partes metálicas de la unidad lejos, y lo quita. interior. •...
-
Page 34: Instruccionnes De Funcionamiento
Instruccionnes de Funcionamiento La apariencia de los controles será como uno de los siguientes. Funcionamiento de los controles y del mando a distancia. AJUSTE DE LA TEMPERATURA • Estos botones controlan la temperatura de la habitación. La temperatura se puede establecer en un intervalo de 15°C a 31°C en aumentos de 1°C MONEY SAVER •... -
Page 35: La Dirección Del Aire
Controles adicionales e informacion importante. La dirección del aire • PARA AJUSTAR LA DIRECCION DEL AIRE USANDO CONTROL DE LA DIRECCION DEL AIRE Las dos lengüetas horizontales para el control de las rejillas le permiten descargar el aire hacia la izquierda, o algo de aire a la izquierda y otro a la derecha, o todo el aire hacia el frente, o cualquier combinación de las posiciones mencionadas. -
Page 36: Requerimientos De La Ventana
Requerimientos de la Ventana Aprender el nombre de las partes antes de la instalación le ayudará a entender el proceso de instalación. Características 1. GABINETE 6. FILTRO DE AIRE 2. DEFLECTOR HORIZONTAL DE AIRE 7. TABLEAU DE CONTROLE (VENTANILLAS VERTICAKLES) 8. -
Page 37: Instrucciones Para La Instalación
Instrucciones para la instalación Requerimientos de la ventana NOTA: Todas las piezas de soporte deben fijarse firmemente a la madera… o al metal. 1. La unidad está diseñada para ser instalada en una ventana doble con anchos entre 22" y 36". El borde superior e inferior deben de estar lo suficientemente abierto para permitir un espacio vertical de por lo menos 14"... - Page 38 A. ANTES DE INSTALAR 1. Introduzca los paneles en los guías del aire acondicionado. Las cortinas atorníllelas con los TIPO A tornillos (TIPO A), como en la Fig. 6. 2. Corte la tira de sellado de doble cara adhesiva (TIPO D) del mismo ancho que la ventana. Remueva el plástico de la banda adhesiva y colóquela en la parte superior de el marco inferior de la ventana.
- Page 39 b.Mientras mantiene el aire acondicionado en posición, BORDE DE LA VENTANA SUPERIOR cuidadosamente baje el borde de la ventana superior GUÍA SUPERIOR BANDA hasta la guía superior del aire acondicionado, como en la Fig.11. APROXI- 4. ASEGURE LOS PANELES MADAMENT 1/4" Extienda los paneles para rellenar los orificios de la GUÍA INFERIOR ventana usando los 4 tornillos (TIPO B) como en la...
- Page 40 Electrical Safety Electrical Data El cable de alimentación tiene incorporado dispositivo de interrupción de corriente. La carcasa del enchufe cuenta con un botón de prueba y otro de reinicio. EI dispositivo debe comprobarse periódicamente presionando primero el botón TEST y después RESET. Si el botón TEST no se desconecta o si el botón RESET no permanece activo, suspenda el uso del aire acondicionado y póngase en...
-
Page 41: Antes De Avisar Al Servicio Técnico
Antes de avisar al Servicio Técnico Tips para solucionar problemas (Ahorre temopo y dinero) Cuando tenga algún problema primero consulte el cuadro que se encuentra abajo y tal vez no necesite llamar para solicitar servicio técnico. Operación normal • Durar te dias lluviosos o cuando la humedad es alta usted puede escuchar un ruido metállco causa do por agua recogida y arrojada contra el condensador. -
Page 42: Garantía
FRIEDRICH con su unidad de aire acondicionado falla, debido a un defecto de manufactura o del material, dentro de los 60 meses siguientes a la fecha original de compra, FRIEDRICH pagará... - Page 43 FRIEDRICH AIR CONDITIONING CO. Visit our web site at www.friedrich.com Post Office Box 1540 • 4200 N. Pan Am Expressway • San Antonio, Texas 78295-1540 • (210) 357-4400 • FAX (210) 357-4490 P/NO.: 3828A21016B 920-152-00 (12/04)