Table des Matières

Publicité

Les langues disponibles

Les langues disponibles

Liens rapides

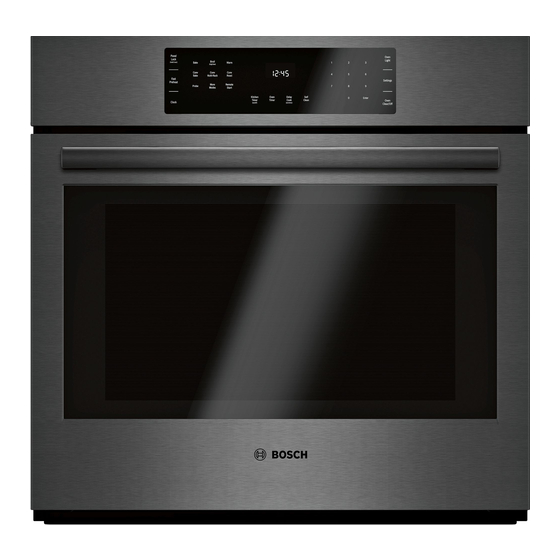
Built-in and Combination Ovens
Installation Manual
HBL8463UC
HBL8443UC
HBL8743UC
HBL8453UC
HBL8753UC
HBL87M53UC

Publicité

Table des Matières
loading

Sommaire des Matières pour Bosch HBL8463UC

  • Page 1 Built-in and Combination Ovens Installation Manual HBL8463UC HBL8443UC HBL8743UC HBL8453UC HBL8753UC HBL87M53UC...
  • Page 2: Table Des Matières

    Three-wire Connection ............. 11 Transport ................5 Oven Installation ............12 For Best Installation ............12 Bosch Combination Ovens ........... 6 Pre-Assembly of the Combination Oven ...... 12 Before you Begin ............6 Tools and Parts Needed ............. 6 Remove Oven Door Prior to Installation ....... 14 Parts Included ...............
  • Page 3: Safety Definitions

    Safety Definitions S a f e t y D e f i n i t i o n s WARNING This indicates that death or serious injuries may occur as a result of non-observance of this warning. CAUTION This indicates that minor or moderate injuries may occur as a result of non-observance of this warning.
  • Page 4: Important Safety Instructions

    IMPORTANT SAFETY INSTRUCTIONS READ AND SAVE THESE INSTRUCTIONS IMPORTANT: SAVE THESE INSTRUCTIONS FOR THE Electric Safety I M P O R T A N T S A F E T Y I N S T R U C T I O N S R E A D A N D S A V E T H E S E...
  • Page 5: Transport

    IMPORTANT SAFETY INSTRUCTIONS READ AND SAVE THESE INSTRUCTIONS Transport To avoid damage to the oven vent, use the transport method shown in the picture below.
  • Page 6: Bosch Combination Ovens

    Bosch Combination Ovens The HBL8743UC, HBL8753UC and HBL87M53UC Bosch The combination ovens listed here are approved for ▯ combination ovens are sold as sets, each of which use in a single cutout, using single power connection. includes two built-in oven components: a conventional Each conventional oven component is designed with ▯...
  • Page 7: Removing Packaging

    Removing Packaging Packaging Bracket Removal-Left and Built-in Ovens: Right Sides Cut the straps. Open top of carton and remove top wood frame. Lift the carton up and over the appliance to remove, or carefully cut along the cut line on the back left side of the carton with a blade shorter than 3/4”...
  • Page 8: Appliance And Cabinet Cutout Dimensions

    Appliance and Cabinet Cutout Dimensions It is good practice, when an oven is installed at the end Single Oven Wall Mount Installation of a cabinet run, adjacent to a perpendicular wall, or cabinet door, to allow at least 1/4” (6.4 mm) space between the side of the oven and the wall/door.
  • Page 9: Dimensions For Combination Oven Units

    Under-Counter Installation Combination Oven Traditional Installation * Includes ¾” (19 mm) base plate. **For single ovens installed under a cabinet, the junction box should be located to the right or left of the unit within range of the power cord. Dimensions for Combination Oven Units The cabinet base must be flat and capable of supporting the weight of the combination oven up to 429 lbs...
  • Page 10 Combination Oven Flush Mount Installation Flush installation requires two side cleats to be attached inside the cabinet frame, recessed from the front.
  • Page 11: Electrical Installation - Grounding Instructions

    All model ovens on the front cover of this installation instruction manual are dual rated, designed to be connected to either 208 or 240V AC, 60 Hz, 4 wire, single-phase power supply. Model Circuit Required HBL8463UC 208V, 60 Hz/ 240V, 60 Hz HBL8443UC 30 AMP HBL8453UC HBL8743UC...
  • Page 12: Oven Installation

    Oven Installation NOTICE: Before installing the appliance, be sure to Assembly of the two Oven Units verify the cabinet dimensions and electrical connections. Notes For Best Installation Do not place the oven into the wall cabinet until after ▯ mounting the speed oven on top of the lower oven and The oven can be difficult for two people to handle during securing it with the universal connector brackets.
  • Page 13 Place the speed oven on top of the universal Connecting Speed Oven Electrical Conduit to connector brackets and fasten in place using three (3) Lower Oven screws per side. Tighten the screw securely, but do Note: When installing the combination unit, the power not overtighten.
  • Page 14: Remove Oven Door Prior To Installation

    Remove Oven Door Prior to Installation Snap the conduit connector into the hole by pressing it in until it clicks into place. It is recommended to remove the conventional (lower) Follow the wiring diagram label and match and oven door to help reduce the unit weight. connect each wire by color to the wires attached to the NOTICE: Do not remove the speed oven door.
  • Page 15: Installing The Oven Into The Cabinet

    Installing the Oven into the Cabinet Close the oven door until it catches on the hinge stop levers, locking the hinges at the proper angle for door removal. The door will be open about 7 inches at the CAUTION top. This takes the spring tension off the hinges so the door can be easily lifted out.
  • Page 16: How To Replace The Oven Door

    Proceed to lift the oven following the guidelines below Install the supplied screws through the tap holes in the with the door removed: trim (2 screws for single ovens, 4 screws for combination ovens). It is recommended to drill pilot Lift points (1) on the front of the unit are for lifting from ▯...
  • Page 17: Testing Operation

    Please don’t hesitate to contact our Customer Support Department if you have any questions or in the unlikely event that your Bosch® appliance needs service. Our service team is ready to assist you. 800-944-2904 www.bosch-home.com/us/support...
  • Page 18 Avertissement issu de la proposition 65 ...... 21 Raccordement à quatre fils ..........27 Transport ................21 Raccordement à trois fils ..........27 Fours combinés Bosch ..........22 Installation du four ............28 Avant de commencer ..........22 Pour une installation optimale ........28 Outils et pièces nécessaires ...........
  • Page 19: Définitions De Sécurité

    Définitions de sécurité D é f i n i t i o n s d e s é c u r i t é AVERTISSEMENT Ceci indique que le non-respect de cet avertissement peut entraîner des blessures graves, voire la mort. ATTENTION Ceci indique que le non-respect de cet avertissement peut entraîner des blessures légères...
  • Page 20: Importantes Consignes De Sécurité

    IMPORTANTES CONSIGNES DE SÉCURITÉ LIRE ET CONSERVER CES INSTRUCTIONS IMPORTANT : CONSERVEZ CES CONSIGNES À Codes et normes de sécurité I M P O R T A N T E S C O N S I G N E S S É...
  • Page 21: Sécurité Apparentée Concernant L´équipement

    IMPORTANTES CONSIGNES DE SÉCURITÉ LIRE ET CONSERVER CES INSTRUCTIONS Sécurité apparentée concernant l´équipement Retirer le ruban adhésif et l´emballage avant d´utiliser l´appareil. Détruiere l´emballage après avoir déballé l´appareil. Ne jamais laisser les enfants jouer avec les matériaux de conditonnement. Ne jamais modifier ni altérer la configuration de l´appareil.
  • Page 22: Fours Combinés Bosch

    Les fours combinés HBL8743UC, HBL8753UC et Chaque module de four traditionnel est conçu avec ▯ HBL87M53UC de Bosch sont vendus en ensembles, qui une boîte de raccordement installée sur le dessus du comprennent tous deux modules de four intégrés : un four, qui est utilisée pour le branchement du câble...
  • Page 23: Retrait De L'emballage

    Fixez l'appareil à l'ouverture de l'armoire à l'aide des Consultez les directives d'installation dans leur ▯ ▯ vis fournies avec un tournevis Phillips. intégralité et respectez le restant des procédures présentées, y compris l'exécution d'un test de Remettez en place la porte du four que vous avez ▯...
  • Page 24: Dimensions De L'appareil Et De La Découpe Des Armoires

    Dimensions de l'appareil et de la découpe des armoires Lors de l'installation du four à l'extrémité d'une série Installation murale d'un four simple d'armoires, en position adjacente par rapport à un mur ou à une porte d'armoire perpendiculaire, il est bon de laisser un espace d'au moins 6,4 mm (1/4 po) entre le côté...
  • Page 25: Dimensions Des Modules De Fours Combinés

    Dimensions des modules de fours Installation murale affleurante d'un four simple combinés Pour une installation affleurée, il est nécessaire de fixer deux cales latérales à l'intérieur du cadre de l'armoire, La base de l'armoire doit être plane et capable de décalées de l'avant.
  • Page 26 Installation traditionnelle d'un four combiné Installation murale affleurante d'un four combiné Pour une installation affleurée, il est nécessaire de fixer deux cales latérales à l'intérieur du cadre de l'armoire, décalées de l'avant. Remarque : La boîte de raccordement peut être située au-dessus, dessous, à...
  • Page 27: Raccordement Électrique : Directives De Mise À La Terre

    être raccordés à une alimentation électrique monophasée à 4 fils de 208 ou 240 V c.a., 60 Hz. Modèle Circuit requis HBL8463UC 208 V, 60 Hz/240 V, 60 Hz HBL8443UC 30 A HBL8453UC Raccordez le fil rouge du four au fil d'alimentation HBL8743UC ▯...
  • Page 28: Installation Du Four

    Installation du four AVIS : Avant d’installer l’appareil, prendre soin de Vis de montage du four 8 vis vérifier la dimension du coffret et les raccordements sont incluses pour fixer la électriques. garniture du four à l'armoire. Les vis se trouvent dans un Pour une installation optimale petit sac en plastique accro- ché...
  • Page 29 Installez la garniture décorative. Raccordement du conduit électrique du four à cuisson rapide au four inférieur Placez la garniture décora- Remarque : Lorsque vous installez un appareil combiné, tive de manière à ce que les le câble d'alimentation doit être correctement branché à brides comportant les trous la boîte de raccordement intégrée du four.
  • Page 30: Retrait De La Porte Du Four Avant Installation

    Retrait de la porte du four avant Acheminez les fils du câble de raccordement venant du four à cuisson rapide à travers le trou de la boîte installation de raccordement intégrée au four. Quatre fils Il est recommandé de retirer la porte du four traditionnel proviennent du four à...
  • Page 31: Installation Du Four Dans L'armoire

    Installation du four dans l'armoire Mettre les deux charnières de porte en position abaissée comme le montre l'illustration. Les charnières gauche et droite de la porte diffèrent légèrement, mais ATTENTION fonctionnent de la même manière. Il est recommandé de porter des gants et des Fermer la porte du four jusqu'à...
  • Page 32: Remontage De La Porte Du Four

    Le point de soulèvement (2) à l'arrière de l'appareil Insérez les vis fournies dans les trous taraudés de la ▯ indique l'emplacement de la main opposée pour les garniture (2 vis pour les fours simples et 4 vis pour les personnes qui aident à...
  • Page 33: Opération D'essai

    L'étiquette de cote du four conventionnel (inférieur) se trouve du côté gauche de la garniture de porte. Les pièces, les filtres, les décalamineuses, les nettoyants en acier inoxydable et plus encore peuvent être achetés dans le magasin en ligne Bosch ou par téléphone. www.bosch-home.com/us/store Canada Marcone 800-482-6022...
  • Page 34 Advertencia en virtud de la Proposición 65 ....37 Conexión eléctrica ............43 Transporte ................37 Conexión de cuatro cables ..........43 Hornos de funcionamiento combinado de Bosch ..38 Conexión de tres cables ..........43 Antes de empezar ............38 Instalar el horno ............44 Herramientas y piezas necesarias .........
  • Page 35: Definiciones De Seguridad

    Definiciones de seguridad D e f i n i c i o n e s d e s e g u r i d a d ADVERTENCIA Esto indica que pueden producirse heridas graves o incluso la muerte si no se cumple con esta advertencia.
  • Page 36: Instrucciones De Seguridad Importantes

    INSTRUCCIONES DE SEGURIDAD IMPORTANTES LEA Y CONSERVE ESTAS INSTRUCCIONES IMPORTANTE: CONSERVAR ESTAS INSTRUCCIONES Códigos y normas de seguridad I N S T R U C C I O N E S S E G U R I D A D I M P O R T A N T E S L E A C O N S E R V E E S T A S...
  • Page 37: Seguridad De Los Equipos Relacionados

    INSTRUCCIONES DE SEGURIDAD IMPORTANTES LEA Y CONSERVE ESTAS INSTRUCCIONES Seguridad de los equipos relacionados Retire toda la cinta y el embalaje antes de usar el electrodoméstico. Destruya el embalaje después de desembalar el electrodoméstico. Nunca deje que los niños jueguen con el material de embalaje. Nunca modifique ni altere la construcción del electrodoméstico.
  • Page 38: Hornos De Funcionamiento Combinado De Bosch

    Hornos de funcionamiento combinado de Bosch Los hornos de funcionamiento combinado HBL8743UC, Los hornos de funcionamiento combinado que se ▯ HBL8753UC y HBL87M53UC se venden como conjuntos mencionan aquí están aprobados para su uso en un que incluyen dos componentes de hornos integrados: un hueco único mediante una sola conexión.
  • Page 39: Quitar El Embalaje

    Quitar el embalaje Extraer las placas de fijación del embalaje Hornos integrados de los laterales derecho e izquierdo Cortar los flejes. Abrir la parte superior del cartón y retirar el marco de madera de la parte superior. Levantar el cartón por encima del aparato para retirarlo, o cortarlo cuidadosamente por la línea de corte situada en su parte posterior izquierda.
  • Page 40: Dimensiones Del Electrodoméstico Y Del Hueco Para El Gabinete

    Dimensiones del electrodoméstico y del hueco para el gabinete Cuando se instala un horno al final de un gabinete, junto Instalación en pared del horno independiente a una pared perpendicular o a una puerta del gabinete, se aconseja dejar un espacio de, al menos, 1/4” (6,4 mm) entre el lateral del horno y la pared o puerta.
  • Page 41: Medidas De Las Unidades Del Horno De Funcionamiento Combinado

    Medidas de las unidades del horno de Vista lateral funcionamiento combinado La base del gabinete debe ser plana y capaz de soportar el peso del horno de funcionamiento combinado, hasta 429 libras (195 kg). Medidas del horno de funcionamiento combinado Instalación debajo de la cubierta * Incluye una placa de base de ¾...
  • Page 42 Instalación tradicional del horno de funcionamiento Instalación enrasada del horno de funcionamiento combinado combinado La instalación enrasada necesita dos refuerzos laterales fijados dentro del marco del gabinete, empotrados desde la parte delantera. Nota: La caja de conexiones puede estar ubicada encima, debajo, a la izquierda o a la derecha de la unidad, siempre que esté...
  • Page 43: Instalación Eléctrica: Instrucciones Para La Conexión A Tierra

    208 o 240 V C.A., 60 Hz, a una red de electricidad monofásica de 4 hilos. Modelo Circuito requerido HBL8463UC 208 V, 60 Hz/240 V, 60 Hz HBL8443UC 30 A HBL8453UC...
  • Page 44: Instalar El Horno

    Instalar el horno AVISO: Antes de instalar el aparato, asegúrese de Tornillos de instalación del verificar las dimensiones del gabinete y las conexiones horno (8): se incluyen torni- eléctricas. llos para asegurar la moldura del horno al gabinete. Los tor- Para una mejor instalación nillos se encuentran en una bolsa pequeña de plástico...
  • Page 45 Instalar la moldura decorativa. Conectar el conducto eléctrico del horno rápido al horno inferior Colocar la moldura decora- Nota: Al montar la unidad de funcionamiento tiva de modo que los bordes combinado, el cable de salida debe estar correctamente con los orificios miren hacia colocado en la caja de conexiones montada en el horno.
  • Page 46: Quitar La Puerta Del Horno Antes De La Instalación

    Quitar la puerta del horno antes de la Guiar los cables del conducto que vienen del horno rápido a través del orificio en la caja de conexiones instalación montada en el horno. Hay cuatro cables que vienen Se recomienda extraer la puerta del horno convencional del horno rápido.
  • Page 47: Instalar El Horno En El Gabinete

    Instalar el horno en el gabinete Poner ambas bisagras móviles de la puerta en su posición más baja posible, tal y como se muestra en la ilustración. Las bisagras izquierda y derecha de la ATENCION puerta difieren ligeramente, pero funcionan de la misma forma.
  • Page 48: Cómo Cambiar La Puerta Del Horno

    Proceder a levantar el horno siguiendo las instrucciones Colocar el horno en la abertura del gabinete de abajo una vez que se haya extraído la puerta La unidad y el material de embalaje bajo ella (palet) Los puntos de agarre (1) en el frontal de la unidad deben colocarse justo delante de la abertura del ▯...
  • Page 49: Probar El Funcionamiento

    Una vez que ambas bisagras están totalmente encajadas tal y como se describe en el paso 3, abrir con cuidado la puerta hasta que esté completamente abierta. Presionar las palancas de ambas bisagras hacia arriba y adelante hasta que queden bloqueados en la ranura y alineados con el frente del cuerpo del horno.
  • Page 50: Soporte De Bosch

    No dude en comunicarse con nuestro Departamento de Atención al Cliente si tiene alguna pregunta o en el caso poco probable de que su aparato Bosch® necesite servicio técnico. Nuestro equipo de servicio técnico está listo para asistirlo.
  • Page 52 *8001137563* 8001137563 1901 Main Street, Suite 600 • Irvine, CA 92614 • 800-944-2904 www.bosch-home.com • © 2019 BSH Home Appliances 990220...

Ce manuel est également adapté pour:

Hbl8443ucHbl8743ucHbl8453ucHbl8753ucHbl87m53uc

Table des Matières