Table des Matières
Publicité
Les langues disponibles
Les langues disponibles
Liens rapides
Questo manuale d'istruzione è fornito da trovaprezzi.it. Scopri tutte le offerte per
cerca il tuo prodotto tra le
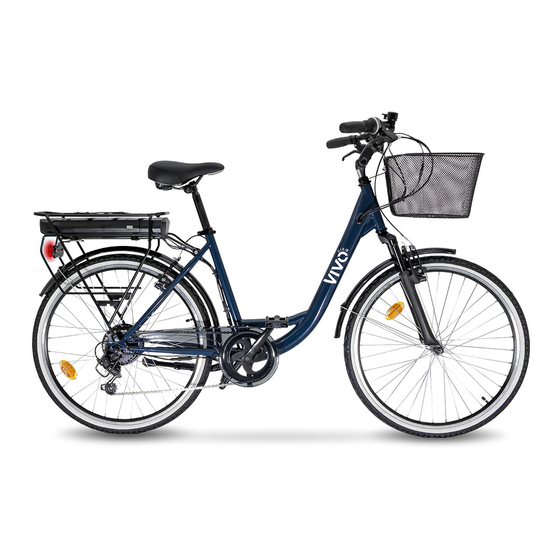
MANUALE D'USO PER BICICLETTA
A PEDALATA ASSISTITA
MANUALE D'USO E MANUTENZIONE
INSTRUCTIONS FOR USE AND MAINTENANCE
INSTRUCCIONES DE USO Y MANTENIMIENTO
GEBRUIKSAANWIJZING EN ONDERHOUD
MODE D'EMPLOI ET D'ENTRETIEN
migliori offerte di Biciclette elettriche
Vivobike VM26
Pag. 2
Pag. 17
Pag. 31
Pag. 46
Pag. 61
1/76
o
Publicité
Chapitres
Table des Matières
Dépannage

Manuels Connexes pour Vivobike VM26


Sommaire des Matières pour Vivobike VM26
- Page 1 Questo manuale d’istruzione è fornito da trovaprezzi.it. Scopri tutte le offerte per Vivobike VM26 cerca il tuo prodotto tra le migliori offerte di Biciclette elettriche MANUALE D’USO PER BICICLETTA A PEDALATA ASSISTITA MANUALE D’USO E MANUTENZIONE Pag. 2 INSTRUCTIONS FOR USE AND MAINTENANCE Pag.
-
Page 2: Manuale D'uso Per Biciclettaa Pedalata Assistita M-Vm26
MANUALE D’USO PER BICICLETTA A PEDALATA ASSISTITA M-VM26 2/76... - Page 3 Congratulazioni per l’acquisto della Vs. bicicletta elettrica M-VM26 attentamente progettata e prodotta secondo i più recenti standard qualitativi europei, incluso: EN 15194 Per un corretto utilizzo della bicicletta si prega di leggere attentamente il manuale d’uso in essere prima dell’utilizzo.
-
Page 4: Avvertenze
Ⅰ. Condizioni per una corretta guida Il modello M-VM26 è stato progettato per la guida su strada o su superficie pavimentata, dove i pneumatici forniti in dotazione non perdono il contatto con il terreno. Ciò deve essere correttamente mantenuto secondo le istruzioni contenute in questo manuale;... - Page 5 Attenzione: Si avverte che in caso di violazione delle condizioni sopracitate, con conseguente rischio di lesioni personali, danni o perdite, la garanzia decadrà automaticamente. Ⅱ. Nomi dei componenti della bicicletta elettrica a pedalata assistita VAE E-4600 (26”) (Fig 1) 1.Copertone e camere d’aria 11.
-
Page 6: Table Des Matières
Istruzioni LA MANUTENZIONE “STRAORDINARIA” DEI COMPONENTI MECCANICI ED ELETTRICI DEVE ESSERE EFFETTUATA DA UN TECNICO QUALIFICATO. Ⅲ. MANUALE PER LE PARTI ELETTRICHE DELLA BICICLETTA Il ciclista dovrà pedalare in senso orario per ottenere la dovuta assistenza dal motore. Questa è un'importante funzione di sicurezza. -
Page 7: Funzionamento
• Non superare il peso complessivo di 130 kg contemplando il ciclista, la bicicletta e l’eventuale carico • L’utilizzo corretto della bicicletta deve essere effettuato da un solo individuo • Garantire una manutenzione regolare sulla bicicletta seguendo rigorosamente questo manuale •... - Page 8 (Fig. 2) (Fig. 2.1) (Fig. 3) Innanzitutto, posizionare la batteria lungo il dispositivo di scorrimento in senso orizzontale (come in fig. 3), spingerla all'interno e assicurare una perfetta aderenza. In secondo luogo, assicurarsi che il pacco batteria sia inserito saldamente al connettore interno nell'alloggiamento dell’unità di controllo. Avviso di chiusura della batteria (Fig.4.1,4.2) Fig.
- Page 9 Se non c’è alcuna presa di corrente vicino alla bicicletta, la batteria può essere rimossa per ricaricarla. Prima di rimuovere la batteria dalla bicicletta, è necessario procedere come segue: * Accertarsi che l'interruttore sia spento, il pulsante deve essere all’infuori (Fig. 4.5). * Girare la chiave verso sinistra per sbloccare la batteria.
-
Page 10: Uso E Manutenzione Della Batteria
5.3 Selezione livello di assistenza Quando l'apparecchio è acceso, è possibile selezionare la tipologia di assistenza tra 3 livelli disponibili, LOW, MID E HIGH. Premere il tasto "+" e "-" per selezionare il livello di assistenza. Ecco come impostare il livello di assistenza: ✓... - Page 11 • lunga vita • un’ampia gamma di temperature di lavoro: da -10°C a +40°C. Per assicurare il corretto funzionamento e durata nel tempo della batteria e per proteggerla da eventuali danni si prega di seguire la seguente linea guida: Durante la percorrenza di un tragitto, quando il livello della carica della batteria sul display LED è...
- Page 12 * Il caricatore non deve essere smontato * Caricare la batteria in un luogo asciutto all’interno. * Si deve usare solo il caricabatterie fornito con la bici elettrica, altrimenti si potrebbe danneggiare la batteria invalidando così la garanzia * Durante la ricarica, sia la batteria che il caricabatterie devono trovarsi a una distanza minima di 10 cm dalla parete o in condizioni di ventilazione per il raffreddamento.
-
Page 13: Risoluzione Dei Problemi
Avvertenza: non aprire la scatola dell’unità di controllo. Qualsiasi tentativo o manomissione invaliderà la garanzia. Rivolgersi al rivenditore locale o al servizio di assistenza autorizzato per riparare la bicicletta. 10. Mantenimento del controllo di spegnimento della leva del freno * Questo è... -
Page 14: Schema Elettrico E Specifiche Tecniche
frequente 6) la batteria è stata problema; effettuare ricarica inutilizzata per un lungo periodo di regolare come descritto nel manuale di tempo istruzioni (fare riferimento al Capitolo 6.3) Se le indicazioni citate non hanno sortito alcun effetto, contattare il rivenditore o il servizio autorizzato. - Page 15 Fig.12 I Cavo del Motore connesso al II cavo di alimentazione è motore collegato alla corrente 1. Bianco (segnale del freno) 1- Verde (Motore HA) 1. Rosso (36 V) 2. Rosso (alimentazione 2- Giallo (Motore HB) 2. Nero (terra) positiva) 3- Blu (Motore HC) 3.
- Page 16 13. Scheda delle principali specifiche tecniche Di seguito il modello della Vs. bicicletta: Modello Osservazioni M-VM26 M-VM26 Alcuni dati tecnici generali in merito alla bicicletta a pedalata assistita: Velocità massima con pedalata ad assistenza 25km/h ±10% elettrica: Distanza con batteria a carica completa: 36V: 75~80 Km (carico totale ≦75kgs)
- Page 17 USER’S MANUAL FOR M-VM26 17/76...
- Page 18 Congratulations on your purchase of this e-bike M-VM26. It has been carefully designed and manufactured according to the latest international quality standards, including: EN 15194 Please read this instruction manual carefully and thoroughly before riding. It contains important information on safety, and maintenance.
- Page 19 Ⅰ. Conditions for riding This pedal electric assistance bicycle is designed for riding on road or riding on a paved surface where the tyres do not lose ground contact. It must be properly maintained according to the instructions found within this book; The maximum weight of the rider, bike and load is required to be less than 130kg.
- Page 20 Ⅱ. Name of components (Fig. 1) 1. Tyres & tubes 11. Pedals 21. Free wheel 2. Rims 12. Crank set 22. Stand 3. Spokes 13. Carter 23. Rear mudguard 4. Front hub with quick release 14. Seat clamp 24. Rear carrier 5.
-
Page 21: Important Safety Cautions
Ⅲ. MANUAL FOR THE ELECTRIC PARTS The rider must pedal forward to obtain any assistance from the motor. This is an important safety feature. This electric pedal assistance bikes will provide assistance up to 25 Km/h, after that the motor will cut out. You may go faster but must do so under your own effort without the electric assistance. -
Page 22: Operation
• When cleaning this bike, please wipe the surface with a piece of soft cloth. For very dirty areas you can wipe it with a little neutral soap and water. Warning: do not wash this electric bike direct with spraying water especially pressure washers. Avoid water entering electric components as this may result in damage of the electric components. - Page 23 (Fig. 3) Firstly, please put the battery case along this slider horizontally (as Fig 3), then push it into and ensure a snug fit. Second, make sure the battery pack is firmly pushed into the controller housing and its connector is securely inserted inside the controller box.
-
Page 24: Led And Function
(Fig. 4.4) (Fig. 4.3) (Fig. 4.5) 5. LED and Function 5.0 On / Off: Press the button to turn the LED display on and off. 5.1 6KM/H Long press the button to use the "assisted start" function to facilitate the start of the race. After the motor starts working and the bike running, you could easily pedal and release the button. -
Page 25: Using And Maintaining The Battery
✓ When selecting the HIGH assistance level, meaning more electric power and less human propulsion are applied to the bike. ✓ This level is suitable for uphill, head wind or heavy load riding. ✓ When shifting to MID assistance level, it means electric and human propulsion almost fifty/fifty applied to this bike. -
Page 26: Using And Maintaining The Charger
Remember to charge the battery full before you will ride for a long trip! Press the button on the end of battery case, when the 4 lights are all green color, it shows the battery is full of power. (Fig. 6.2) Notice: the red light (near the on/off) means the battery must be charged rapidly. -
Page 27: Using And Maintaining The Electric Hub Motor
Procedure for charging Please charge the bike battery according to the following procedure: 7.1 The battery can be charged by the AC, the switch is not necessary to be turned on. 7.2 Insert the charger output plug into the battery securely and then, plug the main cable of the charger into a reachable AC outlet;... -
Page 28: Maintaining The Power-Off Control Of The Brake Lever
10. Maintaining the power-off control of the brake lever* This is a very important component for riding with safety. First, you should pay attention to protect it from impact and avoid any damage. Second, make regular check on all bolts and nuts, and fasten them securely. 11. - Page 29 3) the temperature is too low. above has no effect, please contact your vendor or authorized service. After charging over 4-5 1) environment temperature is 1) charge the battery in an area under hours, the charger indicator 40°C and above. 40°C, or according to this instruction LED is still red, while the 2) environment temperature is...
- Page 30 12. Diagram and specification We reserve the right, without further notice, makes modifications to the product. For further advice, please contact your vendor. 30/76...
-
Page 31: Main Technical Specification Sheet
13. Main technical specification sheet Please find model name of your bike below: Model Remark (for reference) M-VM26 M-VM26 Here is some of the general technical data for this electric bike: Maximum speed with electric assistance: 25km/h ±10% Distance per full charge: 36V: 75~80 Km (total loading ≦75kgs) - Page 32 MANUAL DEL USUARIO PARA M-VM26 32/76...
- Page 33 Enhorabuena por la compra de esta Bicicleta Eléctrica M-VM26 que ha sido cuidadosamente proyectada y fabricada siguiendo los últimos estándares internacionales de calidad, incluidos: EN 15194 Rogamos que lean completamente y con atención este manual de instrucciones antes de utilizar la bicicleta.
- Page 34 I.Condiciones para el uso de esta bicicleta eléctrica de pedaleo asistido Esta bicicleta eléctrica de pedaleo asistido ha sido proyectada para ser utilizada en carretera o en superficies pavimentadas donde las ruedas no pierden contacto con el terreno. Su manutención tiene que ser realizada según las instrucciones contenidas en este manual.
- Page 35 Ⅱ.Lista de los componentes de la bicicleta eléctrica de pedaleo asistido (Fig 1) Cubiertas y Tubos Sillín Llantas Cadena Radios Protector RD Buje anterior Desviador posterior Horquilla anterior Buje del motor posterior Frenos V-Brake anteriores Rueda libre Guardabarros anterior Caballete Manillar y vástago Guardabarros posterior Campanilla...
-
Page 36: Precauciones Importantes De Seguridad
Ⅲ. MANUAL PARA LAS PARTES ELÉCTRICAS DE LA BICICLETA El usuario tiene que pedalear hacia adelante para obtener cualquier tipo de asistencia del motor. Esta es una medida importantísima de seguridad. Esta bicicleta de pedaleo asistido ofrecerá asistencia hasta 25 Kms./h , y a partir de ahí... - Page 37 • No se puede saltar, hacer carreras, efectuar acrobacias o abusar de la bicicleta • Jamás se debe conducir bajo el efecto de estupefacientes o de alcohol • Les aconsejamos que usen los faros cuando se conduce en la oscuridad, con niebla o en caso de escasa visibilidad.
- Page 38 Fig. 2) (Fig. 2.1) (Fig. 3) En primer lugar, coloque la batería en la superficie deslizante perfectamente horizontal (como en la Fig. 3), luego empújela para asegurarse de que se adhiera perfectamente al controlador. Bloqueo / desbloqueo de la batería (Fig.4.1,4.2) Fig.
- Page 39 * Recuerde retirar y guardar la llave después de sacarla de la bicicleta !!! No hay otras copias disponibles. Fig. Fig. 4.3 Fig. Fig. 4.4 Fig. Fig. 4.5 5. Display LED y Funcionamiento 5.0 Encendido / Apagado: Presione el botón para encender y apagar la pantalla LED.
- Page 40 ✓ Cuando la alimentación está encendida, el LED “middle” mediano se enciende cuando el nivel de asistencia está en el 2° grado. Despues se puede apretar el botón “+” y “-” para elegir el nivel bajo, mediano o alto. ✓ Actuando sobre los botones "+" y "-" es posible aprovechar tres niveles intermedios de asistencia, que se pueden activar cuando, pasando por BAJO, MEDIO y ALTO, los LED comienzan a parpadear.
- Page 41 Para garantizar una larga vida a la batería y para no dañarla, hay que seguir las siguientes pautas de uso: 6.1 Durante la conducción, cuando vea que la potencia disminuye en el LED de la pantalla (consulte la Fig. 6.1), la batería debe cargarse en poco tiempo! (Fig.
- Page 42 Procedimiento de recarga Para recargar la batería de la bicicleta eléctrica es necesario seguir el procedimiento indicado a continuación: 7.1 La batería puede cargarse desde la CA, el interruptor no tiene que estar encendido obligatoriamente. Introducir el enchufe de salida del cargador en la batería de forma segura y a continuación conectar el cable principal del cargador en una toma de corriente cercana;...
- Page 43 10.Manutención del “Power-off Control” de las palancas de freno* Esta es una componente fundamental para utilizar la bicicleta de forma segura. En primer lugar, hay que tener muchísimo cuidado para evitar impactos que podrían dañarla. En segundo lugar, hay que controlar que todas las tuercas y tornillos estén ajustados perfectamente.
- Page 44 Después haber 1)Problema con la toma de corriente; 1) Controlar y reparar el enchufe. conectado el cargador al 2)Contacto débil entre la toma de 2) Controlar y volver a enchufar el cargador enchufe, el LED no se corriente y el cargador; en la toma de corriente más fuertemente.
- Page 45 cable motor está II. El cable de alimentación está conectado al motor conectado a la corriente 1-blanco (señal del freno) 1- verde (motor HA) 1- rojo (36V) 2- rojo (alimentación positiva) 2- amarillo (motor HB) 2- negro 3- negro (alimentación negativo) 3- azul (motor HC) 4- azul (cable de bloqueo) 4- rojo (+5V)
- Page 46 Ficha de los principales detalles técnicos En la siguiente tabla encontrarán el modelo de su bicicleta: Modelo Observaciones (como referencia) M-VM26 M-VM26 He aquí algunos datos técnicos generales de esta bicicleta eléctrica: Máxima velocidad con asistencia eléctrica: 25kms/h ±10% 36V: 75~80 kms (recarga total ≦75kgs.)
- Page 47 GEBRUIKERSHANDLEIDING VOOR ELEKTRISCH ONDERSTEUNDE FIETSEN MODEL M-VM26 47/76...
- Page 48 Gefeliciteerd met de aankoop van deze elektrische fiets E-bike mod. M-VM26 Hij werd met zorg ontworpen en geproduceerd in overeenstemming met de recentste kwaliteitsnormen, waaronder: EN 15194 Gelieve deze handleiding aandachtig en zorgvuldig te lezen voordat u de fiets gaat gebruiken.
- Page 49 I. Voorwaarden om te fietsen met deze elektrisch ondersteunde fiets Deze elektrische fiets met trapondersteuning is ontworpen voor gebruik op de weg of verharde ondergrond, waarbij de banden geen contact verliezen met de grond. Hij moet goed worden onderhouden volgens de instructies in deze handleiding.
- Page 50 Naam van de onderdelen van de elektrische fiets met trapondersteuning (Fig. 1) 1. Band en binnenband 16. Zadel 2. Velg 17. Ketting 3. Spaken 18. Derailleurbeschermer 4. Voorste naaf met quickrelease 19. Achterderailleur 5. Voorste vork 20. Achterste naaf met motor 6.
-
Page 51: Belangrijke Voorzorgsmaatregelen
III. HANDLEIDING VOOR DE ELEKTRISCHE ONDERDELEN VAN DE FIETS De bestuurder moet voorwaarts trappen om ondersteuning te krijgen van de motor. Er is een belangrijke veiligheidsvoorziening ingebouwd: deze elektrische fietsen geven ondersteuning tot 25 km/u. Daarna schakelt de motor zichzelf uit. Er kan sneller worden gefietst, maar dan op eigen krachten en zonder elektrische ondersteuning. -
Page 52: Bediening
zichtbaarheid fietst. • Maak de fiets schoon door het oppervlak schoon te vegen met een zachte doek. Erg vuile stukken kunt u schoonmaken met een beetje neutrale zeep en water. WAARSCHUWING: Spuit de fiets nooit rechtstreeks af en zeker niet met een hogedrukreiniger. Voorkom dat er water in een van de elektrische onderdelen komt, want dit kan schade veroorzaken. - Page 53 (Fig. 3) Plaats eerst de batterijhouder horizontaal langs deze schuifregelaar (zoals in Afb. 3), druk hem er vervolgens in en zorg dat hij goed aansluit. Zorg er ten tweede voor dat de batterij stevig in de controllerbehuizing is gedrukt en dat de connector stevig in de controllerbox is gestoken. Let op de batterijvergrendeling (Fig.4.1, 4.2) (Fig.
- Page 54 (Fig. 4.4) (Fig. 4.3) (Fig. 4.5) 5. DISPLAY LED EN FUNCTIES 5.0 Aan/Uit: Druk op de knop omhet LED-display in en uit te schakelen. 5.1 6 km/h Druk lang op de knop om de "geassisteerde start" -functie te gebruiken om de start van de race te vergemakkelijken. (Fig.
-
Page 55: Gebruik En Onderhoud Van De Accu
✓ Wanneer u het hoogste ondersteuningsniveau kiest, wordt er meer elektrische stroom aangewend en moet er minder hard getrapt worden. Dit niveau is geschikt voor bergop, tegen wind of bij zware lading. ✓ Bij het middelste ondersteuningsniveau is het niveau van de trapondersteuning en de kracht die uitgevoerd moet worden om te trappen ongeveer gelijk. - Page 56 Vergeet niet om de batterij volledig op te laden voordat u een lange reis gaat maken! Druk op de knop aan het einde van de batterijhouder, wanneer de 4 lampjes allemaal groen van kleur zijn, geeft dit aan dat de batterij vol Let op: het rode lampje (bij aan / uit) betekent dat de batterij snel moet worden opgeladen.
-
Page 57: Gebruik En Onderhoud Van De Elektrische Naafmotor
Laadprocedure Laad de fietsaccu volgens de hieronder beschreven procedure: De accu kan worden opgeladen zonder dat de schakelaar moet worden aangezet. Steek de aansluiting van de lader veilig in de batterij en steek daarna de stekker van de lader in een bereikbaar stopcontact. -
Page 58: Onderhoud Van De Uitschakelbediening Van De Remgreep
10. Onderhoud van de uitschakelbediening van de remgreep* Dit is een zeer belangrijk onderdeel voor uw veiligheid tijdens het rijden. Bescherm hem te allen tijden tegen schokken en voorkom eventuele schade. Controleer daarnaast regelmatig alle bouten en moeren en zorg ervoor dat ze stevig vastzitten. - Page 59 branden wanneer de stopcontact; indien nodig repareren. accu wordt opgeladen. 2) Er is een slecht contact tussen de 2) Controleer of de stekker goed in het stekker en het stopcontact; stopcontact zit. 3) Laad de accu 3) De temperatuur is te laag. binnenshuis.
- Page 60 (Fig. 12) 60/76...
-
Page 61: Belangrijkste Technische Specificaties
13. Belangrijkste technische specificatiesL Modelnaam van uw fiets: Model Opmerking (ter referentie) M-VM26 M-VM26 Enkele algemene technische gegevens voor deze elektrische fiets: Maximumsnelheid met elektrische ondersteuning: 25 km/u ±10% 36 V: 50~60 km (totaal gewicht ≦75 kg) Afstand met volledige lading:... - Page 62 MANUEL D’INSTRUCTIONS POUR VÉLO À ASSISTANCE ÉLECTRIQUE M-VM26 62/76...
- Page 63 Félicitations pour votre achat de ce vélo à assistance électrique M-VM26 Il a été précautionneusement conçu et fabriqué en conformité avec les derniers standards de qualité européens dont: EN 15194 Veuillez prendre le temps de lire ces instructions avec attention avant de monter en selle.
-
Page 64: Conditions D'usage De Ce Vélo À Assistance Électrique
Conditions d'usage de ce vélo à assistance électrique Ce vélo à assistance électrique est conçu pour un usage sur route ou sur une surface pavée où les pneus sont toujours en contact avec le sol. Il doit être correctement entretenu selon les instructions de ce manuel. Le poids maximum de l'utilisateur, vélo et des bagages ne doit pas excéder 130 kg. - Page 65 II. Noms des composants du vélo à assistance électrique (Fig. 1) 16. Selle 1. Pneu et chambre à air 17. Chaine 2. Jante 18. Protection de dérailleur 3. Rayons 19. Dérailleur arrière 4. Moyeu avant avec levier de serrage 20. Moyeu arrière 5.
- Page 66 III. Manuel d'utilisation des composants électriques du vélo L'utilisateur doit actionner les pédales vers l'avant pour bénéficier de l'assistance motorisée. Il s'agit d'un important aspect de sécurité. Ce vélo à assistance électrique fournit une assistance motorisée jusqu'à une vitesse de 25 km/h. Au-delà, le moteur s'arrêtera. Vous pouvez aller plus vite, mais vous devrez le faire de vos propres efforts, sans assistance électrique.
-
Page 67: Utilisation
• Nous recommandons fortement l'usage d’un éclairage homologué selon le code de la route lorsqu'il fait sombre, qu'il y a du brouillard, ou dans des conditions de visibilité réduite. • Pour nettoyer le vélo, frottez ses surfaces avec un chiffon doux. Les saletés difficiles peuvent être enlevées à... - Page 68 (Fig. 3) Tout d’abord, placer la batterie sur le long du rail parfaitement horizontal (comme sur la Fig. 3), ensuite le pousser avant et s’assurer qu’il adhère parfaitement. Verrouiller/déverrouiller la batterie (Fig. 4.1, 4.2) Fig. 4.1 Fig. 4.2 De la position initiale, tourner à droite en suivant la flèche pour le verrouiller. Au contraire pour débloquer.
-
Page 69: Display Led Et Fonctionnalités
Fig. 4.3 Fig. 4.4 Fig. 4.5 5. Display LED et fonctionnalités 5.0 Allumage/Arret: Appuyez sur le bouton pour allumer et éteindre le display LED. 5.1 6 km/h (voir Fig. 5): Appuyez longuement sur le bouton pour utiliser la fonction "démarrageassisté" afin de faciliter le départ. Affichage de la charge sur le boitier du guidon: Dans des conditions normales, activez l'alimentation et les quatre LED indiqueront le niveau de charge de la batterie. -
Page 70: Utilisation Et Entretien De La Batterie
✓ Le niveau d'assistance moyen signifie que l'effort de l'utilisateur et l'usage de la batterie sont à niveau égal. ✓ Le niveau d'assistance faible signifie que la propulsion du vélo provient plus de l'effort de l'utilisateur que de l'usage de la batterie. Il s'agit donc du mode d'économie d'énergie. Nous vous suggérons d'utiliser ce niveau d'assistance lorsque vous utilisez le vélo pour faire du sport. -
Page 71: Utilisation Et Entretien Du Chargeur
6.2 N’oubliez pas de charger la batterie complètement avant de commencer un long voyage! Appuyez sur le bouton sur le dessous de la batterie, lorsque les 4 LED sont verts, cela indique que la batterie est complètement chargée (Fig. 6.2) Attention! Le LED rouge nous dit que la batterie doit être rechargé... -
Page 72: Utilisation Et Entretien Du Moteur Électrique
Insérez la prise du chargeur dans la batterie et branchez le câble d'alimentation du chargeur dans une prise proche. Lors du rechargement, la LED sur le chargeur sera rouge pour témoigner du bon fonctionnement. Lorsqu'il passe au vert, cela signifie que la batterie est rechargée. Pour terminer le rechargement, vous devez débrancher la prise de courant, puis la prise reliée la batterie. - Page 73 Description du Problème Causes Possibles Résolution Après l'allumage de la 1) le câble du moteur (joint de Tout d'abord, vérifiez que la batterie est batterie, moteur connexion étanche) est mal branché ; chargée. n'est cas, n'assiste pas au pédalage. 2) le levier de frein n'est pas rechargez-la.
-
Page 74: Diagramme Électrique Et Spécifications
pour éviter pour pouvoir recharger la batterie. comme décrit dans le chapitre 6.3 pour d'endommager éviter une exagération du déchargement ; matériel). 4) n'effectuez pas de rechargement avec une tension inférieure à 100 V. Si les solutions précédentes n'ont aucun effet, contactez votre... -
Page 75: Fiche Technique Principale
I le câble de moteur est relié au II Câble de chargement est reliée moteur à la douille 1. Blanc (signal de frein) 1. Vert (moteur HA) 1. Rouge (36V) 2. Rouge (Puissance positive) 2. Jaune (moteur HB) 2. Noir (sol) 3. - Page 76 LIISTR274 76/76...