
Manuels Connexes pour Singer Inspiration 4220


Sommaire des Matières pour Singer Inspiration 4220
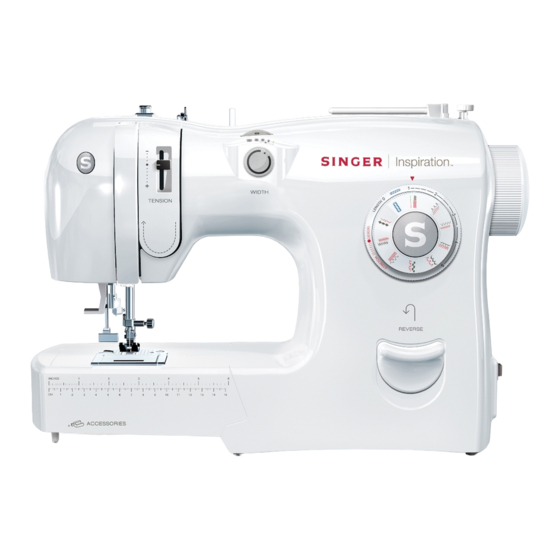
- Page 1 Inspiration 20/28 Stitches / Points / Puntos Sewing Machine Machine à coudre Máquina de Coser 4220 / 4228 AU TO Instruction Book Instruction Book Instruction Book Manuel d'Instructions Manual de Instrucciones...
- Page 2 ® A registered trademark of The Singer Company Ltd. or its affiliates. Copyright © 2007. ® Une marque déposée de The Singer Company Ltd. ou ses affilies. Copyright ©2007. ® Una marca registrada de The Singer Company Ltd. o sus afiliados.
-
Page 3: Table Des Matières
Table of Contents Table des matières 1. Important Safety Instructions ..............Page 05 1. Consignes de sécurité importantes ........... page 2. Getting to Know Your Machine ..............Page 09 2. Faites connaissance avec votre machine ..........page 09 3. Learning How to Set the Machine for the Different Stitches ......Page 14 3. -
Page 4: Consignes De Sécurité Importantes
Para los Territorios Europeos: 9.Hilvanado ..................Pag. 43 Esta máquina de coser Singer fue evaluada de acuerdo con las normas Europeas y aporta los requerimientos relativos a seguridad eléctrica, interferencias de radio e inmunidad 10. Puntada Zigzag ................Pag. 45 electromagnética. -
Page 5: Important Safety Instructions
Do not attempt to adjust the motor belt. couvercles, de lubrifier la machine et The wrong plate, can cause the qualifiée de façon similaire afin d'éviter Contact your nearest authorized SINGER d'effectuer tout ajustement mentionné needle breaks. tout danger. Service Center should any adjustment be dans le présent manuel d'utilisation. -
Page 6: Getting To Know Your Machine
Red 17. Pattern selector dial 17. Sélecteur de point 17. Selector de bordados de Servicio Autorizado de Singer. 18. Stitch length dial 18. Cadran de longueur du point 18. Selector del largo de la puntada Utilice siempre la placa aguja adecuada, 19. - Page 7 Faites connaissance avec votre machine Bouton rotatif de Stitch width dial largeur du point Sélecteur de la position Needle position selector dial de l'aiguille Manette de tension du fil Needle thread tension d'aiguille Bouton rotatif de Stitch length selector dial longueur du point situé...
- Page 8 IMPORTANT: Bobinas (3 unidades) aguja cuando pasa por la máquina. Normalmente está en AUTO. This machine uses only the special bobbin (359838900) by Singer. These bobbins are Sure Fit ™ i nsertion. Selector de puntadas: Gire esta perilla para seleccionar desde una puntada recta o una IMPORTANT : puntada decorativa.
-
Page 9: Learning How To Set The Machine For The Different Stitches
Learning how to set the machine for the different stitches Learning how to set the machine for the different stitches Stitch width dial Needle position selector dial Needle thread tension lever Stitch length Selector dial A U T Pattern selector dial IMPORTANT: Always set the Stitch Length to for all... -
Page 10: Comment Régler La Machine Pour Les Différents Points
Comment régler la machine pour les différents points Comment régler la machine pour les différents points Cadran de largeur du point Sélecteur de la position de l'aiguille Cadran Manette de tension du fil de longueur d'aiguille du point situé derrière le sélecteur de point A U T... - Page 11 Aprendiendo cómo preparar la máquina para Aprendiendo a Configurar su Máquina para las Distintas Puntadas las diferentes puntadas Selector de ancho de puntada Selector de posición de la aguja Selector de largo de puntada Selector de tensión del hilo A U T Selector de puntadas IMPORTANTE: Siempre ajuste el Largo de Puntada a...
-
Page 12: Lifting The Carrying Handle
Lifting the Carrying Handle Connecting the machine Relever la poignée pour transporter la machine Relever la poignée pour transporter la machine Branchement de la machine Levantando la asa Conectando la Máquina For North America “This appliance has a polarized (one blade wider than the other) plug. To reduce the risk of electric shock, this plug is intended to fit in a polarized outlet only one way. -
Page 13: Machine Basics
/ Changement d'aiguille / Cambiando agujas Changing snap-on presser foot Changer les pieds à enclenchement Use only SINGER needles Utilisez des aiguilles SINGER uniquement Cambiando el prensatelas de colocación instantánea Utilice solamente agujas Singer Turn handwheel counter clockwise until the needle is in the Turn handwheel counter clockwise until the needle is in the highest position. -
Page 14: Attaching Snap-On Presser Feet
Machine basics Machine basics Généralités Généralités Aspectos básicos de la máquina Aspectos básicos de la máquina Attaching snap-on presser feet Changing screw-on presser feet or shank Mettre en place le pied presseur à enclenche Changer le pied presseur sur talon visser Colocando el prensatelas de colocación instantánea Cambio del prensatelas a tornillo Turn handwheel counter clockwise until the needle is in the... -
Page 15: Extension Table
Machine basics Machine basics Généralités Généralités Aspectos básicos de la máquina Aspectos básicos de la máquina Drop feed lever Removing and replacing the extension table Retirer et remettre en place le bras libre Abaisse griffes Colocación y extracción de la cubierta removible Bajando los dientes impelentes The feed dogs control the movement of the fabric that is being sewn. -
Page 16: Tension Du Fil
être augmentée ou diminuée pour compenser l'effet de fils décoratifs, points décoratifs, de tissus spéciaux Pour de meilleurs résultats, utilisez toujours des aiguilles SINGER. ou de certaines techniques de couture. Remplacez l'aiguille régulièrement (après avoir cousu deux ou trois projets environ). -
Page 17: Threading The Machine
Threading the machine Threading the machine Enfilage de la machine Enfilage de la machine Ensartando la Máquina Ensartando la Máquina Winding the bobbin Remplissage de la canette Devanando la bobina Turn handwheel counter clockwise until the needle is in the highest position. -
Page 18: Inserting The Bobbin And Removing The Bobbin
Use only SINGER #359838900 bobbins Push the bobbin onto the Bobbin winder pin. Mettre en place et retirer la canette (Utilisez des canettes SINGER #359838900 uniquement) Colocando y quitando la bobina Poussez la canette sur la tige du dévidoir de (utilice sólo bobinas SINGER #359838900) -
Page 19: Threading The Needle Thread
Threading the machine Threading the machine Enfilage de la machine Enfilage de la machine Ensartando la Máquina Ensartando la Máquina Threading the needle / Enfiler le fil d'aiguille / Enhebrado de la aguja Close bobbin visor slide plate, leaving a 6” thread tail. Fermez la plaque transparente du compartiment à... - Page 20 Threading the machine Threading the machine Enfilage de la machine Enfilage de la machine Ensartando la Máquina Ensartando la Máquina Continue to hold the thread firmly, as you thread the machine. Continuez à tenir le fil bien fermement pendant que vous enfilez la machine.
-
Page 21: Automatic Needle Threader
Threading the machine Threading the machine Enfilage de la machine Enfilage de la machine Ensartando la Máquina Ensartando la Máquina Automatic needle threader Enfile-aiguille automatique Pull the Automatic needle threader lever down, and place the thread as illustrated. Ensartando la máquina Poussez la manette de l'enfile-aiguille automatique vers To use the Automatic needle threader;... -
Page 22: Straight Stitching
Straight Stitching Threading the machine Enfilage de la machine Points droits Points droits Ensartando la Máquina Puntada Recta Raising the bobbin thread Stitch width Remonter le fil de canette Note: Any of the three needle positions can be selected when Largeur du point Largeur du point sewing a straight stitch. -
Page 23: Basting
Basting Straight Stitching Points droits Bâtir Puntada Recta Hilvanado Stitch width Begin sewing. Largeur du point Note: Any of the three needle positions can be selected when Sew 5-6 stitches, then stop. Selector de ancho de puntada sewing a straight stitch. Commencer la couture. -
Page 24: Zig-Zag Stitching
Basting Zig-zag Stitching Bâtir Points zigzags Puntada Zigzag Hilvanado Stitch width Largeur du point Note: Any of the needle positions can be selected. Cousez Selector de ancho de puntada Remarque : n'importe laquelle des trois positions d'aiguille Comience a coser. peut être sélectionnée. - Page 25 Zig-zag Stitching Buttonholes one-step Points zigzags Boutonnière 1 épape Puntada Zigzag Ojales en un paso Stitch width dial Sew. Needle position: Center Largeur du point Position de l'aiguille : centrale Cousez. Selector de ancho de puntada Selector de posición de aguja: Centro Comience a coser.
-
Page 26: Boutonnière 1 Étape
Buttonholes one-step Buttonholes one-step Boutonnière 1 étape Boutonnière 1 étape Ojales en un paso Ojales en un paso Balancing the buttonhole Gently pull the buttonhole engaging lever down and push it Équilibrage de la boutonnière to the back. Regulación del ojal Abaissez délicatement la manette de boutonnière, puis poussez le vers l'arrière. -
Page 27: Overedging
Overedging a seam or edge Overedging a seam or edge Surjeter une couture ou un bord Surjeter une couture ou un bord Puntada tipo Overlock Puntada tipo Overlock Lower the presser foot. Stitch width Largeur du point Abaissez le pied presseur. Selector de ancho de puntada Baje la palanca del prensatelas. -
Page 28: Stretch Stitches
Stretch Stitches Stretch Stitches Points extensibles Points extensibles Puntadas Flexibles Puntadas Flexibles Stitch width Largeur du point Lower the presser foot. Selector de ancho de puntada Abaissez le pied presseur. Baje la palanca del prensatelas. Needle position: Center Position de l'aiguille: centrale Selector de posición de la aguja: Centro Set the Stitch length to Sew, allowing the machine to feed the fabric. -
Page 29: Point Invisible
Adjusting Stretch Stitches Blind hem stitch Réglage pour les points extensibles Point invisible Ajustando las puntadas flexibles Puntada para dobladillo invisible Stitch width dial Stretch stitches are stitches with a forward and reverse motion. For best results place a Largeur du point stabilizer under the fabric to assist in proper stitch formation. -
Page 30: Twin Needle Sewing
Optional twin needle Use el control de ancho de puntada para ajustar la Use Singer twin needles Style #2025. posición exacta de la aguja. See your Singer retailer Aiguille double en option... - Page 31 Twin Needle Sewing with Optional Twin Needle Twin Needle Sewing with Optional Twin Needle Couture à l'aiguille jumellée optionnelle Couture à l'aiguille jumellée optionnelle Coser con Aguja Doble (opcional) Coser con Aguja Doble (opcional) Threading for twin needle sewing Change to the twin needle. Mettre en place l'aiguille jumellée Enfilage de la machine avec l'aiguille jumellée Cambie a la aguja doble.
- Page 32 Twin Needle Sewing with Optional Twin Needle Twin Needle Sewing with Optional Twin Needle Couture à l'aiguille jumellée optionnelle Couture à l'aiguille jumellée optionnelle Coser con Aguja Doble (opcional) Coser con Aguja Doble (opcional) Place one spool of thread on the vertical Firmly hold both threads close to the spool with your right hand, spool pin and the other on the horizontal then holding the thread-ends in your left hand, follow the thread...
- Page 33 Twin Needle Sewing with Optional Twin Needle Twin Needle Sewing with Optional Twin Needle Couture à l'aiguille jumellée optionnelle Couture à l'aiguille jumellée optionnelle Coser con Aguja Doble (opcional) Coser con Aguja Doble (opcional) Turn handwheel counter clockwise until the needle is in the Pass one thread through the eye of the right needle, highest position.
-
Page 34: Cleaning The Machine
Maintenance Maintenance Entretien Entretien Mantenimiento Mantenimiento Removing bobbin case Cleaning the machine Retirer le boîtier de canette Nettoyage de la machine Retirar la caja bobina Limpieza de la máquina Replacing bobbin case “A” under the feed dog Remettre "A" sous les griffes "A"... -
Page 35: Liste De Performances
Maintenance Maintenance Entretien Mantenimiento Performance checklist Liste De Performances Thread balls up on Lift presser foot and re-thread the Le fil s'emmêle Relevez le pied presseur et enfilez la machine à nouveau en machine, holding thread firmly. the underside of sous le tissu tenant fermement le fil. - Page 36 Maintenance Entretien Mantenimiento Guía de solución de problemas La aguja no se mueve ¿Está el cable conectado a la clavija? ¿Está el interruptor encendido? ¿Está el controlador conectado? ¿Está el eje devanador a la derecha? La aguja se mueve pero ¿Tiene algún defecto la aguja? la puntada no se forma ¿Está...
- Page 40 Printed in Brazil Printed in Brazil Imprimé au Brésil Impreso en Brasil Eng./ Fren./ Spa. Part Number / Pièce Nº. / Pieza Nº. 360102-023...