
Manuels Connexes pour Studiologic Numa Compact 2


Sommaire des Matières pour Studiologic Numa Compact 2
- Page 1 Operation Manual Manuale d‘uso Bedienungsanleitung Mode d’emploi Rev. 15-05-2017...
-
Page 2: Important Safety Instructions
Mains Before connecting the unit to the main power supply, please check if the power supply is suitable for the Numa Compact 2 adapter. The unit can be powered with 100 – 240VAC, using the included power adapter. - Page 3 ENGLISH Operation Manual Numa Compact 2 by Studiologic®...
-
Page 4: Table Des Matières
Index Safety instructions Your new Numa Compact 2 Product overview Key features Example of use Operation diagram Power - Inputs and connections Power connection USB power Expression / Universal pedals Audio output Headphones Volume Panel - Display and navigation Sound / MIDI... - Page 5 MIDI (Zone edit) Program Change LSB - MSB MIDI channel Volume Split assign Transpose Octave Pedal 1 - Pedal 2 Stick 1 - Stick 2 Aftertouch Declarations Appendix Sound map MIDI Implementation chart Specifications Dimensions Numa Compact 2 by Studiologic®...
-
Page 6: Your New Numa Compact 2
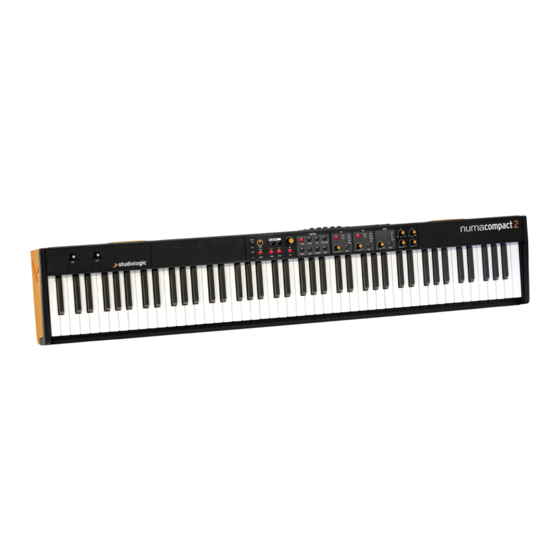
Your new Numa Compact 2 Product overview The Numa Compact 2 is an incredibly powerful musical instrument, packed in a stylish and slim cabinet, based on a totally new technology and updated user interface. The keyboard includes an Aftertouch control and together with the programmable Sticks, allows to have a total control of the musical performance. -
Page 7: Example Of Use
Your new Numa Compact 2 Example of use MIDI IN MIDI OUT PED1 PED2 Operation diagram UPPER Rev send Stereo reverb LOWER Rev send Sound engine UPPER Strings resonance LOWER AUX out Bass Treble Stereo reverb AUDIO out Mastering Volume... - Page 8 Numa Compact 2. Therefore Numa Compact 2 is your per- fect partner on stage, in the studio or at home. 128 voices of max polyphony is available to add depth and expression.
- Page 9 Your new Numa Compact 2 Interactive Numa The integrated USB port allows your Numa Compact 2 to con- nect to your computer and be powered directly, without the USB <> Computer need of the external adapter (included). You can use a USB and MIDI out for MIDI data transmission.
-
Page 10: Power Connection
Numa Compact 2 to the power socket (or use the USB connection). Switch the unit on by using the power button next to the power plug of the Numa Compact 2, set the main Volume, Bass and Treble controls to the half position and the... -
Page 11: Headphones
L/R outputs are still available for recording or other audio connections. When you use the Numa Compact 2 for the first time, we re- commend you to turn the Volume knob on the Output sec- Volume tion to not more than half way between 0 and Full. -
Page 12: Sound / Midi
Parts/Zones selection The main HOME display of the Numa Compact 2 is the one shown at power on and it’s divided in 3 main areas: the top area shows the current Program number and name, the left and right lower areas are related to the Lower and Upper Sound sections, in SOUND mode, and to the Zone A and Zone B sections, in MIDI Mode. -
Page 13: Demo
MIXER page, by keeping it pressed for a few seconds. The Numa Compact 2 has 99 user’s programmable memo- STORE / User Programs ries called Programs, where you can store all SOUND, FX1/2... -
Page 14: Sound Mode
Sound, to make the sound selection easier and faster. Thanks to this function, you will have an automatic setting of your preferred sounds for each Bank. A-PIANO [1/2] P01-JAZZ DUET Concert Stage Ac-Bass Concert V: 127 V: 127 Vintage Studio SOUND A-PIANO A0 - B3 C4 - C8 Numa Compact 2 by Studiologic®... -
Page 15: Sounds
SynBrass FunKlav Square Cembalo Cluster ReedOrg GloKeys ORCHESTRA Strings1 BASS/GUITAR Strings2 Ac-Bass Horns El-Bass Brass Slap Baroque Plucked BigBand Ny-Guitar BrassFall El-Guitar SaxBand Ac-Guitar TenorSax Jz-Guitar JazzFlute 2 Guitars Trumpet 12 Strings Oboe BassRide1 BassRide2 Numa Compact 2 by Studiologic®... -
Page 16: Fx1- Fx2
(programmable send in Edit) Amount: the 2 potentiometers control the Amount of the selected effect, like the dry/wet ratio (for modulating effects like the Chorus) or other parameters, like the distortion level of the DRIVE effects. Numa Compact 2 by Studiologic®... -
Page 17: Fx Autoset
In addition to the powerful FX1-2 double effect processors, STRINGS RESONANCE (Damper model) the Numa Compact 2 also has a built in STRINGS RESONANCE post-processing effect, dedicated to the ACOUSTIC PIANOS sound bank and controlled by the related parameter of the GLOBAL EDIT. -
Page 18: Transposer
He- adphones plug; this will allow to use the headphones out as an extra auxiliary output, for recording or to connect it to an ac- tive-amplified subwoofer, in addition to the internal speakers. Numa Compact 2 by Studiologic®... -
Page 19: Pedal 2
OFF and select the function of the STICK 2 in the related PART EDIT; storing the desired setting in a PRO- GRAM. Numa Compact 2 by Studiologic®... -
Page 20: Factory Reset
- In MIDI BAR open the file you have downloaded; - Press the play button and wait for the end of the procedure; - When the Numa Compact 2 display shows “UPLOAD FINISHED”, restart the instrument (off and on). QMidi: - Open QMidi;... -
Page 21: Programs Send/Receive
WINDOWS You can use a program like MIDI-Ox as it follows (be sure that the Numa Compact 2 is seen by the computer USB/MIDI ports and MIDI-Ox settings). To send data to your computer: - Connect the Numa Compact 2 to your computer via USB;... -
Page 22: Program Name
The Mixer allows to control all four parts and zones (LOWER/ MIXER UPPER/ZONEA/ZONEB) at once, in a single organized page. MIXER This function can also be accessed with a shortcut, keeping 127 U pressed the SPLIT button also marked MIXER with brackets. 64 B Numa Compact 2 by Studiologic®... -
Page 23: Volume
Even with one SPLIT point (programmable for each PROGRAM) the possible settings are almost one hundred, considering the status and combinations of LOWER+UPPER+ZONEA+ZONEB and the SPLIT settings made possible by this function. Numa Compact 2 by Studiologic®... -
Page 24: Transpose
ON in the GLOBAL EDIT area. To control the Stick 2 as- signment manually, you can set to OFF the FX-AUTOSET and the function can be switched ON or OFF and stored in the Pro- grams. Numa Compact 2 by Studiologic®... - Page 25 Normally you will set the Aftertouch ON for the UPPER part, that is commonly used for the main musical part or solo performances, while the LOWER part is normally as- sociated to accompaniments or bass lines, if the SPLIT is active. Numa Compact 2 by Studiologic®...
-
Page 26: Program Change
MIDI (Zone edit) MIDI The Numa Compact 2 allows to control 2 separate MIDI Zones, with all related parameters; the result can be stored in the current PROGRAM, together with the settings of the internal LOWER and UPPER sections, with a common SPLIT point and separate settings. Step through the functions with the MIDI button selected and EDIT button activated: the value of the actual function will be shown on the display and can be adjusted rotating the Encoder. - Page 27 STICK 1 STICK 1 GLOBAL EDIT area. To control the Stick 2 assignment manually, you can set to OFF the FX-AUTOSET and the function can be switched ON or OFF and stored in the Programs. Numa Compact 2 by Studiologic®...
- Page 28 ON for the UPPER zone, that is commonly used for the main musical zone or solo performances, while the LOWER zone is normally associated to accompaniments or bass lines, if the SPLIT is active, however the setting is totally under your con- trol and choice. Numa Compact 2 by Studiologic®...
- Page 29 Please help to keep our environment clean. State of the art To ensure maximum quality all Studiologic by Fatar devices are al- ways engineered to be state-of-the-art products, therefore updates, modifications and improvements are made without prior notice.
-
Page 30: Importanti Informazioni Di Sicurezza
Si prega di seguire le istruzioni riportate nel manuale. La garanzia sarà annullata se operazioni non autorizzate verranno svolte sulla Numa Compact 2. Solo gli accessori specificati dal fabbricante devono essere utilizzati con questa unità. Utilizzare l‘unità solo come specificato in questo manuale. - Page 31 ITALIANO Manuale d‘uso Numa Compact 2 by Studiologic®...
- Page 32 Indice Informazioni di sicurezza Il tuo nuovo Numa Compact 2 Panoramica del prodotto Caratteristiche principali Esempio d‘uso Schema di funzionamento Alimentazione - Ingressi e connessioni Connessione alimentazione Alimentazione USB Pedali Universali / Espressione Uscita audio Cuffie Volume Pannello - Display e navigazione...
- Page 33 MIDI (Zone edit) Program Change LSB - MSB MIDI channel Volume Split assign Transpose Octave Pedal 1 - Pedal 2 Stick 1 - Stick 2 Aftertouch Dichiarazioni Appendix Sound map MIDI Implementation chart Specifiche Dimensioni Numa Compact 2 by Studiologic®...
-
Page 34: Il Tuo Nuovo Numa Compact 2
Il tuo nuovo Numa Compact 2 Panoramica del prodotto Il Numa Compact 2 è uno strumento musicale incredibilmente potente, racchiuso in un cabinet elegante e leggero, basato su una tecnologia totalmente nuova e un‘interfaccia utente aggiornata. La tastiera include il controllo „After Touch“ e, unitamente agli Sticks programmabili, consente di avere un controllo totale della performance musicale. -
Page 35: Esempio D'uso
Il tuo nuovo Numa Compact 2 Esempio d‘uso MIDI IN MIDI OUT PED1 PED2 Schema di funzionamento UPPER Rev send Stereo reverb LOWER Rev send Sound engine UPPER Strings resonance LOWER AUX out Bass Treble Stereo reverb AUDIO out Mastering... - Page 36 Il Numa Compact 2 offre l‘ultima tecnologia innovativa di Fa- tar: la sofisticata tastiera pesata TP9 Piano con Aftertouch. Il Numa Compact 2 pesa solo 7 Kg ed è quindi veramente por- tabile, offre un tocco veramente professionale che ha reso famosa la Fatar.
- Page 37 è alimentato dalla porta USB al fine di evitare un consumo eccessivo. Per la trasmissione dati via USB, collega il Numa Compact 2 al computer con un cavo USB. Lo strumento sarà riconosciuto automaticamente dal tuo computer appena acceso e il driver sarà...
-
Page 38: Connessione Alimentazione
Numa Compact 2 all‘alimentazione (o usa la connessio- ne USB). Accendi l‘unità utilizzando il pulsante posto vicino alla presa di alimentazione del Numa Compact 2, imposta il Volume principale e i controlli di Bassi e Acuti alla posizione intermedia e il controllo “Mastering” al valore minimo (la fun- zione sarà... -
Page 39: Cuffie
Volume Quando usi il Numa Compact 2 per la prima volta, ti racco- mandiamo di impostare il Volume della sezione Output ad un valore intermedio tra lo 0 e il massimo. Mentre suoni potrai regolare il volume come desideri. -
Page 40: Sound / Midi
Selezione parti e/o zone La pagina HOME del display del Numa Compact 2 è quella mostrata all‘accenzione ed è divisa in 3 aree principali: l‘area superiore indica il numero ed il nome di Program corrente, le aree inferiori di sinistra e destra sono relative alle sezioni Lower e Upper nella modalità SOUND, e alle Zone A e B dela modalità... -
Page 41: Demo
Come spiegato nelle sezioni EDIT, il pulsante SPLIT può anche essere usato come scorciatoia per selezionare la pagina MIXER, tenendolo premuto per alcuni secondi. Il Numa Compact 2 ha 99 memorie programmambili dall’u- STORE / User Programs tente chiamate “Programs”, in cui puoi memorizzare i Suoni, i... -
Page 42: Modalità Sound
Grazie a questa funzione, avrai un‘impostazione automatica dei tuoi suoni preferiti per ogni Bank. A-PIANO [1/2] P01-JAZZ DUET Concert Stage Ac-Bass Concert V: 127 V: 127 Vintage Studio SOUND A-PIANO A0 - B3 C4 - C8 Numa Compact 2 by Studiologic®... -
Page 43: Suoni
SynBrass FunKlav Square Cembalo Cluster ReedOrg GloKeys ORCHESTRA Strings1 BASS/GUITAR Strings2 Ac-Bass Horns El-Bass Brass Slap Baroque Plucked BigBand Ny-Guitar BrassFall El-Guitar SaxBand Ac-Guitar TenorSax Jz-Guitar JazzFlute 2 Guitars Trumpet 12 Strings Oboe BassRide1 BassRide2 Numa Compact 2 by Studiologic®... -
Page 44: Fx1- Fx2
(mandata programmabile in Edit) Amount: i due potenziometri controllano la quantità dell‘effetto selezionato, come il rapporto dry/wet (per gli ef- fetti di modulazione come il Chorus) o altri parametri, come il livello di distorsione dell‘effetto Drive. Numa Compact 2 by Studiologic®... -
Page 45: Fx Autoset
GLOBAL EDIT. Questo effetto, creato sulla base dell‘esperienza maturata sul Numa Stage e Concert, aggiunge un carattere di grande realismo ai suoni di piano, riproducendo la risonanza delle corde vere e della tavola armonica dello strumento acustico. Numa Compact 2 by Studiologic®... -
Page 46: Transposer
Numa Compact 2 by Studiologic®... -
Page 47: Pedal 2
OFF e selezionare la funzione dello STICK 2 nella relativa PART EDIT, memorizzando poi l’impostazione desiderata in un PROGRAM. Numa Compact 2 by Studiologic®... -
Page 48: Factory Reset
- In MIDI BAR aprire il file precedentemente scaricato; - Premere il tasto play e attendere la fine della procedura; - Quando il display del Numa Compact 2 mostra il messaggio “UPLOAD FINISHED”, riavviare lo strumento (off e on). QMidi: - Aprire QMidi;... -
Page 49: Programs Send/Receive
WINDOWS Puoi usare un’applicazione come “Midi-Ox” nel modo seguente (assicurati che il Numa Compact 2 sia visto dalle porte del USB/ MIDI del computer e nei settaggi di “MIDI-Ox”). Per inviare i dati al computer: - Collega la tua Numa Compact 2 al computer via USB;... -
Page 50: Program Name
Il MIXER consente di controllare tutte le quattro parti e zone (LOWER/UPPER/ZONEA/ZONEB) inuna singola pagi- MIXER na. Questa funzione è accessibile tramite una sscorciato- 127 U ia, tenendo premuti i pulsanti SPLIT e MIXER. 64 B Numa Compact 2 by Studiologic®... -
Page 51: Volume
ORGAN in tutta la tastiera (TO ALL) e CHOIR solo nella parte destra Anche con un solo punto di SPLIT (programmabile per ogni PROGRAM) le possibili combinazioni sono qua- si un centinaio, considerando le varie combinazioni tra LOWER+UPPER+ZONEA+ZONEB. Numa Compact 2 by Studiologic®... -
Page 52: Transpose
AUTOSET è impostata su ON nell’area GLOBAL EDIT. Per con- trollare manualmente lo STICK 2, puoi impostare su OFF l’FX- AUTOSET e la funzione potrà essere impostata su ON o OFF e memorizzata nei Program. Numa Compact 2 by Studiologic®... - Page 53 ON per la parte UPPER, usata co- munemente per la parte musicale principale o per i soli, mentre la parte LOWER è normalmente associata ad ac- compagnamenti o a parti di basso, se lo SPLIT è attivo. Numa Compact 2 by Studiologic®...
-
Page 54: Program Change
MIDI (Zone edit) MIDI The Numa Compact 2 allows to control 2 separate MIDI Zones, with all related parameters; the result can be stored in the current PROGRAM, together with the settings of the internal LOWER and UPPER sections, with a common SPLIT point and separate settings. Step through the functions with the MIDI button selected and EDIT button activated: the value of the actual function will be shown on the display and can be adjusted rotating the Encoder. - Page 55 STICK 1 STICK 1 GLOBAL EDIT area. To control the Stick 2 assignment manually, you can set to OFF the FX-AUTOSET and the function can be switched ON or OFF and stored in the Programs. Numa Compact 2 by Studiologic®...
- Page 56 ON for the UPPER zone, that is commonly used for the main musical zone or solo performances, while the LOWER zone is normally associated to accompaniments or bass lines, if the SPLIT is active, however the setting is totally under your con- trol and choice. Numa Compact 2 by Studiologic®...
- Page 57 (WEEE). Aiutaci a mantenere il mondo pulito. Stato dell‘arte Per garantire il massimo della qualità, i prodotti Studiologic sono sempre progettati allo stato dell‘arte, per questo sono consentite, senza preavviso: modifiche, migliorie variazioni. Specifiche tecniche e di aspetto possono essere diverse da quanto indicato in questo ma- nuale.
-
Page 58: Wichtige Sicherheitshinweise
Informationen die Sie benötigen, um dieses Gerät zu verwenden. Bitte folgen Sie den Anweisungen in dieser Bedienugsanleitung. Bei Fremdeingriff am NUMA Compact 2 erlischt die Garantie. Es wird empfohlen nur das vom Hersteller vorgesehene Zubehör zu verwenden. Verwenden Sie das Gerät ausschließlich wie in dieser Bedienugsanleitung beschrieben. - Page 59 DEUTSCH Bedienungsanleitung Numa Compact 2 by Studiologic®...
- Page 60 Pedal 2 FX Autoset Werkseinstellung Firmware Version und Update Programme Senden/Empfangen Programmeinstellungen Programm Name Splitpunkt Mixer Menüeinstellungen Lautstärke Splitpunkt setzen Transponieren Octave Rev send Pedal 1 - Pedal 2 Stick 1 - Stick 2 Aftertouch Numa Compact 2 by Studiologic®...
- Page 61 Index MIDI (Zonen-Edit) Programmwechsel LSB - MSB MIDI Kanäle Volume Split assign Transpose Octave Pedal 1 - Pedal 2 Stick 1 - Stick 2 Aftertouch Anmerkungen Anhang Sound Map MIDI Implementation Chart Spezikifationen Maße/Gewichte Numa Compact 2 by Studiologic®...
-
Page 62: Das Numa Compact 2
Das Numa Compact 2 Produktübersicht Das NUMA Compact 2 ist ein höchst leistungsfähiges Musikinstrument, dass in einem stilvollen und schlanken Gehäuse geliefert wird und auf einer völlig neuen Technologie und einer aktua- lisierten Benutzeroberfläche basiert. Die Tastatur ist mit Aftertouch ausgestattet und zusammen mit den programmierbaren Sticks erhält man, die volle Kontrolle über das Instrument. -
Page 63: Anwendungsbeispiel
MIDI OUT PED1 PED2 Funktionsdiagramm UPPER Rev send Stereo reverb LOWER Rev send Sound engine UPPER Strings resonance LOWER AUX out Bass Treble Stereo reverb AUDIO out Mastering Volume Digital Suggested setting ampli er BUILT-IN SPEAKERS Numa Compact 2 by Studiologic®... - Page 64 Musiker wählten diese Klänge aus und waren am Design der praxisgerechten Bedienung des NUMA Com- pact 2 beteiligt. Daher ist das NUMA Compact 2 Ihr perfekter Partner auf der Bühne, im Studio oder zu Hause. 128 Stimmen max. Polyphonie sind verfügbar, um Tiefe und Ausdruck zu erzeugen.
-
Page 65: Lieferumfang
Your new Numa Compact 2 Interactive NUMA Der integrierte USB-Port ermöglicht es das NUMA Compact 2 an Ihren Computer anzuschließen und direkt mit Strom USB <> Computer versorgt zu werden, ohne dass der externe Adapter (im Lie- ferumfang enthalten) benötigt wird. Sie können einen USB- und MIDI-Ausgang für die MIDI-Datenübertragung verwen-... -
Page 66: Stromversorgung
Numa Compact 2 an die Steckdose anzuschließen (oder ver- wenden Sie den USB-Anschluss). Schalten Sie das Gerät mit dem Netzschalter Numa Compact 2 ein, stellen Sie die Laut- stärkeregler-, Bass- und Höhenregler auf die 12 Uhr Position und den Mastering-Regler auf Null-Minimum (die Mastering- Funktion wird in dieser Bedienungsanleitung später erklärt),... -
Page 67: Kopfhöreranschluss
Zur Datenübertragung über USB verbinden Sie das Numa Compact 2 mit einem USB-Kabel mit Ihrem Computer. Wenn Sie das Numa Compact 2 zum ersten Mal anschließen, wird es von Ihrem Computer automatisch erkannt und der entspre- chende Treiber wird vom Betriebssystem installiert (class com- pliant). -
Page 68: Sound / Midi
DEMO Parts/Zones selection Die Haupt-HOME-Anzeige des Numa Compact 2 wird beleuchtet sobald das Gerät eingeschaltet wird und ist in 3 Hauptbereiche eingeteilt: Der obere Bereich zeigt die aktuelle Programmnummer und den Programmnamen an, die linken und rechten unteren Bereiche beziehen sich auf die un- teren (lower) und oberen (upper) Soundbereiche im SOUND-Modus und auf die Zone A und die Zone B im MIDI-Modus. -
Page 69: Demo
Die SPLIT-Taste kann auch als Abkürzung verwendet werden, um die MIXER-Funktion auszuwählen, indem man sie für einige Sekunden gedrückt hält. Das Numa Compact 2 verfügt über 99 Speicherplätze, die “Pro- STORE / Speicherplätze grams” genannt werden. In diesen können Sie alle SOUND-, FX1 / 2-Einstellungen, Intensität, Funktionen, Splitpunkte und... -
Page 70: Sound Modus
Dank dieser Funktion haben Sie eine automatische Ein- stellung Ihrer bevorzugten Sounds für jede Bank. A-PIANO [1/2] P01-JAZZ DUET Stage Concert Ac-Bass Concert V: 127 V: 127 Vintage Studio SOUND A-PIANO A0 - B3 C4 - C8 Numa Compact 2 by Studiologic®... -
Page 71: Sounds
SynBrass FunKlav Square Cembalo Cluster ReedOrg GloKeys ORCHESTRA Strings1 BASS/GUITAR Strings2 Ac-Bass Horns El-Bass Brass Slap Baroque Plucked BigBand Ny-Guitar BrassFall El-Guitar SaxBand Ac-Guitar TenorSax Jz-Guitar JazzFlute 2 Guitars Trumpet 12 Strings Oboe BassRide1 BassRide2 Numa Compact 2 by Studiologic®... -
Page 72: Fx1- Fx2
> FX2 (einer der vier Effekte) > Reverb (send ist programmier- bar in EDIT) Amount-Regler: Die 2 Potentiometer steuern den Anteil des ausgewählten Effekts, wie das “Wet” / “Dry”-Verhältnis (für Modulationseffekte wie der Chorus) oder andere Parameter, wie die Verzerrung des DRIVE-Effekts. Numa Compact 2 by Studiologic®... -
Page 73: Fx Autoset
Dieser Effekt, der mit den Erfahrungen der NUMA STAGE und CONCERT-Instrumente entwickelt wurde, fügte den Klavier- klängen einen noch realistischeren Effekt hinzu und reprodu- ziert die Resonanzen der echten Saiten und des Resonanzbo- dens des akustischen Instruments. Numa Compact 2 by Studiologic®... -
Page 74: Transposer
Verstärkersystem auch dann aktiv, wenn eine Buchse in den Kopfhörer gesteckt ist. Dadurch kann die Kopfhörerbuchse als zusätzlicher Hilfsausgang, zur Aufzeichnung oder zum Anschluss an einen aktivverstärkten Subwoofer zusätzlich zu den internen Lautsprechern verwen- det werden. Numa Compact 2 by Studiologic®... -
Page 75: Pedal 2
PED2 Anschluss so programmiert werden, dass fast alle Pedaltypen angeschlossen werden kön- nen: • Sustain-Pedal Öffner • Sustain-Pedal Schließer • Expression-Pedal (Volume Funktion, Pedale mit Potentiometer und Stereo-Klinkenstecker) • SLP3-D Dreifachpedal Soft/Sostenuto/Sustain mit Halbdämpfer-Funktion Numa Compact 2 by Studiologic®... -
Page 76: Fx Autoset
Möchte man alle Parameter direkt und manuell steuern, kann die Funktion auf OFF gestellt werden und die Funktion des STICK 2 im zugehörigen EDIT Bereich ausgewählt werden und die gewünschte Einstellung in einem PROGRAM (Speicher- platz) abgespeichert werden. Numa Compact 2 by Studiologic®... -
Page 77: Firmware Version Und Update
- Öffnen Sie in der MIDI BAR die Datei, die Sie heruntergeladen haben. - Drücken Sie die Play-Taste und warten Sie auf das Ende des Vorgangs. - Wenn das Numa Compact 2 Display “UPLOAD FINISHED” azeigt, starten Sie das Gerät neu (aus und wieder einschalten). QMidi: - Öffnen Sie QMidi - Wählen Sie die Firmware-Datei aus, die Sie heruntergeladen... - Page 78 MIDI- und die SysEx Librarian - Einstellungen) erkannt wird. Datenübertragung an den Computer: - Öffnen Sie SysEx Librarian. - Wählen Sie in der Symbolleiste “Numa Compact 2” als Gerät aus. - Klicken Sie auf die “Record many” - Taste in SysEx Librarian.
- Page 79 Popup-Menü Namens “Destination”. - Klicken Sie darauf und wählen Sie den MIDI-Port, über den Sie senden möchten. - Wählen Sie auf dem Numa Compact 2 die Funktion RECEIVE (Empfangen) aus. - Im Programm SysEx Librarian drücken Sie die “Play” -Taste und warten, bis die Übertragung abgeschlossen ist.
-
Page 80: Programm Name
UPPER / ZONE A / ZONE B) sofort auf einer einzigen Seite zu MIXER steuern. Diese Funktion kann auch mit einer Taste aufgerufen 127 U werden, wobei die SPLIT [Mix]- Taste gedrückt gehalten wird. 64 B Numa Compact 2 by Studiologic®... -
Page 81: Lautstärke
Selbst mit einem SPLIT-Punkt (programmierbar für jedes PRO- GRAM) gibt es fast hundert mögliche Einstellungen unter Berücksichtigung des Status und der Kombination von LOWER + UPPER + ZONE A + ZONE B und den SPLIT-Einstellungen, die durch diese Funktion ermöglicht werden. Numa Compact 2 by Studiologic®... -
Page 82: Octave
PEDAL 1 - PEDAL 2 Hier können Sie entscheiden, ob die Pedale für jeden Absch- nitt aktiviert sind (UPPER / LOWER oder ZONEA und ZONE B, PART EDIT [6/10] sobald die MIDI-Taste aktiviert ist). PEDAL 1 PEDAL 1 Numa Compact 2 by Studiologic®... -
Page 83: Stick 1 - Stick 2
Bereich (UPPER), der üblicherweise für die meisten Musikstücke oder das Solo verwendet wird, während der un- tere Bereich (LOWER) normalerweise mit Begleitungen oder Basslinien verbunden ist, wenn die SPLIT – Funktion aktiv ist. Numa Compact 2 by Studiologic®... - Page 84 MIDI (Zonen edit) MIDI Mit dem NUMA Compact 2 können Sie 2 separate MIDI-Zonen mit allen zugehörigen Parame- tern steuern. Das Ergebnis kann im aktuellen PROGRAM(M) zusammen mit den Einstellungen der Tastaturbereiche (LOWER- und UPPER) mit einem gemeinsamen SPLIT-Punkt und separaten Ein- stellungen abgespeichert werden.
- Page 85 Tonlage zu spielen. Auf der anderen Seite klingt es manchmal besser, wenn man die Obere (UPPER) - Zone um ein oder zwei Oktaven absenkt. Einfach die gewünschte Einstellung ausprobieren und dann im aktuellen PROGRAM(M) abspeichern. Numa Compact 2 by Studiologic®...
- Page 86 Zone, die üblicherweise als die Hauptmusikzone oder bei So- loaufführungen verwendet wird, während die untere (LOWER) Zone normalerweise mit Begleitungen oder Basslinien verbun- den ist, wenn der SPLIT aktiv ist, aber die Einstellung ist völlig unter Ihrer Kontrolle und nach Ihrer Wahl. Numa Compact 2 by Studiologic®...
- Page 87 Anmerkungen Jedes Gerät von Studiologic von Fatar wird einzeln geprüft und ei- Garantle ner vollständigen Funktionskontrolle unterzogen. Die Verwendung ausschließlich hochwertigster Bauteile erlaubt die Gewährung von zwei Jahren Garantie. Als Garantienachweis dient der Kaufbeleg / Quittung. Schäden, die durch unsachgemäßen Einbau oder unsac gemäße Behandlung entstanden sind, unterliegen nicht der Garantie...
-
Page 88: Consignes De Sécurité Importantes
Veuillez suivre les instructions du mode d'emploi. La garantie sera caduque si des interventions non autorisées sont effectuées sur le Numa Compact 2. Seuls des accessoires spécifiés par le fabricant doivent être utilisés avec cette unité. N'utilisez l'unité que de la façon indiquée dans ce mode d'emploi. - Page 89 FRANÇAIS Mode d’emploi Numa Compact 2 by Studiologic®...
- Page 90 Firmware version and update Programs send/receive Édition de programme Program name Split point Mixer Édition de partie Volume Split Assign Transpose Octave Rev send Pedal 1 - Pedal 2 Stick 1 - Stick 2 A. Touch Numa Compact 2 by Studiologic®...
- Page 91 Prg Chg BANK LSB - MSB MIDI Ch Volume Split Assign Transpose Octave Pedal 1 - Pedal 2 Stick 1 - Stick 2 A.Touch Déclarations Annexe Tableau des sons Tableau d'équipement MIDI Caractéristiques techniques Dimensions Numa Compact 2 by Studiologic®...
-
Page 92: Votre Nouveau Numa Compact 2
Votre nouveau Numa Compact 2 Présentation du produit Le Numa Compact 2 est un instrument de musique d'une puissance incroyable, au design élégant et épuré, reposant sur une technologie totalement nouvelle et une interface utilisateur actualisée. Le clavier réagit à la pression (« aftertouch ») et, avec les Sticks programmables, vous permet d'avoir un contrôle total sur l'interprétation musicale. -
Page 93: Exemple D'utilisation
PED2 Schéma de fonctionnement UPPER Rev send Stereo reverb LOWER Rev send Sound engine UPPER Strings resonance LOWER AUX out Bass Treble Stereo reverb AUDIO out Mastering Volume Digital Suggested setting ampli er BUILT-IN SPEAKERS Numa Compact 2 by Studiologic®... -
Page 94: Mixage Et Mastering Amplification Intégrée
10 +10 W contrôlé numériquement et d’un égaliseur pour donner le meilleur résultat. Fonctions de clavier maître Les fonctions de clavier maître du NUMA Compact 2, avec 2 zones programmables, vous permettent de contrôler d'autres appareils MIDI, de sélectionner les sons et de régler les niveaux directement depuis votre Numa Compact 2. - Page 95 Veuillez noter que le système d'amplification interne est automatiquement désactivé quand l'instrument est alimenté par USB afin d'éviter une consommation d'énergie excessive ou des variations d'alimentation. L'emballage comprend Numa Compact 2 Adaptateur secteur Mode d'emploi sur CD Numa Compact 2 by Studiologic®...
-
Page 96: Connexion Électrique
Branchez la ou les pédales (en option) aux prises correspon- universelles dantes marquées P1 et P2 ; à la prise P1, vous pouvez brancher la pédale Studiologic VP, typiquement destinée à contrôler l'ex- pression/volume. À la prise P2, vous pouvez brancher soit une pédale commutateur simple, soit une pédale d'expression/vo- lume, soit la triple pédale spécifique SLP3-D, comme expliqué... -
Page 97: Sortie Audio
2 à votre ordinateur par un câble USB. La première fois que vous allumez le Numa Compact 2, il est automatiquement reconnu par votre ordinateur et le pilote approprié est installé par le système d'exploitation (compatibilité native dite « class compliant »). Numa Compact 2 by Studiologic®... -
Page 98: Sound / Midi
Quand la touche MIDI est sélectionnée et allumée, l'écran af- fiche le statut des Zones MIDI A et B et l'utilisateur peut accéder à tous les paramètres, fonctions d'édition et valeurs disponibles. Numa Compact 2 by Studiologic®... -
Page 99: Demo
MIXER, si on la maintient pressée quelques secondes. STORE / Le Numa Compact 2 a 99 mémoires programmables par l'utilisa- Programmes personnels teur appelées Programmes, dans lesquelles vous pouvez mémo- riser tous les paramètres de son (SOUND), les commandes d'effet FX1/2, les valeurs, fonctions, points de split et autres paramètres... -
Page 100: Mode Sound
à la fois plus rapide et plus facile. Grâce à cette fonction, vous disposez d'une sélection automa- tique de vos sons préférés pour les différentes banques. A-PIANO [1/2] P01-JAZZ DUET Concert Stage Ac-Bass Concert V: 127 V: 127 Vintage Studio SOUND A-PIANO A0 - B3 C4 - C8 Numa Compact 2 by Studiologic®... - Page 101 SynBrass FunKlav Square Cembalo Cluster ReedOrg GloKeys ORCHESTRA Strings1 BASS/GUITAR Strings2 Ac-Bass Horns El-Bass Brass Slap Baroque Plucked BigBand Ny-Guitar BrassFall El-Guitar SaxBand Ac-Guitar TenorSax Jz-Guitar JazzFlute 2 Guitars Trumpet 12 Strings Oboe BassRide1 BassRide2 Numa Compact 2 by Studiologic®...
-
Page 102: Fx1- Fx2
Amount : les 2 potentiomètres Amount contrôlent l'ampleur de l'effet sélectionné, comme le rapport son sec/son d'effet (pour les effets de modulation comme le chorus) ou d'autres paramètres, comme le niveau de distorsion des effets DRIVE. Numa Compact 2 by Studiologic®... -
Page 103: Réglage Automatique D'effet (Autoset)
Cet effet, issu de l'expérience des célèbres instruments Studio- logic Numa STAGE et CONCERT, ajoute un effet encore plus ré- aliste aux sons de piano puisqu'il reproduit les résonances des cordes et de la table d'harmonie de l'instrument acoustique. Numa Compact 2 by Studiologic®... -
Page 104: Transposer
à un caisson de graves actif amplifié, en plus des haut-parleurs internes. Numa Compact 2 by Studiologic®... -
Page 105: Pedal 2
(la régler sur OFF) et choisir l'action du Stick2 dans Numa Compact 2 by Studiologic®... -
Page 106: Factory Reset
- Dans MIDI BAR, ouvrez le fichier que vous avez téléchargé ; - Pressez le bouton PLAY et attendez la fin de la procédure ; - Quand l'écran du Numa Compact 2 affiche « UPLOAD FI- NISHED » (réception terminée), faites redémarrer l'instru- ment (éteignez-le et rallumez-le). -
Page 107: Programs Send/Receive
WINDOWS Vous pouvez utiliser un programme comme MIDI-Ox décrit ci-dessous (veillez bien à ce que le Numa Compact 2 soit vu par les ports USB/MIDI de l'ordinateur et les réglages de MIDI-Ox). Pour envoyer des données à votre ordinateur : - Connectez le Numa Compact 2 à... -
Page 108: Program Name
Le Mixer vous permet de contrôler les quatre parties et zones MIXER (LOWER/UPPER/ZONEA/ZONEB)sur une même page. Cette MIXER fonction est également accessible par un raccourci qui consiste 127 U à maintenir pressée la touche SPLIT, également marquée [MIX]. 64 B Numa Compact 2 by Studiologic®... -
Page 109: Volume
Même avec un seul point de partage (réglable pour chaque Programme), il y a près de 100 réglages possibles, en considé- rant les statuts et combinaisons de LOWER + UPPER + ZONEA + ZONEB et les réglages de partage rendus possibles par cette fonction. Numa Compact 2 by Studiologic®... -
Page 110: Transpose
PART EDIT [8/10] que le Stick 2 sera automatiquement réglé sur AUTO si la fonc- STICK 1 STICK 1 tion FX AUTOSET correspondante est réglée sur ON dans la zone d'édition globale. Pour contrôler manuellement l'assignation du Numa Compact 2 by Studiologic®... -
Page 111: Touch
UPPER, qui est habituellement utilisée pour la partie musicale principale ou le jeu en solo, tandis que la partie LOWER est normalement associée aux accom- pagnements ou lignes de basse, si le partage du clavier (SPLIT) est activé. Numa Compact 2 by Studiologic®... -
Page 112: Bank Lsb - Msb
Vous pouvez sélectionner le canal MIDI (MIDI CH pour MIDI Channel, d'une valeur de 1 à 16) pour chaque zone, afin de ZONE EDIT [4/13] contrôler 2 appareils externes ou générateurs de sons diffé- MIDI CH MIDI CH rents. Numa Compact 2 by Studiologic®... - Page 113 ZONE EDIT [11/13] 2 sera automatiquement réglé sur AUTO si la fonction FX AU- STICK 1 STICK 1 TOSET correspondante est réglée sur ON dans la zone d'édition globale. Pour contrôler manuellement l'assignation du Stick 2, Numa Compact 2 by Studiologic®...
- Page 114 LOWER est normalement associée aux accom- pagnements ou lignes de basse, si le partage du clavier (SPLIT) est activé, toutefois vous êtes totalement libre de choisir le ré- glage qui vous convient. Numa Compact 2 by Studiologic®...
- Page 115 Déclarations Chaque produit Studiologic de Fatar a été soigneusement fabriqué, éta- Garantie lonné et testé, et bénéficie d'une garantie. Les dommages causés par un transport, une fixation ou une manipulation incorrects ne sont pas couverts par cette garantie. Toute indemnisation dépassant le prix de l'appareil est exclue.
- Page 117 Appendix Appendix Numa Compact 2 by Studiologic®...
- Page 118 Trumpet Plucked Oboe Ny-Guitar Cassotto El-Guitar Accordition Ac-Guitar Musette Jz-Guitar Harmonica 2 Guitars ChoirAh 12 Strings ChoirOh BassRide1 ChoirUh BassRide2 ChoirSint JazzOrg1 Bouzouki JazzOrg2 Kanoun DrawbVib AllDrawb Cawala 888-Pure Mizmar 888-Scan MildSet StndKit AllEven WorldKit Numa Compact 2 by Studiologic®...
-
Page 119: Midi Implementation Chart
1,2: sound level; Expression Sustain Reverb EFX ch 1,2: reverb send, ch 16: reverb level Modulation EFX ch 16: efx level All notes off Please note: MIDI CC not listed above are not supported by the instrument. Numa Compact 2 by Studiologic®... -
Page 120: Technische Daten
4” Design and Specifications are subject to change without notice. Il design e le specifiche tecniche sono soggette a modifica senza preavviso. Design et caractéristiques techniques sont sujets à changement sans préavis. Technische Änderungen vorbehalten. Numa Compact 2 by Studiologic®...