Publicité
Liens rapides
USER MANUAL
ANUEL D'UTILISATION
M
MANUAL DEL USUARIO
MB720 / MB720A
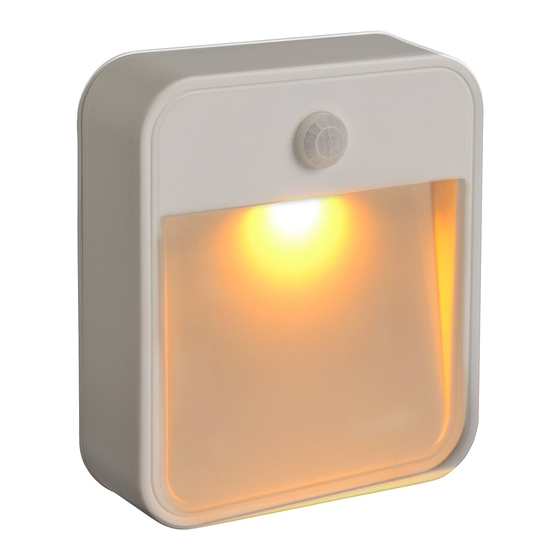
LED STICK ANYWHERE LIGHT | LAMPE À DEL À COLLER
N'IMPORTE OÙ | LUZ LED PARA ADHERIR EN CUALQUIER LUGAR
Customer Service | Service à la clientèle | Servicio de atención al cliente
9 am - 5 pm EST | 877.298.9082 | customerservice@mrbeams.com
Mailing Address | Adresse postale | Dirección postal
Mr Beams U.S. - 600 Beta Drive, Unit 100, Mayfield Village, OH 44143
www.mrbeams.com
BATTERY INSTALLATION |
INSTALLATION DES PILES |
INSTALACIÓN DE LAS PILAS
1. Remove the mounting plate from the back of the light by sliding it
down.
Retirez la plaque de montage de l'arrière de la lampe en la faisant
glisser.
Extraiga la placa de montaje de la parte trasera de la lámpara
deslizando la placa hacia abajo.
2. Pull the mounting plate from the light and set aside.
Retirez la plaque de montage de la lampe et mettez-la de côté.
Extraiga la placa de montaje de la lámpara y colóquela por
separado.
3. Remove the screws to access the battery compartment.
Enlevez les vis pour avoir accès au compartiment à piles.
Quite los tornillos para acceder al compartimento de las pilas.
4. Insert 4 AA batteries into the light. Ensure the batteries are
inserted so that the flat ends are making contact with the springs.
Slide the battery cover back into place and tighten the screws.
Insérez 4 piles AA dans la lampe. Assurez-vous que les piles sont
insérées de sorte à ce que les extrémités plates soient en contact
avec les ressorts. Remettez le couvercle des piles en place et
serrez les vis.
Coloque 4 pilas AA dentro de la lámpara. Asegúrese de que las
pilas estén colocadas de manera tal que los extremos lisos hagan
contacto con los resortes. Deslice la cubierta de las pilas para
colocarla nuevamente en su lugar y ajuste los tornillos.
LIGHT INSTALLATION |
INSTALLATION DE LA LAMPE |
INSTALACIÓN DE LAS LÁMPARAS
Option 1 | Option 1 | Opción 1
A)
1. A) To mount the light with the included adhesive, peel off the
label and apply the adhesive to the back of the mounting plate.
B) Peel off the second adhesive strip and press the mounting
plate in the desired location.
Warning - adhesive is semi-permanent.
A) Pour fixer la lampe avec l'adhésif inclus, détachez
l'étiquette et appliquez l'adhésif à l'arrière de la plaque de
montage.
B)
B) Décollez la deuxième bande adhésive et appuyez sur la
plaque de montage à la position souhaitée.
Avertissement - l'adhésif est semi-permanent.
A) Para instalar la lámpara con el adhesivo incluido,
despegue la etiqueta y aplique el adhesivo a la parte trasera
de la placa de montaje.
B) Despegue la segunda cinta adhesiva y presione la placa
de montaje hasta colocarla en la ubicación deseada.
Advertencia: El adhesivo es semipermanente.
Option 2 | Option 2 | Opción 2
2. To mount the light with the included screws, determine the
mounting location and line up the mounting plate with the
wall. Use a pencil to mark the pilot holes. Use a 1/16" drill
bit to create the pilot holes (if mounting to drywall, use the
plastic anchors included with the screws). Use a hammer to
tap the plastic anchors into the pilot holes, before screwing in
the mounting bracket.
Pour fixer la lampe avec les vis incluses, déterminez
l'emplacement de fixation et alignez la plaque de montage au
mur. Utilisez un crayon pour marquer les avant-trous. Utilisez
un foret de 1/16 po pour créer les avant-trous (pour montage
sur cloison sèche, utilisez les chevilles en plastique inclus
avec les vis). Utilisez un marteau pour insérer les chevilles
en plastique dans les avant-trous avant de visser le support
de fixation.
Para instalar la lámpara con los tornillos que se incluyen,
determine la ubicación de montaje y alinee la placa de montaje
con la pared. Utilice un lápiz para marcar los agujeros guía.
Utilice una broca de 1/16 in para realizar los agujeros guía (si el
montaje se hará en una pared de yeso, use los tacos de fijación
de plástico incluidos con los tornillos). Use un martillo para
insertar con golpes suaves los tacos de fijación de plástico
dentro de los agujeros guía, antes de atornillar el soporte
de montaje.
3. Slide the light onto the mounting plate. When changing
batteries, slide the light off the mounting plate to access the
battery compartment.
Glissez la lampe dans la plaque de montage. Lors du
remplacement des piles, glissez la lampe hors de la plaque
de montage pour accéder au compartiment à piles.
Deslice la lámpara para colocarla en la placa de montaje. Al
cambiar las pilas, deslice la lámpara para quitarla de la placa
de montaje para acceder al compartimento de las pilas.
Publicité

Manuels Connexes pour Mr Beams MB720


Sommaire des Matières pour Mr Beams MB720
- Page 1 Deslice la cubierta de las pilas para Mailing Address | Adresse postale | Dirección postal colocarla nuevamente en su lugar y ajuste los tornillos. Mr Beams U.S. - 600 Beta Drive, Unit 100, Mayfield Village, OH 44143 www.mrbeams.com...
- Page 2 1 año de garantía en caso de defectos: Solution: Flashing can be a sign that the batteries Todos los productos Mr Beams cuentan con una garantía en caso de defectos de mano de obra WARNING: This product contains chemicals known to the State of are low and need to be replaced.