Publicité
Les langues disponibles
Les langues disponibles
Liens rapides
USA office: Fontana
AUS office: Truganina
GBR office: FDS Corporation Limited,Unit 4, Blackacre Road, Great Blakenham,Ipswich, Ip6 0FL,United Kingdom
If you're having difficulty, our friendly
customer team is always here to help.
FRA office: Saint Vigor d'Ymonville
THIS INSTRUCTION BOOKLET CONTAINS IMPORTANT SAFETY INFORMATION.
USA:cs.us@costway.com
AUS:cs.au@costway.com
PLEASE READ AND KEEP FOR FUTURE REFERENCE.
GBR:cs.uk@costway.com
FRA:cs.f r @costway.com
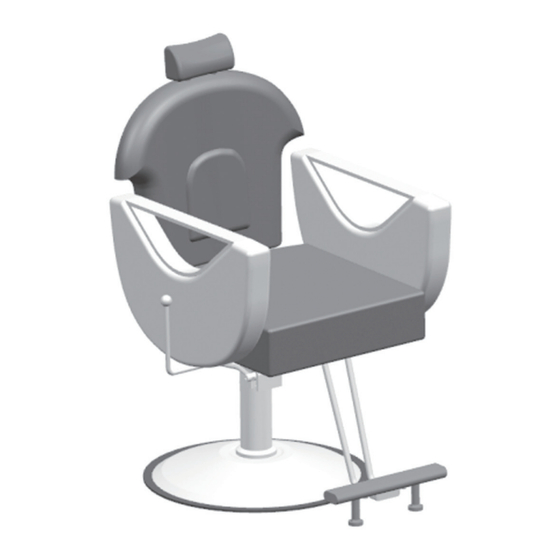
Chair of hairdresser
Chaise de Coiffeur
JB10010
Publicité

Sommaire des Matières pour Costway JB10010
- Page 1 GBR office: FDS Corporation Limited,Unit 4, Blackacre Road, Great Blakenham,Ipswich, Ip6 0FL,United Kingdom THIS INSTRUCTION BOOKLET CONTAINS IMPORTANT SAFETY INFORMATION. USA:cs.us@costway.com If you're having difficulty, our friendly AUS:cs.au@costway.com PLEASE READ AND KEEP FOR FUTURE REFERENCE. GBR:cs.uk@costway.com customer team is always here to help. FRA:cs.f r @costway.com...
- Page 2 ATTENTION! Before You Start PLEASE READ THESE INSTRUCTIONS BEFORE Please read all instructions carefully. USING THIS DEVICE. Retain instructions for future reference. Separate and count all parts and hardware. Read through each step carefully and follow the proper order. We recommend that, where possible, all items are assembled near to the area in which they will be placed in use, to avoid moving the product unnecessarily once assembled.
- Page 3 SAFETY Bolt of pump M6x12*6 To reduce risk of injury when assembling & using the chair, follow these precautions: Gasket φ30xφ10x1*6vv • Read all of these instructions before assembling and using your salon chair. • It is helpful to have 2 people assemble and turn the chair upright Flange bolts M8x50*6 after assembling.
- Page 4 Second: Install the foot pedal Fourth: Install the armrest Stepping lever Shim Fixed screw Bolt Step 1: Disassemble the bolts and washers pre installed on (5) and (4) Step 2: Use the removed bolts and washers to install (5) and (4) Step 1: Loosen the two small fixing screws pre fixed to (6).
- Page 5 Sixth:Set the Seat onto the top of Pump Second:Raising the Chair • Step down on the Foot Bar repeatedly to raise the chair to the desired height. • Do not over-extend the chair, creating the risk of falls or tipping the chair and its occupant over, resulting in injury.
- Page 6 SÉCURITÉ Pour réduire les risques de blessures lors de l'assemblage et de l'utilisation du fauteuil, suivez ces précautions: ATTENTION ! • Lisez toutes ces instructions avant d'assembler et d'utiliser votre VEUILLEZ LIRE CES INSTRUCTIONS AVANT D'UTI- fauteuil de salon. LISER CET APPAREIL. •...
- Page 7 Deuxièmement : Installation de la pédale Boulon de pompe M6x12*6 Joint φ30xφ10x1*6 Levier à pas de pas Boulons de bride M8x50*6 Vis fixe Clé hexagonale intérieure M5*1 Étape 1 : Desserrez les deux petits boulons de fixation préfixés à (6). Étape 2 : Installez (7) sur (SlTaing two suuall fixing bolt).
- Page 8 Quatrièmement : Installation de l'accoudoir Sixièmement : Placez le siège sur le dessus de la pompe. Cheville Boulon Étape 1 : Retirez les boulons et les rondelles déjà installés sur (5) et Étape 1. Localisez la fente dans la courte cohue sous le siège. (4).
- Page 9 Deuxièmement : Relevez la chaise • Appuyez plusieurs fois sur le repose-pieds pour soulever le fauteuil à la hauteur voulue. • Ne pas trop lever la chaise, ce qui risquerait de la faire tomber ou de la faire basculer et d'entraîner des blessures. Return / Damage Claim Instructions DO NOT discard the box / original packaging.


