Publicité
Les langues disponibles
Les langues disponibles
Liens rapides
Manuale di installazione
Installation manual
Installationsanleitung
Manuel d'installation
Manual de instalación
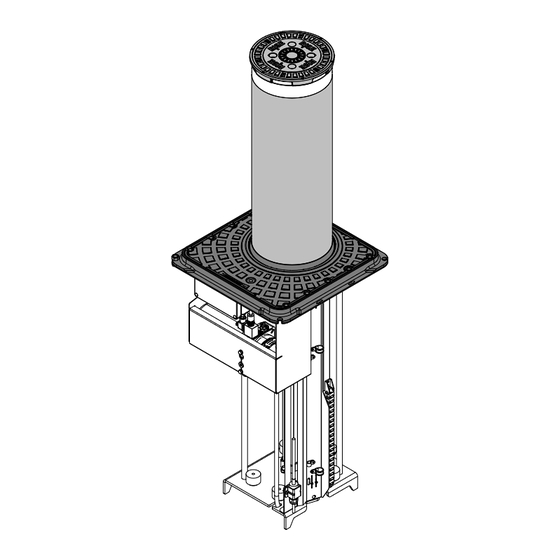
SPARTACUS
200/600 - 200/800
IT
Dissuasore idraulico automatico
GB
Automatic hydraulic bollard
DE
Automatischer Hydraulikpoller
FR
Borne escamotable hydraulique
ES
Bolardo hidràulico automàtico
Publicité

Sommaire des Matières pour Rise SPARTACUS 200/600
- Page 1 SPARTACUS 200/600 - 200/800 Manuale di installazione Dissuasore idraulico automatico Installation manual Automatic hydraulic bollard Installationsanleitung Automatischer Hydraulikpoller Manuel d'installation Borne escamotable hydraulique Manual de instalación Bolardo hidràulico automàtico...
- Page 2 0 / 6 0 / 8 ( 2 0 0 / 6 ( 2 0 0 / 8 CA.200/600 CA.200/800 2 SPARTACUS...
- Page 3 Ghiaino/Gravel 290mm Kies/Gravel Grava (Ø 8 ÷ 20 mm) 900 mm SPARTACUS 3...
- Page 4 4,8x9,5 4,8x9,5 oppure / or oppure / or 4x10mm 4x10mm ATTENZIONE!! Aprire solo il foro che si trova sul lato opposto alla direzione d’impatto. CAUTION! Only open the hole on the side opposite the direction of impact. VORSICHT! Öffnen Sie das Loch nur auf der Seite, die der Aufprallrichtung entgegengesetzt ist.
- Page 5 Guaina Corrugata Ø50 Flexible sheath Ø50 Wellmantel Ø50 Guyane ondulée Ø50 Vaina corrugada Ø50 Cemento Concrete Zement Ciment Cemento 100mm - Ghiaino/Gravel/Kies/Gravier (Ø 8 ÷ 20 mm) Guaina Corrugata Ø50 Flexible sheath Ø50 Wellmantel Ø50 Guyane ondulée Ø50 Vaina corrugada Ø50 IMPACT DIRECTION IMPACT...
- Page 6 6 SPARTACUS...
- Page 7 IMPACT DIRECTION M12x30 SPARTACUS 7...
- Page 8 400mm 400mm CP.MAX IMPACT DIRECTION 8 SPARTACUS...
- Page 9 - Non lasciare che i bambini giochino con i comandi o in prossimità del dissuasore. - In caso di anomalie di funzionamento non tentare di riparare il guasto ma avvertire un tecnico specializzato. Utilizzare solo accessori originali RISE Srl. - Non eseguire modifiche su componenti facenti parte del sistema RISE. Eventuali modifiche, alterazioni, manomissioni del sistema RISE o l'uso di ac- cessori non originali RISE fa decadere la garanzia del prodotto e RISE Srl declina ogni responsabilità...
- Page 10 Istruzioni di montaggio Informazioni generali Posa cassa di fondazione. Dissuasore idraulico automatico. Procedere con l'inserimento della cassa di fondazione (Fig. 5) all'interno Disponibile con tubo in acciaio verniciato o rivestito da una camicia in dello scavo, verificando che: acciaio Inox AISI 316 elettrolucidato.
- Page 11 - In the case of functioning anomalies do not attempt to repair the fault but contact a specialised technician. Only use original RISE Srl accessories. - Do not modify any components that are part of the RISE system. Any modification, alterations or tampering with the RISE system, or the use of non original RISE accessories, will cause the product warranty to lapse and RISE Srl declines any responsibility with regards to safety and proper system operation.
- Page 12 Installation manual General information Laying the foundation box Automatic hydraulic bollard. Proceed with the insertion of the foundation box (Fig. 6) inside the Available with a painted steel tube or lined with an electropolished excavation, checking that: AISI 316 stainless steel jacket. - the positioning dimension is correct The acoustic buzzer, the heater for particularly cold climates and - the crate is perfectly horizontal (use a level)
- Page 13 - Lassen Sie Kinder nicht mit den Bedienelementen oder in der Nähe des Pollers spielen. - Versuchen Sie bei Betriebsstörungen nicht, den Fehler zu beheben, sondern rufen Sie einen Fachtechniker an. Verwenden Sie nur Originalzubehör von RISE Srl. - Nehmen Sie keine Änderungen an Komponenten vor, die Teil des RISE-Systems sind. Jegliche Modifikationen, Veränderungen, Manipulationen am RISE-System oder die Verwendung von nicht originalem RISE-Zubehör führen zum Erlöschen der Produktgarantie und RISE Srl lehnt jede Verantwortung...
- Page 14 Montageanleitung Allgemeine Informationen Verlegung des Fundamentkastens. Automatischer hydraulischer Anti-Terror-Poller mit Zertifizierungen: Fahren Sie mit dem Einsetzen des Fundamentkastens fort (Abb. 5) Erhältlich mit lackiertem Stahlrohr oder ummantelt mit einem innerhalb der Ausgrabung, um zu überprüfen, ob: elektropolierten AISI 316 Edelstahlmantel. - das Positionierungsmaß...
- Page 15 - Ne laissez pas les enfants jouer avec les commandes ou à proximité de la borne escamotable. - En cas d’anomalies de fonctionnement, n’essayez pas de réparer le défaut mais avisez un technicien spécialisé. N’utilisez que des accessoires d’origine de RISE Srl.
- Page 16 instructions de montage Informations générales Pose caisson de fondation. Borne escamotable hydraulique automatique. Procéder à l’insertion du caisson de fondation (Fig. 5) à l’intérieur Disponible avec tuyau en acier peint ou revêtu d’une enveloppe en de l’excavation en vérifiant que: acier inoxydable AISI 316 électropoli.
- Page 17 - No realizar modificaciones en componentes que formen parte del sistema RISE. Las eventuales modificaciones, alteraciones, manipulaciones del sistema RISE o el uso de accesorios no originales de RISE hace que se anule la garantía del producto y RISE Srl declina cualquier responsabilidad inherente a la seguridad y el buen funcionamiento de la instalación.
- Page 18 Instrucciones de montaje Información general Colocación de la caja de cimentación Disuasor hidráulico automático. Proceder con la introducción de la caja de cimentación (Fig. 5) en Disponible con tubo de acero barnizado o revestido por una camisa el interior de la excavación, comprobando que: en acero Inox AISI 316 electropulido.
- Page 19 Tipo di prodotto: Dissuasore Model/Product: Bollard Modello/Tipo: SPARTACUS 200/600 - SPARTACUS 200/800 - Type: SPARTACUS 200/600 - SPARTACUS 200/800 - SPARTACUS SPARTACUS 200/600-I - SPARTACUS 200/800-I 200/600-I - SPARTACUS 200/800-I The object of the declaration described above is in conformity with the...
- Page 20 EN 13241-1:2016 50581:2012 EN 12453:2017, EN 12978:2008 (si procede) Benincà Luigi, Responsabile legale. Benincà Luigi, Responsabile legale. Sandrigo, 28/06/2022. Sandrigo, 28/06/2022. RISE S.r.l. - Via Capitello, 45 - 36066 - Sandrigo (VI) Italy - Tel.: +39 0444 751401 www.riseweb.it - info@riseweb.it...

