Publicité
Liens rapides
USA office: Fontana
AUS office: Truganina
DEU office: FDS GmbH, Neuer Höltigbaum 36, 22143 Hamburg, Deutschland
If you're having difficulty, our friendly
customer team is always here to help.
GBR office: Ipswich
ITA office: Milano
POL office: Gdańsk
FRA office: Saint Vigor d'Ymonville
USA:cs.us@costway.com
POL:sklep@costway.com
AUS:cs.au@costway.com
DEU:cs.de@costway.com
GBR:cs.uk@costway.com
FRA:cs.fr@costway.com
I T A :cs.i t @costway.com
ESP:cs.es@costway.com
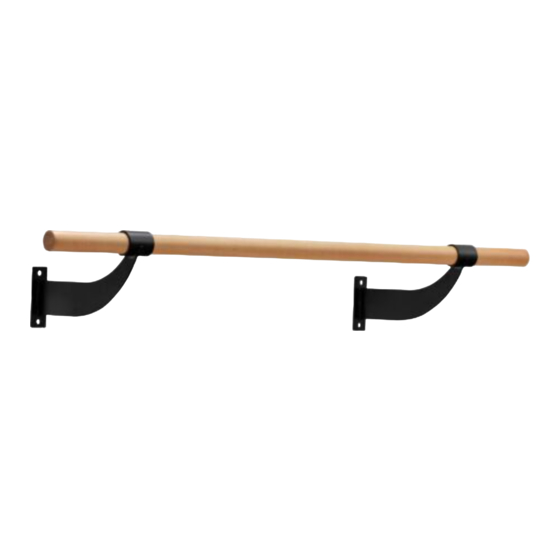
Wall Mounted Ballet Barre
Wand-Ballettstange
Barre de Ballet Murale
Barra de Ballet de Pared
Barra da Ballo da Parete
Drążek baletowy montowany na ścianie
SP37861
THIS INSTRUCTION BOOKLET CONTAINS IMPORTANT SAFETY INFORMATION. PLEASE READ AND KEEP FOR FUTURE REFERENCE.
Publicité

Manuels Connexes pour Costway SP37861


Sommaire des Matières pour Costway SP37861
- Page 1 USA:cs.us@costway.com POL:sklep@costway.com If you're having difficulty, our friendly AUS:cs.au@costway.com DEU:cs.de@costway.com customer team is always here to help. GBR:cs.uk@costway.com FRA:cs.fr@costway.com I T A :cs.i t @costway.com ESP:cs.es@costway.com THIS INSTRUCTION BOOKLET CONTAINS IMPORTANT SAFETY INFORMATION. PLEASE READ AND KEEP FOR FUTURE REFERENCE.
-
Page 2: Before You Start
Before You Start Avant de Commencer Please read all instructions carefully. Veuillez lire attentivement toutes les instructions. Retain instructions for future reference. Conservez les instructions pour vous y référer ultérieurement. Separate and count all parts and hardware. Vérifiez toutes les pièces et les accessoires. Read through each step carefully and follow the proper order. -
Page 3: Prima Di Iniziare
Prima di Iniziare Si prega di leggere attentamente tutte le istruzioni. Conservare le istruzioni per riferimento futuro. Separare e contare tutte le parti e gli accessori. Leggere attentamente ogni passo e seguire l'ordine corretto. Si consiglia, ove possibile, di assemblare tutti gli articoli vicino alla zona in cui verranno posti in uso, per evitare di spostare inutilmente il prodotto una volta assemblato. - Page 4 Steps: WARNING Noted: Most barres are mounted at 106.8cm( 42inch) above the • Please keep the bar away from humid environment to prolong the floor with optional 2nd barre mounted at 81.28cm (32inch) life time. above the floor. However, you can mount them at a height •...
- Page 5 Schritte: Zu beachten: Die meisten Stangen sind 106,8 cm über dem Boden montiert, die optionale 2. Stange ist 81,28 cm über dem Boden montiert. Sie können sie jedoch in einer Höhe montieren, die Ihnen am besten passt. 1. Bohren Sie mit der elektrischen Handbohrmaschine 4 Löcher (Ø 12 mm) in die Wand und setzen Sie die Schrauben (4) wie in der Abbildung (1) gezeigt ein.
- Page 6 WARNUNG - Bitte halten Sie den Stab von feuchter Umgebung fern, um die Lebensdauer zu verlängern. - Diese Ausrüstung muss mit geeigneten Matten, Spotting und qualifizierten Spottern für jede Aktivität oder Fertigkeit verwendet werden. - Kennen Sie Ihre Grenzen und die Grenzen Ihrer Ausrüstung. Lassen Sie sich von einem qualifizierten Ausbilder beraten, bevor Sie eine neue Aktivität oder Fertigkeit ausprobieren.
- Page 7 Étapes : AVERTISSEMENT Remarque : La plupart des barres sont montées à 106,8 cm • Veuillez garder la barre à l'écart de l'environnement humide pour au-dessus du sol avec une deuxième barre en option montée à prolonger la durée de vie. 81,28 cm au-dessus du sol.
- Page 8 Pasos Nota: La mayoría de las barras se montan a 106,8 cm del suelo, con la segunda barra opcional montada a 81,28 cm del suelo. Sin embargo, puede montarlas a la altura que más le convenga. 1. Utilice el taladro eléctrico de mano para perforar 4 agujeros (de 12 mm de diámetro) en la pared e inserte los tornillos (4) como se muestra en la imagen (1).
- Page 9 ADVERTENCIA • Por favor, mantenga la barra alejada de ambientes húmedos para prolongar su vida útil. • Este equipo debe utilizarse con colchonetas adecuadas, equipo de localización y observadores cualificados para cada actividad o habilidad. • Conozca sus limitaciones y las de su equipo. Consulte a un instructor cualificado antes de intentar cualquier actividad o habilidad nueva.
- Page 10 Passi AVVERTIMENTO Nota: La maggior parte delle barre si monta a 106,8 cm da terra, • Tenere la barra lontana dall'ambiente umido per prolungarne la con la seconda barra opzionale montata a 81,28 cm da terra. durata. Tuttavia, puoi montarle all'altezza che preferisci. •...
-
Page 11: Lista Części
Etapy montażu: Uwaga: W większości przypadków drążek baletowy montuje się na wysokości ok 105 cm nad podłogą, a drugi drążek (opcjonalny) na wysokości ok. 80 cm. Możesz jednak zamontować drążek na takiej wysokości, która odpowiada ci najbardziej. 1. Za pomocą wiertarki elektrycznej wywierć w ścianie cztery otwory o średnicy 12mm i umieść... - Page 12 OSTRZEŻENIA ● Nie wystawiaj produktu na działanie wilgoci, aby przedłużyć jego żywotność. Return / Damage Claim Instructions ● Produkt musi być użytkowany na specjalnych matach oraz pod okiem wykwalifikowanego trenera. DO NOT discard the box / original packaging. In case a return is required, the item must be returned in original box. Without this ●...
-
Page 13: Instructions De Retour / Réclamation De Dommages
Instructions De Retour / Réclamation De Dommages Istruzioni Per La Restituzione / Reclamo Per Danni NE PAS jeter la boîte/l'emballage d'origine. NON scartare la scatola / confezione originale. Dans le cas où un retour est requis, l'article doit être retourné dans sa boîte Nel caso in cui sia richiesto un reso, l'articolo deve essere restituito nella scatola d'origine.