
Manuels Connexes pour Exit Kickback L

Sommaire des Matières pour Exit Kickback L
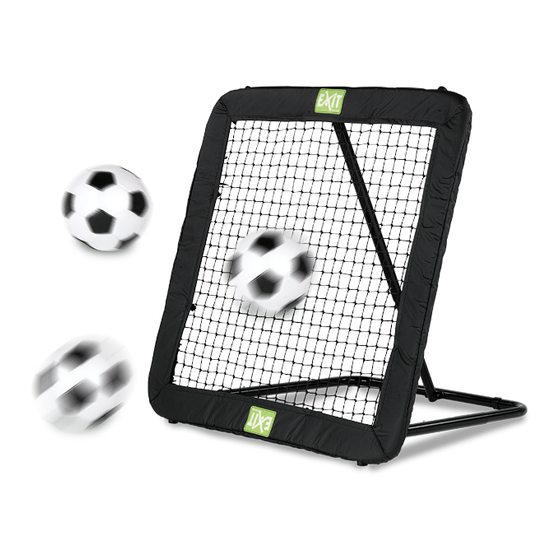
- Page 1 User manual Gebrauchsanweisung Gebruikshandleiding Mode d’emploi retain for future reference...
- Page 3 English Deutsch Nederlands Français...
- Page 4 Being open- minded, we really appreciate all comments and ideas which will help us improve our products or develop new ones. You are invited to send your ideas to us at info@exit- toys.com”...
- Page 5 2.0 Warnings for safe use: • Adult supervision is required at all times when the rebounder is used by children. • To reduce risk of entanglement, keep small children away from net area at all times. • When properly assembled and used as intended, this rebounder is designed to provide many hours of training and playing enjoyment.
-
Page 6: Assembly And Installation Instructions
3.0 Assembly and Installation Instructions • Adequate overhead clearance is essential. Provide clearance for wires, tree limbs, and other possible hazards. • Lateral clearance is essential. Place the rebounder away from walls, structures, fences, and other play areas. Maintain a clear space on all sides of the rebound- er. - Page 7 5.0 Guarantee Conditions & Service The owner of this product has the following guarantees on the product: • 2 years from date of purchase on the frame (regular use). • A 3-month guarantee is given on the other parts (regular use). •...
- Page 8 Außerdem kontrollieren wir selbst ständig unsere Produktionsabläufe und lassen diese als weitere Kontrolle regelmäßig durch unabhängige Stellen überprüfen. Nur Produk- te, die den höchsten EXIT Toys Standards gerecht werden, werden mit dem EXIT Toys label gekennzeichnet. Wir danken Ihnen für Ihr Vertrauen in dieses Produkt. Und wir sind sicher, dass Ihre Kinder genau viel Spaß...
- Page 9 2.0 Richtlinien für einen sicheren Gebrauch: Um den Aufbau zu erleichtern, lesen Sie bitte vor Beginn die folgenden Anweisungen durch. Wir empfehlen, den Aufbau mit zwei Personen durchzuführen. Diese Montageanleitung für späteres Nachschlagen aufbewahren. • Wird das Rebounder von Kindern benutzt ist stets eine erwachsene Aufsicht erforderlich.
-
Page 10: Pflege- Und Wartungshinweise
3.0 Aufbau- und Montageanleitung • Achten Sie auf genügend ausreichenden Freiraum. Schaffen Sie genügend Raum für Leitungen, Äste und andere mögliche Gefährdungen. • Seitlicher Abstand ist wichtig. Stellen Sie das Rebounder nicht in der Nähe von Mauern, Tragwerken, Zäunen und anderen Spielgeländen auf. Sorgen Sie an al- len Seiten des Rebounders für freien Raum. - Page 11 5.0 Garantiebedingungen und Service Der Eigentümer dieses Produkts erhält die folgenden Garantien für dieses Produkt: • Auf den Rahmen zwei Jahr ab Kaufdatum (bei normaler Nutzung). • Auf alle anderen Teile 3 Monate ab Kaufdatum (bei normaler Nutzung). • die Garantie bezieht sich nur auf Material-/Konstruktionsfehler des Produkts und/ oder andere Teile.
- Page 12 We voeren ook voortdurend controles uit tijdens de productie en we laten regelmatig nieuwe onafhankelijke tests uitvoeren als extra controle. Enkel de producten die voldoen aan de strengste normen van EXIT Toys krijgen het EXIT Toys merk. Wij stellen het zeer op prijs dat u bij ons klant bent en danken u voor het vertrou- wen in dit product.
- Page 13 2.0 Richtlijnen voor veilig gebruik: Lees voor het monteren de volgende instructies. Het assembleren gaat gemakkelijker met twee personen. Bewaar deze handleiding voor later. • Als de rebounder door kinderen wordt gebruikt, dient er altijd ouderlijk toezicht te zijn. • Sta niet toe dat kinderen op de rebounder klimmen, omdat het doel hierdoor kan omvallen en ernstig letsel of overlijden kan veroorzaken.
-
Page 14: Assemblage- En Installatie-Instructies
3.0 Assemblage- en installatie-instructies • De ruimte boven het doel dient vrij te zijn. Zorg ervoor dat er zich geen bedra- ding, boomtakken en andere mogelijke gevaren boven de rebounder bevinden. • Het is tevens belangrijk om de ruimte naast de rebounder vrij te laten. Plaats de rebounder niet in de buurt van muren, bouwwerken, hekwerken en andere speel- ruimten. -
Page 15: Garantievoorwaarden
5.0 Garantievoorwaarden De eigenaar van dit product heeft de volgende garanties op dit product: • Gedurende 2 jaar na datum aankoop op het frame (bij normaal gebruik). • Gedurende 3 maanden op overige onderdelen (bij normaal gebruik). • De garantie geldt uitsluitend voor materiaal- en constructiefouten ten aanzien van het product, of onderdelen daarvan. - Page 16 Nous testons égalemant en continu nos cycles de production et faisons régulièrement réaliser des tests indépendants à titre de contrôle supplémentaire. Seuls les produits qui se montrent à la hauteur de la norme EXIT Toys la plus rigoureuse sont porteurs de l’étiquette EXIT Toys.
-
Page 17: Consignes De Sécurité
2.0 Consignes de sécurité: Pour simplifier l’assemblage, veuillez lire les instructions suivantes avant de com- mencer, une personne additionnelle serait utile pour faciliter l’assemblage. Conservez ce manuel pour un réassemblage futur. • Lorsque le rebounder est utilisée par des enfants, la surveillance permanente d’un adulte est requise. -
Page 18: Instructions D'assemblage Et D'installation
Instructions d’Assemblage et d’installation • Une hauteur libre suffisante est essentielle. Veillez à un dégagement suffisant pour les fils, branches d’arbre, et autres risques possibles. • Un dégagement latéral est essentiel. Placez le rebounder loin des murs, struc- tures, barrières, et autres terrains de jeux. Maintenez un espace libre de tous les côtés du rebounder. -
Page 19: Conditions De Garantie Et Service Après- Vente
5.0 Conditions de garantie et service après- vente Le propriétaire du produit de EXIT Toys bénéficie des garanties suivantes sur ce produit: • 2 ans après date d’achat sur le cadre (avec un emploi normal). • 3 mois sur toutes les autres pieces (avec un emploi normal). - Page 20 Components / Komponenten / Onderdelen / Composants 1 Pad 1pcs 2 Upper U-pipe 1pcs 3 Lower U-pipe 1pcs 5 Elastic with ball 4 Net 1pcs 6 Rear U-pipe 1pcs 36pcs 7 Rear straight pipe 2pcs 8 Φ42mm pipe 1pcs 9 Φ38mm pipe 1pcs 10 L-plug 2pcs 11 M8X65mm Bolt 1pcs 12 M8 Plastic washer 2pcs...
- Page 21 Assembly steps / Montageschritte / Montage / Assemblée EN: Lay the Pad (1) upside down. Then insert the upper U-pipe (2) into the Lower U-pipe (3) to assemble the frame. Note: The Pad (1) needs to be lifted when assembling the upper U-pipe (2) and the Lower U-pipe (3). DE: Legen Sie den Rebounder mit der Abdeckung (1) nach unten auf den Boden.
- Page 22 EN: Turn around the Pad (1). Use two elastics with ball (5) through the first mesh of the net (4) at each 4 corners of the frame as shown and put the elastics around the frame. Note: First attach an elastic at the horizontal direction, then attach another elastic at the vertical direction.
- Page 23 EN: Attach all remaining elastics (5) to the frame as indicated by the arrows. Then attach all the straps of the pad (1) to the Net (4). DE: Befestigen Sie nun die restlichen Gummis (5) am Rahmen (siehe die Pfeile in der Abbildung).
- Page 24 EN: Insert the first hole of the ø38mm pipe (9) into the second hole of the ø42mm pipe(8). Then insert the L-plug (10) from the top down. There are multi adjustment positions, according to the desired position. DE: Stecken Sie das erste Loch der ø38 mm-Stange (9) in das zweite Loch der ø42 mm-Stange (8).
- Page 25 EN: This Rebounder L has three adjustment angels when using the button snap adjustments and ten angles when using the L-plug. DE: Dieser Rebounder L lässt sich mithilfe der Schnappverschlüsse in drei Positionen und mithilfe der L-Verbinder in zehn Positionen verstellen.
- Page 26 EN: Congratulations! The EXIT Kickback Rebounder is ready to use! DE: Herzlichen Glückwunsch! Ihr EXIT Kickback Rebounder ist nun einsatzbereit! NL: Gefeliciteerd! Uw EXIT Kickback Rebounder is nu gereed voor gebruik! FR: Félicitations! Le EXIT Kickback Rebounder est prêt à être utilisé !
- Page 27 Notes / Notizen / Notities / Notes...
- Page 28 Contact: Dutch Toys Group Fabriekstraat 17 P.O. Box 369, 7000 AJ Doetinchem info@exittoys.com www.exittoys.com EXIT is a registered trade mark of Dutch Toys Group...