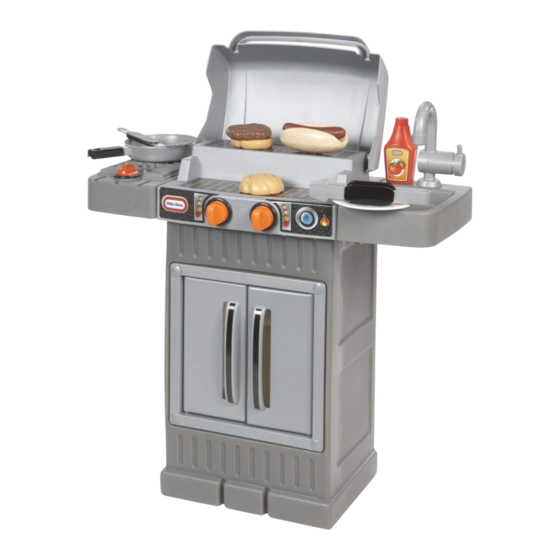
Sommaire des Matières pour Little Tikes Cook 'N Grow
- Page 1 All manuals and user guides at all-guides.com months Cook 'N Grow BBQ Grill ™ ASSEMBLY INSTRUCTIONS #633904M Adult assembly required. Approx. assembly time: 25min. Look for video of assembly at littletikes.com/videoinstructions XIM633904 - 9/20...
- Page 2 All manuals and user guides at all-guides.com © Thank you for choosing the Little Tikes Cook 'N Grow BBQ Grill . ™ We strive to provide a durable, easy-to-assemble toy thats made to last, giving your child years of imaginative, engaging fun! Really important information you should know! •...
- Page 3 BEFORE you begin assembly, make sure you have all the parts listed below. Some packages of hardware may have extras pieces. Questions? We’re here to help. Little Tikes customer service team at 1-800-321-0183. Tools required (not included) Shown actual size Fastener (4) (4) 1"...
- Page 4 All manuals and user guides at all-guides.com Ready...let’s start with decals! Decals must be applied to a clean, dry surface. Wipe clean with a dry rag before application. Remove air from under decals by applying pressure to the decals starting from the center, and work towards edges.
- Page 5 All manuals and user guides at all-guides.com Turn it on PUSH in (2) knobs (part J) into the countertop (part D) snap into place. One more knob PUSH in grill knob (part K) onto the burner (part F) snap into place.
- Page 6 All manuals and user guides at all-guides.com Grill and SINK it! Grill and SINK it! Snap the grill (part F) into the countertop. Snap the grill (part F) into the countertop. Snap the sink (part G) into the countertop. Snap the sink (part G) into the countertop. Ready for the faucet Insert faucet (part H) into the countertop and secure by attaching the faucet fastener (part I) under the countertop...
- Page 7 All manuals and user guides at all-guides.com Frame it! Push each fastener into the door frame (part B) Then firmly push each fastener into the holes on the grill base (part A). Fastener...
- Page 8 All manuals and user guides at all-guides.com 2 ways to assemble! Cook ‘N Grow™ BBQ Grill GROWS WITH YOUR CHILD! STAGE Choose from 2 heights STAGE...
- Page 9 All manuals and user guides at all-guides.com STAGE #1 Attach the grill lid (part E) onto the counter top. Then slide the counter top into the grill base (part A). Finally, pop the 2 doors (part C) onto the grill base. Snap in one side of the grill lid first, then the other side...
- Page 10 All manuals and user guides at all-guides.com STAGE #2 When converting from STAGE 1 to STAGE 2. Remove the countertop from the grill base (part A). Remove the doors and turn the grill base into the tall position. Re-attach the countertop then pop the doors back into place.
- Page 11 Barbecue Cook ‘N Grow INSTRUCTIONS DE MONTAGE mois Montage par un adulte requis. Durée de montage approximative : 25 min. Merci d’avoir choisi l’ensemble Barbecue Cook 'N Grow de Little © Tikes . Nous sommes déterminés à fournir un jouet durable et facile à...
- Page 12 à compter de sa date d’achat (le reçu d’achat daté est exigé comme preuve d’achat). Au titre de travail (partie D) pour qu’ils s’enclenchent en place. la présente garantie, la seule responsabilité de The Little Tikes Company et le seul recours se limitent Étape 3 : Un autre bouton au remplacement de la pièce défectueuse ou au remplacement du produit.
- Page 13 El montaje debe realizarlo un adulto. Tiempo aproximado de montaje: 25 min. de Little Tikes © Gracias por elegir la Parrilla para barbacoa Cook 'N Grow ™ Nos esforzamos por crear juguetes perdurables, fáciles de ensamblar y creados para durar, que brindan a sus niños años de diversión fascinante y ocurrente.
- Page 14 Impreso en E.U.A. un trapo seco antes de la aplicación. Para © The Little Tikes Company, una compañía de MGA Entertainment. LITTLE TIKES® es una marca registrada de MINIMUM SIZE allowed is .2” high Little Tikes en EE.UU. y otros países. Todos los logotipos, nombres, personajes, representaciones, imágenes, Updated 12.2.11 per Paul Madan (new spacing)
- Page 15 All manuals and user guides at all-guides.com...
- Page 16 LIMITED WARRANTY The Little Tikes Company makes fun, high quality toys. We warrant to the original purchaser that this product is free of defects in materials or workmanship for one year * from the date of purchase (dated sales receipt is required for proof of purchase).


