Publicité
Les langues disponibles
Les langues disponibles
Liens rapides
Publicité

Manuels Connexes pour La Crosse Technology CA79103v2


Sommaire des Matières pour La Crosse Technology CA79103v2
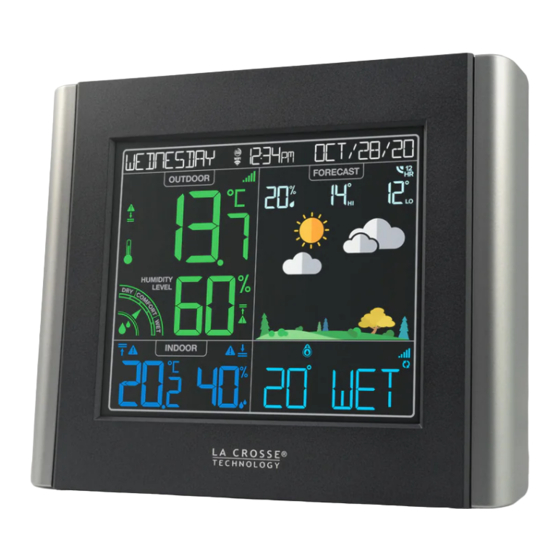
- Page 1 Wi-Fi COLOR FORECAST STATION SET UP GUIDE MODEL NUMBER CA79103v2 / V11...
- Page 2 Table of Contents BASICS LA CROSSE VIEW TEMP. AND HUMIDITY Initial Setup Connecting to the App Viewing Your TH Data 11-12 Station Settings Connecting Your Station History Records Buttons Add Your Sensors to the Outdoor Comfort Meter LCD Display Brightness Temp.
- Page 3 BASICS Initial Setup Power Up Weather Station Insert the 5V Power Adapter into an outlet, and then plug it into the Power Jack on the back of the station. Next, remove the Insulation Tab from the Station’s Battery Compartment. Thermo-Hygro Sensor Install 2 fresh “AA”...
- Page 4 LA CROSSE VIEW Connecting to the App Stay Connected to Your Home Stay connected to your home anytime, anywhere Anytime, Anywhere. with the La Crosse View app. Monitor home conditions and set alerts so your home can get ahold of you when something seems off. Connecting your station is optional and the display will function as a standalone unit without the Wi-Fi connection.
- Page 5 LA CROSSE VIEW Connecting Your Station Now that you’ve created your La Crosse View account, it’s time to connect your station to your home router using the La Crosse View app. Connecting to Your Wi-Fi Network The La Crosse View app is required to connect your station to the Wi-Fi network. Download and install the app first.
- Page 6 LA CROSSE VIEW Having Trouble Connecting to Wi-Fi? The app should guide you through the best method for your Wi-Fi network and router. However, if you have trouble connecting, please go bit.ly/wifi_questions or scan the QR code. This will explain additional connectivity options, including connecting by WPS or contacting our technical support team for further assistance.
- Page 7 Manually Add Sensor Into the App* Open your La Crosse View app. On the Main Menu, go to ADD/EDIT and select DEVICES. On the Devices page, select the ADD DEVICE or PLUS (+) button. Scan the Barcode on your Breeze Pro Sensor or type in the Device ID manually. Confirm the sensor image and Device ID and add a Device Name and Location Name.
- Page 8 BASICS Station Settings When the station is first powered on, it will search for the sensors which will connect Use the buttons on the within 10 minutes. top of the station to adjust Note: The Water Leak sensor will show in place the values.
- Page 9 BASICS Buttons Back View 1. LIGHT ( 2. TEMPERATURE ( ) 3. EXTRA Press to adjust backlight. Press to view Temperature Press to toggle through extra Hold to enter Auto-Dim and Humidity History. While sensors and pressure. Hold to settings. viewing, hold MINUS button to...
- Page 10 BASICS LCD Display Brightness Adjusting the LCD Display Brightness Press the button to adjust the backlight intensity. There are 4 brightness levels, plus an off option. Auto-Dim Settings Program your display to automatically dim during preselected times. Hold the button to enter the Auto-Dim Settings Menu.
- Page 11 BASICS Time and Calendar Display 1. DAY OF THE WEEK 2. WI-FI ICON ( 3. AUTO-DIM ICON ( Select from English, Spanish, or Indicates active Wi-Fi Indicates active auto-dim French in the settings menu connection* setting 4. 12/24 HOUR TIME 5.
- Page 12 TEMPERATURE & HUMIDITY Viewing Your Temperature and Humidity Data...
- Page 13 TEMPERATURE & HUMIDITY Viewing Your Temperature and Humidity Data 1. LOW BATTERY ICON 2. OUTDOOR HIGH 3. OUTDOOR LOW FOR THERMO-HYGRO TEMPERATURE ALERT TEMPERATURE ALERT SENSOR ( ICON ( ) ICON ( ) Appears if a high temperature Appears if a low temperature Indicates thermo-hygro sensor alert is set and active alert is set and active...
- Page 14 TEMPERATURE & HUMIDITY Viewing Your Temperature and Humidity Data Viewing Records Press the button to toggle through indoor/ outdoor temperature & humidity history records with time and date stamps. Records Viewing Order • • Outdoor High Temperature Outdoor Low Temperature Outdoor High Humidity •...
- Page 15 TEMPERATURE & HUMIDITY Temperature and Humidity Alerts Setting Temperature and Humidity Alerts Hold the button for to enter the Alert Settings Menu. Use the buttons adjust alerts settings. Press to confirm your selection. Your programmed alerts are active when the icon(s) appear on the LCD.
- Page 16 FORECAST Viewing Your Forecast Data 1. INTERNET ICON ( ) Indicates the station is connected and receiving AccuWeather forecasts* 2. CHANCE OF PRECIPITATION Percent chance of precipitation in the 12 hours* 3. DAILY FORECASTED HIGH TEMPERATURE Forecasted high temperature in the next 12 hours* 4.
- Page 17 FORECAST Viewing Your Forecast Data Forecast Icons When using as a standalone station, the display will use changes in barometric pressure to predict your weather to come in the next 12 hours. This is represented by 6 forecast scenes (sunny, partly Sunny Partly Sunny Clouds...
- Page 18 FORECAST Viewing Your Forecast Data Daily and Hourly Forecast Buttons When connected to Wi-Fi, use the daily forecast ( ) and hourly forecast ( ) buttons on the top of the station to view future forecast information. Daily Forecast Hourly Forecast •...
- Page 19 PRESSURE SENSORS Relative Pressure Spot Water Leak Sensor Your Water Leak Sensor data shares the same display area as the pressure readings. How to View Additional Data in the Extra Sensor Field • Your Relative Pressure reading will come from your station’s internal barometer. •...
- Page 20 SENSORS Sensor Placement and Mounting Positioning Your Water Leak Sensor • The sensor will work best when simply placed on a floor. It will begin to detect water at 0.787mm (0.031 inches). • If sensor is placed vertically (i.e. hung inside a sump pump) the depth of the water needs to be at least 6.35mm (0.25 inches) high to trigger the sensor.
- Page 21 SENSORS Additional Add-On Sensors Whether you choose to connect with the La Crosse View app or not, this station can display data for up to 4 extra sensors. This data will appear in the blue Extra Sensor field and in your La Crosse View app if connected.
- Page 22 APPENDIX THERMO-HYGRO SENSOR SPECIFICATIONS • Outdoor Temperature Range: -40°C to 60°C Specifications (-40°F to 140°F) • Outdoor Humidity Range: 10 to 99%RH • Transmission Range: 121 Meters (400 feet) open air • Power Requirements: 2 “AA” Batteries (not included) Wi-Fi NETWORK REQUIREMENTS •...
- Page 23 APPENDIX Care and Maintenance WARNING This product contains a button battery. Battery replacement instruction: If swallowed, it could cause severe injury or death in just 2 When batteries of different brand or type are used together, hours. or new and old batteries are used together, some batteries Seek medical attention immediately.
- Page 24 APPENDIX APPENDIX Canada Statement This device contains licence-exempt transmitter(s)/receiver(s) that comply with Innovation, Science and Economic Development Canada’s licence-exempt RSS(s). Operation is subject to the following two conditions: (1) This device may not cause interference. (2) This device must accept any interference, including interference that may cause undesired operation of the device. The device meets the exemption from the routine evaluation limits in section 2.5 of RSS 102 and compliance with RSS-102 RF exposure, users can obtain Canadian information on RF exposure and compliance.
- Page 25 STATION DE PRÉVISION COULEUR Wi-Fi GUIDE D’UTILISATION NUMÉRO DE MODÈLE CA79103v2 / V11...
- Page 26 FONCTIONS DE BASE Table des matières Réglage initial Alimentation FONCTIONS DE BASE LA CROSSE VIEW TEMPÉRATURE ET HUMIDITÉ Réglage Initial Connexion à l’application Affichage de vos 10-11 Réglage de la station Connexion de votre station données de température Ajoutez vos capteurs à Boutons et d’humidité...
- Page 27 LA CROSSE VIEW LA CROSSE VIEW Connexion à l’application Connexion de votre station Maintenant que vous avez créé votre compte La Crosse View, il est temps de connecter votre station à votre routeur domestique à l’aide de l’application La Crosse View. Connexion à...
- Page 28 Ajouter manuellement un capteur à l’application* LA CROSSE VIEW Vous rencontrez des difficultés de connexion au Wi-Fi ? Ouvrez votre application La Crosse View. Dans le menu principal, sélectionnez « ADD/EDIT » (ajouter/ modifier), puis « DEVICES » (appareils). L’application vous guidera par étape selon votre réseau Wi-Fi et votre routeur.
- Page 29 FONCTIONS DE BASE FONCTIONS DE BASE Réglage de la station Boutons Lorsque la station est mise en marche, elle cherche les capteurs, qui se connecteront Utilisez les touches dans les 10 minutes suivantes. le haut de la station pour Remarque : Le capteur de fuite d’eau s’affichera ajuster les valeurs.
- Page 30 FONCTIONS DE BASE FONCTIONS DE BASE Intensité de l’écran à ACL Heure et calendrier Réglage de la luminosité de l’écran ACL Appuyez sur le bouton pour régler l’intensité du rétroéclairage. Il y a quatre niveaux d’intensité, en plus de l’option OFF. Paramètres de la fonction d’atténuation automatique de l’intensité...
- Page 31 TEMPÉRATURE ET HUMIDITÉ TEMPÉRATURE ET HUMIDITÉ Affichage de vos données de température Affichage de vos données de température et d’humidité et d’humidité 1. ICÔNE DE BATTERIE 2. ICÔNE D’ALERTE 3. ICÔNE D’ALERTE FAIBLE AVEC CAPTEUR HAUTE TEMPÉRATURE D’EXTÉRIEUR BASSE THERMO-HYGRO ( EXTÉRIEURE ( ) TEMPÉRATURE ( ) Indique que la pile du capteur...
- Page 32 TEMPÉRATURE ET HUMIDITÉ TEMPÉRATURE ET HUMIDITÉ Affichage de vos données de température Alertes de température et d’humidité et d’humidité Réglage des alertes de température et d’humidité Affichage des enregistrements Tenez enfoncé le bouton pour entrer dans le menu de réglage Appuyez sur le bouton pour faire défiler les températures des alertes.
- Page 33 PRÉVISION PRÉVISION Affichage de vos données de prévision Affichage de vos données de prévision Icônes de prévision 1. ICÔNE INTERNET ( ) Lorsque la station est utilisée en mode autonome, Indique que la station est connectée et reçoit des prévisions AccuWeather * elle utilise les changements de la pression atmosphérique pour prédire les conditions météo 2.
- Page 34 PRÉVISION PRESSION CAPTEURS Affichage de vos données de prévision Pression relative Capteur de fuite d’eau L’information provenant de votre capteur de Boutons des prévisions quotidiennes et horaires fuite d’eau s’affiche au même endroit que la Lorsque la station est connectée au réseau sans fil, utilisez les boutons quotidiennes ( pression sur votre écran.
- Page 35 CAPTEURS CAPTEURS Placement et montage du capteur Capteurs additionnels Positionnement de votre capteur de fuite d’eau Qu’elle soit connectée ou non à l’application La • Pour obtenir un fonctionnement optimal, nous vous recommandons Crosse View, votre station peut afficher les données de placer le capteur sur le plancher, tout simplement.
- Page 36 Soins et entretien SPÉCIFICATIONS DU CAPTEUR THERMO-HYGRO ANNEXE ANNEXE • Plage de température extérieure : de -40°C à 60 °C (de -40 °F à 140 °F) Spécifications Ce produit fonctionne avec des piles alcalines. Remplacement des piles : • Plage d’humidité extérieure : de 10 % à...
- Page 37 ANNEXE Déclaration pour le Canada Cet appareil contient un ou des émetteurs/récepteurs exempts de licence conformes au CNR d’Innovation, Sciences et Développement économique Canada. Son fonctionnement est soumis aux deux conditions suivantes : (1) cet appareil ne doit pas provoquer d’interférences; (2) il doit accepter toute interférence reçue, notamment celles pouvant entraîner un dysfonctionnement.