Publicité
Liens rapides
Tools needed:
Outils requis:
Adjustable wrench
Screwdriver
Clé à molette
Tournevis
Safety goggles
Channel-lock pliers
Lunettes protectrices
Pince Channellock
Need Help? Please call our toll-free Technical Support line at 1-800-487-8372 for additional assistance or service.
Besoin d'aide? Veuillez communiquer avec notre ligne de soutien technique sans frais à 1 800 487-8372 pour obtenir du service
ou de l'aide additionnels.
REV Date 07-02-2012
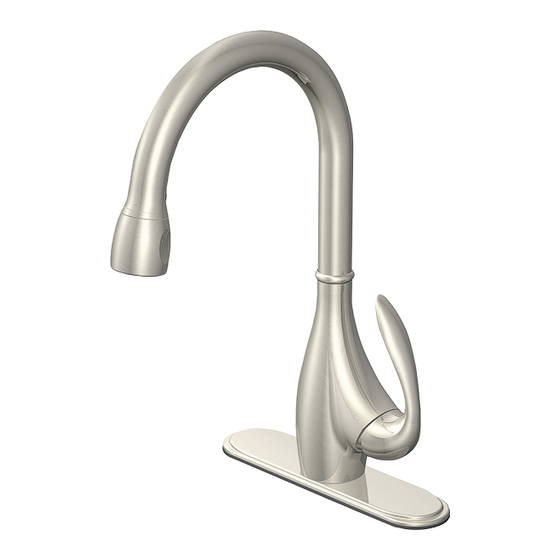
Pull-down Kitchen Faucet
Mitigeur d'évier à bec escamotable
Safety Tips
• When installing flexible hose, there should be no torsion or deformation; DO NOT fold into V or L
shape; DO NOT use if there are any cracks or deformations.
• The fittings should be installed by a licensed plumber.
• Cover your drain to avoid losing parts.
Consignes de sécurité
• Lorsque vous installez le tuyau flexible, il ne doit exister aucune torsion ou déformation;
NE le pliez PAS en V ou L; NE L'UTILISEZ PAS s'il existe des fissures ou déformations.
• Les raccords doivent être installés par un plombier accrédité.
• Recouvrez le drain pour éviter de perdre des pièces.
1
SKU # 063-3192-4
Publicité

Sommaire des Matières pour Cuisinart 063-3192-4
- Page 1 SKU # 063-3192-4 Pull-down Kitchen Faucet Mitigeur d’évier à bec escamotable Tools needed: Outils requis: Adjustable wrench Screwdriver Clé à molette Tournevis Safety Tips • When installing flexible hose, there should be no torsion or deformation; DO NOT fold into V or L shape;...
- Page 2 Important Information • Prior to beginning installation, turn off the cold and hot water lines and turn on the old faucet to release built-up pressure. • When installing your new faucet, first hand-tighten connector nuts. Then use one wrench to hold the fitting and a second wrench to tighten the nut an additional 1/4 turn.
- Page 3 Includes/Comprend: Faucet body Corps du robinet Deck plate Applique Putty plate Plaque à mastic Spray head Douchette Rubber washer Rondelle en caoutchouc Discharge tube Tube d’évacuation Metal washer Rondelle en métal Water supply line Conduite d’eau Lock nut Contre-écrou Hose Tuyau Quick connector Raccord rapide...
- Page 4 Faucet Installation/Installation du robinet Turn on water and flush water supply lines into a bucket. Turn off water supply. Ouvrez l’eau et vidangez les conduites d’eau dans un seau. Fermez l’alimentation en eau. Do not release spring clip from hose until after completing Without deck plate installation.
- Page 5 Faucet Installation/Installation du robinet Continued/Suite With deck plate installation. Unscrew screws on lock nut (H) until they are flush with the face of the nut. Avec l’installation de l’applique. Dévissez les vis du contre-écrou (H) jusqu’à ce qu’elles soient à niveau avec la face de l’écrou.
- Page 6 Faucet Installation/Installation du robinet Continued/Suite Remove cap from discharge tube (E). Attach quick connector (I) to discharge tube (E). Pull down on quick connector (I) to ensure it is secure. NOTE: For removal, Retirez le capuchon du tube d’évacuation (E). see “Quick Connector Removal.”...
- Page 7 Faucet Installation/Installation du robinet Continued/Suite Turn on water supply and allow water to run through the hose to Replace spray head (A). flush out the faucet. Check for leaks. Replacez la douchette (A). Ouvrez l’alimentation en eau couler dans le tuyau pour rincer le robinet.
- Page 8 Parts Diagram/Schéma des pièces Handle Insert & Screw / Insertion pour levier et vis Metal Handle / Levier en métal Trim Cap / Capuchon de garniture Lock Nut / Écrou de blocage Lock Nut / Écrou de blocage Ceramic Disc Cartridge / Cartouche à disque en céramique Spout Assembly / Assemblage du bec Hose Guide / Guide de boyau Spray Head / Tête de douchette...
-
Page 9: Maintenance, Entretien
Maintenance/Entretien Your new faucet is designed for years of trouble-free performance. Keep it looking new by cleaning it periodically with a soft cloth. Avoid abrasive cleaners, steel wool, and harsh chemicals as these will dull the finish and void your warranty. Votre nouveau robinet est conçu pour vous offrir des années de rendement sans problème.