Table des Matières
Publicité
Les langues disponibles
Les langues disponibles
Liens rapides
www.sylvania.com
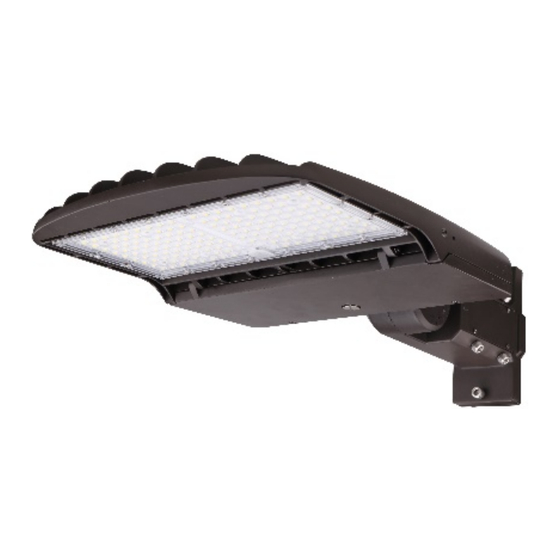
SYLVANIA ValueLED™ Area Light
PLEASE READ THE BELOW WARNING BEFORE ATTEMPTING INSTALLATION
• DO NOT USE A GENERATOR TO TEST THE LUMINAIRE.
• PLEASE ABIDE BY ALL RELEVANT NATIONAL, STATE, AND MUNICPAL SAFETY CODES WHEN
INSTALLING THIS FIXTURE.
• TO AVOID SHOCK, PLEASE DO NOT ATTEMPT INSTALLATION DURING RAIN
• INSTALLATIONS SHOULD ONLY BE ATTEMPTED BY LICENSED ELECTRICIANS.
• PLEASE WEAR GLOVES WHILE ATTEMPTING INSTALLATIONS.
• PLEASE DISCONNECT THE LUMINAIRE IF SMOKE OR FIRE IS VISIBLE DURING OR FOLLOWING
ANY INSTALLATION ATTEMPTS
The ValueLED™ Area Flood is ideal in
new construction and retrofit applications.
Available in two wattages and two
distribution types, this product family
builds onto the existing SYLVANIA Area
Flood portfolio and includes a universal
mounting bracket for round and square
poles as well tenon and wall mounting.
For warranty information please visit :
www.ledvanceUS.com/warrantyregistrat
ion.
WARNING
3983099
Publicité
Table des Matières

Sommaire des Matières pour Sylvania ValueLED 3A
- Page 1 Available in two wattages and two distribution types, this product family builds onto the existing SYLVANIA Area Flood portfolio and includes a universal mounting bracket for round and square poles as well tenon and wall mounting.
-
Page 2: Wiring Diagram
This product has 3 dimming functions available: a) Constant Current 1-10VDC dimming, b) PWM signal dimming and c) Variable resistance dimming. Please choose the appropriate dimming function for your needs if dimming is desired. Make all wiring connections via the supplied wire leads in accordance with NEC and local codes. For units with a NEMA photocontrol receptacle, if the aiming angle will be beyond 45 above horizontal, place a continuous bead of silicone completely around the top edge of the receptacle to seal the shorting cap or photocontrol. -
Page 3: Installation Instructions
UNIVERSAL MOUNTING BRACKET (Figure 1): INSTALLATION INSTRUCTIONS: Mounting with Slipfitter Mount : 1. Remove parts two, four, five, and six from the universal mounting bracket included in the box. 2. Loosen the four locking bolts (part 8 of figure 1) on slipfitter bracket, make all wiring connections via the supplied wire leads in accordance with NEC and local codes, and pull the wires completely into the pole (figure 2) or junction box (junction can box can be accessed through part 3 of figure 1). - Page 4 Mounting with Pole Mount: 1. Secure to pole: • For square pole (remove parts 2 and 6 from figure 1) a. Remove and discard bolts (part 8 from figure 1) and remove rubber plugs (part 14 from figure 1). b. Place the rubber plugs (part 14) where the discarded bolts were previously located (see figure 4) c.
- Page 5 Pole Mount Bolt Drill Pattern Mounting with Wall Mount: • For Wall mounting (remove parts 2 and 6 from figure 1) a. Remove and discard bolts (part 8 from figure 1) and remove rubber plugs (part 14 from figure 1). b.
-
Page 6: Luminaire Pour Grandes Surfaces Valueled
SYLVANIA et inclut un support de montage universel pour les fûts ronds et carrés ainsi que pour le montage mural. -
Page 7: Schéma De Câblage
Ce produit offre 3 fonctions de gradation : a) gradation 1-10V c.c. à courant constant, b) gradation à signal MIL et c) gradation à résistance variable. Veuillez choisir la fonction de gradation appropriée à vos besoins. Effectuer les connexions à l’aide des fils inclus et en respectant les exigences du code national de l’électricité et des codes locaux. Pour les unités avec un réceptacle à... - Page 8 Shorting cap = Fiche de mise en court-circuit Photocell = Cellule photoélectrique Socket = Douille Lamp = Lampe SUPPORT DE MONTAGE UNIVERSEL (Figure 1) : DIRECTIVES D’INSTALLATION : Montage avec raccord lisse : 1. Retirer les pièces deux, quatre, cinq et six du support de montage universel inclus dans la boîte. 2.
- Page 9 A&D Bracket = Support A et D A&D Bracket = Support A et D Lamp = Lampe Rubber Plug = Bouchon de caoutchouc Lamp = Lampe A&D Bracket = Support A et D Installation bar = Barre pour installation Junction Box = Boîte de jonction Add pieces = Ajouter des pièces Adjusting Bolt = Boulon de réglage Round Pole = Fût rond...
- Page 10 Configuration de perçage des boulons de montage sur le fût Montage mural : • Pour le montage mural (retirer les pièces 2 et 6 de la figure 1) a. Retirer et jeter les boulons (pièce 8 de la figure 1) et retirer les bouchons de caoutchouc (pièce 14 de la figure 1).
