Table des Matières
Publicité
Les langues disponibles
Les langues disponibles
CONDITION DE GARANTIE
Ce produit est garanti pour une période de 2 ans à partir de la date d'achat*, contre
toute défaillance résultant d'un vice de fabrication ou de matériau. Cette garantie ne
FR
couvre pas les vices ou les dommages résultant d'une mauvaise installation, d'une
utilisation incorrecte ou de l'usure anormale du produit.
*sur présentation du ticket de caisse.
WARRANTY CONDITIONS
This product is guaranteed against faults caused by defects in manufacturing or the
materials used for a period of two years, starting from the date of purchase.* This
EN
warranty does not cover defects or damage caused by failure to install the device
correctly, incorrect use of the product, or excessive wear and tear.
*proof of purchase required.
GARANTIEVOORWAARDEN
Dit product wordt gegarandeerd voor een periode van 2 jaar vanaf de aankoopdatum*,
voor elke storing die het gevolg is van een fabricagefout of het materiaal. Gebreken of
NL
schade door slechte installatie, onjuist gebruik of abnormale slijtage van het product
worden niet gedekt door deze garantie.
*op vertoon van kassabon.
CONDICIONES DE GARANTÍA
El certificado de garantía de este producto tiene una duración de 2 años a partir de la
fecha de compra* que se limita a los defectos de fabricación y averías del material.
ES
Se excluyen de la garantía deficiencias o daños originados por una mala instalación,
errores en la manipulación o por un uso inadecuado.
*previa presentación del comprobante de compra.
ELECTRO DEPOT
EN 50419 :2006 LOGO
1 route de Vendeville
59155 FACHES-THUMESNIL - FRANCE
NOT OK
OK
04/2021-01
2/2
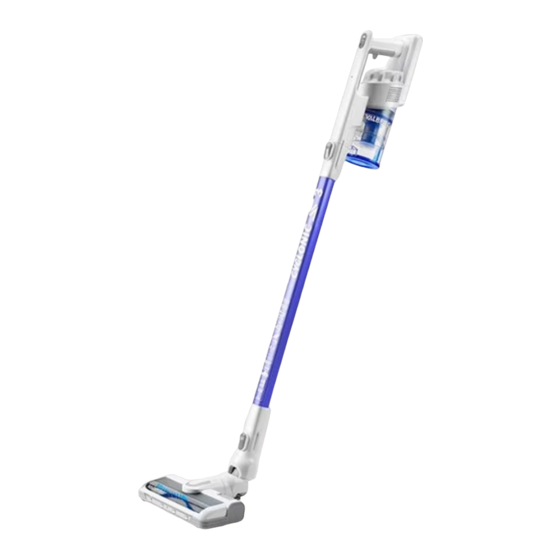
Aspirateur
Stick Vacuum
Stofzuiger
Aspirador
975542 - CYCLONIC-S3
CONSIGNES D'UTILISATION
....................02
INSTRUCTIONS FOR USE
....................14
GEBRUIKSAANWIJZINGEN
....................26
INSTRUCCIONES DE USO
....................38
Publicité
Table des Matières
Dépannage

Sommaire des Matières pour VALBERG CYCLONIC-S3
- Page 1 CONDICIONES DE GARANTÍA El certificado de garantía de este producto tiene una duración de 2 años a partir de la 975542 - CYCLONIC-S3 fecha de compra* que se limita a los defectos de fabricación y averías del material. Se excluyen de la garantía deficiencias o daños originados por una mala instalación, errores en la manipulación o por un uso inadecuado.
- Page 2 110 cm...
- Page 3 Merci ! M e rc i d ’ a v o i r c h o i s i c e p ro d u i t VA L B E R G . Choisis, testés et recommandés par ELECTRO DEPOT, le s p ro d u i t s d e l a m a rq u e VA L B E R G v o u s a s s u re n t u n e u t i l i s a t i o n s i m p l e , u n e p e r f o r m a n c e f i a b l e e t u n e q u a l i t é...
-
Page 4: Table Des Matières
Table des matières Composants Aperçu de l’appareil Aperçu de l’appareil Utilisation prévue Caractéristiques Chargement de l’aspirateur Utilisation de Utilisation de l’aspirateur l’appareil Installation du support mural Nettoyage et entretien Nettoyage et Vidage du compartiment à poussière entretien Retrait du compartiment à poussière et des filtres Nettoyage du rouleau de la brosse et des axes de roulettes Résolution des blocages... -
Page 5: Aperçu De L'appareil
Aperçu de l’appareil VEUILLEZ PRENDRE LE TEMPS DE LIRE ATTENTIVEMENT LE PRÉSENT MODE D’EMPLOI AINSI QUE LE LIVRET RÉGLEMENTAIRE SÉPARÉ AVANT D’UTILISER L’APPAREIL. GARDEZ LES DEUX LIVRETS AFIN DE POUVOIR VOUS Y RÉFÉRER ULTÉRIEUREMENT. Composants Couvercle du compartiment à Poignée de l’unité principale poussière Bouton d’alimentation (OFF - LOW - HIGH, soit Arrêt - Vitesse lente -... -
Page 6: Utilisation Prévue
N’utilisez l’appareil qu’en intérieur et dans un endroit sec. AVERTISSEMENT ! N’utilisez pas cet aspirateur pour aspirer de l’eau ou des liquides. Caractéristiques Modèle : 975542 - CYCLONIC-S3 Aspirateur Puissance : 140 W max. Capacité du compartiment à poussière : 0,4 L Vitesse rapide –... -
Page 7: Utilisation De L'appareil
Utilisation de l’appareil Chargement de l’aspirateur Chargez complètement l’aspirateur avant la première utilisation, après chaque utilisation ou lorsque le niveau de la batterie est faible. • Lorsque le niveau de la batterie est faible, le dernier voyant LED clignote pour rappeler à... -
Page 8: Utilisation De L'aspirateur
Utilisation de l’appareil Utilisation de l’aspirateur AVERTISSEMENT ! • N’utilisez jamais l’appareil sans les filtres et le compartiment à poussière. • Vérifiez que l’appareil est éteint et débranché de la prise secteur avant d’installer ou de changer des accessoires. Installation des accessoires •... -
Page 9: Installation Du Support Mural
Utilisation de l’appareil Retrait des accessoires • Vérifiez que l’appareil est bien hors tension. • Tirez le suceur/la brosse 2 en 1 ou appuyez sur le bouton de déverrouillage sur le tube télescopique/la brosse turbo motorisée afin de les détacher de l’unité principale. Fonctionnement •... -
Page 10: Nettoyage Et Entretien
Nettoyage et entretien Nettoyage et entretien AVERTISSEMENT ! • Débranchez toujours l’appareil de la prise secteur avant de le nettoyer. • Pour éviter tout danger électrique, l’unité principale, la brosse turbo motorisée, l’adaptateur secteur et le cordon ne doivent jamais être mis dans l’eau ni dans tout autre liquide. -
Page 11: Vidage Du Compartiment À Poussière
Nettoyage et entretien Vidage du compartiment à poussière • Pour vider le compartiment à poussière, éteignez l’aspirateur. • Retirez le tube télescopique et/ou l’accessoire de l’entrée d’air de l’unité principale. Tenez l’unité principale verticalement au-dessus d’une poubelle. Poussez le levier du couvercle vers le bas. -
Page 12: Nettoyage Du Rouleau De La Brosse Et Des Axes
Nettoyage et entretien Nettoyage du rouleau de la brosse et des axes de roulettes Si le rouleau de la brosse ou les axes de roulettes de la brosse turbo motorisée se bloquent, éteignez l’appareil. Nettoyage du rouleau de la brosse Utilisez une pièce pour tourner le verrou du côté... -
Page 13: Dépannage
Nettoyage et entretien Dépannage Consultez le présent guide de dépannage pour résoudre les problèmes que vous pourriez rencontrer fréquemment avec l’appareil. Si votre problème persiste, n’utilisez pas l’appareil et contactez un centre de réparation agréé pour le faire inspecter et réparer. Problème Cause possible Solution... - Page 14 Nettoyage et entretien Rangement • Débranchez toujours l’appareil de la prise de courant avant de le ranger. • Rangez l’appareil dans un endroit propre, sec et à l’abri de la poussière, hors de portée des enfants et des animaux domestiques. •...
- Page 15 Thank you! T h a n k y o u f o r c h o o s i n g t h i s VA L B E R G p ro d u c t . V A L B E R G p r o d u c t s a r e c h o s e n , t e s t e d , a n d recommended by ELECTRO DEPOT, so you can be sure y o u a re g e t t i n g a t o p - q u a l i t y, e a s y - t o - u s e p ro d u c t t h a t w o n ’...
- Page 16 Table of Contents Parts Product overview Product overview Intended use Specifications Charging the vacuum cleaner Product usage Using the vacuum cleaner Installing the wall mount Cleaning and maintenance Cleaning and Emptying the dust cup maintenance Detaching the dust cup and filters Cleaning the brush roller and wheel axles Clearing blockages Troubleshooting...
-
Page 17: Product Overview
Product overview PLEASE TAKE TIME TO CAREFULLY READ THIS USER MANUAL AND THE SEPARATE REGULATORY BOOKLET BEFORE USING THE UNIT. KEEP BOTH BOOKLETS FOR FUTURE REFERENCE. Parts Main unit handle Dust cup lid Power switch (OFF – LOW – HIGH) Charging socket Power/battery LED indicator lights Dust cup lid lever... -
Page 18: Intended Use
Any other use may damage the unit or cause injury. Only use the unit indoors, in a dry place. WARNING! Do not use this vacuum cleaner to vacuum water or liquids. Specifications Model: 975542 - CYCLONIC-S3 Vacuum cleaner Power: 140 W max. Dust cup capacity: 0.4 L High speed –... -
Page 19: Product Usage
Product usage Charging the vacuum cleaner Fully charge the vacuum cleaner before the first use, after each use, or whenever the battery level is low. • When the battery level is low, the last LED indicator will flash during use to remind the user to charge the unit. -
Page 20: Using The Vacuum Cleaner
Product usage Using the vacuum cleaner WARNING! • Never use the unit without the filters and dust cup. • Make sure the unit is switched off and unplugged from the mains socket before attaching or changing any tools. Attaching the tools •... -
Page 21: Installing The Wall Mount
Product usage Detaching the tools • Make sure the unit is switched off. • Pull off the crevice tool/2-in-1 brush tool or press the release button on the extension hose/motorised turbo brush to detach the tools from the main unit. Operation •... -
Page 22: Cleaning And Maintenance
Cleaning and maintenance Cleaning and maintenance WARNING! • Always unplug the unit from the mains socket before cleaning it. • To avoid electrical hazards, never immerse the main unit, motorised turbo brush, AC adapter or cable in water or any other liquids. Never rinse them under a tap. NOTE: Never use solvents, chemical or abrasive cleaning products, wire brushes, sharp objects or scouring pads to clean the unit. -
Page 23: Emptying The Dust Cup
Cleaning and maintenance Emptying the dust cup • To empty the dust cup, turn off the vacuum cleaner. • Detach the extension hose and/or vacuum tool from the main unit’s air inlet. Hold the main unit vertically over a bin. Press the lid lever down. The lid on the bottom of the dust cup will flip open. -
Page 24: Cleaning The Brush Roller And Wheel Axles
Cleaning and maintenance Cleaning the brush roller and wheel axles If the brush roller or wheel axles of the motorised turbo brush become blocked or jammed, turn off the unit. Cleaning the brush roller Use a coin to turn the lock on the right side of the motorised turbo brush to the position. -
Page 25: Troubleshooting
Cleaning and maintenance Troubleshooting Use this troubleshooting guide to resolve any common problems that you may encounter with the unit. If the problem persists, do not use the unit and contact an authorised repair centre to have it inspected and if necessary, repaired. Problem Possible Cause Solution... -
Page 26: Storage
Cleaning and maintenance Storage • Always unplug the unit before storing it. • Store the unit in a fresh, dry and dust-free place, out of the reach of children and pets. • Please retain the packaging and use it to store your unit when it is not in use for an extended period of time. - Page 27 Proficiat met uw keuze voor een product van VALBERG. De selectie en de testen van de toestellen van VALBERG g e b e u re n v o l le d i g o n d e r c o n t ro le e n s u p e r v i s i e v a n E L E C T R O D E P O T.
- Page 28 Inhoudstafel Onderdelen Overzicht van het Overzicht van het apparaat toestel Doelmatig gebruik Specificaties De stofzuiger opladen Gebruik van het Gebruik van de stofzuiger toestel De muurhouder installeren Reiniging en onderhoud Reiniging en Het stofreservoir leegmaken onderhoud Het stofreservoir en de filters verwijderen De borstelrol en de wielassen reinigen Verstoppingen verwijderen Probleemoplossing...
-
Page 29: Overzicht Van Het Toestel
Overzicht van het toestel LEES ALTIJD EERST DEZE GEBRUIKSAANWIJZING EN DE AFZONDERLIJKE GIDS MET WETTELIJKE VOORSCHRIFTEN DOOR VOORDAT HET APPARAAT WORDT GEBRUIKT. BEWAAR DEZE TWEE HANDLEIDINGEN VOOR TOEKOMSTIGE RAADPLEGING. Onderdelen Handgreep van hoofdeenheid Deksel van stofreservoir Aan/uit-knop (OFF (uit) - LOW (lage Oplaadaansluiting snelheid) - HOOG (hoge snelheid)) Led-controlelampjes voor... -
Page 30: Doelmatig Gebruik
Dit apparaat is alleen bestemd voor gebruik in een droge binnenruimte. WAARSCHUWING! Gebruik deze stofzuiger niet voor het opzuigen van water of een andere vloeistof. Specificaties Model: 975542 - CYCLONIC-S3 Stofzuiger Vermogen: 140 W max. Inhoud van stofreservoir: 0,4 L Hoge snelheid –... -
Page 31: Gebruik Van Het Toestel
Gebruik van het toestel De stofzuiger opladen Laad de stofzuig volledig op voordat deze voor de eerste keer wordt gebruikt, na elk gebruik of wanneer het accuvermogen laag is. • Als het accuvermogen laag is, knippert het laatste led-controlelampje om aan te geven dat het apparaat opgeladen moet worden. - Page 32 Gebruik van het toestel Gebruik van de stofzuiger WAARSCHUWING! • Gebruik het apparaat nooit zonder de filters en het stofreservoir. • Controleer of het apparaat is uitgeschakeld en de stekker uit het stopcontact is gehaald voor het installeren of vervangen van accessoires. De accessoires installeren •...
- Page 33 Gebruik van het toestel De accessoires verwijderen • Controleer of het apparaat van de voeding is ontkoppeld. • Trek aan het spleetmondstuk/2-in-1 borstel of duw op de ontgrendelingsknop op de telescopische buis/elektrische turboborstel om ze van de hoofdeenheid los te maken. Werking •...
-
Page 34: Reiniging En Onderhoud
Reiniging en onderhoud Reiniging en onderhoud WAARSCHUWING! • Haal de stekker voor het reinigen altijd uit het stopcontact. • Dompel de hoofdeenheid, de elektrische turboborstel, de netadapter en het snoer nooit in water of een andere vloeistof om elk elektrisch gevaar te vermijden. Spoel ze nooit onder de kraan. -
Page 35: Het Stofreservoir Leegmaken
Reiniging en onderhoud Het stofreservoir leegmaken • Om het stofreservoir te legen, schakel de stofzuiger uit. • Maak het spleetmondstuk en/of het accessoire los van de luchtinlaat van de hoofdeenheid. Breng de eenheid verticaal boven een vuilnisbak aan. Duw de hendel van het deksel omlaag. -
Page 36: De Borstelrol En De Wielassen Reinigen
Reiniging en onderhoud De borstelrol en de wielassen reinigen Als de borstelrol of de wielassen van de elektrische turboborstel blokkeren, schakel het apparaat uit. De borstelrol reinigen Draai het slot aan de rechterkant van de elektrische turboborstel naar de positie met behulp van een muntstuk. -
Page 37: Probleemoplossing
Reiniging en onderhoud Probleemoplossing Raadpleeg deze probleemoplossingsgids om problemen die zich tijdens het gebruik van het apparaat kunnen voordoen op te lossen. Als uw probleem blijft aanhouden, gebruik het apparaat dan niet en neem contact op met een erkend servicecentrum voor controle en reparatie. Probleem Mogelijke oorzaak Oplossing... - Page 38 Reiniging en onderhoud Opslag • Haal altijd de stekker uit het stopcontact voordat u het apparaat opbergt. • Bewaar het apparaat in een koele, droge en schone ruimte, uit de buurt van kinderen en huisdieren. • Bewaar de verpakking om uw apparaat in op te bergen als u het langere tijd niet denkt te gebruiken.
- Page 39 ¡Muchas gracias! M u c h a s g r a c i a s p o r h a b e r e le g i d o n u e s t ro p ro d u c t o VA L B E R G .
-
Page 40: Descripción Del
Índice Componentes Descripción del Descripción del aparato aparato Uso previsto Características Carga de la aspiradora Utilización del Uso de la aspiradora aparato Instalación del soporte de pared Limpieza y mantenimiento Limpieza y Vaciado del compartimento colector de polvo mantenimiento Desmontaje del compartimento colector de polvo y de los filtros Limpieza del rodillo del cepillo y de los ejes de las ruedas... -
Page 41: Descripción Del Aparato
Descripción del aparato LEA DETENIDAMENTE ESTE MANUAL DE INSTRUCCIONES, ASÍ COMO EL MANUAL DE ADVERTENCIAS NORMATIVAS, ANTES DE UTILIZAR EL APARATO. GUARDE AMBOS MANUALES PARA FUTURAS CONSULTAS. Componentes Tapa del compartimento colector de Asa de la unidad principal polvo Botón de alimentación (OFF - LOW - HIGH, es decir, Apagado - Velocidad Toma de carga lenta - Velocidad rápida) -
Page 42: Uso Previsto
Utilice este aparato únicamente en interiores y en un entorno seco. ¡ADVERTENCIA! No utilice la aspiradora para aspirar agua ni ningún otro líquido. Características Modelo: 975542 - CYCLONIC-S3 Aspiradora Potencia: 140 W máx. Capacidad del compartimento colector de polvo: 0,4 L Velocidad rápida: 25 W... -
Page 43: Utilización Del Aparato
Utilización del aparato Carga de la aspiradora Cargue completamente la aspiradora antes del primer uso, después de cada uso o cuando la batería esté baja de carga. • Cuando la batería esté baja de carga, parpadeará el último indicador LED para avisar al usuario de que debe cargar el aparato. -
Page 44: Uso De La Aspiradora
Utilización del aparato Uso de la aspiradora ¡ADVERTENCIA! • Nunca utilice el aparato sin los filtros y sin el compartimento colector de polvo. • Asegúrese de que el aparato esté apagado y desenchufado de la toma de corriente antes de montar o cambiar los accesorios. Montaje de los accesorios •... -
Page 45: Instalación Del Soporte De Pared
Utilización del aparato Desmontaje de los accesorios • Asegúrese de que el aparato esté correctamente desconectado de la corriente eléctrica. • Tire de la boquilla de succión/el cepillo 2-en-1 o presione el botón de desbloqueo en el tubo telescópico/el cepillo turbo motorizado para desmontarlos de la unidad principal. Funcionamiento •... -
Page 46: Limpieza Y Mantenimiento
Limpieza y mantenimiento Limpieza y mantenimiento ¡ADVERTENCIA! • Desenchufe siempre el aparato de la toma de corriente antes de limpiarlo. • Para evitar cualquier riesgo eléctrico, la unidad principal, el cepillo turbo motorizado, el adaptador de corriente y el cable no deberán sumergirse nunca en el agua ni en ningún otro líquido. - Page 47 Limpieza y mantenimiento Vaciado del compartimento colector de polvo • Para vaciar el compartimento colector de polvo, apague la aspiradora. • Saque el tubo telescópico y/o el accesorio de la entrada de aire de la unidad principal. Sujete la unidad principal en vertical sobre un cubo de basura. Empuje la palanca de la tapa hacia abajo.
- Page 48 Limpieza y mantenimiento Limpieza del rodillo del cepillo y de los ejes de las ruedas Si el rodillo del cepillo o los ejes de las ruedas del cepillo turbo motorizado se bloquean, apague el aparato. Limpieza del rodillo del cepillo Utilice una moneda para girar el bloqueo del lado derecho del cepillo turbo motorizado hasta la posición Levante la solapa de debajo del bloqueo, tire del extremo derecho del rodillo del...
-
Page 49: Resolución De Problemas
Limpieza y mantenimiento Resolución de problemas Consulte esta guía de resolución de problemas para resolver los problemas que podría experimentar frecuentemente con el aparato. Si su problema persiste, no utilice el aparato y contacte con un centro de reparaciones autorizado para que lo examinen y lo reparen. Problema Posible causa Solución... -
Page 50: Almacenamiento
Limpieza y mantenimiento Problema Posible causa Solución Los 5 indicadores • La batería o el motor • Apague el aparato y deje que se enfríe LED parpadean de la aspiradora están completamente. Elimine el bloqueo, en rápidamente y la sobrecalentados y/o el caso de que lo haya.