
Sommaire des Matières pour TOSHIBA TEC Corporation B-570-QP Serie
- Page 1 All manuals and user guides at all-guides.com TEC Thermal Printer B-570-QP SERIES Owner’s Manual Mode d’emploi Bedienungsanleitung Manual de instrucciones Gebruikershandleiding...
- Page 2 All manuals and user guides at all-guides.com LIST OF STANDARDS OF CONFORMITY Manufacturer : TOSHIBA TEC Corporation Address : 570 Ohito, Ohito-Cho, Tagata-Gun, Shizuoka-Ken, 410-2323 Japan declares that following product Product Name : Bar Code Printer Model : B-57X-YY Options...
- Page 3 All manuals and user guides at all-guides.com TEC Thermal Printer B-570-QP SERIES Owner’s Manual...
-
Page 4: Safety Summary
All manuals and user guides at all-guides.com ENGLISH VERSION EM1-33031 Safety Summary Safety Summary Personal safety in handling or maintaining the equipment is extremely important. Warnings and Cautions necessary for safe handling are included in this manual. All warnings and cautions contained in this manual should be read and understood before handling or maintaining the equipment. - Page 5 All manuals and user guides at all-guides.com ENGLISH VERSION EM1-33031 Safety Summary Disconnect Disconnect If foreign objects (metal fragments, When unplugging the power cords, the plug. the plug. water, liquids) enter the machines, be sure to hold and pull on the plug first turn off the power switches and portion.
- Page 6 All manuals and user guides at all-guides.com ENGLISH VERSION EM1-33031 TABLE OF CONTENTS Page 1. INTRODUCTION....................E1- 1 1.1 Applicable Model ...................E1- 1 1.2 Accessories ...................E1- 1 2. SPECIFICATIONS ...................E2- 1 2.1 Printer ....................E2- 1 2.2 Options ....................E2- 1 2.3 Media .....................E2- 2 2.4 Ribbon ....................E2- 2 3.
-
Page 7: Applicable Model
All manuals and user guides at all-guides.com 1. INTRODUCTION ENGLISH VERSION EM1-33031 1.1 Applicable Model 1. INTRODUCTION Thank you for choosing the TEC B-570 series thermal/transfer printer. This new generation high performance/quality printer is equipped with the latest hardware including the newly developed high density (12 dots/mm, 306 dots/inch) near edge print head. - Page 8 All manuals and user guides at all-guides.com 2. SPECIFICATIONS ENGLISH VERSION EM1-33031 2.1 Printer 2. SPECIFICATIONS 2.1 Printer Model B-570-QP Item Supply voltage AC 220V ~ 240V +10%, -15%, 50Hz +2Hz, -2Hz Power consumption 198W maximum (standby: 51W maximum) Operating temperature range 5°C ~ 40°C Relative humidity 25% ~ 85%RH (no condensation)
- Page 9 All manuals and user guides at all-guides.com 2. SPECIFICATIONS ENGLISH VERSION EM1-33031 2.3 Media 2.3 Media Refer to the following Label Tag paper NOTE 2. Black Mark Black Mark (on reverse side) (on reverse side) Stop Stop Tag paper position position position position...
-
Page 10: Front/Rear View
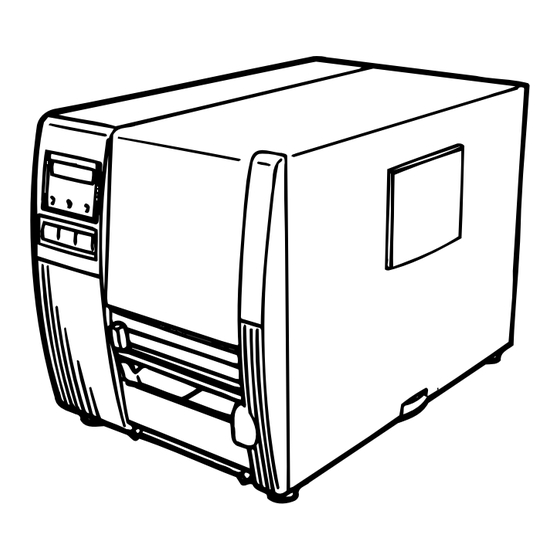
All manuals and user guides at all-guides.com 3. OVERVIEW ENGLISH VERSION EM1-33031 3.1 Front/Rear View 3. OVERVIEW 3.1 Front/Rear View Front View Rear View Outlet for the high speed PC Top Cover Message Display (LCD) interface cable (Option) Memory Card Slot Supply Window Serial Interface Connector... -
Page 11: Dip Switch Functions
All manuals and user guides at all-guides.com 4. DIP SWITCH FUNCTIONS ENGLISH VERSION EM1-33031 4. DIP SWITCH FUNCTIONS 4. DIP SWITCH FUNCTIONS The DIP switches are located to the right of the supply shaft. Supply Shaft WARNING: Ribbon Shaft Turn the POWER OFF before switching the functions. DIP SW 2 Function ON/OFF... -
Page 12: Installing The Printer
All manuals and user guides at all-guides.com 5. INSTALLING THE PRINTER ENGLISH VERSION EM1-33031 5.1 Connecting the Power Cord and Cables 5. INSTALLING THE PRINTER 5.1 Connecting the Power Cord and Cables WARNING! Turn the POWER SWITCH to OFF before connecting the power cord or cables. Serial I/F Cable (RS-232C) Expansion I/O Cable Parallel I/F Cable (Centronics) -
Page 13: Loading The Media
All manuals and user guides at all-guides.com 6. LOADING THE MEDIA ENGLISH VERSION EM1-33031 6. LOADING THE MEDIA 6. LOADING THE MEDIA WARNING: 1. Do not touch moving parts. To reduce the risk that fingers, jewelry, clothing, etc., be drawn into the moving parts, push the switch in the “OFF”... - Page 14 All manuals and user guides at all-guides.com 6. LOADING THE MEDIA ENGLISH VERSION EM1-33031 6. LOADING THE MEDIA 4. Put the media on the supply shaft. 5. Pass the media around the damper, then pull the media towards the front of the printer. 6.
- Page 15 All manuals and user guides at all-guides.com 6. LOADING THE MEDIA ENGLISH VERSION EM1-33031 6. LOADING THE MEDIA Removing the paper holders' upper plates from the media guide 1 Remove the two T-4x8 screws to detach the media guide from the printer. Media Guide Screw (T-4x8) Fig.
- Page 16 All manuals and user guides at all-guides.com 6. LOADING THE MEDIA ENGLISH VERSION EM1-33031 6. LOADING THE MEDIA An easy way to set the black mark sensor position 1 Pull the media about 500 mm out of the front of the printer, turn the media back on it's self and feed it under the print head past the sensor so that the black mark can be seen from above.
- Page 17 All manuals and user guides at all-guides.com 6. LOADING THE MEDIA ENGLISH VERSION EM1-33031 6. LOADING THE MEDIA 10. The media is now loaded and the sensor position is set. Batch type: Media Fig. 6-9 NOTE: Set the selection switch to the STANDARD/STRIP position. Improper setting can affect the print quality.
-
Page 18: Adjustment
All manuals and user guides at all-guides.com 6. LOADING THE MEDIA ENGLISH VERSION EM1-33031 6. LOADING THE MEDIA Cutter type: Where a cutter is fitted load the media as standard and feed it through the cutter module. NOTES: 1. Be sure to cut the backing paper of label. Cutting labels will cause the glue to stick to the cutter, which may affect the cutter quality and shorten the cutter life. -
Page 19: Loading The Ribbon
All manuals and user guides at all-guides.com 7. LOADING THE RIBBON ENGLISH VERSION EM1-33031 7. LOADING THE RIBBON 7. LOADING THE RIBBON WARNING! 1. Do not touch moving parts. To reduce the risk that fingers, jewelry, clothing, etc., be drawn into the moving parts, push the switch in the “OFF”... - Page 20 All manuals and user guides at all-guides.com 8. INSERTING THE OPTIONAL FLASH MEMORY CARD ENGLISH VERSION EM1-33031 8. INSERTING THE OPTIONAL FLASH MEMORY CARD 8. INSERTING THE OPTIONAL FLASH MEMORY CARD WARNING! Turn the power OFF when inserting or removing the flash memory card. CAUTION: To protect memory cards, discharge static electricity from your body by touching the printer rear cover prior touching the memory cards.
-
Page 21: Care/Handling Of The Media And Ribbon
All manuals and user guides at all-guides.com 9. CARE/HANDLING OF THE MEDIA AND RIBBON ENGLISH VERSION EM1-33031 9. CARE/HANDLING OF THE MEDIA AND RIBBON 9. CARE/HANDLING OF THE MEDIA AND RIBBON CAUTION: Be sure to read carefully and understand the Supply Manual. Use only media and ribbon which meet specified requirements. - Page 22 All manuals and user guides at all-guides.com 10. GENERAL MAINTENANCE ENGLISH VERSION EM1-33031 10.1 Cleaning 10. GENERAL MAINTENANCE WARNING! 1. Be careful when handling the print head as it becomes very hot. 2. Care must be taken not to injure yourself with the printer paper cutter. 3.
-
Page 23: Covers And Panels
All manuals and user guides at all-guides.com 10. GENERAL MAINTENANCE ENGLISH VERSION EM1-33031 10.2 Covers and Panels 10.2 Covers and Panels The covers should be cleaned by wiping with a dry cloth or a cloth slightly dampened with a mild detergent solution. - Page 24 All manuals and user guides at all-guides.com 10. GENERAL MAINTENANCE ENGLISH VERSION EM1-33031 10.3 Removing Jammed Paper Cleaning the Cutter Unit WARNING! 1. Be sure to turn the power off before cleaning the cutter unit. 2. The cutters are sharp and care should be taken not to injure yourself when cleaning. 1.
-
Page 25: Threshold Setting
All manuals and user guides at all-guides.com 10. GENERAL MAINTENANCE ENGLISH VERSION EM1-33031 10.4 Threshold Setting 10.4 Threshold Setting For the printer to maintain a constant print position it uses the transmissive sensor to detect the gap between labels by measuring the amount of light passing through the media. When the media is pre- printed, the darker (or more dense) inks can interfere with this process causing paper jammed errors. - Page 26 All manuals and user guides at all-guides.com 11. TROUBLESHOOTING ENGLISH VERSION EM1-33031 11. TROUBLESHOOTING 11. TROUBLESHOOTING WARNING! If you cannot solve a problem with the following solutions, do not attempt to repair it yourself. Turn the power off, unplug the printer, then contact your Authorized Service representative for assis- tance.
- Page 27 All manuals and user guides at all-guides.com 11. TROUBLESHOOTING ENGLISH VERSION EM1-33031 11. TROUBLESHOOTING Problem Solution Error Message EXCESS HEAD The print head is too hot. Turn the power off and decrease the TEMP print head temperature. HEAD ERROR 1. Restart the printing by pressing the This message is displayed when sending the head broken check [RESTAERT] key.
- Page 28 All manuals and user guides at all-guides.com 11. TROUBLESHOOTING ENGLISH VERSION EM1-33031 11. TROUBLESHOOTING Problem Solution Error Message example) When an error is detected in a com- Correct the command and re-send it PC001; 0A00, mand 20 bytes of the command are again.
- Page 29 All manuals and user guides at all-guides.com I'imprimante Transfert Thermique TEC B-570-QP SERIES Mode d’emploi...
-
Page 30: Résumé Des Précautions
All manuals and user guides at all-guides.com FRENCH VERSION FM1-33031 Résumé des précautions Résumé des précautions La sécurité personnelle lors de la manipulation ou de líentretien du matériel est extrémement importante. Les avertissements et précautions nécessaires à la manipulation en toute sécurité du matériel sont inclus dans ce manuel. - Page 31 All manuals and user guides at all-guides.com FRENCH VERSION FM1-33031 Résumé des précautions Si des corps étrangers (fragments de Débranchez la Débranchez Pour débrancher le câble métal, eau, liquides) pénètrent à l'intérieur fiche. la fiche. d’alimentation, tirez-le par la prise. Ne de la machine, commencez par tirez pas directement sur le câble.
- Page 32 All manuals and user guides at all-guides.com FRENCH VERSION FM1-33031 TABLE DES MATIERES Page 1. INTRODUCTION....................F1- 1 1.1 Modèle Applicable ................. F1- 1 1.2 Accessoires ................... F1- 1 2. SPECIFICATIONS ................... F2- 1 2.1 Imprimante..................... F2- 1 2.2 Options ....................F2- 1 2.3 Papier ....................
-
Page 33: Modèle Applicable
All manuals and user guides at all-guides.com 1. INTRODUCTION FRENCH VERSION FM1-33031 1.1 Modèle Applicable 1. INTRODUCTION Nous vous remercions d'avoir porté votre choix sur l'imprimante transfert thermique de la série B-570. Ce modèle a été conçu pour être utilisé dans un environnement hostile, les consommables étant placés à... - Page 34 All manuals and user guides at all-guides.com 2. SPECIFICATIONS FRENCH VERSION FM1-33031 2.1 Imprimante 2. SPECIFICATIONS 2.1 Imprimante Type Série B-570-QP Article Alimentation CA 220 ~ 240 V + 10 %, -15 %, 50 Hz, +2 Hz, -2 Hz Consommation 198W max.
- Page 35 All manuals and user guides at all-guides.com 2. SPECIFICATIONS FRENCH VERSION FM1-33031 2.3 Papier 2.3 Papier Fig. 2-1 NOTES: Les media specifications qui n'ont pas été écrites là-dessus n'ont pas été changées. Lors de l’utilisation de roulcaux d’étiquette avec marque noire, les spécifications suivantes doivent être respectées.
-
Page 36: Vue Generale
All manuals and user guides at all-guides.com 3. VUE GENERALE FRENCH VERSION FM1-33031 3.1 Face Avant et Arrière 3. VUE GENERALE 3.1 Face Avant et Arrière Vue de face Vue de la face arrière Sortie du câble interface Capot Connecteur Afficheur (LCD) rapide PC (Option) carte mémoire... -
Page 37: Utilisation Des Dip Switch
All manuals and user guides at all-guides.com UTILISATION DES DIP SWITCH FRENCH VERSION FM1-33031 4. UTILISATION DES DIP SWITCH 4. UTILISATION DES DIP SWITCH Les interrupteurs sont situés du côté droit du support papier. Support de ATTENTION! rouleau papier Couper l’alimentation de l’imprimante avant de Support ruban modifier la configuration. -
Page 38: Mise En Route De L'imprimante
All manuals and user guides at all-guides.com 5. MISE EN ROUTE DE L'IMPRIMANTE FRENCH VERSION FM1-33031 5.1 Connexion du cordon d'alimentation et des câbles 5. MISE EN ROUTE DE L'IMPRIMANTE 5.1 Connexion du cordon d'alimentation et des câbles AVERTISSEMENT! Prendre soin de couper l'alimentation avant de connecter le cordon d'alimentation et les autres câbles. -
Page 39: Chargement Du Papier
All manuals and user guides at all-guides.com 6. CHARGEMENT DU PAPIER FRENCH VERSION FM1-33031 6. CHARGEMENT DU PAPIER 6. CHARGEMENT DU PAPIER AVERTISSEMENT! 1. Ne pas toucher des parties mobiles. Pour réduire le risque que deses doigts, la joaillerie, les vétements, etc., seraient tirer dans les parties mobiles, pousser l’interrupteur à... - Page 40 All manuals and user guides at all-guides.com 6. CHARGEMENT DU PAPIER FRENCH VERSION FM1-33031 6. CHARGEMENT DU PAPIER 4. Mettre la bobine sur l'axe support papier. 5. Passer le papier autour du regulateur de tension, puis le tirer vers la face avant de l'imprimante. Fixer le guide de rouleau papier restant sur le support papier.
-
Page 41: Démontage Des Plaques Porte Papier Du Guide Papier
All manuals and user guides at all-guides.com 6. CHARGEMENT DU PAPIER FRENCH VERSION FM1-33031 6. CHARGEMENT DU PAPIER Démontage des plaques porte papier du guide papier 1 Retirez les deux vis T-4x8 pour séparer le guide papier de l'imprimante. Guide papier Vis (T-4x8) Fig. -
Page 42: Positionnement De La Cellule De Marque Noire
All manuals and user guides at all-guides.com 6. CHARGEMENT DU PAPIER FRENCH VERSION FM1-33031 6. CHARGEMENT DU PAPIER Positionnement de la cellule de marque noire 1 Sortir le papier de 500 mm et le faire entrer de nouveau sous la tête jusqu'aux cellules. 2 Ajuster la position de la cellule marque noire pour avoir votre marque au milieu de celle-ci. - Page 43 All manuals and user guides at all-guides.com 6. CHARGEMENT DU PAPIER FRENCH VERSION FM1-33031 6. CHARGEMENT DU PAPIER 10. Les opérations de chargement du papier et du réglage des cellules sont terminées. Impression par lot: Papier Fig. 6-9 NOTE: Placer le DIP SWITCH en position de STANDARD/STRIP. Une mauvaise position peut affecter la qualité...
- Page 44 All manuals and user guides at all-guides.com 6. CHARGEMENT DU PAPIER FRENCH VERSION FM1-33031 6. CHARGEMENT DU PAPIER Coupe: Lors de l'utilisation du module de coupe, faites sortir le papier du couteau lors de sa mise en place. NOTES: 1. Il ne faut pas couper dans l'étiquette adhésive car la colle peut se déposer sur la lame, entraîner des problèmes de coupe et réduire la durée de vie de celle-ci.
-
Page 45: Chargement Du Film
All manuals and user guides at all-guides.com 7. CHARGEMENT DU FILM FRENCH VERSION FM1-33031 7. CHARGEMENT DU FILM 7. CHARGEMENT DU FILM AVERTISSEMENT! 1. Ne pas toucher des parties mobiles. Pour réduire le risque que deses doigts, la joaillerie, les vétements, etc., seraient tirer dans les parties mobiles, pousser l’interrupteur à... -
Page 46: Installation De La Carte Memoire Flash
All manuals and user guides at all-guides.com 8. INSTALLATION DE LA CARTE MEMOIRE FLASH (OPTION) FRENCH VERSION FM1-33031 8. INSTALLATION DE LA CARTE MEMOIRE FLASH (OPTION) 8. INSTALLATION DE LA CARTE MEMOIRE FLASH (OPTION) ATTENTION! Mettez l'imprimante hors tension lors de la mise en place ou de la sortie de la carte mémoire. PRECAUTION: Pour protéger la carte mémoire, zeuillez d’abord toucher le capot de l’imprimante avant de toucher à... - Page 47 All manuals and user guides at all-guides.com 9. PRECAUTIONS DE STOCKAGE DES CONSOMMABLES FRENCH VERSION FM1-33031 9. PRECAUTIONS DE STOCKAGE DES CONSOMMABLES 9. PRECAUTIONS DE STOCKAGE DES CONSOMMABLES Utiliser uniquement des fournitures aux recommandations TOSHIBA TEC. La raison de ces spécifications est d'assurer une bonne qualité d'impression, durée de vie de la tête et de produire des codes à...
-
Page 48: Nettoyage
All manuals and user guides at all-guides.com 10. MAINTENANCE FRENCH VERSION FM1-33031 10.1 Nettoyage 10. MAINTENANCE ATTENTION! 1. Attention, lorsque vous ouvrez le bloc d’impression, celui-ci peut étre chaud. 2. Faire attention au couteau de l’imprimante. 3. Ne pas toucher des parties mobiles. Pour réduire le risque que deses doigts, la joaillerie, les vétements, etc., seraient tirer dans les parties mobiles, pousser l’interrupteur à... -
Page 49: Capot, Face Avant
All manuals and user guides at all-guides.com 10. MAINTENANCE FRENCH VERSION FM1-33031 10.2 Capot, Face Avant 10.2 Capot, Face Avant Nettoyer les capots à l'aide d'un chiffon sec ou imbibé d'une solution adaptée. NOTE: Utiliser des produits prévus pour l'électricité statique. ATTENTION! 1. -
Page 50: Nettoyage Du Couteau
All manuals and user guides at all-guides.com 10. MAINTENANCE FRENCH VERSION FM1-33031 10.3 Elimination des Fournitures Coincées Nettoyage du couteau ATTENTION! 1. Vérifier que l'imprimante est hors tension. 2. Veiller à ne pas abîmer la lame du couteau. 1. Devisser les deux vis pour sortir le capot du couteau. 2. -
Page 51: Régler La Détection Des Etiquettes Pré-Imprimées
All manuals and user guides at all-guides.com 10. MAINTENANCE FRENCH VERSION FM1-33031 10.4 Régler la Détection des Etiquettes Pré-imprimées 10.4 Régler la Détection des Etiquettes Pré-imprimées Pour imprimer les étiquettes à une position constante, une cellule de transparence est utilisée pour détecter l'échenillage entre deux étiquettes ceci de façon automatique. -
Page 52: Depistage Des Pannes
All manuals and user guides at all-guides.com 11. DEPISTAGE DES PANNES FRENCH VERSION FM1-33031 11. DEPISTAGE DES PANNES 11. DEPISTAGE DES PANNES ATTENTION! Notre premier souci est de vous donner entière satisfaction et un meilleur service. S'il y avait, malgré tout, un problème de fonctionnement de cette imprimante, veuillez vérifier les points suivants avant de faire appel au service après-vente. - Page 53 All manuals and user guides at all-guides.com 11. DEPISTAGE DES PANNES FRENCH VERSION FM1-33031 11. DEPISTAGE DES PANNES Message Problème Solution La tête d'impression est trop chaude. Mettre l'imprimante hors tension et TETE TROP attendre que la tête refroidisse. CHAUDE Ce message est affiché...
- Page 54 All manuals and user guides at all-guides.com 11. DEPISTAGE DES PANNES FRENCH VERSION FM1-33031 11. DEPISTAGE DES PANNES Message Problème Solution Lors d'une erreur de syntaxe, Corriger votre application. Example) l'afficheur vous indique la ligne en PC001; 0A00, cause sur 20 caractères. Erreur de syntaxe 0300, 2, 2 Problèmes internes.
- Page 55 All manuals and user guides at all-guides.com TEC Thermo-/Thermotransfer-Drucker B-570-QP SERIES Bedienungsanleitung...
-
Page 56: Bedeutung Der Symbole
All manuals and user guides at all-guides.com GERMAN VERSION GM1-33031 Zusammenfassung sicherheitsregeln Zusammenfassung sicherheitsregeln Sicherheit bei der Bedienung sowie bei Wartungsarbeiten am Geräte hat oberste Priorität. Notwendige Vorsichts- und Wamhinweise für eine sichere Handhabung sind in diesem Handbuch enthalten. All Vorsichts- bzw. Wamhinweise in disesem Handbuch sollten vor einer Bedienung oder Wartung sorgfältig gelesen und befolgt werden. - Page 57 All manuals and user guides at all-guides.com GERMAN VERSION GM1-33031 Zusammenfassung sicherheitsregeln Falls Fremdkörper (Metallteile, Netzstecker Netzstecker Beim Abziehen der Netzkabel darf Wasser, Flüssigkeiten) in die abziehen. abziehen. nur am Stecker gezogen werden. Maschinen gelangen, schalten Sie Durch Ziehen am Kabel können die zuerst die Netzschalter aus, und internen Drähte freigelegt und Feuer ziehen Sie die Netzstecker von den...
- Page 58 All manuals and user guides at all-guides.com GERMAN VERSION GM1-33031 INHALTSVERZEICHNIS Seite 1. EINFÜHRUNG ....................G1- 1 1.1 Modellbezeichnung ................G1- 1 1.2 Beipack ....................G1- 1 2. SPEZIFIKATIONEN ..................G2- 1 2.1 Drucker ....................G2- 1 2.2 Opcionen ....................G2- 1 2.3 Papier ....................
- Page 59 All manuals and user guides at all-guides.com 1. EINFÜHRUNG GERMAN VERSION GM1-33031 1.1 Modellbezeichnung 1. EINFÜHRUNG Vielen Dank, daß Sie sich für den TEC Drucker B-570 entschieden haben. Dieser Drucker vereinigt hohe Auflösung (12 Punkte/mm ≥ 306 DPI) mit hoher Druckgeschwindigkeit und ist auch in industrieller Umgebung einsetzbar, da das Papier im Drucker Platz findet.
- Page 60 All manuals and user guides at all-guides.com 2. SPEZIFIKATIONEN GERMAN VERSION GM1-33031 2.1 Drucker 2. SPEZIFIKATIONEN 2.1 Drucker ITEM B-570-QP Netzspannung AC 220V ~ 240V +10%, -15%, 50Hz, +2Hz, -2Hz Leistungssaufnahme 198W maximum (Standby: 51W maximum) Temperaturbereich 5°C ~ 40°C Luftfeuchte 25% ~ 85% relative Luftfeuchte, nicht kondensierend Druckkopf...
- Page 61 All manuals and user guides at all-guides.com 2. SPEZIFIKATIONEN GERMAN VERSION GM1-33031 2.3 Papier 2.3 Papier Abb. 2-1 38 ~ 999.0 10.0 ~ 999.0 25.4 ~ 999.0 25.4 ~ 999.0 8.0 ~ 997.0 23.4 ~ 997.0 25.0 ~ 993.0 50.8 ~ 140.0 47.8 ~ 137.0 2.0 ~ 20.0 2.0 ~ 20.0...
-
Page 62: Lcd-Display
All manuals and user guides at all-guides.com 3. ÜBERBLICK GERNAM VERSION GM1-33031 3.1 Vorder-/Rückseite 3. ÜBERBLICK 3.1 Vorder-/Rückseite Vorderansicht Rückansicht Einsteckplatz für Hochge-schwindingkeits- Gehäusedeckel Flash Memory LCD Display Schnittstelle (Option) Sichtfenster Steckplatz Anschluß für serielle Schnittstelle Anschluß für parallele Schnittstelle Bedienfeld Anschluß... - Page 63 All manuals and user guides at all-guides.com 4. DIP SWITCH FUNKTIONEN GERNAM VERSION GM1-33031 4. DIP SWITCH FUNKTIONEN 4. DIP SWITCH FUNKTIONEN Die DIP Switches befinden sich neben der Papierabwickelachese rechts. ACHTUNG! Papierabwickelachse NETZ AUSSCHALTEN, bevor die Schalter Farbbandachse verändert werden. DIP SW 2 ON/OFF Funktion...
-
Page 64: Installation Des Druckers
All manuals and user guides at all-guides.com 5. INSTALLATION DES DRUCKERS GERMAN VERSION GM1-33031 5.1 Anschluss der Kabel 5. INSTALLATION DES DRUCKERS 5.1 Anschluss der Kabel ACHTUNG! Den Netzschalter auf “AUS” = “0” stellen, bevor Sie Netzkabel oder andere Kabel einstecken. Serielles Kabel (RS-232C) Start-/Stopp-Kabel Parallel Kabel (Centronics) -
Page 65: Einsetzen Des Papiers
All manuals and user guides at all-guides.com 6. EINSETZEN DES PAPIERS GERMAN VERSION GM1-33031 6. EINSETZEN DES PAPIERS 6. EINSETZEN DES PAPIERS ACHTUNG! 1. Fassen Sie keine beweglichen Teile an. Um zu verhindern, daß Finger, Schmuck, Kleidungsstücke oder ähnliches von den beweglichen Teilen erfaßt werden, schalten Sie das Gerät IMMER “AUS”. - Page 66 All manuals and user guides at all-guides.com 6. EINSETZEN DES PAPIERS GERMAN VERSION GM1-33031 6. EINSETZEN DES PAPIERS 4. Schieben Sie nun die Materialrolle auf die Achse. 5. Führen Sie das Material über die Führungsschiene und ziehen Sie dann das Material bis zur Vorderkante des Druckers.
- Page 67 All manuals and user guides at all-guides.com 6. EINSETZEN DES PAPIERS GERMAN VERSION GM1-33031 6. EINSETZEN DES PAPIERS Entfernung der oberen Platten der Papierhalterung von der Papierführung 1 Entfernen Sie die zwei T-4x8 Schrauben, um die Papierführung vom Drucker zu lösen. Papierführung Schraube (T-4x8) Abb.
- Page 68 All manuals and user guides at all-guides.com 6. EINSETZEN DES PAPIERS GERMAN VERSION GM1-33031 6. EINSETZEN DES PAPIERS Elnfache Positionierung des Reflexmarkensensors 1 Ziehen Sie das Material zunächst ca. 500 mm aus dem Drucker und führen es mit der Unterseite nach oben unter dem Kopf zurück, bis Sie eine Reflexmarke sehen können. 2 Justieren Sie nun den Reflexmarkensensor auf die Mitte der Marke (das hintere Loch zeigt die exakte Position des Sensors).
- Page 69 All manuals and user guides at all-guides.com 6. EINSETZEN DES PAPIERS GERMAN VERSION GM1-33031 6. EINSETZEN DES PAPIERS 10. Das Material ist nun richtig eingesetzt und der Sensor in Position. Für kontinuierlichen Druck Papier Abb. 6-9 HINWEIS: Setzen Sie den Selektionsschalter auf STANDARD/STRIP Position. Falsches Einschalten kann die Druckqualität beeinflussen.
- Page 70 All manuals and user guides at all-guides.com 6. EINSETZEN DES PAPIERS GERMAN VERSION GM1-33031 6. EINSETZEN DES PAPIERS Für Betrieb mit Messer: Das Papier so weit durchziehen, das es vorne aus dem Messer austritt. HINWEISE: 1. Bitte nur das Trägermaterial des Etiketts schneiden. Beim Schneiden der Etiketten kann sich Klebematerial auf dem Messer festsetzen.
-
Page 71: Einsetzen Des Farbbandes
All manuals and user guides at all-guides.com 7. EINSETZEN DES FARBBANDES GERMAN VERSION GM1-33031 7. EINSETZEN DES FARBBANDES 7. EINSETZEN DES FARBBANDES ACHTUNG! 1. Fassen Sie keine beweglichen Teile an. Um zu verhindern, daß Finger, Schmuck, Kleidungsstücke oder ähnliches von den beweglichen Teilen erfaßt werden, schalten Sie das Gerät IMMER “AUS”. - Page 72 All manuals and user guides at all-guides.com 8. EINSETZEN DER FLASH MEMORY KARTE (Option) GERMAN VERSION GM1-33031 8. EINSETZEN DER FLASH MEMORY KARTE (Option) 8. EINSETZEN DER FLASH MEMORY KARTE (Option) ACHTUNG! Zum Einsetzen oder Entnehmen der Karte den Drucker immer ausschalten. VORSICHT: Um die Speicherkarte vor Statik zu schützen, sollten Sie vor Herausziehen der Karte die rückseitige Abdeckung des Druckers berühren.
- Page 73 All manuals and user guides at all-guides.com 9. HINWEISE ZUM PAPIER UND FARBBAND GERMAN VERSION GM1-33031 8. HINWEISE ZUM PAPIER UND FARBBAND 9. HINWEISE ZUM PAPIER UND FARBBAND Verwenden Sie nur Materialien, die von TOSHIBA TEC zugelassen sind: Dies ist wichtig, um Druckqualität, Kopflebensdauer und Lesbarkeit von Barcodes sicherzustellen.
- Page 74 All manuals and user guides at all-guides.com 10. WARTUNG GERMAN VERSION GM1-33031 10.1 Reinigen 10. WARTUNG ACHTUNG! 1. Vorsicht beim Umgang am Druckkopf, dieser kann sehr heiß werden. 2. Das Messer des Druckers ist sehr scharf, daher ist HÖCHSTE VORSICHT geboten, um Verletzungen zu vermeiden.
-
Page 75: Beseitigung Eines Papierstaus
All manuals and user guides at all-guides.com 10. WARTUNG GERMAN VERSION GM1-33031 10.2 Gehäuse 10.2 Gehäuse Reinigen Sie das Gehäuse mit einem trockenen Tuch. Bei starker Verschmutzung kann auch ein ausgewrungenes, feuchtes Tuch mit Reiniger (Pril, Dor, etc.) verwendet werden. HINWEIS: Besonders geeignet sind handelsübliche Reiniger für Büromaschinen, die elektrostatische Aufladungen verhindern. - Page 76 All manuals and user guides at all-guides.com 10. WARTUNG GERMAN VERSION GM1-33031 10.3 Beseitigung eines Papierstaus Reinigung des Messers ACHTUNG! 1. Der Drucker muß ausgeschaltet sein. 2. Das Messer ist sehr scharf, daher ist bei der Reinigung HÖCHSTE VORSICHT geboten, um Verletzungen zu vermeiden.
-
Page 77: Sensoranpassung Für Vorgedruckte Etiketten
All manuals and user guides at all-guides.com 10. WARTUNG GERMAN VERSION GM1-33031 10.4 Sensoranpassung für vorgedruckte Etiketten 10.4 Sensoranpassung für vorgedruckte Etiketten Der Durchleuchtungssensor misst die Menge des Lichts, die durch das Papier geht, und erkennt beim Etikettenzwischenraum, daß ein neues Etikett beginnt. Hierdurch ist es möglich, von Etikett zu Etikett die Druckposition konstant zu halten. - Page 78 All manuals and user guides at all-guides.com 11. FEHLERBEHEBUNG GERMAN VERSION GM1-33031 11. FEHLERBEHEBUNG 11. FEHLERBEHEBUNG ACHTUNG! Wenn mit den nachfolgend beschriebenen Maßnahmen ein Fehler nicht beseitigt werden kann, so schalten Sie den Drucker aus, ziehen das Netzkabel ab und nehmen Sie bitte Kontakt mit lhrem zuständigen TOSHIBA TEC-Händler auf.
- Page 79 All manuals and user guides at all-guides.com 11. FEHLERBEHEBUNG GERMAN VERSION GM1-33031 11. FEHLERBEHEBUNG Fehlermeldung Ursache Lösung KOPF Der Druckkopf wurde zu heiß. Drucker ausschalten und abkühlen UEBERHITZT lassen. 1. Mit [RESTART] kann weiter- KOPF DEFEKT Diese Meldung erscheint, wenn aufgrund des Befehls “Head Broken Line”...
- Page 80 All manuals and user guides at all-guides.com 11. FEHLERBEHEBUNG GERMAN VERSION GM1-33031 11. FEHLERBEHEBUNG Fehlermeldung Ursache Lösung Andere Weisen auf Hard- oder Softwarefehler Wenn der Fehler durch Aus/ Fehlermeldungen hin. Einschalten nicht beseitigt werden kann, Kundendienst anfordern. HINWEIS: Normalerweise lassen sich alle Fehler durch Drücken der [RESTART] Taste beheben. Geht dies nicht, so schalten Sie den Drucker aus und wieder ein.
- Page 81 All manuals and user guides at all-guides.com Impresora térmica TEC B-570-QP SERIES Manual de instrucciones...
- Page 82 All manuals and user guides at all-guides.com SPANISH VERSION SM1-33031 Mantenimiento Mantenimiento La seguridad personal en el manejo y mantenimiento de los equipos es extremadamente importante. Las Advertencias y Precauciones necesarias para el manejo seguro están contempladas en este manual. Se deben leer y entender todas las advertencias y precauciones contenidas en este manual antes de manejar o mantener el equipo.
- Page 83 All manuals and user guides at all-guides.com SPANISH VERSION SM1-33031 Mantenimiento Desconecte la Si entran objetos extraños Desconecte Cuando desenchufe los cables de (fragmentos de metal, agua, líquidos) clavija. la clavija. alimentación, asegúrese de sujetar en las máquinas, apague primero las clavija y tirar de ella.
- Page 84 All manuals and user guides at all-guides.com SPANISH VERSION SM1-33031 ÍNDICE Página 1. INTRODUCCION .....................S1- 1 1.1 Descripción del modelo .................S1- 1 1.2 Accesorios .....................S1- 1 2. ESPECIFICACIONES ..................S2- 1 2.1 Impresora ....................S2- 1 2.2 Opciones ....................S2- 2 2.3 Papel .....................S2- 2 2.4 Cinta ......................S2- 2 3.
-
Page 85: Descripción Del Modelo
All manuals and user guides at all-guides.com 1. INTRODUCCION SPANISH VERSION SM1-33031 1.1 Descripción del modelo 1. INTRODUCCION Gracias por elegir la impresora térmica B-570 de TOSHIBA TEC. La serie B-570 de impresoras térmicas permite que el rollo de papel quede dentro de la impresora, lo cual es ideal para trabajar en ambientes agresivos. - Page 86 All manuals and user guides at all-guides.com 2. ESPECIFICACIONES SPANISH VERSION SM1-33031 2.1 Impresora 2. ESPECIFICACIONES 2.1 Impresora Modelo B-570-QP Características 220V ~ 240V AC +10%, -15%, 50Hz + 2Hz, -2Hz Tensión de alimentación Máximo 198W (parada: Máximo 51W) Consumo 5°C ~ 40°C Rango de temperaturas 25% ~ 85%RH (sin vapor)
- Page 87 All manuals and user guides at all-guides.com 2. ESPECIFICACIONES SPANISH VERSION SM1-33031 2.3 Papel 2.3 Papel Fig. 2-1 NOTAS: 1. Asegúrese de que el paple que va a cargar cumple las especificaciones arriba indicadas. 2. Cuando se hagan las marcas negras en los rollos de etiquetas hay que tener en cuenta los siguientes requerimientos. Si la separación entre etiquetas es menor de 4 mm: La longitud de la marca negra debe ser mayor que la separación entre etiquetas.
-
Page 88: Vista General
All manuals and user guides at all-guides.com 3. VISTA GENERAL SPANISH VERSION SM1-33031 3.1 Vista frontal y posterior de la impresora 3. VISTA GENERAL 3.1 Vista frontal y posterior de la impresora Vista frontal Vista posterior Salida del cable para la conexión del I/F PC Cubierta superior Slot para... - Page 89 All manuals and user guides at all-guides.com 4. FUNCIONAMIENTO DE LOS DIP SWITCH SPANISH VERSION SM1-33031 4. FUNCIONAMIENTO DE LOS DIP SWITCH 4. FUNCIONAMIENTO DE LOS DIP SWITCH Los DIP switch se hallan situados a la derecha del eje del rollo de papel. ATENCIÓN! Eje del rollo de papel Apagar la impresora antes de manipular los DIP...
-
Page 90: Conexión De Los Cables
All manuals and user guides at all-guides.com 5. INSTALACION DE LA IMPRESORA SPANISH VERSION SM1-33031 5.1 Conexión de los cables 5. INSTALACION DE LA IMPRESORA 5.1 Conexión de los cables ATENCIÓN! Apagar la impresora antes de conectar cualquier cable. Cable I/F serie (RS-232C) Cable de expansión I/O Cable I/F paralelo (Centronics) Cable de alimentación... -
Page 91: Carga Del Papel
All manuals and user guides at all-guides.com 6. CARGA DEL PAPEL SPANISH VERSION SM1-33031 6. CARGA DEL PAPEL 6. CARGA DEL PAPEL ATENCIÓN! 1. Antes de manipular cualquier pieza de la impresora en movimiento (motors, rodillos, etc.), desenchufe la impresora de la red a fin de evitar que los dedos, joyas, ropa, etc, puedan engancharse en ellas. - Page 92 All manuals and user guides at all-guides.com 6. CARGA DEL PAPEL SPANISH VERSION SM1-33031 6. CARGA DEL PAPEL 4. Colocar el rollo de papel en el soporte del rollo de papel. 5. Pase el papel por el regulador de tiro y llévelo hacia el frontal de la impresora. Coloque la sujeción lateral del rollo de papel tal y como ilustra la figura.
- Page 93 All manuals and user guides at all-guides.com 6. CARGA DEL PAPEL SPANISH VERSION SM1-33031 6. CARGA DEL PAPEL Extracción de las pletinas superiores las sujeciones de la guía de papel 1 Quitar los dos tornillos T-4x8 para soltar la guía de papel de la impresora. Guía del Papel Tornillo (T-4x8) Fig.
- Page 94 All manuals and user guides at all-guides.com 6. CARGA DEL PAPEL SPANISH VERSION SM1-33031 6. CARGA DEL PAPEL Ajuste de la posición del sensor de marca negra 1 Sacar unos 500 mm de papel y doblarlo de tal manera que se introduzca entre la cabeza de impresión y el papel ya introducido.
- Page 95 All manuals and user guides at all-guides.com 6. CARGA DEL PAPEL SPANISH VERSION SM1-33031 6. CARGA DEL PAPEL 10. Ahora tanto el papel como la posición del sensor se encuentran ubicados correctamente. Emisión continua: Papel Fig. 6-9 NOTA: Coloque el conmutador de selección en la posición STANDARD/STRIP. Una posición incorrecta de este conmutador puede afectar a la calidad de impresión.
- Page 96 All manuals and user guides at all-guides.com 6. CARGA DEL PAPEL SPANISH VERSION SM1-33031 6. CARGA DEL PAPEL Emisión con cortador: Cuando se trabaja con cortador, avance el papel hasta la salida de papel ubicada en el módulo cortador. NOTAS: 1. A la hora de trabajar con el cortador, asegúrese de cortar sólo papel soporte. Tenga en cuenta que si se cortan etiquetas el adhesivo de estas se queda pegado en la cuchilla;...
- Page 97 All manuals and user guides at all-guides.com 7. COLOCACION DE LA CINTA SPANISH VERSION SM1-33031 7. COLOCACION DE LA CINTA 7. COLOCACION DE LA CINTA ATENCIÓN! 1. Antes de manipular cualquier pieza de la impresora en movimiento (motors, rodillos, etc.), desenchufe la impresora de la red a fin de evitar que los dedos, joyas, ropa, etc, puedan engancharse en ellas.
- Page 98 All manuals and user guides at all-guides.com 8. COMO INTRODUCIR LA TARJETA DE MEMORIA (Opcional) SPANISH VERSION SM1-33031 8. COMO INTRODUCIR LA TARJETA DE MEMORIA (Opcional) 8. COMO INTRODUCIR LA TARJETA DE MEMORIA (Opcional) ATENCIÓN! Apagar siempre la impresora cuando se vaya a introducir o extraer la tarjeta de memoria. ATENCIÓN: Para evitar que la tarjeta se carge con la electricidad electroestática que nuestro cuerpo pueda poseer, antes de operar sobre ella, toque cualquier zona metálica de la parte posterior de la...
- Page 99 All manuals and user guides at all-guides.com 9. ACERCA DE LOS CONSUMIBLES SPANISH VERSION SM1-33031 9. ACERCA DE LOS CONSUMIBLES 9. ACERCA DE LOS CONSUMIBLES ATENCIÓN: Por tratarse de una impresora de transferencia térmica, se aconseja que se usen las etiquetas y cintas recomendadas por TOSHIBA TEC.
- Page 100 All manuals and user guides at all-guides.com 10. MANTENIMIENTO SPANISH VERSION SM1-33031 10.1 Limpieza 10. MANTENIMIENTO ATENCIÓN! 1. Tenga cuidado en el manejo del cabezai ya que éste puede estar caliente. 2. Tener cuidado de no cortarse con la cuchilla de la impresora. 3.
- Page 101 All manuals and user guides at all-guides.com 10. MANTENIMIENTO SPANISH VERSION SM1-33031 10.2 Panel y cubiertas 10.2 Panel y cubiertas Limpiar la cubierta con un paño seco o ligeramente humedecido con algún producto limpiador. ATENCIÓN: Limpiar las chapas con productos que carezcan de electricidad estática. ATENCIÓN! 1.
- Page 102 All manuals and user guides at all-guides.com 10. MANTENIMIENTO SPANISH VERSION SM1-33031 10.3 Cómo quitar el papel atascado Cómo limpiar la unidad cortadora ATENCIÓN! 1. Asegurarse de que la impresora se encuentra apagada antes de empezar a limpiar. 2. Tener cuidado de no cortarse con las cuchillas. 1.
- Page 103 All manuals and user guides at all-guides.com 10. MANTENIMIENTO SPANISH VERSION SM1-33031 10.4 Configuración del umbral de etiqueta 10.4 Configuración del umbral de etiqueta Para empezar a imprimir etiquetas en una determinada posición, la cual va a ser fija, se usa el sensor de transparencia, el cual es usado para detectar el espacio entre etiquetas.
- Page 104 All manuals and user guides at all-guides.com 11. SOLUCION DE ERRORES SPANISH VERSION SM1-33031 11. SOLUCION DE ERRORES 11. SOLUCION DE ERRORES ATENCIÓN! Si su problema no se encuentra entre los expuestos en este apartado, no intente resolverlo por si mismo. Apague, desenchufe la impresora y contacte con su distribuidor autorizado para solicitar asistencia.
- Page 105 All manuals and user guides at all-guides.com 11. SOLUCION DE ERRORES SPANISH VERSION SM1-33031 11. SOLUCION DE ERRORES Mensaje de error Problema Solución TEMP. CABEZA El cabezal de impresión está muy Apage la impresora y baje la ALTA caliente. temperatura del cabezal. ERROR DE Este mensaje aparece cuando se 1.
- Page 106 All manuals and user guides at all-guides.com 11. SOLUCION DE ERRORES SPANISH VERSION SM1-33031 11. SOLUCION DE ERRORES Mensaje de error Problema Solución ejemplo) Cuando el programa del comando de Rectifique el comando y envíelo de PC001; 0A00, comunicaciones produce un error, el nuevo.
- Page 107 All manuals and user guides at all-guides.com TEC Thermische Drukker B-570-QP SERIES Gebruikershandleiding...
-
Page 108: Betekenis Van De Symbolen
All manuals and user guides at all-guides.com DUTCH VERSION NM1-33031 Samenvatting veiligheid Samenvatting veiligheid De veiligheid van personen tijdens het gebruik of het onderhoud van de uitrusting is van heel groot belang. Verwittigingen en voorschriften die nodig zijn voor een veilig gebruik werden opgenomen in deze handleiding. - Page 109 All manuals and user guides at all-guides.com DUTCH VERSION NM1-33031 Samenvatting veiligheid Haal de Zet het toestel af en haal vervolgens Haal de stekker Trek niet aan het snoer om een de stekker uit het stopkontakt indien stekker uit het uit het stekker uit een stopkontakt te halen.
- Page 110 All manuals and user guides at all-guides.com DUTCH VERSION NM1-33031 INHOUDSTAFEL Pagina 1. INLEIDING ...................... N1- 1 1.1 Omschrijving van typenummer ............. N1- 1 1.2 Toebehoren ..................N1- 1 2. KENMERKEN ....................N2- 1 2.1 Drukker ....................N2- 1 2.2 Optie ..................... N2- 1 2.3 Papier ....................
- Page 111 All manuals and user guides at all-guides.com 1. INLEIDING DUTCH VERSION NM1-33031 1.1 Omschrijving van typenummer 1. INLEIDING Wij feliciteren u met uw keuze voor een thermische drukker TEC B-570. De B-570 met ingesloten media rollen is geschikt voor het drukken in de meest benarde situaties. Door zijn uitmuntende prijs/ kwaliteitsverhouding en recentste technologie behoort deze drukker tot het topniveau van de drukkers van de nieuwe generatie.
- Page 112 All manuals and user guides at all-guides.com 2. KENMERKEN DUTCH VERSION NM1-33031 2.1 Drukker 2. KENMERKEN 2.1 Drukker Model B-570-QP Naam Voeding AC 220V ~ 240V +10%, -15%, 50Mhz + 2Mhz, - 2Mhz Verbruik 198W maximum (51W: Standby) Temperatuurslimiet 5°C ~ 40°C Relatieve vochtigheid 25% ~ 85%RH (zonder condensatie) Drukkop...
- Page 113 All manuals and user guides at all-guides.com 2. KENMERKEN DUTCH VERSION NM1-33031 2.3 Papier 2.3 Papier Zie opmerking 2. Gemarkeerd papier Etiket Zwarte stip op achterzijde Zwarte stip op achterzijde Stoplijn Soplijn Gemarkeerd papier Snijlijn Snijlijn Referentie Referentie Coordin. Coordin. Referentie Referentie Coordin.
-
Page 114: Lcd Scherm
All manuals and user guides at all-guides.com 3. OVERZICHT DUTCH VERSION NM1-33031 3.1 Voor - en Achterzijde 3. OVERZICHT 3.1 Voor - en Achterzijde Voorzijde Achterzijde Uitgang kabel PC- interface voor snelle Hoofddeksel PCMCIA kaart slot Scherm (LCD) verwerking (Optie) Toevoeraanduiding (2 slots) Connectie voor... - Page 115 All manuals and user guides at all-guides.com DIP-SCHAKELAAR DUTCH VERSION NM1-33031 4. DIP-SCHAKELAAR 4. DIP-SCHAKELAAR Deze schakelaar bevindt zich rechts van de papierhouder-as. Papierhouder-as WAARSCHUWING! Zet eerst de printer af om deze schakelaar in te Lint-as stellen. DIP-Schakelaar 2 Funktie ON/OFF Snelheid van de transmissie 2400 BPS...
- Page 116 All manuals and user guides at all-guides.com 5. INSTALLATIE VAN DE DRUKKER DUTCH VERSION NM1-33031 5.1 Connectie van het electrisch snoer en de kabels 5. INSTALLATIE VAN DE DRUKKER 5.1 Connectie van het electrisch snoer en de kabels WAARSCHUWING! Zet eerst de printer af (schakelaar op “OFF”) om het electrisch snoer en de kabels te installeren. Seriële I/F kabel (RS-232C) Uitbreidingskabel I/O Parallelle I/F kabel (Centronics)
- Page 117 All manuals and user guides at all-guides.com 6. HET LADEN VAN PAPIER DUTCH VERSION NM1-33031 6. HET LADEN VAN PAPIER 6. HET LADEN VAN PAPIER WAARSCHUWING! 1. Reak geen bewegende delen aan. Plaats de schakelaar op OFF om elke beweging te stoppen en het risiko dat vingers, juwelen, kleding enz.
- Page 118 All manuals and user guides at all-guides.com 6. HET LADEN VAN PAPIER DUTCH VERSION NM1-33031 6. HET LADEN VAN PAPIER 4. Breng het papier op de papierhouder-as. 5. Plaats het papier rond de trekregelaar, trek dan het papier naar de voorkant van de printer tot onder de printkop.
- Page 119 All manuals and user guides at all-guides.com 6. HET LADEN VAN PAPIER DUTCH VERSION NM1-33031 6. HET LADEN VAN PAPIER Verwijdering van de bovenplaten van de papierhouders op de medialeider 1 Verwijder de twee T-4 X 8 vijzen om de medialeider los te maken van de drukker. Medialeider Vijs (T-4x8) Figuur 6-5...
- Page 120 All manuals and user guides at all-guides.com 6. HET LADEN VAN PAPIER DUTCH VERSION NM1-33031 6. HET LADEN VAN PAPIER Instellingsprocedure van de zwarte stip sensor (Met volgende procedure zal deze instelling gemakkelijk verlopen.) 1 Voer ongeveer 500 mm papier uit de drukker, vouw het om en duw het uiteinde onder de drukkop tot aan de papiersensor.
- Page 121 All manuals and user guides at all-guides.com 6. HET LADEN VAN PAPIER DUTCH VERSION NM1-33031 6. HET LADEN VAN PAPIER 10. Het laden van het papier en de instelling van de papiersensor zijn voltooid. Batch type: Papier Figuur 6-9 OPMERKING: Plaats de selektieschakelaar op de STANDARD/STRIP positie.
- Page 122 All manuals and user guides at all-guides.com 6. HET LADEN VAN PAPIER DUTCH VERSION NM1-33031 6. HET LADEN VAN PAPIER Snijtype: Wanner het mes gebruikt wordt, moet het papier door de uitgang van de snijmodule doorgevoerd worden. OPMERKING: 1. Let er voor op dat de drager meegesneden wordt. Indien lijm van de etiketten op het mes blijft plakken, heeft dit schadelijke gevolgen voor zijn levensduur en kwaliteit.
- Page 123 All manuals and user guides at all-guides.com 7. HET LADEN VAN LINT DUTCH VERSION NM1-33031 7. HET LADEN VAN LINT 7. HET LADEN VAN LINT WAARSCHUWING! 1. Reak geen bewegende delen aan. Plaats de schakelaar op OFF om elke beweging te stoppen en het risiko dat vingers, juwelen, kleding enz.
- Page 124 All manuals and user guides at all-guides.com 8. INSTALLATIE VAN DE “FLASH GEHEUGEN” KAART (Optie) DUTCH VERSION NM1-33031 8. INSTALLATIE VAN DE “FLASH GEHEUGEN” KAART (Optie) 8. INSTALLATIE VAN DE “FLASH GEHEUGEN” KAART (Optie) VERWITTIGING! Zet de drukker steeds af om de flash geheugen kaart in en uit haar slot te halen. LET OP: Beveilig de geheugenkaarten tegen de statische electriciteit van uw lichaam door de acherkap van de drukker aan te raken voor u de kaarten neemt.
- Page 125 All manuals and user guides at all-guides.com 9. VOORZORGEN EN BEHANDELING VAN HET VERBRUIKSMATERIAAL DUTCH VERSION NM1-33031 9. VOORZORGEN EN BEHANDELING VAN HET VERBRUIKSMATERIAAL 9. VOORZORGEN EN BEHANDELING VAN HET VERBRUIKSMATERIAAL WAARSCHUWING: Lees aandachtig deze handleiding en zorg ervoor dat de inhoud goed begrepen werd. Gebruik enkel de door TOSHIBA TEC aanbevolen media en etiketten.
- Page 126 All manuals and user guides at all-guides.com 10. ONDERHOUD DUTCH VERSION NM1-33031 10.1 Reiniging 10. ONDERHOUD WAARSCHUWING! 1. Wees voorzichtig, de drukkop kan zeer heet worden. 2. Let op het mes voor verwondingen. 3. Reak geen bewegende delen aan. Plaats de schakelaar op OFF om elke beweging te stoppen en het risiko dat vingers, juwelen, kleding enz.
- Page 127 All manuals and user guides at all-guides.com 10. ONDERHOUD DUTCH VERSION NM1-33031 10.2 Beschermingsvlakken en deksels 10.2 Beschermingsvlakken en deksels Reinig de buitenzijde van de drukker met een droge doek of een doek die lichtjes met reinigingsmiddel werd bevochtigd. OPMERKING: Reinig het deksel van de drukker met een antistatisch reinigingsmiddel voor het onderhoud van geautomatiseerd bureaumateriaal.
- Page 128 All manuals and user guides at all-guides.com 10. ONDERHOUD DUTCH VERSION NM1-33031 10.3 Papieropstopping Reiniging van de snijmodule WAARSCHUWING! 1. Zet de drukker steeds af om de snijmodule te reinigen. 2. Let op het mes voor verwondingen. 1. Maak twee vijzen los en verwijder het snijpaneel. 2.
- Page 129 All manuals and user guides at all-guides.com 10. ONDERHOUD DUTCH VERSION NM1-33031 10.4 Instelling van de voedingholte 10.4 Instelling van de voedingholte De spatiesensor zorgt ervoor dat elk etiket automatisch op hetzelfde startpunt wordt bedrukt. Bij gebruik van voorgedrukte etiketten, kan het gebeuren dat, naargelang de inktsoort, de sensor er niet in slaagt de voedingsholte te detekteren.
- Page 130 All manuals and user guides at all-guides.com 11. MOGELIJKE PROBLEMEN DUTCH VERSION NM1-33031 11. MOGELIJKE PROBLEMEN 11. MOGELIJKE PROBLEMEN WAARSCHUWING! Mocht er zich een probleem voordoen dat met onderstaande tabel niet opgelost kan worden, probeer niet de drukker zelf te herstellen. Zet de drukker af, haal de stekker uit het stopkontakt en stel u in verbinding met een erkende dienstverlener.
- Page 131 All manuals and user guides at all-guides.com 11. MOGELIJKE PROBLEMEN DUTCH VERSION NM1-33031 11. MOGELIJKE PROBLEMEN Foutmelding Probleem Oplossing TEMP. FOUT De drukkop is te heet. Zet de drukker af en laat de drukkop afkoelen. Dit bericht verschijnt nadat het PRINTKOP 1.
- Page 132 All manuals and user guides at all-guides.com 11. MOGELIJKE PROBLEMEN DUTCH VERSION NM1-33031 11. MOGELIJKE PROBLEMEN Foutmelding Probleem Oplossing Indien een fout voorkomt in de Verbeter het kommando en stuur het PC001; 0A00, programmatie van het kommunikatie opnieuw door. kommando, zullen 20 bytes vav het kommando verschijnen op de display.