Publicité
Les langues disponibles
Les langues disponibles
Liens rapides
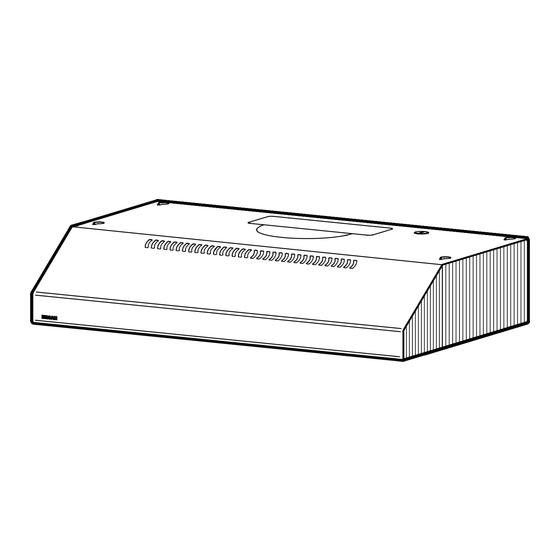
CBD1 Series
Range Hoods
READ AND SAVE THESE INSTRUCTIONS
WARNING
TO REDUCE THE RISK OF FIRE, ELECTRIC SHOCK, OR IN-
JURY TO PERSONS, OBSERVE THE FOLLOWING:
1. Use this unit only in the manner intended by the manufac-
turer. If you have questions, contact the manufacturer at the
address or telephone number listed in the warranty.
2. Before servicing or cleaning unit, switch power off at service
panel and lock the service disconnecting means to prevent
power from being switched on accidentally. When the ser-
vice disconnecting means cannot be locked, securely fasten
a prominent warning device, such as a tag, to the service
panel.
3. Installation work and electrical wiring must be done by a
qualified person(s) in accordance with all applicable codes
and standards, including fire-rated construction.
4. Sufficient air is needed for proper combustion and exhaust-
ing of gases through the flue (chimney) of fuel burning equip-
ment to prevent backdrafting. Follow the heating equipment
manufacturer's guideline and safety standards such as those
published by the National Fire Protection Association (NFPA),
and the American Society of Heating, Refrigeration and Air
Conditioning Engineers (ASHRAE), and the local code au-
thorities.
5. This product may have sharp edges. Be careful to avoid cuts
and abrasions during installation and cleaning.
6. When cutting or drilling into wall or ceiling, do not damage
electrical wiring and other hidden utilities.
7. Ducted fans must always be vented to the outdoors.
8. Use only metal ductwork.
9. Do not use this fan with any solid-state speed control device.
10. As an alternative, this product may be installed with the UL-
approved cord kit designated for the product, following in-
structions packed with the cord kit.
11. This unit must be grounded.
TO REDUCE THE RISK OF A RANGE TOP GREASE FIRE:
1. Never leave surface units unattended at high settings.
Boilovers cause smoking and greasy spillovers that may ig-
nite. Heat oils slowly on low or medium settings.
2. Always turn hood ON when cooking at high heat or when
flambéing food (i.e. Crepes Suzette, Cherries Jubilee, Pep-
percorn Beef Flambé).
3. Clean ventilating fans frequently. Grease should not be al-
lowed to accumulate on fan or filter.
4. Use proper pan size. Always use cookware appropriate for
the size of the surface element.
TO REDUCE THE RISK OF INJURY TO PERSONS IN THE
EVENT OF A RANGE TOP GREASE FIRE, OBSERVE THE
FOLLOWING:*
1. SMOTHER FLAMES with a close-fitting lid, cookie sheet,
or metal tray, then turn off the burner. BE CAREFUL TO
PREVENT BURNS. If the flames do not go out immediately,
EVACUATE AND CALL THE FIRE DEPARTMENT.
Register your product online
at: www.broan.com
FOR DOMESTIC COOKING ONLY
WARNING
2. NEVER PICK UP A FLAMING PAN — You may be burned or
spread the fire.
3. DO NOT USE WATER, including wet dishcloths or towels - a
violent steam explosion will result.
4. Use an extinguisher ONLY if:
A. You know you have a Class ABC extinguisher, and you
already know how to operate it.
B. The fire is small and contained in the area where it started.
C. The fire department is being called.
D. You can fight the fire with your back to an exit.
* Based on "Kitchen Firesafety Tips" published by NFPA.
CAUTION
1. For indoor use only.
2. For general ventilating use only. Do not use to exhaust haz-
ardous or explosive materials and vapors.
3. To avoid motor bearing damage and noisy and/or unbal-
anced impeller, keep drywall spray, construction dust, etc.,
off power unit.
4. Do not use over cooking equipment greater than 60,000
BTU/hr.
5. Your hood motor has a thermal overload which will automati-
cally shut off the motor if it becomes overheated. The motor
will restart when it cools down. If the motor continues to shut
off and restart, have the hood serviced.
6. The bottom of the hood MUST NOT BE LESS than 18" and at
a maximum of 24" above cooktop for best capture of cooking
impurities.
7. Please read specification label on product for further infor-
mation and requirements.
NOTE
If hood is to be installed non-ducted:
Purchase non-ducted filter (Model BPQTF) from your
local distributor or retailer.
Installer: Leave this manual
with the homeowner.
Homeowner: Cleaning, Maintenance and
Operating instructions on page 2.
CBD1 SERIES
Page 1
Publicité

Manuels Connexes pour Broan CBD1 Serie


Sommaire des Matières pour Broan CBD1 Serie
- Page 1 CBD1 SERIES Page 1 CBD1 Series Register your product online at: www.broan.com Range Hoods READ AND SAVE THESE INSTRUCTIONS FOR DOMESTIC COOKING ONLY WARNING WARNING TO REDUCE THE RISK OF FIRE, ELECTRIC SHOCK, OR IN- 2. NEVER PICK UP A FLAMING PAN — You may be burned or JURY TO PERSONS, OBSERVE THE FOLLOWING: spread the fire.
- Page 2 CBD1 SERIES Page 2 OPERATION Stainless Steel Cleaning Always turn the hood ON before cooking in order to establish an • Regularly wash with clean cloth or rag soaked with warm water air flow in the kitchen. After turning off the range, let the hood run and mild soap or liquid dish detergent. for a few minutes to clear the air. • Always clean in the direction of original polish lines.
- Page 3 CBD1 SERIES Page 3 INSTALL DUCTWORK PREPARE HOOD LOCATION (Ducted Hoods Only) Use the proper diagram below for placement of ductwork and electrical cutout in cabinet or wall. For a non-ducted installation, DO NOT cut a duct access hole. ROOF CAP 3¼"...
- Page 4 CBD1 SERIES Page 4 CONTENTS 7” ROUND * FIND INSIDE DUCT OF HOOD PLATE (1) 3¼” X 10” (1) 7” ROUND (1) GREASE DAMPER / DUCT DUCT FILTER CONNECTOR* CONNECTOR (1) PARTS BAG** CONTAINING: (1) BULB SUCTION (5) #10 X 5/8” CUP TOOL RD.
- Page 5 CBD1 SERIES Page 5 INSTALL THE HOOD 7” ROUND KNOCKOUT PLATE (also WARNING remove 3¼” x 10” To reduce the risk of electrical shock, switch power off vertical plate) at service panel. Lock or tag service panel to prevent power from being switched on accidentally. 3¼”...
- Page 6 CBD1 SERIES Page 6 CONNECT THE WIRING LAMP SOCKET BRACKET GROUND SCREW SCREWS HOUSE To change the depth of bulb sockets: POWER CABLE - Remove bottom panel (See Step 9). - Disconnect light harness. - Loosen 2 Screws holding Lamp Socket Bracket to Connect House Power Cable to range hood wiring - Light Panel.
- Page 7 CBD1 SERIES Page 7 SERVICE PARTS DESCRIPTION PART NO. BOTTOM PANEL ASSEMBLY, WHITE 97018651 BOTTOM PANEL ASSEMBLY, BLACK 97018652 BOTTOM PANEL ASSEMBLY, STAINLESS STEEL 97018653 BOTTOM PANEL ASSEMBLY, BISQUE 97019353 SCREW PACKAGE #8-18 X 3/8 (2 SCREWS) R602534 LAMP WIRE HARNESS 97018656 MOTOR WIRE HARNESS 99271465...
- Page 8 PURPOSE. During this one year period, Broan-NuTone will, at its option, repair or replace, without charge, any product or part which is found to be defective under normal use and service. THIS WARRANTY DOES NOT EXTEND TO FLUORESCENT LAMP STARTERS, TUBES, HALOGEN AND INCANDESCENT BULBS, FUSES, FILTERS, DUCTS, ROOF CAPS, WALL CAPS AND OTHER ACCESSORIES FOR DUCTING.
- Page 9 SÉRIE CBD1 Hottes de cuisine Page 9 de série CBD1 Enregistrez votre produit en ligne à : www.broan.com LIRE CES DIRECTIVES ET LES CONSERVER POUR USAGE DOMESTIQUE SEULEMENT AVERTISSEMENT AVERTISSEMENT AFIN DE DIMINUER LES RISQUES D’INCENDIE, D’ÉLECTRO- OBSERVEZ LES CONSIGNES SUIVANTES DE MANIÈRE À...
- Page 10 SÉRIE CBD1 Page 10 FONCTIONNEMENT • Rincez toujours à l’eau propre (2 ou 3 fois) après le nettoyage. Séchez complètement en essuyant. Mettez toujours la hotte en MARCHE avant de cuisiner afin d’établir • Vous pouvez également utiliser un nettoyant spécial pour une circulation d’air dans la cuisine. Laissez la hotte fonctionner acier inoxydable.
- Page 11 SÉRIE CBD1 Page 11 POSE DES CONDUITS PRÉPARATION DE (Hottes avec conduit seulement) L’EMPLACEMENT DE LA HOTTE CONDUIT VERTICAL 8,3 X 25,4 CM (3-1/4 X 10 PO) CAPUCHON DE TOIT CONDUIT 8, 3 x 25 , 4 cm (3-1/ 4 x 10 po) ou ROND de 17, 8 cm VIS DE M ONTAGE DE LA HOTTE (5 ) (7 po) (Pou r é...
- Page 12 SÉRIE CBD1 Page 12 CONTENU PLAQUE DE CONDUIT ROND DE 17 ,8 CM (7 PO) (1) RACCORD (1) CLAPET / RACCORD DE CONDUIT ROND (1) FILTRE À DE CONDUIT GRAISSES DE 17,8 CM (7 PO) DE 8,3 X 25,4 CM (3-1/4 X 10 PO) (1) SAC DE PIÈCES CONTENANT : (1) VENTOUSE...
- Page 13 SÉRIE CBD1 Page 13 INSTALLATION DE LA HOTTE PLAQUE RONDE PRÉAMORCÉE DE 17 ,8 CM (7 PO) [ENLEVER AVERTISSEMENT ÉGALEMENT LA PLAQUE VERTICALE DE 8,3 X 25,4 CM Pour réduire les risques de choc électrique, coupez le (3-1/4 X 10 PO)] courant du panneau électrique.
- Page 14 SÉRIE CBD1 Page 14 RACCORD DU CÂBLAGE SUPPORT DE SOCLE D’ A MPOULE VIS DE MISE À LA TERRE Pour changer la profondeur des socles d’ampoule : CÂBLE ÉLECTRIQUE - Enlevez le panneau inférieur (voir étape 9). DE LA MAISON - Débranchez le connecteur d’éclairage.
- Page 15 SÉRIE CBD1 Page 15 PIÈCES DE RECHANGE REPÈRE DESCRIPTION ° DE PIÈCE ENSEMBLE DE PANNEAU INFÉRIEUR, BLANC 97018651 ENSEMBLE DE PANNEAU INFÉRIEUR, NOIR 97018652 ENSEMBLE DE PANNEAU INFÉRIEUR, ACIER INOXYDABLE 97018653 ENSEMBLE DE PANNEAU INFÉRIEUR, BISQUE 97019353 SACHET DE VIS N 8-18 X 3/8 (2 PAR SACHET) R602534 °...
- Page 16 Garantie limitée d’un an Broan-NuTone garantit au consommateur et acheteur initial de ses produits que ceux-ci sont exempts de tout vice de matériau ou de fabrication pour une période d’un (1) an à compter de la date d’achat originale. CETTE GARANTIE NE COMPORTE AUCUNE AUTRE GARANTIE, EXPRESSE OU TACITE, Y COMPRIS, MAIS SANS S’Y LIMITER, LES GARANTIES TACITES DE VALEUR MARCHANDE...
- Page 17 SERIE CBD1 Página 17 Campanas Registre su producto en el Serie CBD1 sitio web www.broan.com LEA Y CONSERVE ESTAS INSTRUCCIONES SOLAMENTE PARA COCINAR EN CASA ADVERTENCIA ADVERTENCIA PARA REDUCIR EL RIESGO DE LESIONES A LAS PERSONAS EN CASO DE PARA REDUCIR EL RIESGO DE INCENDIO, DESCARGA ELÉCTRICA...
- Page 18 SERIE CBD1 Página 18 FUNCIONAMIENTO Limpieza del acero inoxidable COSAS QUE PUEDE HACER: ENCIENDA siempre la campana antes de comenzar a cocinar, • Regularmente, lave con una tela o trapo limpio remojado con agua con el fin de establecer un flujo de aire en la cocina. Después de tibia y jabón o detergente líquido para platos. apagar la estufa, deje que la campana funcione durante unos • Siempre limpie en la dirección de las líneas originales de pulido.
- Page 19 SERIE CBD1 Página 19 INSTALE EL SISTEMA CONDUCTO VERTICAL DE TORNILLOS DE M ONTAJ E 3¼ X 10 PULG. (8.3 X 25.4 CM) DE CONDUCTOS DE LA CAM PANA (5 ) 13-15 / 16 pu lg. (35 . 4 cm ) 13-15 / 16 pu lg.
- Page 20 SERIE CBD1 Página 20 CONTENIDO PLACA DEL CONDUCTO * ENCUENTRA EN EL INTERIOR REDONDO DE LA CAMPANA. DE 7 PULG. (17.8 CM) CONECTOR CONECTOR PARA REGULADOR/ PARA CONDUCTO (1) FILTRO CONDUCTO DE 3¼ X 10 REDONDO DE DE GRASA PULG. (8.3 X 25.4 CM)* 7 PULG.
- Page 21 SERIE CBD1 Página 21 INSTALE LA CAMPANA PLACA REDONDA DE ORIFICIO CIEGO DE 7 PULG. (17.8 CM) (TAMBIÉN DESMONTE LA PLACA ADVERTENCIA VERTICAL DE 3¼ X 10 PULG. Para reducir el riesgo de una descarga eléctrica, [8.3 X 25.4 CM]) desconecte el suministro eléctrico en el panel de servicio.
- Page 22 SERIE CBD1 Página 22 CONECTE EL CABLEADO SOPORTE DEL RECEPTÁCULO DE LA LÁMPARA TORNILLO DE TIERRA TORNILLOS CABLE ELÉCTRICO Para cambiar la profundidad de los receptáculos de las bombillas: DE LA CASA - Quite el panel inferior (vea el paso 9). - Desconecte el arnés de las luces.
- Page 23 SERIE CBD1 Página 23 PIEZAS DE SERVICIO CLAVE DESCRIPCIÓN PIEZA N. CONJUNTO DE PANEL INFERIOR, BLANCO 97018651 CONJUNTO DE PANEL INFERIOR, NEGRO 97018652 CONJUNTO DE PANEL INFERIOR, ACERO INOXIDABLE 97018653 CONJUNTO DE PANEL INFERIOR, BEIGE 97019353 PAQUETE DE TORNILLOS #8-18 x 3/8 (2 TORNILLOS) R602534 ARNÉS DE CABLES DE LA LÁMPARA 97018656...
- Page 24 Esta garantía sustituye todas las garantías anteriores. Para tener derecho al servicio de la garantía, usted debe (a) notificar a Broan NuTone a la dirección y número de teléfono que aparecen abajo, (b) proporcionar el número de modelo y la identificación de la pieza y (c) describir la naturaleza de cualquier defecto en el producto o pieza.