Publicité
Liens rapides
Assembly Instructions
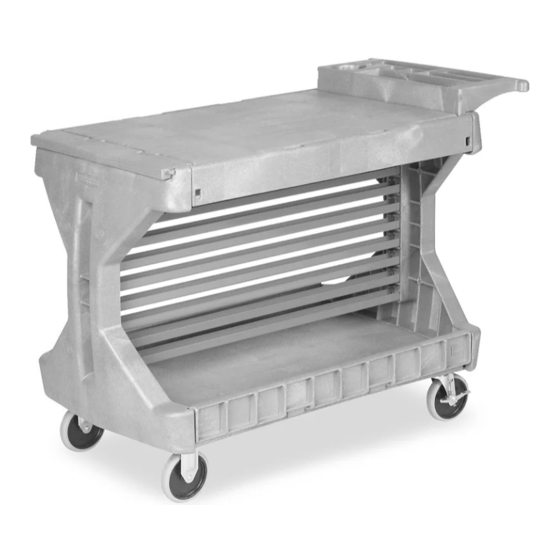
Bin Utility Cart with Rail Kit
Model No. H-1495, H-1496, H-1497, H-1910
PARTS:
PARTES:
PIÈCES:
A
x 30
1.25" SCREWS
TORNILLOS DE 3.17CM (1.25 PULGADAS)
VIS DE 3 CM (1,25 PO)
Hook, Gancho, Trou
E
x 2
BOTTOM GATE
REJILLA INFERIOR
GRILLE INFÉRIEURE
H
x 1
TOP SHELF
ENTREPAÑO SUPERIOR
TABLETTE SUPÉRIEURE
R
x 9
RAIL
RIEL
RAIL
TOOLS:
HERRAMIENTAS:
OUTILS :
Rubber Mallet
Mazo de goma
Maillet en caoutchouc
B
x 2
5" SWIVEL CASTER
RUEDA GIRATORIA DE 12.7 CM (5 PULGADAS)
ROULETTE PIVOTANTE DE 12,7 CM (5 PO)
Tongue
Lengüeta, Languette
I
x 1
BOTTOM SHELF
ENTREPAÑO INFERIOR
TABLETTE INFÉRIEURE
Phillips Screwdriver
Destornillador Phillips
Tournevis Phillips
C
x 2
5" FIXED CASTER
RUEDA FIJA DE 12.7 CM (5 PULGADAS)
ROULETTE FIXE DE 12,7 CM (5 PO)
F
x 1
FRONT GATE
REJILLA FRONTAL
GRILLE AVANT
800-295-5510 www.uline.com
Instrucciones de ensamblaje
Modelo H-1495, H-1496, H-1497,
H-1910
Instructions d'assemblage
Modèle n° H-1495, H-1496, H-1497,
H-1910
Hole, Orificio, Trou
D
x 2
TOP GATE
REJILLA SUPERIOR
GRILLE SUPÉRIEURE
G
x 1
HANDLE
ASIDERA
POIGNÉE
J
x 1
FRONT PANEL
PANEL FRONTAL
PANNEAU AVANT
Goggles
Gafas
Lunettes de protection
K
x 1
BACK PANEL
PANEL POSTERIOR
PANNEAU ARRIÈRE
Publicité

Sommaire des Matières pour Uline H-1495
- Page 1 Assembly Instructions 800-295-5510 www.uline.com Instrucciones de ensamblaje Modelo H-1495, H-1496, H-1497, H-1910 Bin Utility Cart with Rail Kit Instructions d’assemblage Model No. H-1495, H-1496, H-1497, H-1910 Modèle n° H-1495, H-1496, H-1497, H-1910 PARTS: PARTES: PIÈCES: Hole, Orificio, Trou x 30 1.25"...
- Page 2 Slide tongues of bottom shelf (I) into back panel (K). Deslice las lengüetas del entrepaño inferior (I) en el panel posterior (K). Glisser les languettes de la tablette inférieure (I) dans le panneau arrière (K). Place handle (G) on top of back panel (K) so that the screw holes on Turn cart on side, install four screws through each swivel handle tabs line up with holes on back panel (K).
- Page 3 Insert tongues on one end of top shelf (H) into Install additional four screws through four tab holes slots on back panel as shown. Install which are near the four screws just attached in step 2 screws on each side as shown. 4a.
- Page 4 Attach front gate (F) to front panel (J) by Attach front panel (J) to top shelf (H) and bottom shelf (I) simultaneous- sliding 2 hinges on front panel into front gate ly by sliding shelf tongues into slots on front panel (J). Be sure to place as shown.
- Page 5 Beginning at bottom rail, slowly move front panel (J) back into position, making sure each rail (R) secures properly into slots on both panels. You may need to alternately pull the front panel away from and push it towards the back panel to hold each successive rail in place.
- Page 6 • USER DE PRUDENCE LORSQU’ON DÉPLACE LE CHARIOT SUR UNE PENTE OU SUR UNE SURFACE INÉGALE. • LE CHARIOT PEUT SE RENVERSER SI LE POIDS N’EST PAS RÉPARTI UNIFORMÉMENT. • LE CHARGEMENT MAXIMAL PAR CHARIOT EST DE 180 kg. (400 lb). • Brevet américain en instance 800-295-5510 www.uline.com ©2013 Akro-Mils/Myers Industries #AKM290UL 11/13...
