Publicité
Les langues disponibles
Les langues disponibles
Liens rapides
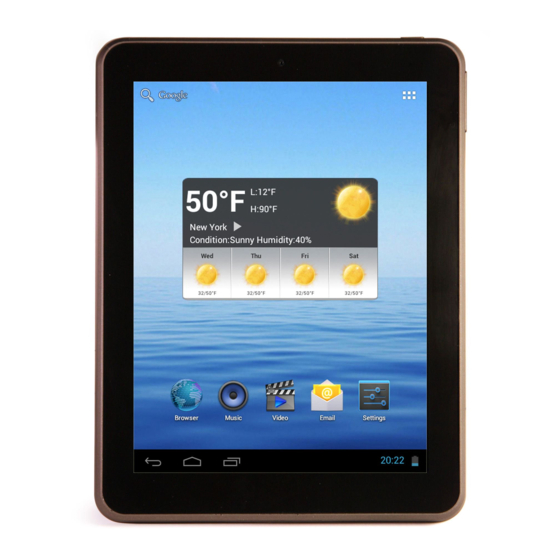
8" Capacitive Touch Android Tablet
c
d
e
f g
a. VOL+ – turn up the volume
b. VOL- - turn down the volume
c. Power button – press and hold to power on or off
the unit;; briefly press to turn on or off the screen.
d. Micro USB Port – to a computer through USB
cable.
e. POWER-IN port - connect to power supply through
DC adaptor
f. Built-in microphone
STEP 1 Charge the Battery
Plug the DC adaptor to the POWER-IN port of the
unit and the standard 220V power socket to start
charging. It takes about 5 hours to fully charge the
battery. The charge indicator should light up in
orange once the battery is fully charged.
STEP 2 Transfer files
(1) Connect the device to computer with the supplied USB cable.
(2) Two new removable disk drives should appear on your computer standing for the internal
memory of the device and the memory card inside it.
(3) Copy files to the removable disk drive just as you would do to your hard drive.
(4) On your computer, left click the
click the pop-up message "Stop the USB Mass Storage Device – Drive (X)." to disconnect
the device from the computer safely.
Quick Start Guide
Accessories
USB Cable
Buttons & Ports
a b
h
j
i
Step by Step to Get Started
DC Adaptor
k
icon at the right bottom corner of the desktop and then
1
Pouch
m
l
g. Earphone Port – connect to
stereo earphones.
h. Charge indicator
i.
Camera lens
j.
Touch screen
k. Built-in speakers
l.
Micro SD card slot
m. Reset pin hole – reset your
device if it freezes.
NEXT8P12
Ver.1.0
Publicité

Sommaire des Matières pour Nextbook Premium 8 SE
- Page 1 NEXT8P12 Quick Start Guide 8” Capacitive Touch Android Tablet Ver.1.0 Accessories USB Cable DC Adaptor Pouch Buttons & Ports a. VOL+ – turn up the volume g. Earphone Port – connect to b. VOL- - turn down the volume stereo earphones. c.
- Page 2 STEP 3 Turn on the Unit Press and hold the Power button of the unit until you see the startup screen. Tip: To turn off the device, press and hold the Power button, then select “Power Off”. Note: The device may sleep with the screen off when there is no action for a while (depending on the Screen Timeout setting).
- Page 4 Browser – Surf on Internet Music – Playing music files Calculator Nextbook FAQ – FAQ about the unit Calendar Nextbook Guide – Guide on how to use the unit. Camera – take photos or Office Suite – View Office document in video clips.
- Page 5 Using the Toolbar You can use the toolbar to navigate through your device’s internal memory/ memory card and delete or copy files. Home Go to the Home Screen. LevelU p Go back one level in the directory. Multi Select more than one file. Sliding your finger on the toolbar Editor Copy, delete, move, paste or rename the...
- Page 6 Close Recent Applications Your device can remember applications that you used recently. That’s very useful when you want to go back to a window you opened recently. Also, you can close these applications to enhance system performance. to display applications that (2) Hold your tap on the application that you used recently.
- Page 7 NEXT8P12 Guide de démurrage rapide 8” Tablette Android a Toucher Capacitif Ver.1.0 Liste des accessoires C ble USB Adaptateur CA Pochette Boutons et ports a. VOL+ g. Port pour écouteurs - connexion à b. VOL- des écouteurs stéréo. c. Bouton de mise en marche – appuyez et h.
- Page 8 ÉTAPE 3 Allumer l'appareil Appuyez et maintenez enfoncé le bouton de mise en marche de l'appareil jusqu'à ce que vous voyiez l'écran de démarrage. Conseil : Pour éteindre l'appareil, appuyez et maintenez enfoncé le bouton de mise en marche, puis sélectionnez « Éteindre ». Remarque : Le périphérique peut se mettre en veille avec l'écran lorsqu'il n'y a aucune action pendant un certain temps (en fonction du réglage du délai de temporisation de l'écran).
- Page 10 B&N Nook...
- Page 11 Explorateur ou Astro pour entrer en mode explorateur de fichiers. Appuyer sur la zone grise affiche/cache la barre d’outils. En faisant glisser votre doigt sur la barre d’outils, En faisant glisser votre doigt sur la barre d’outils, vous pouvez faire dérouler tous les outils vous pouvez faire dérouler tous les outils Répertoire-racine Répertoire-racine...
- Page 12 (3) Appuyez sur « Désinstaller » pour désinstaller l'application. Managing Tasks Afin de sauvegarder la mémoire du système et améliorer la performance du système, vous pouvez mettre fin à certaines tâches que vous n’utilisez pas pour l’instant. (1) Tapez sur l’application « Advanced Task (2) Tapez sur la tâche à...


