Table des Matières
Publicité
Les langues disponibles
Les langues disponibles
Liens rapides
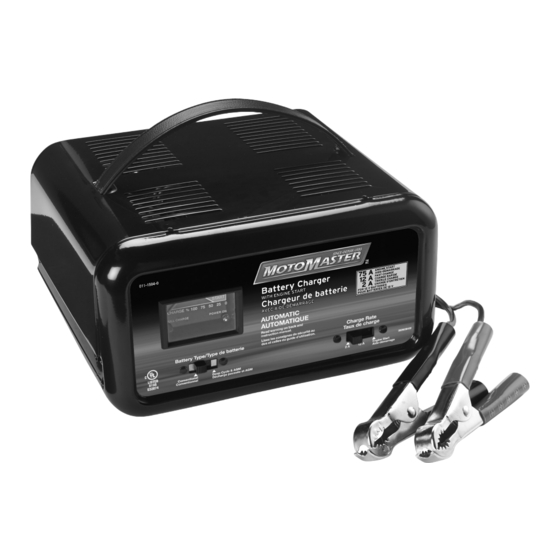
Model / Modèle :
Battery Charger
Chargeur de batterie
Voltage / Tension : 12 V
Amperage / Intensité : 2, 12, 75 A
DO NOT RETURN THIS PRODUCT TO THE STORE!
Call Customer Service for assistance: 800-528-6817
NE PAS RETOURNER LE PRODUIT AU MAGASIN!
Appeler le service à la clientèle pour obtenir de l'aide : 800-528-6817
READ THE ENTIRE MANUAL BEFORE USING THIS PRODUCT.
FAILURE TO DO SO COULD RESULT IN SERIOUS INJURY OR DEATH.
LIRE ENTIÈREMENT LE GUIDE AVANT D'UTILISER CE PRODUIT.
LE NON-RESPECT DE CETTE CONSIGNE PEUT ENTRAÎNER DES
BLESSURES SÉRIEUSES OU LA MORT.
All manuals and user guides at all-guides.com
™
MC
011-1504-0
OWNERS MANUAL
GUIDE D'UTILISATION
0099001313-00
Publicité
Table des Matières

Manuels Connexes pour Motomaster 011-1504-0


Sommaire des Matières pour Motomaster 011-1504-0
- Page 1 All manuals and user guides at all-guides.com OWNERS MANUAL GUIDE D’UTILISATION ™ 011-1504-0 Model / Modèle : Battery Charger Chargeur de batterie Voltage / Tension : 12 V Amperage / Intensité : 2, 12, 75 A DO NOT RETURN THIS PRODUCT TO THE STORE!
- Page 2 All manuals and user guides at all-guides.com IMPORTANT: READ AND SAVE THIS SAFETY AND INSTRUCTION MANUAL. SAVE THESE INSTRUCTIONS – This manual will show you how to use your charger safely and effectively. Please read, understand and follow these instructions and precautions carefully, as this manual contains important safety and operating instructions.
-
Page 3: Personal Precautions
All manuals and user guides at all-guides.com 1.11 To reduce the risk of a battery explosion, follow these instructions and those published by the battery manufacturer and the manufacturer of any equipment you intend to use in the vicinity of the battery. Review the cautionary markings on these products and on the engine. 1.12 This charger employs parts, such as switches and circuit breakers, that tend to produce arcs and sparks. -
Page 4: Charger Location
All manuals and user guides at all-guides.com CHARGER LOCATION RISK OF EXPLOSION AND CONTACT WITH BATTERY ACID. Locate the charger as far away from the battery as the DC cables permit. Never place the charger directly above the battery being charged; gases from the battery will corrode and damage the charger. -
Page 5: Grounding And Ac Power Cord Connections
All manuals and user guides at all-guides.com Connect the POSITIVE (RED) charger clip to the POSITIVE (POS, P, +) post of the battery. Position yourself and the free end of the cable you previously attached to the NEGATIVE (NEG, N, -) battery post as far away from the battery as possible – then connect the NEGATIVE (BLACK) charger clip to the free end of the cable. - Page 6 All manuals and user guides at all-guides.com Battery Type Switch Use this switch to set the type of battery to be charged. • Conventional – These type of batteries are usually used to start and run engines for cars, trucks and motorcycles. These batteries have vent caps and marked as “low maintenance”...
-
Page 7: Maintenance Instructions
All manuals and user guides at all-guides.com NOTE: An Automatic charger automatically switches between Charge Mode and Maintain Mode as necessary. The FULL CHARGE (green) LED will light up when the battery is at full charge and off when the voltage drops below a preset level and the charger goes into Charge Mode. -
Page 8: Before Returning For Repairs
All manuals and user guides at all-guides.com 14. TROUBLESHOOTING PROBLEM POSSIBLE CAUSE REASON/SOLUTION The charger is making Circuit breaker is cycling. The settings may be wrong. an audible clicking Check the charger settings. sound. Battery is defective. Have the battery checked. Shorted battery cables or Circuit breaker cycles when clips. - Page 9 All manuals and user guides at all-guides.com 16. LIMITED WARRANTY This MotoMaster product carries a two (2) year limited warranty against defects in workmanship and materials. At its discretion, MotoMaster Canada agrees to have any defective part(s) repaired or replaced free of charge, within the stated warranty period, when returned by the original purchaser with proof of purchase.
- Page 10 All manuals and user guides at all-guides.com IMPORTANT : LIRE ET CONSERVER CE GUIDE DE CONSIGNES DE SÉCURITÉ ET D’UTILISATION. CONSERVER CES CONSIGNES – Ce guide vous montrera comment utiliser votre chargeur efficacement et en toute sécurité. Veuillez lire, comprendre et suivre ces instructions et précautions attentivement sachant que ce guide contient d’importantes consignes d’utilisation et de sécurité.
-
Page 11: Précautions Personnelles
All manuals and user guides at all-guides.com RISQUE DE GAZ EXPLOSIFS. 1.10 TRAVAILLER À PROXIMITÉ D’UNE BATTERIE AU PLOMB-ACIDE EST DANGEREUX. LES BATTERIES PRODUISENT DES GAZ EXPLOSIFS EN MARCHE NORMALE. POUR CETTE RAISON, IL EST DE LA PLUS HAUTE IMPORTANCE QUE VOUS SUIVIEZ LES DIRECTIVES CHAQUE FOIS QUE VOUS UTILISEZ LE CHARGEUR. -
Page 12: Emplacement Du Chargeur
All manuals and user guides at all-guides.com Ajoutez de l’eau distillée dans chaque élément de batterie jusqu’à que le niveau d’acide atteigne celui spécifié par le fabricant de la batterie. Ne pas faire déborder. Pour une batterie dont les éléments n’ont pas de bouchons, comme les batteries VRLA (accumulateur au plomb-acide à... -
Page 13: Directives De Montage
All manuals and user guides at all-guides.com Pour les véhicules à mise à la masse positive, connectez la pince NÉGATIVE (NOIRE) du chargeur de batterie à la borne de la batterie NÉGATIVE (NEG, N, -), non mise à la masse. Connectez la pince POSITIVE (ROUGE) au châssis du véhicule ou au bloc moteur à... -
Page 14: Panneau De Contrôle
All manuals and user guides at all-guides.com 10. PANNEAU DE CONTRÔLE Ampèremètre L’ampèremètre indique la quantité prise par la batterie. Lorsque la batterie est presque chargée, il prend moins de courant du chargeur. Le pourcentage de charge est prévu come un aide visuelle afin de simplifier la lecture de l’état de charge de la batterie. Lorsque la batterie a atteint la pleine charge l’indicateur DEL est allumé... -
Page 15: Consignes D'utilisation
All manuals and user guides at all-guides.com 11. CONSIGNES D’UTILISATION Ce chargeur de batterie doit être correctement assemblé conformément aux instructions de montage avant de l’utiliser. Le chargement 1. Mettez le chargeur sur une surface non inflammable et sèche telle qu’une surface en bois ou en béton. -
Page 16: Consignes D'entretien
All manuals and user guides at all-guides.com Utilisation de la fonction Aide-démarrage Votre chargeur de batterie peut être utilisé pour aider au démarrage de votre voiture si la batterie est faible. Suivez ces directives pour utiliser la fonction AIDE-DÉMARRAGE. Suivez toutes les consignes de sécurité et les précautions relatives au chargement de votre batterie. -
Page 17: Instructions De Transport Et De Stockage
All manuals and user guides at all-guides.com 13. INSTRUCTIONS DE TRANSPORT ET DE STOCKAGE 13.1 Entreposez le chargeur non branché, en position verticale. Le cordon conduira de l’électricité jusqu’à ce qu’il soit débranché de la prise. 13.2 Entreposez-le à l’intérieur, dans un endroit sec et frais (à moins que vous n’utilisiez un chargeur de batteries nautiques). -
Page 18: Avant De L'envoyer Pour Réparation
All manuals and user guides at all-guides.com PROBLÈME CAUSE POSSIBLE RAISON/SOLUTION La batterie est connectée Les pinces n’offrent pas une Vérifiez la connexion à la batterie et le chargeur est allumé, bonne connexion. et au châssis. Assurez-vous que mais il n’y a pas de les prises sont propres. -
Page 19: Garantie Limitée
Cet article MotoMasterMD Eliminator comporte une garantie de deux (2) ans contre les défauts de fabrication et de matériau(x). MotoMaster Canada consent, à sa discrétion, à réparer ou à remplacer toute pièce défectueuse sans frais au cours de la période de garantie convenue lorsque l’article, accompagné...