Publicité
Owner's Operation and Instruction Manual
CAUTION!
Please read this entire manual before you install
or use your new room heater. Failure to follow
instructions may result in property damage, bodily
injury, or even death. Improper Installation Could
Void Your Warranty!
SAFETY NOTICE:
If this heater is not properly installed, a house fire
may result. For your safety, follow the installation
instructions. Never use make shift compromises
during the installation of this heater. Contact local
building or fire officials about permits, restrictions
and installation requirements in your area.
U.S. Environmental Protection Agency
Certified to comply with 2015 particulate
emissions standards.
Not approved for use in mobile homes, do not install in a mobile home
This manual will help you to obtain efficient, dependable service from the heater, and enable you to order
French version is available for download from the U. S. Stove website: http://www.usstove.com
Version française est disponible pour téléchargement à partir du site
Report#: 0215WS054S
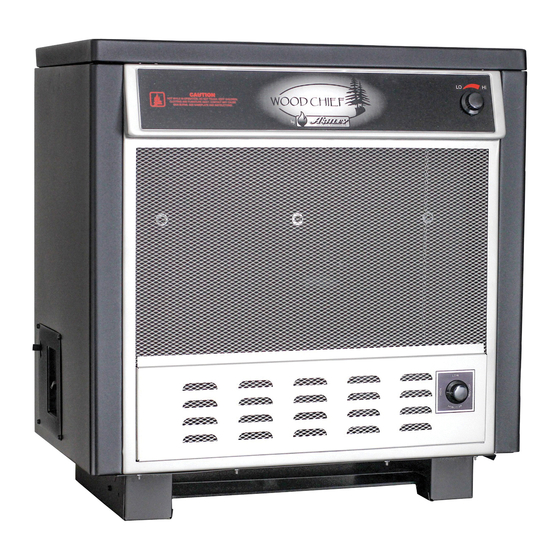
MODELS: AW100E, AW100EB
Conforms to UL-1482-11 (R2015) and ULC-S627-00
Washington state approved
Save these instructions
repair parts correctly. Keep in a safe place for future reference.
Web de la Poêle US: http://www.usstove.com
United States Stove Company
227 Industrial Park Road
South Pittsburg, TN 37380
P.O. Box 151
852470D-0604G
Publicité
Table des Matières

Manuels Connexes pour Ashley AW100E

Sommaire des Matières pour Ashley AW100E
- Page 1 Owner’s Operation and Instruction Manual MODELS: AW100E, AW100EB CAUTION! Please read this entire manual before you install or use your new room heater. Failure to follow instructions may result in property damage, bodily injury, or even death. Improper Installation Could...
- Page 2 The instructions pertaining to the installation of your wood stove comply with UL-1482-11 (R2015), and ULC-S627-00 standards. This manual describes the installation and operation of the Ashley, AW100E, AW100EB wood heater. This heater meets the 2015 U.S. Environmental Protection Agency’s crib wood emission limits for wood heaters sold after May 15, 2015.
- Page 3 TOOLS AND MATERIALS NEEDED FOR INSTALLATION TOOLS MATERIALS • Pencil • Chimney Connection- 6” Diameter Black Steel • Masuring Tape or 6 foot rule pipe (24 gauge minimum) and elbow(s) either • Tin Snips adjustable1 or corrugated as necessary • Drill and 1/8” dia. bit •...
- Page 4 ASSEMBLY INSTRUCTIONS BLOWER ASSEMBLY-OPTIONAL INSTALLATION 1. Remove the Panel (A) using tin snips or knock out using a hammer and chisel careful not to distort the mounting surface. 2. Attach the Blower Mounting Box (B) to the rear of the unit using four(4) of the supplied #10 screws.
- Page 5 ASSEMBLY INSTRUCTIONS INSTRUCTIONS FOR LATCH OPERATION Follow these instructions to operate you unit safely when operating the feed door. 1. Turn handle clockwise to the 12 o’clock position (A), pull the door open until you engage the second step (B). 2.
-
Page 6: Clearances To Combustibles
CLEARANCES TO COMBUSTIBLES It is of utmost importance that the clearances to combustible materials be strictly adhered to during installation of the stove. Refer to the tables below. (458mm) (1296mm) (458mm) 23.25” (2134mm) (407mm) (989mm) (356mm) (305mm) • Floor to ceiling height must be at least 7’ (2.13m) in all cases. NON-COMBUSTIBLE CONSTRUCTION •... - Page 7 FLOOR PROTECTOR When the heater is used on a combustible floor, use an Underwriters Listed floor protector that conforms to UL Standards (UL 1618) and CAN/ULC for Canada, that provides at minimum type 1 ember protection. The floor protector should be under the stove, 16” (18” for Canadian Instillations)beyond the front and 8” beyond each side of the fuel loading and ash removal opening.
- Page 8 CHIMNEY CONNECTOR (STOVE PIPE) Your chimney connector and chimney must have the same diameter as the stove outlet (6”). If this is not the case, we recommend you contact your dealer in order to insure there will be no problem with the draft. The stove pipe must be made of aluminized or cold roll steel with a minimum thickness of 0.021”...
- Page 9 CHIMNEY Take into account the chimney’s location to insure it is not too close to neighbours or in a valley which may cause unhealthy or nuisance conditions. Your wood stove may be hooked up with a 6” factory built or masonry chimney.
- Page 10 FACTORY BUILT CHIMNEY When a metal prefabricated chimney is used, the manufacturer’s installation instructions must be followed. You must also purchase (from the same manufacturer) and install the ceiling support package or wall pass-through and “T” section package, firestops (where needed), insulation shield, roof flashing, chimney cap, etc. Maintain proper clearance to the structure as recommended by the manufacturer.
-
Page 11: Masonry Chimney
MASONRY CHIMNEY Ensure that a masonry chimney meets the minimum standards of the National Fire Protection Association (NFPA) by having it inspected by a professional. Make sure there are no cracks, loose mortar or other signs of deterioration and blockage. Have the chimney cleaned before the stove is installed and operated. When connecting the stove through a combustible wall to a masonry chimney, special methods are needed. - Page 12 COMBUSTIBLE WALL CHIMNEY CONNECTOR PASS-THROUGHS Method A. 12” (304.8 mm) Clearance to Combustible Wall Member: Using a minimum thickness 3.5” (89 mm) brick and a 5/8” (15.9 mm) minimum wall thickness clay liner, construct a wall pass-through. The clay liner must conform to ASTM C315 (Standard Specification for Clay Fire Linings) or its equivalent.
- Page 13 WOODSTOVE UTILIZATION This heater is designed to burn natural wood only. Higher efficiencies and lower emissions generally result when burning air dried seasoned hardwoods, as compared to softwoods or to green or freshly cut hardwoods. DO NOT BURN: 1. Garbage; 10.
-
Page 14: Operational Tips
Smaller pieces of wood will dry faster. All logs exceeding 6” in diameter should be split. The wood should not be stored directly on the ground. Air should circulate through the cord. A 24” to 48” air space should be left between each row of logs, which should be placed in the sunniest location possible. - Page 15 Before igniting the paper and kindling wood, it is recommended that you warm up the chimney. This is done in order to avoid back draft problems often due to negative pressure in the house. If such is the case, open a window slightly near the stove and twist together a few sheets of newspaper into a torch.
- Page 16 SECONDARY AIR allows the woodstove to burn clean. This preheated air enters the upper firebox just below the baffle plate. This superheated air mixed with the wood gases and flames ignites, reaching temperatures in this unit range. Without Secondary Air these volatile gases would exit the stove unburned as creosote, smoke, particulates, and high levels of Carbon Monoxide, greatly decreasing efficiency.
- Page 17 STEP 3 Using a canned air duster, gently spray any accumulative dust or buildup off of the timer. WARNING: Be careful not to use too much air pressure as this may cause potential damage to the timer STEP 4 Use a general machine oil (3-IN-ONE) to apply a small drop of oil to each of the locations shown below.
- Page 18 HEATING Controlled combustion is the most efficient technique for wood heating because it enables you to select the type of combustion you want for each given situation. The wood will burn slowly if the wood stove air intake control is adjusted to reduce the oxygen supply in the combustion chamber to a minimum.
-
Page 19: Ash Disposal
Attention: This wood heater needs periodic inspection and repair for proper operation. It is against federal regulations to operate this wood heater in a manner inconsistent with operating instructions in this manual. cool, then inspect the chimney for damage. If no damage results, perform a chimney cleaning to ensure there is no more creosote deposits remaining in the chimney. -
Page 20: Repair Parts
REPAIR PARTS... - Page 21 REPAIR PARTS Key Part No. Description Qty. 852472 Hi/Lo Label 610145 Cabinet Front Weldment/Assy. 852488 Plate, Control Panel 89687 Thermostat Knob Black 27468 Air Box Cover 610184 Air Distribution Box 69207 Draft Plate Weld Assembly 25550 H.pin Drft Damper 40075 Frame, Draft Door 88090 Gasaket...
- Page 22 REPAIR PARTS Key Part No. Description Qty. 892767 Wooden Knob 27486 Door Handle 27462 Door Catch 40763 Feed Door 27489 Fire Door Hinge 88032 1” Rope Fiber 41” 40764 Cast Door 27460 Ash Door Hinge 88032 1” Rope Fiber 27” In order to maintain warranty, components must be replaced using original manufacturers parts purchased through your dealer or directly from the appliance manufacturer.
- Page 23 REPAIR PARTS Part No. Description Qty. 610235 Baffle Weldment 610230 Top Brick Rack 89066 Firebrick (4-1/2 X 9) 27472 Brick Spacers 27564 Floor Back 610221 Floor (Welded) 610223 Cleanout Cover Weldment In order to maintain warranty, components must be replaced using original manufacturers parts purchased through your dealer or directly from the appliance manufacturer.
- Page 24 Limited Warranty Circulating Heaters The operation of this heater in a manner inconsistent with the owner’s manual will void the warranty and is also against federal regulations. United States Stove Company warrants to the original purchaser its products against premature failure of any component due to workmanship, quality, or materials as follows: TIME PERIOD: Firebox ............................
-
Page 25: Service Record
Service Record It is recommended that your heating system is serviced regularly and that the appropriate Service Interval Record is completed. Service Provider: Before completing the appropriate Service Record below, please ensure you have carried out the service as described in the manufacturer’s instructions. -
Page 26: How To Order Repair Parts / Comment Commander Des Pièces De Rechange
HOW TO ORDER REPAIR PARTS / COMMENT COMMANDER DES PIÈCES DE RECHANGE This manual will help you obtain efficient, dependable service from your heater, and enable you to order repair parts correctly. Keep this manual in a safe place for future reference. When writing, always give the full model number which is on the nameplate attached to the heater.