
Manuels Connexes pour pclocs Lockncharge iQ 30 Cart


Sommaire des Matières pour pclocs Lockncharge iQ 30 Cart
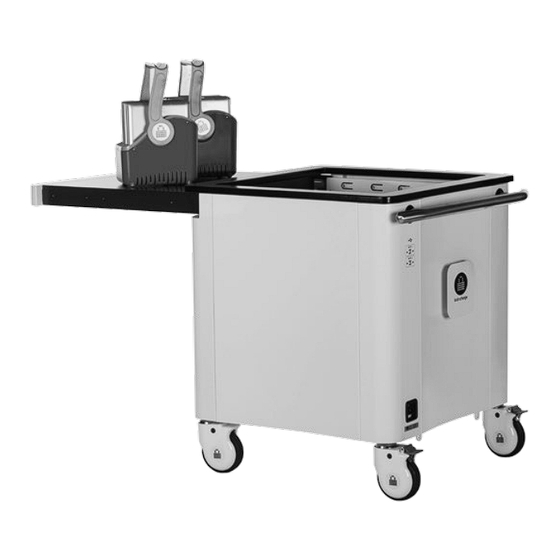
- Page 1 USER INSTRUCTIONS iQ 30 Cart™ www.pclocs.com.au www.lockncharge.com...
- Page 2 iQ 30 Cart™ Congratulations on your purchase of the iQ 30 Cart . Follow these instructions for easy and fast set-up of your iQ 30 Cart. PC Locs, LocknCharge and the Padlock device are Trademarks of IWS Global Pty Ltd. Copyright IWS Global Pty Ltd, May 2014.
- Page 3 INSTRUCTION MANUAL Section A - Setting up the iQ 30 Cart. STEP 1 - Opening the iQ 30 Cart. Swing the handle to unlock the sliding top. Slide the top to open. STEP 2 - Routing the cables. Remove the Carry Baskets. Remove the mats.
- Page 4 iQ 30 Cart™ STEP 2 - Routing the cables continued... Lay the shelves on a scratch-proof surface. Insert all the device cables into the USB ports. ENSURE BOTH iQ SYNC CHARGE BOXES ARE SWITCHED ON Run the cable up through the hole at the end. Pass the cable end through the center Gripweld.
- Page 5 INSTRUCTION MANUAL STEP 3 - Devices ready for syncing and charging. Insert all your devices in the Carry Baskets and place back into the iQ 30 Cart. Plug the device cable end into the device. Unwind the power cable and When not used, wrap excess cable around plug into the wall socket.
- Page 6 iQ 30 Cart™ Section B - Setting up the Security Chain Kit. Tools required: The Security Chain Kit contains the following: • Masonry hammer-drill • 1 x 3 holed Anchor Plate and security chain • 10mm masonry drill bit • 3 x 55mm long, 8mm Anchor Bolts •...
- Page 7 INSTRUCTION MANUAL Troubleshooting If no lights are illuminated with the iQ 16 Sync Charge Box is switched ON, check that the power cable is fully inserted into the iQ 16 Sync Charge Box socket and the other end is fully inserted into the mains power socket and the mains power switch is ON.
- Page 8 Compliances and Approvals USA | CANADA: Conforms to UL60950-1 www.pclocs.com.au www.lockncharge.com...
- Page 9 BEDIENUNGSANLEITUNG iQ 30 Cart™ www.pclocs.com.au www.lockncharge.com...
- Page 10 iQ 30 Cart™ Herzlichen Glückwunsch zu Ihrem Kauf. Folgen Sie diesen Anweisungen für eine einfache und zügige Inbetriebnahme. PC Locs, LocknCharge und die Padlock-Vorrichtung sind Marken der IWS Global Pty Ltd. Copyright IWS Global Pty Ltd, Mai 2014. Haftungsausschluss Diese Informationen sind geistiges Eigentum von IWS Global Pty Ltd. Sie dürfen ohne vorherige schriftliche Genehmigung weder teilweise noch vollständig verteilt, reproduziert oder kopiert werden.
- Page 11 BEDIENUNGSANLEITUNG SCHRITT 1: Öffnen des iQ 30 Carts Entsperren Sie die obere Schublade mit dem Griff. Ziehen Sie die obere Schublade aus. SCHRITT 2: Verlegen der Kabel Entfernen Sie die Tragekörbe. Entfernen Sie die Matten. Lösen Sie die Rändelschrauben der internen Entfernen die 4 Fächer durch Anheben der Fächer.
- Page 12 iQ 30 Cart™ SCHRITT 2: Verlegen der Kabel - Fortsetzung Legen Sie die Fächer auf eine kratzfeste Stecken Sie alle Gerätekabel in die Oberfläche. USB-Anschlüssse. STELLEN SIE SICHER, DASS BEIDE iQ SYNC CHARGE BOXEN EINGESCHALTET SIND Verlegen Sie die Kabel durch die Öffnung am Führen Sie die Kabelenden durch die Ende.
- Page 13 BEDIENUNGSANLEITUNG SCHRITT 3: Aufladen und Synchronisieren der Geräte Setzen Sie die Geräte in die Tragekörbe ein. Verbinden Sie die Gerätekabel mit den Geräten. Setzen Sie dann die Körbe in den iQ 30 Cart. Verbinden Sie das Netzkabel mit der Bei Nichtbenutzung wickeln Sie das Kabel um die Wandsteckdose.
- Page 14 iQ 30 Cart™ SCHRITT 4: Sicherheitskettensatz installieren Benötigte Werkzeuge: Der Sicherheitskettensatz umfasst Folgendes: • Bohrhammer • 1 x Ankerplatte mit drei Löchern und Sicherheitskette • Steinbohrer 10 mm • 3 x Ankerbolzen 8 mm, Länge 55 mm • Stift und Lineal oder Maßband •...
-
Page 15: Garantie
BEDIENUNGSANLEITUNG Fehlerbehebung Wenn bei eingeschalteter iQ 16 Sync Charge Box keine Lampen leuchten, prüfen Sie das Netzkabel auf festen Halt in der Fassung der iQ 16 Sync Charge Box und der Steckdose, und überprüfen Sie den Ein/ Ausschalter. Um die iQ 16 Sync Charge Box auf korrekten Betrieb zu überprüfen, schalten Sie diese zunächst AUS. Entfernen Sie alle angeschlossenen USB-Kabel und schalten Sie das Gerät wieder EIN. -
Page 16: Usa Und Kanada
Länderzulassungen USA und KANADA: Entsprechung gemäß UL60950-1 www.pclocs.com.au www.lockncharge.com... - Page 17 INSTRUCCIONES PARA EL USUARIO iQ 30 Cart™ www.pclocs.com.au www.lockncharge.com...
- Page 18 iQ 30 Cart™ Enhorabuena por su compra. Siga estas instrucciones para instalar de forma fácil y rápida el iQ 30 Cart. PC Locs, LocknCharge y el dispositivo Padlock son marcas comerciales de IWS Global Pty Ltd. Derechos de autor de IWS Global Pty Ltd, mayo de 2014. Descargo de responsabilidad.
- Page 19 MANUAL DE INSTRUCCIONES PASO 1 – Abrir el iQ 30 Cart Gire la manija para desbloquear la tapa superior deslizante. Deslice la tapa superior para abrir. PASO 2 – Tender los cables Saque las bandejas. Quite las alfombrillas. Afloje y quite las ruedecillas ubicadas en los Quite los cuatro estantes levantándolos por el estantes interiores.
- Page 20 iQ 30 Cart™ PASO 2 – Continuación de tender los cables… Coloque los estantes sobre una superficie a Inserte los cables de todos los dispositivos en los prueba de arañazos. puertos USB. ASEGÚRESE DE QUE AMBAS CAJAS DE CARGA Y SINCRONIZACIÓN iQ ESTÉN ENCENDIDAS Pase el cable hacia arriba a través del orificio del Pase el cable a través de la junta de sujeción.
- Page 21 MANUAL DE INSTRUCCIONES PASO 3 – Dispositivos listos para sincronización y carga Inserte todos los dispositivos en las bandejas y Conecte el extremo del cable del dipositivo al vuélvalas a poner en el iQ 30 Cart. dispositivo. Desenrrolle el cable de alimentación y conéctelo Cuando no lo use, enrrolle el exceso de cable a a una toma de corriente.
- Page 22 iQ 30 Cart™ PASO 4 – Instalación del kit de la cadena de seguridad Herramientas necesarias: El kit de la cadena de seguridad contiene lo siguiente: • Taladro percutor para hormigón • Placa de anclaje perforada 1 x 3 y cadena de seguridad •...
-
Page 23: Procedimientos Para Solucionar Problemas
MANUAL DE INSTRUCCIONES Procedimientos para solucionar problemas Si no se enciende ninguna luz cuando el interruptor de la iQ 16 Sync Charge Box se pone en posición de encendido (ON), compruebe que uno de los extremos del cable de alimentación esté totalmente insertado en el conector de la iQ 16 Sync Charge Box, el enchufe del otro extremo esté... - Page 24 Cumplimiento de normativas y aprobaciones EE.UU. | CANADÁ: Cumple con UL60950-1 www.pclocs.com.au www.lockncharge.com...
- Page 25 INSTRUCTIONS D’UTILISATION iQ 30 Cart™ www.pclocs.com.au www.lockncharge.com...
- Page 26 iQ 30 Cart™ Félicitations pour votre achat ! Suivez les instructions suivantes pour installer facilement et rapidement votre iQ 30 Cart. PC Locs, LocknCharge et the Padlock device sont des marques déposées d'IWS Global Pty Ltd. Copyright IWS Global Pty Ltd, mai 2014. Clause de non-responsabilité.
- Page 27 NOTICE D’UTILISATION ÉTAPE 1 – Ouverture de l’iQ 30 Cart Faites pivoter la poignée pour déverrouiller la partie supérieure coulissante. Faites coulisser la partie supérieure pour ouvrir. ÉTAPE 2 – Guidage des câbles Retirez les paniers de transport. Retirez les nattes. Retirez les 4 tablettes en glissant le doigt dans les Enlevez les molettes des tablettes intérieures.
- Page 28 iQ 30 Cart™ ÉTAPE 2 – Guidage des câbles (suite) Déposez les tablettes sur une surface protégée Insérez tous les câbles de connexion dans les contre les rayures/éraflures. ports USB. ASSUREZ-VOUS QUE LES DEUX iQ SYNC CHARGE BOX™ SONT EN CIRCUIT Passez l’extrémité...
-
Page 29: Étape 3 - Dispositifs Prêts Pour La Synchronisation Et Le Chargement
NOTICE D’UTILISATION ÉTAPE 3 – Dispositifs prêts pour la synchronisation et le chargement Insérez tous vos dispositifs dans les paniers de Branchez l’extrémité du câble du dispositif dans transport et remontez-les dans l’iQ 30 Cart. le dispositif. Déroulez le câble d’alimentation et branchez-le Enroulez la partie éventuellement inutilisée du dans la prise murale. -
Page 30: Étape 4 - Installation Du Kit De Chaîne De Sécurité
iQ 30 Cart™ ÉTAPE 4 – Installation du kit de chaîne de sécurité Outils requis : Le kit de chaîne de sécurité contient les outils suivants : • Marteau perforateur • 1 x plaque d’ancrage à 3 trous et chaîne de sécurité •... -
Page 31: Dépannage
NOTICE D’UTILISATION Dépannage Si aucun voyant lumineux ne s'allume lorsque l'iQ Sync Charge Box™ est mis en circuit (interrupteur sur « ON »), vérifiez que le câble d'alimentation électrique est complètement inséré dans la prise de courant de l'iQ 16 Sync Charge Box et que l'autre extrémité du câble est bien branchée dans la prise d'alimentation secteur et que l'interrupteur secteur est sur «... - Page 32 Conformité et homologations USA | CANADA : Conformité UL60950-1 www.pclocs.com.au www.lockncharge.com...
- Page 33 ISTRUZIONI PER L’USO iQ 30 Cart™ www.pclocs.com.au www.lockncharge.com...
- Page 34 iQ 30 Cart™ Congratulazioni per il tuo acquisto. Seguire queste istruzioni per una configurazione semplice e rapida dell’iQ 30 Cart. PC Locs, LocknCharge e il dispositivo Padlock sono marchi commerciali di IWS Global Pty Ltd. Copyright IWS Global Pty Ltd, maggio 2014. Esclusione di responsabilità.
- Page 35 MANUALE DI ISTRUZIONI PASSO 1 – Apertura di iQ 30 Cart Girare la maniglia e sbloccare la parte superiore scorrevole. Far scorrere la parte superiore per aprire. PASSO 2 – Posa dei cavi Rimuovere i cestelli di trasporto. Rimuovere i tappetini. Rimuovere i 4 pannelli sollevandoli attraverso il Rimuovere le rotelline sui pannelli interni.
-
Page 36: Assicurarsi Che Entrambe Le Iq Sync Charge Box Siano Accese
iQ 30 Cart™ PASSO 2 – Posa dei cavi (continua...) Poggiare i pannelli su una superficie antigraffio. Inserire tutti i cavi del dispositivo nelle porte USB. ASSICURARSI CHE ENTRAMBE LE iQ SYNC CHARGE BOX SIANO ACCESE Passare l’estremità del cavo attraverso il Far passare il cavo attraverso il foro all’estremità. - Page 37 MANUALE DI ISTRUZIONI PASSO 3 – Dispositivi pronti per la sincronizzazione e la carica Inserire tutti i dispositivi nei cestelli di trasporto e Collegare l’estremità del cavo del dispositivo nel riposizionarli in iQ 30 Cart. dispositivo. Srotolare il cavo di alimentazione e collegarlo alla Quando non usato, avvolgere il cavo in eccesso presa elettrica.
- Page 38 iQ 30 Cart™ PASSO 4 – Installazione del Kit Catena di sicurezza Attrezzi necessari: Il Kit Catena di sicurezza contiene quanto segue: • Trapano a percussione per muratura • 1 x astra di ancoraggio a 3 fori e catena di sicurezza •...
-
Page 39: Risoluzione Dei Problemi
PCLocs/LocknCharge è stata avvertita della possibilità di tali danni. Gli obblighi di PC Locs/ LocknCharge sono strettamente ed esclusivamente limitati alla sostituzione o riparazione di qualsiasi prodotto difettoso. - Page 40 Compliances and Approvals USA | CANADA: Conforme a UL60950-1 www.pclocs.com.au www.lockncharge.com...
-
Page 41: Instruções De Utilização
INSTRUÇÕES DE UTILIZAÇÃO iQ 30 Cart™ www.pclocs.com.au www.lockncharge.com... - Page 42 iQ 30 Cart™ Parabéns pela sua aquisição. Siga estas instruções para uma configuração rápida e fácil do seu iQ 30 Cart. PC Locs, LocknCharge e o dispositivo Padlock são marcas comerciais da IWS Global Pty Ltd. Direitos de autor da IWS Global Pty Ltd, Maio de 2014. Exclusão de responsabilidade.
- Page 43 MANUAL DE INSTRUÇÕES PASSO 1 – Abertura do iQ 30 Cart Puxe a pega para destrancar a parte superior deslizante. Faça deslizar a parte superior para abrir. PASSO 2 – Encaminhamento dos cabos Retire os Cestos de Transporte. Retire os tapetes. Desaperte os selectores rotativos nas prateleiras Retire as 4 prateleiras, elevando-as através do internas.
- Page 44 iQ 30 Cart™ PASSO 2 – Encaminhamento dos cabos (continuação) Coloque as prateleiras numa superfície à prova Insira todos os cabos do dispositivo nas portas de riscos. USB. CERTIFIQUE-SE DE QUE AMBAS AS UNIDADES iQ SYNC CHARGE BOX ESTÃO LIGADAS Passe a extremidade do cabo através do passa- Passe o cabo através do orifício na extremidade.
- Page 45 MANUAL DE INSTRUÇÕES PASSO 3 – Dispositivos prontos para sincronização e carregamento Insira todos os seus dispositivos nos Cestos de. Ligue a extremidade do cabo do dispositivo ao Transporte e coloque-os no iQ 30 Cart. dispositivo. Desenrole o cabo de alimentação e ligue-o à Quando não estiver a ser utilizado, enrole o tomada de parede.
- Page 46 iQ 30 Cart™ PASSO 4 – Instalação do kit da corrente de segurança Ferramentas necessárias: O kit da corrente de segurança contém o seguinte: • Berbequim • 1 placa de retenção com 3 orifícios e corrente de segurança • Broca de 10 mm •...
-
Page 47: Resolução De Problemas
MANUAL DE INSTRUÇÕES Resolução de problemas Se não acenderem quaisquer luzes ao ligar a iQ 16 Sync Charge Box, verifique se o cabo de alimentação está completamente inserido na tomada da iQ 16 Sync Charge Box e se a outra extremidade está completamente inserida na tomada de energia e o interruptor ligado. - Page 48 Conformidade e Aprovações EUA | CANADÁ: Em conformidade com a norma UL60950-1 www.pclocs.com.au www.lockncharge.com...