Table des Matières
Publicité
Les langues disponibles
Les langues disponibles
Liens rapides
Publicité
Chapitres
Table des Matières

Manuels Connexes pour Hoover HNFLS G474TAH-84


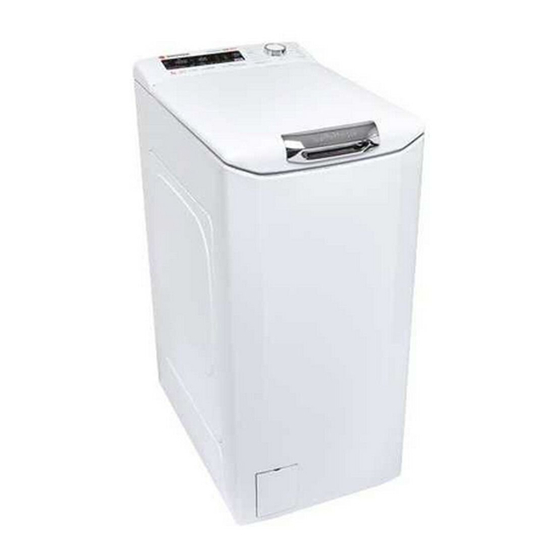
Sommaire des Matières pour Hoover HNFLS G474TAH-84
-
Page 2: Table Des Matières
Grazie per aver scelto una lavatrice Hoover. I RAEE contengono sia sostanze inquinanti Siamo orgogliosi di offrire sempre nuovi (che possono cioè avere un impatto negativo prodotti innovativi tecnologicamente anche molto pesante sull’ambiente) sia materie avanzati, con una gamma completa di prime (che possono essere riutilizzate). -
Page 3: Norme Generali Di Sicurezza
Evitare che i bambini giochino 1. NORME GENERALI DI con la lavatrice o che si occupino SICUREZZA della sua pulizia e manutenzione Questo apparecchio è destinato l senza supervisione. ad uso in ambienti domestici e I bambini dovrebbero essere l simili come per esempio: supervisionati per assicurarsi che −... - Page 4 Dopo l’installazione, l’apparecchio lasciare lavatrice l l deve essere posizionato in modo esposta a pioggia, sole o ad che la spina sia raggiungibile. altri agenti atmosferici. La massima capacità di carico In ogni caso di guasto e/o di l l di biancheria asciutta differisce malfunzionamento, si consiglia di a seconda del modello (fare...
-
Page 5: Installazione
2. INSTALLAZIONE Svitare le 2 o 4 viti "A" sul lato l posteriore e rimuovere i 2 o 4 distanziali "B" come in figura 1. min 4 cm +2,6 mt min 50 cm max 85 cm Porre gli accessori di protezione l... - Page 6 di quello del tubo della lavatrice, a un’altezza minima di 50 cm. e massima di 75 cm. dal pavimento (figura 4). Se necessario, utilizzare l’accessorio l curvo per un miglior fissaggio e supporto del tubo di scarico. Se in dotazione al modello acquistato: Per spostare facilmente la lavatrice, l...
-
Page 7: Collegamento Idraulico
Collegamento idraulico l Allacciare il tubo dell’acqua al rubinetto (figura 6) utilizzando solamente il tubo fornito con l'apparecchio (i vecchi tubi non devono essere riutilizzati). l In alcuni modelli, potrebbero essere presenti più delle seguenti caratteristiche: l HOT&COLD (figura 7): predisposizione al collegamento alla rete idrica con acqua calda e fredda per un maggiore risparmio energetico. -
Page 8: Consigli Pratici
3. CONSIGLI PRATICI Quale temperatura di lavaggio selezionare? l L’utilizzo smacchiatori prima Indicazioni sul carico lavaggio lavabiancheria riduce necessità lavare temperature superiori a 60°C. È possibile risparmiare ATTENZIONE: durante la selezione del fino al 50% utilizzando la temperatura di bucato, assicurarsi: lavaggio di 60°C anziché... -
Page 9: Pulizia E Manutenzione Ordinaria
l 4. PULIZIA E MANUTENZIONE Scollegare la lavatrice dalla presa di corrente. ORDINARIA l Staccare il tubo dalla fascetta e portare il tubo verso il basso, svuotando l’acqua Per la pulizia del mobile esterno della lavatrice, completamente in un catino. utilizzare un panno umido, evitando abrasivi, alcol e/o diluenti. -
Page 10: Guida Rapida All'uso
5. GUIDA RAPIDA ALL'USO 6. COMANDI E PROGRAMMI Questa lavatrice è in grado di adattare automaticamente il livello dell’acqua al tipo e alla quantità della biancheria. Questo sistema porta ad una diminuzione dei consumi d’energia e ad una riduzione sensibile dei tempi di lavaggio. Selezione del programma l... - Page 11 Tasto AVVIO/PAUSA ATTENZIONE: Non toccare il display all'inserimento della Chiudere l'oblò PRIMA di premere il spina perché la macchina, nei primi tasto AVVIO/PAUSA. secondi, effettua un'autocalibrazione che potrebbe essere interrotta: se ciò avvenisse la macchina potrebbe non l Premere per avviare il ciclo impostato con funzionare in maniera ottimale.
- Page 12 l Si consiglia di utilizzare solo il 20% della Tasto PARTENZA DIFFERITA quantità consigliata sulla confezione del l detersivo. Questo tasto permette di programmare l’avvio del ciclo di lavaggio con un ritardo - AQUAPLUS massimo di 24h. l Questa opzione (disponibile solo in alcuni l...
- Page 13 l - LIVELLO DI SPORCO È possibile modificare la velocità della centrifuga in qualsiasi momento, anche l momento della selezione senza portare la macchina in PAUSA. programma, verrà automaticamente indicato il tempo di lavaggio preimpostato per quel programma. Un sovradosaggio di detersivo può causare un'eccessiva formazione...
-
Page 14: Blocco Tasti
l Attendere lo spegnimento della spia BLOCCO TASTI PORTA BLOCCATA prima di aprire l l'oblò. pressione contemporanea tasti SELEZIONE TEMPERATURA e SELEZIONE CENTRIFUGA per circa 2) GIRI CENTRIFUGA 3 secondi permette di bloccare i tasti. Indica velocità centrifuga In questo modo, si può evitare che programma selezionato che può... - Page 15 "Download" sito - regola i risciacqui in base al carico e al http://simplyfiservice.candy-hoover.com. tipo di biancheria che si è scelto di lavare; 9) SPIA CICLO NOTTE Indica la selezione della relativa opzione. - regola il ritmo di rotazione del cesto per adattarlo al tipo di tessuto;...
- Page 16 ARRUOLAMENTO MACCHINA SU APP l Scaricare l'App Hoover Wizard proprio dispositivo. L’App Hoover Wizard è disponibile sia per dispositivi con sistema operativo Android che per iOS, sia per tablet che per smartphone. conosce posizione dell'antenna NFC, spostare leggermente lo smartphone con movimento circolare...
- Page 17 Tabella programmi (MAX.) DETERSIVO PROGRAMMA (fare riferimento al cruscotto) (MAX.) 1 o 2 Tutto in Uno 20°C 20° Igiene + 60° Tutto in Uno 59 Min. 40° 30° Rapidi 30° 14-30-44 Min. 40° Capi Scuri 40° Lana 40° Lava a mano & Seta 30°...
- Page 18 Note da considerare In tutti i programmi è possibile ridurre la * La massima capacità carico velocità della centrifuga secondo il consiglio biancheria asciutta differisce a seconda del fabbricante del tessuto, oppure per capi del modello (fare riferimento al cruscotto). molto delicati eliminare la fase di centrifuga.
-
Page 19: Selezione Programmi
Tutto in Uno 59 Min. Selezione programmi Questo programma permette di lavare tessuti quali cotone, sintetici e misti in soli Per trattare i vari tipi di tessuto e le varie 59 minuti, a pieno carico ed a 40°C (o gradazioni di sporco, la lavatrice è dotata di meno) ed è... - Page 20 Camicie Cotone Resistente Il ciclo di lavaggio è ottimizzato per ridurre Realizzato per sviluppare il massimo grado di formazione pieghe, mantenendo lavaggio. La centrifuga finale alla massima un’eccellente risultato di lavaggio. E’ inoltre velocità assicura un’ottima strizzatura. possibile ridurre la velocità della centrifuga per una stiratura più...
- Page 21 l MAX, La vaschetta detergente presenta Preparazione del lavaggio le tacche per l’indicazione di livello massimo di detersivo che non deve Apertura / Chiusura del cestello essere superato l Aprire lo sportello della lavatrice. l Quando i tessuti presentano macchie l...
-
Page 22: Risoluzione Problemi E Garanzia
7. RISOLUZIONE PROBLEMI E GARANZIA Nel caso si pensi che la lavatrice non funzioni in modo corretto, consultare la breve guida sotto riportata, con alcuni suggerimenti pratici per risolvere le anomalie più comuni. SEGNALAZIONE ERRORI l Modelli dotati di display: gli errori verranno visualizzati tramite un numero preceduto da una "E"... -
Page 23: Altre Anomalie
ALTRE ANOMALIE Problema Possibili cause e soluzioni pratiche lavatrice Verificare che la spina sia inserita in modo corretto. Controllare che non manchi l’alimentazione elettrica. funziona / non parte Appurare che la presa di corrente funzioni, provandola con un altro apparecchio come ad esempio una lampada. Verificare la corretta chiusura dell'oblò. - Page 24 L’utilizzo di detersivi ecologici senza fosfati Se l’inconveniente persiste o se si pensi che può produrre i seguenti effetti: ci sia un malfunzionamento, contattare immediatamente un nostro Centro Assistenza - acqua di scarico dei risciacqui più Tecnica Autorizzato. torbida: è un effetto legato alla presenza di zeoliti in sospensione che non ha effetti negativi sull’efficacia del risciacquo.
-
Page 25: Règles Environnementales
Merci d’avoir choisi une machine à laver Les déchets des équipements électriques et Hoover. Nous sommes certains qu’elle électroniques (DEEE) contiennent vous donnera entière satisfaction et substances polluantes peut prendra soin de votre linge, même délicat, entraîner des conséquences négatives pour jour après jour. -
Page 26: Règles Générales De Sécurité
1. RÈGLES GÉNÉRALES des instructions pour une utilisation en toute sécurité de l’appareil. Les DE SÉCURITÉ enfants ne doivent pas jouer Le produit est conçu pour être l avec l'appareil. Le nettoyage et utilisé dans un foyer domestique, l’entretien de l’appareil ne doit comme: pas être fait par des enfants sans - Le coin cuisine dans des... - Page 27 modèles équipés d’un N’exposez pas la machine à la l sélecteur). pluie, soleil intempéries. Le positionnement de l’appareil l doit permettre un accès facile à En cas de panne ou de l la prise de courant après dysfonctionnement: éteindre la installation.
-
Page 28: Installation
2. INSTALLATION Dévissez les 2 ou 4 vis "A" sur l le dos de l’appareil et retirer les 2 ou 4 cales "B" comme illustré sur la figure 1. min 4 cm +2,6 mt min 50 cm max 85 cm Poser les enjoliveurs “C”, livrés l... -
Page 29: Au Cas Où Votre Modèle Serait Fourni Avec L'accessoire
50 cm de hauteur et 75 cm. maximum du sol (figure 4). Si nécessaire, utilisez l’accessoire l courbe, pour vous aider à mieux fixer l’appareil et le support du tube d’évacuation. Au cas où votre modèle serait fourni avec l’accessoire: Pour pouvoir déplacer facilement le l... - Page 30 Raccordement à l’eau l Brancher le tuyau d’eau au robinet (figure 6). Utiliser uniquement le tuyau fournit avec l’appareil (ne pas réutiliser un tuyau d’une ancienne installation). l Certains modèles peuvent inclure une ou plusieurs des caractéristiques suivantes: l CHAUD ET FROID (figure 7): conduites d’eau avec connexion eau chaude et eau froide pour...
-
Page 31: Conseils Pratiques
3. CONSEILS PRATIQUES Un lavage chaud est-il nécessaire? l Eliminer les taches avec un détachant ou Conseils de chargement faire tremper les taches dans l'eau avant de la laver réduit la nécessité d'un ATTENTION : Lorsque vous triez le linge, programme lavage à... -
Page 32: Entretien Et Nettoyage
l 4. ENTRETIEN ET Débranchez la machine à laver. NETTOYAGE l Enlevez la bague sur le tuyau et le plier vers le bas afin de vider le reste d’eau. Pour nettoyer l’extérieur de la machine, utilisez un chiffon humide en évitant les l... -
Page 33: Guide D'utilisation Rapide
5. GUIDE D'UTILISATION 6. CONTRÔLES ET RAPIDE PROGRAMMES Cette machine adapte automatiquement le niveau de l'eau en fonction du type et de la quantité de linge. Ce système permet de diminuer la consommation d'énergie et réduit nettement les temps de lavage. Sélection du programme l... -
Page 34: Sélecteur De Programmes Avec Position Off
Touche DEPART/PAUSE ATTENTION: touchez l’écran lors Fermez la porte avant d’appuyer sur la branchement de la machine car elle touche DEPART/PAUSE. étalonne système durant premières secondes. Ceci pourrait l Appuyez sur cette touche pour démarrer engendrer un mauvais fonctionnement. le programme sélectionné. Si tel est le cas, veuillez débrancher puis brancher de nouveau la machine. - Page 35 - Appuyez touche DEPART sensible, pour lesquelles le moindre DIFFERE pour activer la fonction puis résidu de détergent peut causer des appuyez de nouveau pour définir un délai de irritations ou des allergies. 1 heure. Chaque pression supplémentaire l Il est conseillé d'utiliser la fonction retarde d’une heure jusqu’à...
-
Page 36: Verrouillage Des Commandes
Touche SELECTION TEMPERATURE La machine est dotée d'un appareil électronique spécial qui empêche les l Cette touche vous permet de changer la cycles d'essorage à vide ou lors de température du cycle de lavage. charges non équilibrées. Cela réduit le niveau sonore et les vibrations de la l... -
Page 37: Afficheur Digital
3) INDICATEURS SELECTION TEMPERATURE Afficheur digital témoins lumineux indiquent température de lavage du programme L’affichage Digital vous permet de visualiser sélectionné. température peut être en permanence l’état de la machine. modifiée à l’aide de la touche correspondant n’est possible d’augmenter température au-delà... -
Page 38: Indicateur De Vapeur
Wi-Fi, vous pouvez vous référer à la section "Download" site - détermine la durée du cycle de lavage; http://simplyfiservice.candy-hoover.com. 9) INDICATEUR DE VAPEUR - contrôle du rinçage en fonction du type de textile qui doit être lavé; Le témoin lumineux montre l’activation de la fonction vapeur. -
Page 39: L'appareil
ONE Fi EXTRA, chargez votre tambour, la lessive, l’adoucissant, fermez la porte et positionnez le sélectionneur sur la position ONE Fi EXTRA. A partir de ce moment vous pouvez contrôler votre appareil grâce à l’application Hoover Wizard. -
Page 40: Détergent
Coton Blanc 90° Comment activer le contrôle à distance via l’applicaiton Hoover Wizard (en utilisant une connection Wi-Fi). Si l’appareil n’est pas encore synchronisé, appuyez sur la touche DEPART/PAUSE, le cycle "Auto-hygiène" permettant de laver la cuve et le tambour va alors commencer. -
Page 41: Important
Veuillez lire ces informations La vitesse d’essorage peut également être * Capacité de chargement maximale de réduite pour correspondre aux exigences vêtements secs selon le modèle utilisé de certaines étiquettes de tissu ou dans le (voir le bandeau de commande). cas de tissus très délicats pour annuler complètement l’essorage. -
Page 42: Sélection Des Programmes
Tout Hygiène Sélection des programmes Grâce à la technologie ALL IN ONE, ce programme vous assure un lavage en profondeur tout optimisant machine dispose différents température de lavage et les phases de programmes et d’options pour répondre à rinçage, éliminant ainsi les allergènes et tous vos besoins et nettoyer différents types résidus lessiviels. - Page 43 ONE Fi EXTRA lavage. Il est également possible de réduire Comment activer le contrôle à distance encore la vitesse de rotation afin d’assurer l’applicaiton Hoover Wizard un repassage plus facile. utilisant connection Wi-Fi). l’appareil n’est pas encore synchronisé, Délicats...
-
Page 44: Préparation Lavage
l MAX - Le niveau maximum de détergent Préparation lavage est précisé sur le bac à produits. Ne dépassez pas ce niveau de remplissage. Ouverture/Fermeture tambour l Ouvrir la porte du lave-linge. l Quand les tissus présentent des l Ouvrir le tambour en appuyant sur le bouton tâches qui nécessitent d'être traitées (A), et positionner en même temps l'autre avec des produits blanchissants liquides,... -
Page 45: Dépannage Et Garanties
7. DÉPANNAGE ET GARANTIES Si vous constatez que votre lave-linge fonctionne mal, consultez le mini-guide ci-dessous qui vous indiquera commun les résoudre les problèmes communs. RAPPORTS D’ERREURS l Affichage Digital: le code d’erreur s’affiche avec la letter "E" (exemple: Erreur 2 = E2). l... -
Page 46: Autres Anomalies
AUTRES ANOMALIES Type d’anomalies Causes probables et résolutions Le lave-linge ne lance Assurez-vous que votre lave-linge est bien branché. Vérifiez que le produit est sous tension. cycle Assurez-vous que la prise de courant est bien sous tension en lavage. branchant un autre appareil électrique. La porte peut-être mal fermée. - Page 47 L'utilisation détergents écologiques Si le problème persiste ou si vous détectez sans phosphates (voir les informations qui une anomalie contactez immédiatement un figurent sur le paquet) peut provoquer les service client agréé. effets suivants: Il est recommandé d’utiliser des pièces détachées originales disponibles/vendues - Les eaux sales du rinçage peuvent être dans nos centres de service client agréés.
- Page 48 Wir freuen uns, dass Sie sich für ein Gerät aus Im Restmüll oder bei falscher Behandlung dem Hause Hoover entschieden haben – wir können diese der menschlichen Gesundheit und sind stolz Ihnen ein innovatives Sortiment der Umwelt schaden. Es ist daher sehr wichtig, an fortschrittlichen Produkten anbieten zu dass elektrische und elektronische Altgeräte...
-
Page 49: Generelle Sicherheitshinweise
physischen, sensorischen oder 1. GENERELLE geistigen Fähigkeiten oder ihrer SICHERHEITSHINWEISE Unerfahrenheit oder Unkenntnis Dieses Gerät ist ausschließlich l nicht in der Lage sind, die für den Haushaltsgebrauch konzipiert Waschmaschine sicher zu bedienen, bzw. für den haushaltsnahen dürfen die Waschmaschine nicht Gebrauch, wie z.B: ohne Aufsicht oder Anweisung durch - Teeküchen für das Personal von... - Page 50 Ventilatorenöffnungen, Bringen Sie keine Schnur an, l behindert. um die Maschine vorzuziehen. Das Gerät ist abgeschaltet, wenn l Setzen Sie das Gerät keinem l sich Referenzpunkt Regen, direktem Sonnenlicht oder dem Bedienknauf in der Position anderen Wetterelementen aus. AUS/OFF befindet. jeder Im Falle einer Störung schalten l...
-
Page 51: Installation
2. INSTALLATION Lösen Sie die 2 bzw. 4 Schrauben l "A" auf der Geräterückseite und entfernen die 2 bzw. 4 Distanzstücke "B" wie in Abbildung 1 gezeigt. min 4 cm +2,6 mt min 50 cm max 85 cm Anziehen mitgelieferten l... - Page 52 besser - in einer Mindesthöhe von 50 cm und höchstens 75 cm. vom Boden an einen festen Abfluß anschließen, dessen Durchmesser größer als der des Geräteschlauchs sein muß (Abbildung 4). Falls notwendig, benutzen Sie das l gebogene Zusatzteil um einen besseren Halt für das Abwasserrohr zu erreichen.
- Page 53 Wasseranschluss l Bitte das Gerät ausschließlich mit dem mitgelieferten Zulaufschlauch (keinesfalls alten Schlauch benutzen) Wasseranschluß verbinden (s. Abbildung 6). l Einige Modelle enthalten oder mehrere der folgenden Eigenschaften: HEIß&KALT (Abbildung Wasserverbindungseinstellungen mit heiß und kalt für höhere Energieeinsparungen. Verbinden Sie den grauen Schlauch mit dem Wasserhahn und den roten mit dem Heißwasserhahn.
-
Page 54: Praktische Tipps
3. PRAKTISCHE TIPPS Ist heißes Waschen erforderlich? l Das Vorbehandeln von Flecken kann ein Beladungstipps heißes Waschen ersetzen und man kann bis zu 50% Energie bei einem 60 Grad Waschgang sparen. WARNUNG: Beim Sortieren der Wäsche, beachten Sie folgende Punkte: Nachfolgend ein kurzer Ratgeber mit - Wurden metallische Objekte aus der Tipps... -
Page 55: Wartung Und Reinigung
l 4. WARTUNG UND Ziehen alle Stecker Maschine. REINIGUNG l Trennen Sie den Schlauch von dem Riegel und Um die Waschmaschine von außen zu füllen Sie das gesamte Wasser in eine Schüssel. reinigen, nutzen Sie ein feuchtes Tuch mit l Sichern Sie den Schlauch wieder mit den Riegeln. -
Page 56: Kurzanleitung
5. KURZANLEITUNG 6. STEUERUNG UND PROGRAMME Dieses Gerät verfügt über eine moderne Mengenautomatik, die automatisch die benötigte Wassermenge, den Energieverbrauch und die Waschdauer anpasst. Programmauswahl l Schalten Sie Ihr Gerät ein und wählen Sie das benötigte Programm aus. l Stellen wenn nötig eine... -
Page 57: Waschprogramm Abbrechen
Taste START/PAUSE WARNUNG: Berühren beim Einstecken des Geräts ZUERST das Bullauge schliessen und in keinem Fall das Display, da sich die dann die Taste START/PAUSE drücken. Maschine in den ersten Sekunden kalibriert. Sollte dies dennoch passieren, nehmen Sie das Gerät vom l... - Page 58 l Es wird empfohlen hierfür 20% der Taste STARTZEITVORWAHL vom Waschmittelhersteller empfohlenen Waschmitteldosis angegebenen l Der Programmstart kann zwischen 1 Waschmittelfach zu verwenden. Stunde Stunden verzögert werden. - AQUAPLUS l Bei Zuwahl dieser Option (nur in einigen l Um den Programmstart zu verzögern, Programmen verfügbar) wird...
- Page 59 - VERSCHMUTZUNGSGRAD Eine Überdosierung von Waschmittel l Sobald das Programm ausgewählt wurde, kann zu übermäßiger Schaumbildung wird die eingestellte Waschzeit für dieses führen. Wenn das Gerät übermäßigen Programm automatisch angezeigt. Schaum entdeckt, kann Schleuderphase aussetzen oder die l Mit dieser Option haben Sie je nach Dauer des Programms verlängern und Verschmutzungsgrad Stoffs...
- Page 60 l Warten bis die Anzeige TÜRVERRIEGELUNG TASTENSPERRE erloschen ist, bevor die Tür geöffnet wird. l Drücken Sie gleichzeitig die Tasten WASCHTEMPERATURWAHL 2) ANZEIGE SCHLEUDERDREHZAHLWAHL SCHLEUDERDREHZAHLWAHL für In der Anzeige erscheint die gewählte ungefähr 3 Sekunden, dann können die Schleuderdrehzahl des Programmes. Diese Tasten der Maschine gesperrt werden.
- Page 61 Wäsche Funktionalitäten und den Kurzanleitungen zur Einbindung in das Heimnetzwerk finden Sie im Bereich "Download" oder unter - Anzahl und Intensität der Spülgänge http://simplyfiservice.candy-hoover.com. nach Art und Menge des eingesetzten Waschmittels 9) DAMPF-ANZEIGE Die Kontrollleuchte zeigt die Auswahl der - Trommeldrehrhythmus nach Art und entsprechenden Option.
- Page 62 Logo von ONE Fi EXTRA befindet dank Wi-Fi erlaubt, das Gerät via App aus (siehe Abbildung hier unten). der Ferne zu steuern. ANMELDUNG DES GERÄTES (VIA APP) l Laden Sie die Hoover Wizard App auf Ihr Gerät. Hoover Wizard gleichermaßen für...
- Page 63 Programmübersicht (MAX.) WASCHMITTEL PROGRAMM (siehe Steuertafel) (MAX.) 1 o 2 All In One 20°C 20° All Hygiene 60°C 60° All In One 59 Min. 40° 30° Kurz 30° 14-30-44 Min. 40° Dunkle Wäsche 40° Wolle 40° Handwäsche & Seide 30° Spülen Abpumpen &...
- Page 64 Bitte beachten Sie folgende Hinweise: Die Schleuderdrehzahl kann je nach Modell * Die maximale Beladungskapazität (trockene und den Angaben auf dem Wäscheetikett auch Kleidung lt. Normtest) hängt von dem angepasst bzw. das Endschleudern komplett jeweiligen Gerätemodell ab (s. Bedienblende). unterbunden werden. Die Steuerung geschieht dabei über die Taste SCHLEUDERDREHZAHLWAHL.
- Page 65 l Große, dunkle Wäschestücke, wie z.B. Programmauswahl Jeans oder Handtücher, sollten stets separat gewaschen werden. Gerät bietet eine Vielzahl Programmen Optionen, l Keine NICHT FARBECHTEN Kleidungsstücke verschiedene Textilarten allen mitwaschen. Verschmutzungsgraden optimal zu reinigen. All Hygiene 60°C Dank der ALL IN ONE-Technologie und ALL IN ONE-Technologie durch optimierte...
- Page 66 Spülen Mischwäsche Es werden 3 Spülgänge mit Zwischenschleudern Für pflegeleichte Textilien aus Baumwolle, (Schleuderdrehzahl kann mit der Taste Leinen, Synthetik oder Mischgewebe SCHLEUDERDREHZAHLWAHL reduziert reduzierter Waschtemperatur bzw. oder ganz abgestellt werden) durchgeführt. Schleuderdrehzahl. Baumwolle Effizientestes Waschprogramm (kombinierter Abpumpen & Schleudern Energie-/Wasserverbrauch) für die Reinigung nachträglichen Schleudern.
- Page 67 l Fach ist für Weichspüler, Duftmittel, Waschvorbereitung Stärke und spezielle Zusatzmittel (wie z.B. Stärke und Waschblau) vorgesehen. Trommel öffnen / schließen l Tür des Waschautomaten öffnen. l Die Beschriftung MAX am Waschmittelbehälter l Die Trommel beim Betätigen des Knopfes gibt die maximale Befüllung mit Waschmittel (A) öffnen, und gleichzeitig die andere an.
-
Page 68: Problemlösungen Und Garantie
7. PROBLEMLÖSUNGEN UND GARANTIE Wenn Sie der Meinung sind, das Gerät würde nicht korrekt funktionieren, dann finden Sie in der beigelegten Kurzanleitung einige praktische Tipps, wie die häufigsten Probleme zu beheben sind. FEHLER-BERICHT l Geräte mit Display: die Störung wird durch den Buchstaben E zusammen mit einer Nummer angezeigt (Beispiel: Error 2 = E2) l... - Page 69 SONSTIGE AUFFÄLLIGKEITEN Problem Mögliche Ursachen und praktische Lösungen Die Waschmaschine Stellen Sie sicher, dass das Gerät an einer funktionierenden Steckdose angeschlossen ist. geht nicht/startet nicht. Stellen Sie sicher, dass das Gerät eingeschaltet ist. Stellen Sie sicher, dass die Steckdose funktioniert, und testen Sie das mit einem anderen Gerät (eine Lampe) Es kann sein, dass die Tür nicht korrekt geschlossen ist: öffnen und schließen Sie es noch einmal.
- Page 70 Nutzung phosphatfreien Wenn das Problem fortbesteht oder wenn Waschmitteln können folgende Dinge Sie einen technischen Defekt vermuten, resultieren: kontaktieren Sie umgehend ein autorisiertes Kundendienstzentrum. Es empfiehlt sich immer Originalersatzteile - Trüberes Abwasser: Dieser Effekt zu benutzen, die in unseren autorisierten bedingt durch suspendierten...
-
Page 71: Environmental Conditions
Thank-you for choosing a Hoover washing Environmental conditions machine. We are proud to always offer new, innovative technologically This appliance is marked according to advanced products, with a complete range the European directive 2012/19/EU home appliances ensure true on Waste Electrical and Electronic assistance in your daily routine. -
Page 72: General Safety Rules
1. GENERAL SAFETY in a safe way and understand the hazards involved. RULES Children shall not play with the This appliances is intended to l appliance. Cleaning and user be used in household and maintenance shall not be made similar applications such as: by children without supervision. - Page 73 After installation, the appliance In the event of fault and/or l l must be positioned so that the malfunction, turn plug is accessible. washing machine, close the water faucet and do not tamper The maximum load capacity of l with the appliance. dry clothes depends on the Immediately contact...
-
Page 74: Installation
2. INSTALLATION Remove the 2 or 4 transportation l screws (A) on the back and remove the 2 or 4 flat washers, rubber bungs and plastic spacer tubes (B) as illustrated in figure 1. min 4 cm +2,6 mt min 50 cm max 85 cm Fit the trims provided "C"... - Page 75 than that of the outlet pipe and at a height of min. 50 cm. and a maximum of 75 cm. from the floor (fig. 4). If necessary, use the curved l accessory to attach and support the outlet pipe more securely. If your model offers this function: To move the washing machine l...
-
Page 76: Hydraulic Connections
Hydraulic connections l Connect the water hose to the water supply tap (fig. 6) only using the hose supplied with the appliance (do not reuse old hose-sets). l Some models may include one or more of the following features: l HOT&COLD (fig. -
Page 77: Practical Tips
3. PRACTICAL TIPS Is a hot wash required? l Pretreat stains with stain remover or soak Load tips dried in stains in water before washing to reduce the necessity of a hot wash programme. WARNING: when sorting laundry, make Save up to 50% energy by using a 60°C sure: wash programme. -
Page 78: Maintenance And Cleaning
l 4. MAINTENANCE AND Unplug the washing machine. CLEANING l Detach the tube from the strap and lower it, fully draining water into a bowl. To clean the washing machine exterior, use a damp cloth, avoiding abrasives, alcohol and/or l Secure the drain tube with the strap when solvents. -
Page 79: Quick User Guide
5. QUICK USER GUIDE 6. CONTROLS AND PROGRAMS This washing machine automatically adjusts the level of the water to the type and quantity of washing. This system gives a reduction in energy consumption and a saving in washing times. Program selection l... -
Page 80: Start/Pause Button
START/PAUSE button WARNING: Don’t touch the display while inserting Close the door BEFORE selecting the plug because machines button START/PAUSE. calibrates the systems during the first seconds: touching the display, the machine couldn’t work property. In l Press to start the selected cycle. this case, remove the plug and repeat the operation. - Page 81 l - AQUAPLUS To delay the start use the following procedure: l This option (available only in some programmes) allows you to wash the load - Select the required programme. in a much larger quantity of water and this, together with the new combined - Press the delay start button once to action of the drum rotation cycles, where activate it (h00 appears on the display)
-
Page 82: Temperature Selection
l This option allows you to choose between The machine is fitted with a special 3 levels of wash intensity modifying the electronic device, which prevents the length of the programme, depending on spin cycle without load how much the fabrics are soiled (can only particularly unbalanced load. ... - Page 83 3) WASH TEMPERATURE INDICATOR Digital Display LIGHTS This shows the washing temperature of the The display’s indicator system allows you to selected programme that can be changed be constantly informed about the status of (where allowed) by the relevant button. the machine.
- Page 84 Wi-Fi, please load in the drum and in the first minutes refer to the "Download" section on of the wash it: http://simplyfiservice.candy-hoover.com. - adjusts the amount of water required; - determines the length of the wash cycle; 9) STEAM INDICATOR LIGHT...
- Page 85 App, thanks to Wi-Fi function. on the appliance (as illustred below). MACHINE ENROLLMENT (ON APP) l Download the Hoover Wizard App on your device. The Hoover Wizard App is available for devices running both Android and iOS,...
- Page 86 Table of programmes (MAX.) DETERGENT PROGRAMME (see control panel) (MAX.) 1 o 2 All In One 20°C 20° All Hygiene 60° All In One 59 Min. 40° 30° Rapid 30° 14-30-44 Min. 40° Dark Colours 40° Wool 40° Handwash & Silk 30°...
- Page 87 Please read these notes: The spin speed may also be reduced, to * Maximum load capacity of dry clothes, match any guidelines suggested on the according to the model used (see control fabric label, or for very delicate fabrics panel). cancel the spin completely this option is available with a spin speed button.
- Page 88 Designed for cotton garments, it provides a Programmes selection 60°C temperature and is recommended for a reduced load. To clean different types of fabrics and various levels of dirt, the washing machine All In One 59 Min. has specific programs to meet every need This programme allows you to wash mixed of washing (see table of programmes).
- Page 89 Delicates Whites This program has reduced periods of drum Made to have a perfect washing. The final rotation during the cycle and is particularly spin at maximum speed gives more efficient suitable or washing delicate fabrics. The removal. wash cycle and rinses are carried out with a ONE Fi EXTRA high level of water to ensure the best Position that you have to select when you...
- Page 90 l The compartment is for fabric Preparing the wash conditioners, scenting agents and special additives such as starch, blueing, etc. Opening/ closing the drum l Open the washing machine lid. l MAX - on the detergent case is underlined the maximum level of detergent to be used. l...
-
Page 91: Throubleshooting And Warranty
7. THROUBLESHOOTING AND WARRANTY If you believe the washing machine is not working correctly, consult the quick guide provided below which includes some practical tips on how to fix the most common problems. ERROR CODE FORMAT l Models with a display: the error is shown by a number preceded by the letter “E” (example: E2 = Error 2). - Page 92 OTHER ANOMALIES Problem Possible causes and practical solutions The washing machine Make sure the product is plugged into a working supply socket. Make sure power is on. does not work / start Make sure the wall socket is working, testing it with another appliance such as a lamp.
- Page 93 The use of ecological detergents without If the problem persists or if you suspect a phosphates may cause the following effects: malfunction, immediately contact Authorised Customer Service Centre. - cloudier rinse drain water: This effect is tied to the suspended zeolites which do It is always recommended to use original not have negative effects on rinse spare parts, that are available at our...
- Page 94 fk hldsk...
- Page 95 fk hldsk...