
Manuels Connexes pour Scale House NCS3K


Sommaire des Matières pour Scale House NCS3K
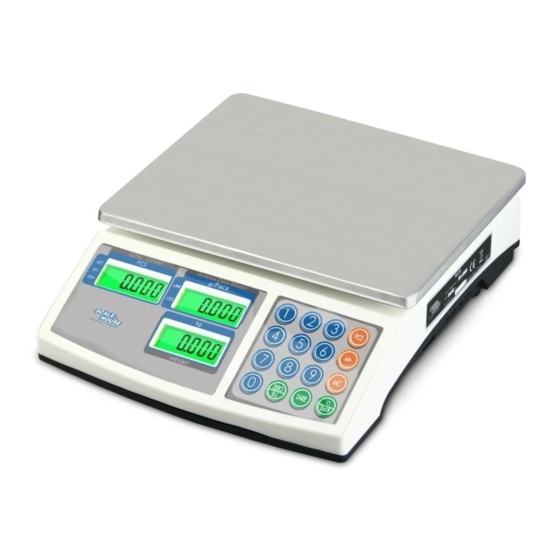
- Page 1 COUNTING SCALE ZÄHLWAAGE BALANCE DE COMPTAGE BILANCIA CONTAPEZZI USER MANUAL BENUTZERHANDBUCH MANUEL D’UTILISATION MANUALE OPERATIVO...
- Page 2 SPRACHEN LANGUAGES LANGUES LINGUE DEUTSCH ........................ 3 ENGLISH ....................... 12 FRANÇAIS ......................21 ITALIANO ....................... 30...
-
Page 3: Table Des Matières
DEUTSCH INHALTSVERZEICHNIS 1 EINLEITUNG ..................................4 2 TECHNISCHE HAUPTEIGENSCHAFTEN .......................... 4 3. INSTALLATION .................................. 5 3.1 STROMVERSORGUNG UND INBETRIEBNAHME ....................5 3.2 BATTERIEBETRIEB..............................5 4. TASTEN UND ANZEIGEN AUF DEM FRONTPANEL ......................6 4.1 FUNKTION DER TASTEN ............................6 4.2 FUNKTION DER KONTROLLLEUCHTEN ......................... 7 5. -
Page 4: Einleitung
Halten Sie die Waage sauber. Stapeln Sie keine Waren auf die unbenutzte Waage. 2. TECHNISCHE HAUPTEIGENSCHAFTEN Version Schale Wägebereich Ziffernschritt [g] Auflösung g CE-M (Abmessungen mm) Ziffernschritt g NCS3K 218x267 0,01 NCS6K 218x267 0,02 NCS15K 218x267 0,05 NCS30K 218x267 0,10 Betriebstemperatur: 0°C - 40°C / 32°F - 104°F. -
Page 5: Installation
3. INSTALLATION a) Die Verpackung öffnen. b) Nivellieren Sie die Waage mittels der Stellfüße bis die Libelle im Zentrum ist. Ein stabiler Standort der Waage ist sehr wichtig. ALLE ECKEN MÜSSEN GLEICHMÄSSIG STEHEN. Überprüfen Sie gründlich, dass alle Füße auf dem Boden feststehen, und dass die Waage bei Ecklast nicht instabil ist (Die Waage darf nicht „kippeln“). -
Page 6: Tasten Und Anzeigen Auf Dem Frontpanel
4. TASTEN UND ANZEIGEN AUF DEM FRONTPANEL 4.1 TASTENFUNKTIONEN - Löschen des Brutto-Gewichts, bis +/-10% des max. Wägebereichs. ZERO-B.L. - Bei kurzem drücken, erlaubt es das Einstellen des Hinterleuchtungsmodus (Siehe Abschnitt 5.10). - Abzug der Tarawerte und Änderung von Brutto- auf Netto-Modus. TARE - Bei längerem drü... -
Page 7: Funktionen
4.2 SYMBOL-FUNKTION SYMBOL FUNKTION 0 Zeigt an, dass das Brutto-Gewicht angezeigt wird. Zeigt an, dass totalisiert wurde. Zeigt an, dass das Netto-Gewicht angezeigt wird. LOW-PCS Zeigt an, dass das Referenzgewicht zu gering ist. Erneuten Vorgang starten. LOW-APW Zeigt an, dass das Stückgewicht <... -
Page 8: Überlast Warnung
5.4 ÜBERLAST WARNUNG Bitte legen Sie keine Gegenstände auf die Waage, welche die maximale Kapazität übersteigen. Wenn “- - - - -“ angezeigt wird und ein piepen ertönt, nehmen Sie den Gegenstand von der Schale um eine Beschädigung der Wägezelle zu vermeiden. 5.5 STÜCKZÄHLUNG Bei der Stückzählung können Sie entweder Teile in einen Behälter einzählen oder Teile aus einem Behälter herauszählen. -
Page 9: Setup
Um sich den im Speicher abgelegten Gesamtwert anzeigen zu lassen, drücken Sie die M+ Taste, wenn die Waage NULL ist (Zero Anzeige leuchtet). Zum beenden eine beliebige Taste drücken. Um den summierten Wert zu löschen, drücken Sie während dieser angezeigt wird oder der Normalansicht die MC Taste. -
Page 10: Gewichtsfilter
6.5 GEWICHTSFILTER 1. Drücken Sie PCS und 5 während des Anschaltens im Selbstcheck. 2. Mit TARE können Sie die möglichen Filter auswählen: SPd 0, SPd 1, SPd 2. Je höher der Filterwert, desto höher ist die Reaktion. 3. M+ drücken zum bestätigen. 6.6 HINTERLEUCHTUNG Durch lange drücken der ZERO-B.L Taste Scrollen Sie durch die folgenden Funktionsmodi der Hintergrundbeleuchtung;... -
Page 11: Konformitätserklärung
KONFORMITÄTSERKLÄRUNG Dieses Gerät entspricht den erforderlichen Standards und Normen bezüglich der anzuwendenden Europäischen Vorschriften. Die Konformitätserklärung ist auf der Webseite www.scalehouse.it einsehbar. GARANTIE Die ZWEIJÄHRIGE Garantiezeit beginnt mit dem Tag der Lieferung des Gerätes. Sie beinhaltet kostenlose Ersatzteile und Arbeitszeiten für Reparaturen, wenn das GERÄT FREI HAUS AN DEN SITZ DES VERKÄUFERS ZURÜCKGESENDET WIRD. - Page 12 ENGLISH INDEX 1. INTRODUCTION ................................13 2. MAIN TECHNICAL SPECIFICATIONS ..........................13 3. INSTALLATION ................................. 14 3.1 POWER SUPPLY AND START-UP ........................... 14 3.2 BATTERY POWERED .............................. 14 4. FRONT PANEL KEYS AND INDICATORS ........................15 4.1 FUNCTION OF THE KEYS ............................15 4.2 FUNCTION OF THE INDICATORS ...........................
-
Page 13: Introduction
Do not stack material on the scales when they are not in use. 2. MAIN TECHNICAL SPECIFICATIONS Model Plate Capacity kg Division g Resolution g CE-M Division g (dimensions in mm) NCS3K 218x267 0,01 NCS6K 218x267 0,02 NCS15K 218x267 0,05... -
Page 14: Installation
3. INSTALLATION a) Unpack then product. b) Level the platform by adjusting the adjustable feet until the bubble is in the centre of the level. The stability of the platform is very important. ALL THE CORNERS MUST REST IN A UNIFORM WAY. Carefully check that all feet fully rest on the ground and that the platform, loaded on the corner, is not unstable (if a corner is not resting on the ground its relative foot is easier to turn). -
Page 15: Front Panel Keys And Indicators
4. FRONT PANEL KEYS AND INDICATORS 4.1 FUNCTION OF THE KEYS - It clears the displayed gross weight if it’s within +/- 2% of the total capacity. ZERO-B.L. - If pressed at length it allows the backlight set (see section 5.10). - It executes the semiautomatic tare. -
Page 16: Function Of The Indicators
4.2 FUNCTION OF THE INDICATORS INDICATOR FUNCTION 0 Indicates that the weight detected on the weighing system is near zero. Indicates that total value is greater than 0. Indicates that the displayed weight is a net weight. LOW-PCS Indicates that an insufficient number of samples was used in order to determine an accurate count (see section 5.5.3). -
Page 17: Counting Pieces
5.5 COUNTING PIECES Through the reference function it’s possible to use the scale as a piece counter. 5.5.1 COUNTING PROCEDURE The operations to be carried out are the following: Place the empty container on the scale and press TARE to tare it. Check that the zero is on the display Type the quantity of pieces chosen for the SAMPLE with the keyboard;... -
Page 18: Set-Up
NOTE: With approved instrument the accumulation functions with a minimum weight of 20d. The maximum total value which may be viewed is 99999. Once reached these limits the message “- OF -” will appear on the display. The maximum total value which may be accumulated is 99999. Once reached these limits, one should clear the total;... -
Page 19: Display Backlight
6.6 DISPLAY BACKLIGHT By keeping pressed the ZERO-B.L. key, the display will scroll the possible activation modes; release the key when the desired functioning is displayed: backlighting always off backlighting always on. AUTO backlighting on when the weight is unstable or when a key is pressed. The backlighting remains active for 5 seconds. -
Page 20: Recycling Instruction
RECYCLING INSTRUCTION The crossed-out wheeled bin on the product means that at the product end of life, it must be taken to separate collection or to the reseller when a new equivalent type of equipment is purchased. The adequate differentiated refuse collection in having the product recycled, helps to avoid possible negative effects on the environment and health and supports the recycling of the materials of which the equipment is made. - Page 21 FRANÇAIS INDEX 1. INTRODUCTION ................................22 2. CARACTÉRISTIQUES TECHNIQUES PRINCIPALES ....................22 3. INSTALLATION ................................23 3.1 ALIMENTATION ET ALLUMAGE ..........................23 3.2 ALIMENTATION PAR BATTERIE ..........................23 4. TOUCHES DU CLAVIER ET AFFICHEURS ........................24 4.1 FONCTIONS DES TOUCHES ..........................24 4.2 FONCTIONS DES INDICATEURS ...........................
-
Page 22: Introduction
Ne pas laisser de matériaux sur la balance en dehors de son utilisation. 2. CARACTÉRISTIQUES TECHNIQUES PRINCIPALES Version Plateau Portée kg Division g Résolution g Division CE-M g (Dimensions en mm) NCS3K 218x267 0,01 NCS6K 218x267 0,02 NCS15K 218x267 0,05... -
Page 23: Installation
3. INSTALLATION a) Enlevez l'emballage. b) Mettre la balance de niveau en tournant les pieds à vis jusqu'à ce que le niveau à bulle positionné sous le plateau soit au centre. La stabilité de la balance est très importante. TOUS LES ANGLES DOIVENT REPOSER UNIFORMÉMENT SUR LA BASE. Veillez à ce que tous les pieds opposent une résistance à... -
Page 24: Touches Du Clavier Et Afficheurs
4. TOUCHES DU CLAVIER ET AFFICHEURS 4.1 FONCTION DES TOUCHES - Met à zéro le poids brut affiché si le poids est compris entre +/- 2 % de la portée total. ZERO-B.L. - Permet de configurer le rétro éclairage, si elle est appuyée longuement (voir paragraphe 5.10). - Exécute la tare semi automatique. -
Page 25: Fonctions Des Indicateurs
4.2 FONCTION DES INDICATEURS INDICATEUR FONCTION 0 Indique que le poids relevé du système de pesage se trouve en proximité du zéro. Indique que la valeur du total est supérieure à 0. Indique que la valeur affichée est un poids net. LOW-PCS Indique que l’on a employé... -
Page 26: Message De ''Overload
pas dépasser la portée maximale de l'instrument. Pour effacer la valeur de la tare, déchargez la balance et appuyez sur TARE à nouveau. 5.4 MESSAGE D’ ‘’OVERLOAD’’ Il est recommandé de ne pas dépasser la capacité maximale de la balance, quand le message “- - - - -” s'affiche, accompagné... -
Page 27: Menu De Setup
totalisation, le symbole "M +" est activé. Retirez le poids jusqu'à ce que la balance ne retourne pas à zéro et retourne à l'affichage normal, continuez jusqu'à ce que tous les poids ou les pièces aient été totalisées. Pour afficher le nombre total de pièces totalisées, appuyez sur la touche M+ lorsque la balance est à zéro (sur indication de zéro allumé). -
Page 28: Filtre De Pesage
4. Modifiez la valeur via le clavier numérique et confirmez en appuyant sur la touche M+. 5. Une fois validée la valeur, la balance retourne en mode pesée. 6.5 FILTRE DE PESAGE 1. Appuyez au même temps sur les touches PCS et 5 pendant le pesage normal. 2. -
Page 29: Déclaration De Conformité
DÉCLARATION DE CONFORMITÉ Ce dispositif est conforme aux standards et aux normes et règlements européens à appliquer. La Déclaration de Conformité est disponible à l’adresse Internet www.scalehouse.it. GARANTIE La garantie est de DEUX ANS à compter de la date de livraison de l'instrument, et couvre gratuitement la main d'œuvre et les pièces de rechange éventuelles pour des INSTRUMENTS RENDUS FRANCO SIEGE DU VENDEUR et en cas de pannes NON réparables dues au client (par exemple en cas d'une mauvaise... - Page 30 ITALIANO INDICE 1. INTRODUZIONE ................................31 2. PRINCIPALI CARATTERISTICHE TECNICHE ........................ 31 3. INSTALLAZIONE ................................32 3.1 ALIMENTAZIONE E ACCENSIONE ......................... 32 3.2 ALIMENTAZIONE A BATTERIA ..........................32 4. TASTI E INDICATORI DEL PANNELLO FRONTALE....................... 33 4.1 FUNZIONE DEI TASTI ............................. 33 4.2 FUNZIONE INDICATORI ............................
-
Page 31: Introduzione
Mantenere pulita le bilancia. Non lasciare materiale sulla bilancia quando non è utilizzata. 2. PRINCIPALI CARATTERISTICHE TECNICHE Modello Piatto Portata kg Divisione g Risoluzione g Divisione CE-M g (dimensioni in mm) NCS3K 218x267 0,01 NCS6K 218x267 0,02 NCS15K 218x267 0,05 NCS30K... -
Page 32: Installazione
3. INSTALLAZIONE a) Togliere l'imballo. b) Livellare la piattaforma agendo sui piedini a vite fino a che la bolla di livello non è al suo centro. Riveste molta importanza la stabilità della piattaforma. TUTTI GLI ANGOLI DEVONO APPOGGIARE IN MODO UNIFORME. Controllare con cura che tutti i piedini oppongano resistenza al suolo e che la piattaforma, caricata in angolo, non sia instabile (se un angolo non appoggia il relativo piedino è... -
Page 33: Tasti E Indicatori Del Pannello Frontale
4. TASTI E INDICATORI DEL PANNELLO FRONTALE 4.1 FUNZIONE DEI TASTI - Azzera il peso lordo visualizzato, se esso rientra nel +/- 2% della portata totale. ZERO-B.L. - Premuto a lungo permette impostazione della retroilluminazione (vedere paragrafo 5.10). - Esegue la tara semiautomatica. TARE - Premuto a lungo permette la modifica della zona di gravità... -
Page 34: Funzione Indicatori
4.2 FUNZIONE INDICATORI INDICATORE FUNZIONE 0 Indica che il peso rilevato dal sistema di pesatura si trova in prossimità dello zero. Indica che il valore di totale è maggiore di 0. Indica che il valore visualizzato è un peso netto. LOW-PCS Indica che è... -
Page 35: Conteggio Pezzi
5.5 CONTEGGIO PEZZI Tramite la funzione di referenza è possibile utilizzare la bilancia come contapezzi. 5.5.1 PROCEDURA DI REFERENZA Le operazioni da eseguire sono le seguenti: 1) Caricare sulla bilancia il contenitore vuoto, se esiste, e premere TARE per metterlo in tara. 2) Assicurarsi che la bilancia sia a zero, e introdurre la quantità... -
Page 36: Setup
NOTA: Con strumento omologato la totalizzazione funziona con un peso minimo di 20d. Il valore massimo di totale visualizzabile per i pezzi è 99999. Raggiunto questi limiti verrà visualizzato il messaggio “- OF -” sul display. Il valore massimo di totale accumulabile per i pezzi è 99999. Raggiunto questi limiti, occorre azzerare il totale; premendo il tasto M+ infatti, verrà... -
Page 37: Messaggi
6.6 RETROILLUMINAZIONE DISPLAY Premendo il tasto ZERO-B.L, il display scorre i possibili modi di attivazione; rilasciare il tasto quando è visualizzato il funzionamento desiderato: retroilluminazione sempre spenta retroilluminazione sempre accesa. AUTO retroilluminazione accesa solo quando il peso è maggiore di 0 o quando si preme un tasto. La retroilluminazione rimane attiva per 5 secondi. -
Page 38: Istruzioni Per Lo Smaltimento
ISTRUZIONI PER LO SMALTIMENTO Il simbolo del cassonetto barrato riportato sul prodotto, indica che il prodotto alla fine della propria vita utile deve essere conferito agli idonei centri di raccolta differenziata, oppure riconsegnato al rivenditore al momento dell’acquisto di un nuovo prodotto equivalente.