Table des Matières

Sommaire des Matières pour Blackhawk ROKEN 1000K
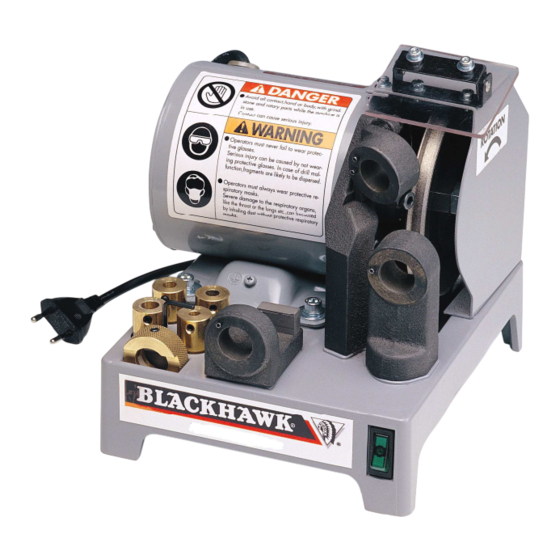
- Page 1 BST1000KM3L REV : FEB 2010 ROKEN 1000K Part Number : BST1000K Référence : BST1000K Bestellnummer : BST1000K INSTRUCTIONS MANUAL (ORIGINAL INSTRUCTIONS) NOTICE D’INSTRUCTIONS (NOTICE ORIGINALE) BETRIEBSANLEITUNG (ORIGINALBETRIEBSANLEITUNG)
- Page 2 _________________________________________ROKEN 1000_____________________________________...
-
Page 3: Table Des Matières
_________________________________________ROKEN 1000_____________________________________ TABLE OF CONTENTS – TABLE DES MATIERES – INHALTSVERZEICHNIS Page WARNINGS – MISES EN GARDE – WARNHINWEISE 1) BEFORE AND DURING USE – AVANT ET PENDANT L’UTILISATION – VOR UND WÄHREND DER BENUTZUNG 2) DURING USE – PENDANT L’UTILISATION – WÄHREND DER BENUTZUNG 3) AFTER USE –... - Page 4 _________________________________________ROKEN 1000_____________________________________ I) Warnings 1) BEFORE AND DURING USE • Wear protective glasses to avoid any metal projections. • Wear a respiratory mask to avoid inhaling metal particles. • Check your clothes and rectify them if necessary. There must be no risk for them to be caught by the machine. (Tie, sleeves, etc.) •...
- Page 5 _________________________________________ROKEN 1000_____________________________________ I) Mises en garde 1) AVANT ET PENDANT L’UTILISATION • Utilisez des lunettes de protection pour vous préserver des éventuelles projections métalliques. • Portez un masque respiratoire pour éviter d’inhaler des poussières métalliques. • Contrôlez et, si nécessaire, rectifier vos vêtements afin qu’ils ne puissent être happés par la meule. (Cravate, manches, etc.) •...
- Page 6 _________________________________________ROKEN 1000_____________________________________ I) Warnhinweise 1) VOR UND WÄHREND DER BENUTZUNG • Tragen Sie eine Schutzbrille zum Schutz vor möglichen Metallspritzern. • Tragen Sie eine Atemmaske, um keinen Metallstaub einzuatmen. • Überprüfen Sie ihre Kleidung und ändern Sie sie gegebenenfalls. Die Kleidung darf nicht von der Schleifscheibe erfasst werden.
-
Page 7: Description Of The Grinder And The Standard Accessories
_________________________________________ROKEN 1000_____________________________________ II) Description of the grinder and the standard accessories Description de l’affûteuse et de ses accessoires Beschreibung von Schleifmaschine und Standardzubehör 1) DESCRIPTION OF PARTS – DENOMINATION DES COMPOSANTS – BEZEICHNUNG DER TEILE Support 2: point angle Plastic protective plate Support 2 : angle de pointe Glace plastique de protection Halterung 2: Spitzenwinkel... -
Page 8: Operating - Utilisation - Benutzung
_________________________________________ROKEN 1000_____________________________________ III) Operating – Utilisation – Benutzung 1) ADJUSTMENT – REGLAGE – EINSTELLUNG Choose the holder cylinder corresponding to the size of the drill to be sharpened. Prendre le cylindre de maintien correspondant au diamètre du foret à affûter. Wählen Sie den Haltezylinder entsprechend dem Durchmesser des zu schleifenden Bohrers. -
Page 9: First Grinding - Premier Affutage - Erstes Schleifen
_________________________________________ROKEN 1000_____________________________________ 2) FIRST GRINDING – PREMIER AFFUTAGE – ERSTES SCHLEIFEN Switch the machine on to start the rotation of the grindstone. Appuyer sur l’interrupteur pour la mise en rotation de la meule diamantée. Betätigen Sie den Schalter, um die Rotation der Diamant-Schleifscheibe zu starten. Insert the holder + drill + holder ring in support 1 (sharpening angle), so that the drill is in contact with the grindstone. -
Page 10: Second Grinding - Deuxieme Affutage - Zweites Schleifen
_________________________________________ROKEN 1000_____________________________________ Hold the holder ring against support 1. Turn the holder ring left and right as far as the pin will allow you. Repeat this until you cannot hear the grinding noise any longer. Faites pivoter la bague de guidage à droite et à gauche à fond contre la butée, en la maintenant délicatement poussée jusqu’à... -
Page 11: Adjustment Of The Stroke Of The Head Of Support 2, Point Angle
_________________________________________ROKEN 1000_____________________________________ 180° Give the composition a ½ turn (180°), until the 2 pins fit into the second of the two grooves on the holder ring. Faire pivoter l’assemblage de 180°, les butées du support 2 doivent être introduites dans la 2 ème encoche de la bague de guidage. -
Page 12: Maintenance - Maintenance - Wartung
_________________________________________ROKEN 1000_____________________________________ IV) Maintenance – Maintenance – Wartung 1) REPLACING THE GRINDSTONE – REMPLACEMENT DE LA MEULE – AUSWECHSELN DER SCHLEIFSCHEIBE Loosen the 3 screws with a 3mm hexagon wrench (not supplied) and remove the grindstone’s metal housing. Dévisser les 3 vis de fixation du carter métallique à l’aide d’une clé Allen de 3mm (non fournie). Entfernen Sie die 3 Befestigungsschrauben vom Metall-Schutzgehäuse mit einem 3mm Inbusschlüssel (ist nicht im Lieferumfang). -
Page 13: Spare Parts - Pieces De Rechange - Ersatzteile
_________________________________________ROKEN 1000_____________________________________ V) Spare parts – Pièces de rechange – Ersatzteile 1) EXPLODED VIEW – VUE ECLATEE – EXPLOSIONSZEICHNUNG... - Page 14 _________________________________________ROKEN 1000_____________________________________ 2) PART NUMBERS AND DESCRIPTIONS – REFERENCES ET DESCRIPTION DES PIECES – BESTELLNUMMERN UND BEZEICHNUNG DER TEILE DESCRIPTION DESCRIPTION BEZEICHNUNG BST1000K01 MOTOR MOTEUR MOTOR BST1000K02 GRINDER MEULE SCHLEIFSTEIN BST80004 GRINDER COVER CARTER DE PROTECTION ABDECKUNG 2nd GRINDING SUPPORT 2ème SUPPORT DE POLISSAGE 2er SCHLEIFSUPPORT BST1000K04...
- Page 15 _________________________________________ROKEN 1000_____________________________________...
- Page 16 BP 5 – 67026 Strasbourg Cedex - F RANCE Tel: +33 3 88 65 76 30 – Fax: +33 3 88 65 76 51 – E-Mail : g-mehl@blackhawk.fr BLACKHAWK SA FRANCE – BENELUX BP 5 – 67026 Strasbourg Cedex – F RANCE Tel: 03 88 65 76 30 –...