Publicité
Les langues disponibles
Les langues disponibles
Liens rapides
OPTISCHE MESSTECHNIK
OPTICAL MEASURING SYSTEMS
SYSTEMES DE MESURE OPTIQUE
Rue Gurnigel 48
CH-2501 Bienne
Bedienungsanleitung • Mode d'emploi • Instruction
Projektoren / Projecteurs / Projectors
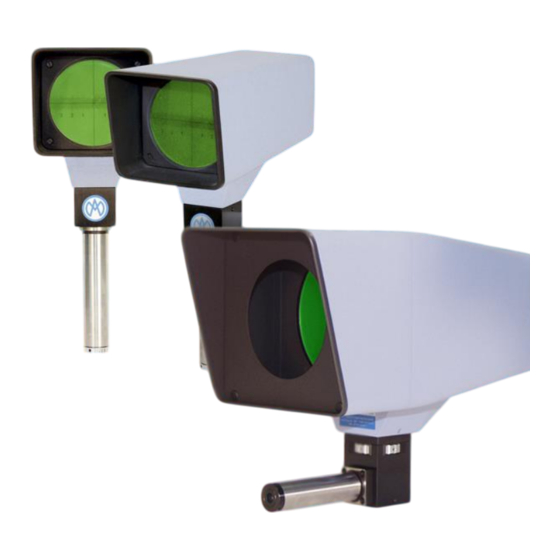
MA 200 / 220 / 230 / 240 / 250 ( G / C / GC / P )
Optischer Winkelmesser
G =
Goniomètre optique
Optical protractor
Abgewinkelter Projektor
C =
Projecteur coudé
Angled projector
Abgewinkelter Projektor mit Winkelmesser
GC =
Projecteur coudé avec goniomètre
Angled projector with protractor
projectors$24.doc
marcel - aubert - sa
Tél.: +41 (0)32 365 51 31
Fax: +41 (0)32 365 76 20
E-mail: info@marcel-aubert-sa.ch
Vergleichsschablone
P =
Plaque de comparaison
Comparison template
Durchlichtbeleuchtung
D =
Eclairage diascopique
Transmitted light illuminator
Auflichtbeleuchtung
E =
Eclairage épiscopique
Incident light illuminator (surface)
www.marcel-aubert-sa.ch
1/12
Publicité

Sommaire des Matières pour marcel aubert MA 200
- Page 1 E-mail: info@marcel-aubert-sa.ch www.marcel-aubert-sa.ch Bedienungsanleitung • Mode d'emploi • Instruction Projektoren / Projecteurs / Projectors MA 200 / 220 / 230 / 240 / 250 ( G / C / GC / P ) Optischer Winkelmesser Vergleichsschablone Goniomètre optique Plaque de comparaison...
- Page 2 projectors$24.doc 2/12...
- Page 3 Erste Kontrolle und Inbetriebnahme A) Projektor und Lampe sorgfältig auspacken und Optik von eventueller Verschmutzung befreien. Am besten reinigt man die Gläser mit einem sauberen weichen Lappen. Beleuchtungen: Durchlicht: Projektor und Lampe auf betreffende Maschine montieren. Auflicht: Projektor auf betreffende Maschine montieren. Das aufstecken der Lampe auf den Tubus bis zum Anschlag (ca.
- Page 4 Projektoren mit Vergleichsschablonen "P" Einlegen eines Filmes mit Symbol in den Filmträger Doppel - Plexiglasplatte (Filmträger) Transparenter Film mit Symbol Neutraler Film, matt projectors$24.doc 4/12...
- Page 5 Auswechseln der Halogenlampe und zentrieren der Lampe D = Durchlichtbeleuchtung E = Auflichtbeleuchtung Durchlicht -, und Auflichtbeleuchtungen Achtung: Lampengehäuse vor Manipulationen abkühlen lassen ! A) Schraube (1) lösen und Fassung (2) herausziehen. Halogenlampe (6V/20W, 12V/50W oder 12V/100W) auswechseln und Fassung (2) wieder einführen. (Halogenlampe nie mit den Fingern berühren).
- Page 6 Mode d’emploi pour les projecteurs A) Déballer soigneusement le projecteur et la lampe. Les débarrasser de toutes éventuelles impuretés. Les verres optiques se nettoient de préférence avec un chiffon propre. Eclairages: Diascopique: Monter le projecteur et la lampe sur la machine. Episcopique: Monter le projecteur sur la machine.
- Page 7 Projecteurs avec plaque de comparaison "P" Mise en place d'un film avec symbole dans le support de films Plaque plexi - double (support de films) Film transparent avec symbole Film neutre, mat projectors$24.doc 7/12...
- Page 8 Remplacement de l'ampoule halogène et centrage de la lampe D = Eclairage diascopique E = Eclairage épiscopique Eclairage diascopique et épiscopique Attention: laisser refroidir le corps de lampe avant toute manipulation ! A) Débloquer la vis (1) et retirer le porte-ampoule (2). Remplacer l'ampoule halogène (6V/20W, 12V/50W ou 12V/100W) et remettre le porte-ampoule (2).
- Page 9 First control and setting up A) Unpack carefully projector and lamp. If necessary wipe optics clean with a lint free clean cloth. Illuminator: For transmitted light: Mount projector and lamp on the concerned machine tool. For incident light: Mount the projector on the concerned machine tool. To avoid damage to the delicate mirror inside the lamp, set the lamp into its tubing very carefully.
- Page 10 Projectors with comparison templates "P" Placement of a film with symbol in the film holder Double plexi - glassplate (filmholder) Transparent film with symbol Film neutral, mat projectors$24.doc 10/12...
- Page 11 Renewal of the halogen-bulb and centering of the light illuminator D = Transmitted light illuminator E = Incident light illuminator TRANSMITTED AND INCIDENT LIGHT ILLUMINATORS Attention: Before manipulate the lamp-casing let it cool down ! A) Loosen screw (1) and pull the lamp socket (2) out. Set a new halogen bulb in (6V/20W, 12V/50W or 12V/100W) and push the socket (2) in again.
- Page 12 marcel - aubert - sa OPTISCHE MESSTECHNIK OPTICAL MEASURING SYSTEMS SYSTEMES DE MESURE OPTIQUE Rue Gurnigel 48 CH-2501 Bienne Tél.: +41 (0)32 365 51 31 Fax: +41 (0)32 365 76 20 E-mail: info@marcel-aubert-sa.ch www.marcel-aubert-sa.ch Besuchen Sie uns • Visit us at • Visitez notre site www.marcel-aubert-sa.ch projectors$24.doc 12/12...
