Publicité
Liens rapides
A L L
P U R P O S E
M E T A L
G A R D E N
EN
OWNER'S MANUAL /
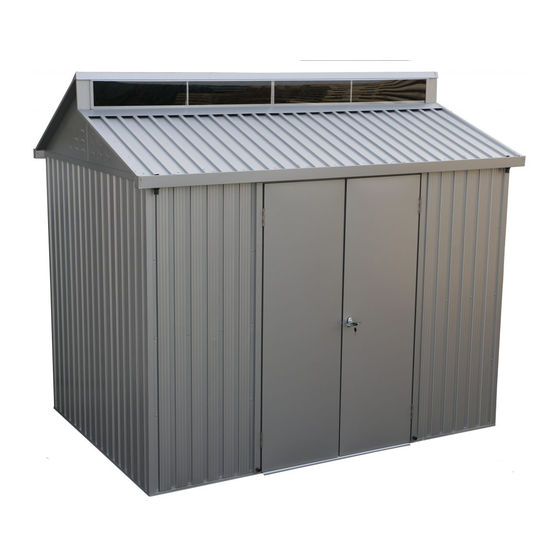
Instructions for Assembly 'Aluminium Skylight Shed'
Size 8Ft x 6Ft / 2.6 m x 1.8 m
Ver: 1.0
FR
MANUEL D'INSTRUCTION/
Instructions pour l'Assemblage 'Aluminium Skylight Shed'
Dimension 8Pieds x 6Pieds / 2.6 Mètre x 1.8 Mètre
Ver: 1.0
DE
Benutzerhandbuch /
Montageanleitung'Aluminium Skylight
Größe: 8Ft x 6Ft / 2.6 m x 1.8 m
Ver: 1.0
ES
MANUAL DEL PROPIETARIO /
Instrucciones de montaje
'Aluminium Skylight
Tamaño 8Pies x 6Pies / 2.6 Metros x 1.8 Metros
Ver: 1.0
PT
MANUAL DO PROPRIETARIO/
Intruções de
montagem.'Aluminium Skylight
Tamanho 8 pés x 6pés / 2.6 Metro x 1.8 Metro
Ver: 1.0
NL
Gebruiksaanwijzing voor eigenaar/
Instructies voor bouw
'Aluminium Skylight
Maat 8 voet x 6 voet / 2.6 Meter x 1.8 Meter
Versie: 1.0
CS
Příručka uživatele /
Návod k montáži
'Aluminium Skylight
Velikost 8 Stopy x 6 Stopy / 2.6 Metr x 1.8 Metr
Verze : 1.0
SK
NÁVOD PRE UŽÍVATELA /
'Aluminium Skylight
Návod na zloženie
Velkosť 8 Stopa x 6Stopa / 2.6 m x 1.8 m
Pozri: 1.0
SL
PRIROČNIK ZA LASTNIKA /
Navodila za montažo
'Aluminium Skylight
Velikost 8 Čevljev x 6Čevljev / 2.6 Metrov x 1.8 Metrov
Razl: 1.0
TM
A Product of
S H E D S
HR
Instrukcije za skupštine
Veličina 8 Stopalo x 6 Stopalo/ 2.6 Metar x 1.8 Metar
Ver: 1.0
HU
Útmutató az összeszereléshez
8 Láb x 6Láb / 2.6 Méter x 1.8 Méter
1.0 :verzió
SV
Shed'
Monteringsinstruktioner för
Storlek 8 fot x 6 fot / 2.6 m x 1.8 m
Version: 1.0
IT
Shed'
Istruzioni per l'assemblaggio
Dimensione 8 Piedi x 6 Piedi / 2.6 Metri x 1.8Metri
Versione: 1.0
PL
Shed'
Instrukcja montażu
Wymiary 8 Stopy x 6Stopy / 2.6 Metr x 1.8 Metr
Wersja: 1.0
RO
Shed'
Instrucţiuni de asamblare
Mărime 8 Picioare x 6Picioare / 2.6 Metri x 1.8 Metri
Ver: 1.0
BG
Shed'
Инструкции за сглобяване
Размер 8 Фута x 6 Фута / 2.6 Метра x 1.8 Метра
Версия: 1.0
TR
Shed'
Montaj Talimatları
8 Fit x 6Fit / 2.6 m x 1.8m
Sürüm: 1.0
Shed'
ALUMINIUM GARDEN SHED
Gazdinski Priručnik /
'Aluminium Skylight
FELHASZNÁLÓI KÉZIKÖNYV /
'Aluminium Skylight
ÄGARENS MANUAL/
'Aluminium Skylight
MANUALE DEL PROPRIETARIO /
'Aluminium Skylight
PODRĘCZNIK UŻYTKOWNIKA /
'Aluminium Skylight
MANUAL DE UTILIZARE /
'Aluminium Skylight
РЪКОВОДСТВО ЗА ПРИТЕЖАТЕЛЯ /
'Aluminium Skylight Shed'
KULLANIM KILAVUZU /
'Aluminium Skylight Shed'
Shed'
Shed'
Shed'
Shed'
Shed'
Shed'
Publicité

Manuels Connexes pour USP DURAMAX Aluminium Skylight Shed


Sommaire des Matières pour USP DURAMAX Aluminium Skylight Shed
- Page 1 ALUMINIUM GARDEN SHED A Product of A L L P U R P O S E M E T A L G A R D E N S H E D S OWNER’S MANUAL / Gazdinski Priručnik / Instructions for Assembly ‘Aluminium Skylight Shed’ Instrukcije za skupštine ‘Aluminium Skylight Shed’...
- Page 2 Building Dimensions : Storage Exterior Dimension Interior Dimension Approximate Door Opening Size Base Dimension Roof Edge to Edge Area Volume Wall to Wall inch inch inch inch 42 7/8 Sq. Ft 250 Cu.Ft 8 Ft x 6 Ft Width 99 1/4 103 5/8 263.2 95 7/8...
- Page 3 Gebouw afmeting: Opslag Binnenkant afmeting Buitenkant afmeting Benadering Deur opening Maat Gebied Muur tot muur Volume Basis afmeting Dakrand tot rand inch inch inch inch 42 7/8 250 Kubieke 8 Voet x 6 Voet Vierkante voet voet Wijdte 99 1/4 103 5/8 263.2 95 7/8...
- Page 4 Zgrada dimenzija Skladištenje Vanjski dimenzija Približno određena Interijer dimenzija Vrata Open Područje Svezak Krov rub to rub Zidni to zidni mjera Temeljiti dimenzija inch inch inch inch 42 7/8 Četvornih 250 Kubni 8 Stopalo x 99 1/4 103 5/8 263.2 95 7/8 243.7 106.7...
- Page 5 Wymiary budowlane: Wymiary wewnętrzne Magazynowa Wymiary zewnętrzne Przybliżone Otwieranie drzwi Kubatura Wymiary fundamentów Dachu od krawędzi do krawędzi od ściany do ściany Powierzchnia wymiary inch inch inch 8 Stopy x 6 250 Stopy 42 7/8 Stopy sześcienny Szerokość 99 1/4 263.2 95 7/8 243.7...
-
Page 6: Benötigte Werkzeuge
Tools You Will Need Alati, Trebat će Vam 1. Cordless Drill - Philips Head 6. Tape Measure 1. Bežični Svrdlo – Philips Voditelj 6. Traka Divizor 2. Screwdriver - Philips Head 7. Hand Gloves 2. Vijak Vozač - Philips Voditelj 7. - Page 7 Parts List Seznam součásti Lista delle varie parti Liste des pièces Zoznam častí Lista części Teileliste Seznam delov Lista elementelor componente Listado de piezas Dijelovi Lists Списък на частите Lista de Peças Alkatrészlista Parça Listesi Onderdelenlijst Komponentlista 1.Check all parts prior to installation. 2.Use screws with plastic washers on top of prepainted surface only.
- Page 8 L001 L043 L002 L044 L003 L045 L004 L048 A048 L005 L049 A049 L006 L050 A050 L007 L051 H053 L008 L052 3Slabs L010 L053 4Slabs L011 L054 L012 L055 L013 L056 L014 L057 L015 L058 L016 L059 L017 L060 L018 L062 L019 L020 L021...
- Page 9 L036 L037 L034 L056 L057 L056 L040 L040 L056 L040 L055 L030 L028 L040 L029 L060 L028 L040 L027 L036 L032 L038 L029 L031 L035 L053 L053 L053 L052 L054 L039 L035 L039 L039 L039 L039 L022 L051 A048 L024 L015 A049 A050...
- Page 10 #16-18 # 19-33 # 34-49 # 50-55...
- Page 11 Foundation Základy Fondamenta Fondation Základ Podstawa Fundaţia Fundament Temelj Фундамент La cimentación Temelj Fundação Alap Temel Fundering Grunden (EN) DuraMax must be installed on a level wooden platform or a level concrete foundation. (FR) DuraMax doit être installé sur une plate-forme en bois ou une fondation de béton. (DE) DuraMax ist auf einer ebenen Holzplattform oder einem ebenen Betonfundament zu installieren.
- Page 12 (PT) Deitare 2” x 4”mm Plano Pressão à prova de intempéries tratados parafusos prisioneiros de madeira: (tamanho atual 2”x 3 1/2”, 50mm x 88.9mm) (NL) Laag 2 x 4 Vlak Druk behandeld weer bewijs hout hengsten (Precieze maat 2 x 3 ½, 50 mm x 88.9 mm) (CS) Poloha 2 x 4 plohy tlak ošetřené...
- Page 13 96”x 48”X ” (x1) 96”x 22”X ” (x1) 6”x 70”X ” (x1) (EN) Exterior Grade (CDX) - 3/4” (19mm)Weather proof Marine grade plywood (FR) Qualité extérieure (CDX) - 3/4 po (19mm) météo preuve Marine grade contreplaqué.. (DE) Aussenansicht Grade (CDX) - 3/4’’(19mm) Wetter Beweis Marine Grade Sperrholz. (ES) Calidad exterior (CDX) - 3/4”...
- Page 14 Concrete Platform Betonové Platforma Piattaforma in cemento Plate-forme en béton armé Betónové Platforma Platforma betonowa Betonauflage plattform Betonski Platform Platforma de beton Base de hormigón Betonski Platform Бетон Платформа Plataforma concreta Beton Platform Beton Platform Betonnen plaat Betongplattform To ensure that your shed withstands high winds,we recommend using this floor option. A concrete pad or large size concrete patio stone squares is recommended for suitable floor base.
- Page 15 Annak érdekében, hogy a fészer ellenálljon a magas szeleknek, javasoljuk, hogy használja ezt a padlót. Betonpárna vagy nagyméretű betonpadló kőpadok ajánlottak megfelelő padlóalapra. Győződjön meg arról, hogy szilárd és vízszintes, és lehetővé teszi a vízelvezetést távol a helyszíntől. Végezzünk el egy szintetikus alapot, amely 103 3/8'' x 72 1/4''(2620mm x 1835mm) külső méretekkel rendelkezik.
- Page 16 1.Set the Torque limit of your Screw drill to #3 or #4 to ensure the Screws do not strip the Metal reinforcements. 2.It is important that these instructions are followed step by step. 3.Don’t install under windy conditions. 4.All panels are clearly marked and care should be taken to use the correct one. 5.Use screws with plastic washers on top of prepainted surface only.
- Page 17 Base Frame Základní kostra Cornice di Base Canaux de base Základňový rám Rama fundamentowa Bodenrahmen Osnovni okvir Rama bazei Armazón de la base Baza okvir Основна Рама Base de armação Alapváz Temel Çerçevesi Basis frame Basram Parts needed Potřebné součástí Parti occorrenti Pièces nécessaires Potrebné...
- Page 18 (x8) L001 (x1) L003 (x2) L002 L001 1,2&3 L003 L002 L003 L003 L002 L002 L001 L001 1,2&3 L003 L001 L001 L006 (x1) (x2) L002 L001 L006 L006 L002 L006 1&2 L001 L001 L001...
- Page 19 L004 (x4) (x8) L002 L004 L004 L001 L004 L001 1&2 L004 L002 L004 L004 L001 L005 (x2) (x4) L002 L004 L005 L004 1&2 L004 L004 L005 L002 L005 L005 L004 L004...
- Page 20 (EN) This Shed included one Window Kit (L062) & It can be assembled in 6 positions as per shown in below. This Manual Continues with POSITION 1. (FR) Cet abri comprend un kit de feneëtre (L062) & il peut être assemblé dans 6 positions comme indiqué ci-dessous. Ce manuel se poursuit avec la POSITION 1.
- Page 21 Walls & Columns Zdi a kolumny Pareti & Colonne Murs et colonnes Steny a stĺpy Ściany I Kolumya Wände und Säulen Stene in stebri Pereţi şi stâlpi Columnas y paredes Zidovi i Kolumne Стени & Колони Paredes e Colunas Falak és oszlopok Duvarlar &...
- Page 22 S1 (x3) S3 (x2) PW (x5) L044 (x1) L043 L044 L044 L001 L002 L044 L043 L044 L002 L002 L044 L001 L043 (x1) (x2) (x2) L043 L043 L043 L043 L001 L001...
- Page 23 S1 (x3) S3 (x2) PW (x5) L044 (x1) L043 L043 L044 L044 L002 L001 L043 L044 L044 L002 L002 L044 L043 L001 (x6) (x6) L014 (x1) L014 L014 L043 L044 L043...
- Page 24 L044 (x1) (x2) (x2) L044 M034 L044 L002 L002 L001 S1 (x3) S3 (x2) PW (x5) L043 (x1) L043 L044 L043 L043 L044 L043 L044 L043 L001 L002 L001 L001 L002 L044 L043...
- Page 25 L016 (x1) (x4) (x4) L014 L014 L016 L044 L016 L016 L044 L044 L044 S1 (x8) S3 (x4) PW (x12) L043 (x1) L016 L044 L043 L044 L043 L044 L044 L043 L002 L044 L043...
- Page 26 S1 (x2) PW (x2) L044 (x1) L044 L044 L002 L002 L001 S1 (x3) S3 (x2) PW (x5) L043 (x1) L043 L044 L043 L044 L043 L043 L044 L043 L001 L044 L043 L001 L002...
- Page 27 S1 (x4) PW (x4) L016 (x1) L014 L014 L016 L044 L016 L016 L044 L044 L044 S1 (x4) S3 (x2) PW (x6) L045 (x1) L044 L044 L045 L045 L044 L045 L002 L044 L043 L045...
- Page 28 L012 (x1) S1 (x3) PW (x3) L012 L043 L012 L043 L012 L043 S1 (x12) PW (x8) L010 (x1) L013 (x1) L013 L012 L010 L044 L013 L010 L044 L043 L043 L010 L043...
- Page 29 S1 (x10) PW (x6) L011 (x1) L013 (x1) L011 L043 L043 L010 L013 L011 L043 L010 (x1) S1 (x8) PW (x4) L013 (x1) L044 L013 L010 L044 L010 L011 L045...
- Page 30 S1 (x7) L012 (x1) PW (x3) L013 (x1) L043 L012 L044 L013 L012 L010 L013 S1 (x6) PW (x6) L015 (x1) L015 L016 L015 L043 1&2 L016 L015 L043...
- Page 31 S1 (x9) PW (x11) S3 (x2) L043 (x1) L043 L043 L043 L043 L001 L043 L043 L043 S1 (x12) PW (x16) S3 (x4) L043 (x1) L043 L043 L043 L043 L043 L043 L043 L043 L001 L043 L043...
- Page 32 S1 (x4) PW (x4) L019 (x1) L019 L019 L010 L019 1&2 L045 L045 S1 (x6) PW (x8) S2 (x2) L062 (x1) L062 L062 L010 L062 L019 L045...
- Page 33 L007 (x1) S3 (x2) S2 (x4) S1 (x1) PW (x7) L014 L014 L007 L007 L043 L043 L007 L043 L007 L043 L007 L043 L008 (x1) S3 (x2) S2 (x4) S1 (x1) PW (x7) L043 L014 L014 L008 L043 L008 L043 L043 L008 L008 L043...
- Page 34 S1 (x2) L017 (x1) L018 (x1) PW (x2) L017 L018 S3 (x2) S1 (x3) PW (x5) L014 L007 L017 L008 L017 L007...
- Page 35 Soffitto Střecha Roof Toit Strecha Dach Acoperişul Dach Streha Покрив El techo Krov Çatı Tető Telhado Potřebné součástí Parts needed Parti occorrenti Potrebné časti Niezbędne elementy Pièces nécessaires Dele, ki jih boste potrebovali Benötigte Teile Elementele componente necesare Dijelovi potreban Необходими...
- Page 36 S3 (x3) L048 (x1) L050 (x1) L024 (x1) L023 (x1) L050 L024 L050 L048 L023 L023 L048 S1 (x8) L020 (x1) L051 L020 L015 1,2&3 L051 L020 L016 L051 L049 L020 L016 L044 L016 L051 L062 L044 L015...
- Page 37 L020 (x1) S1 (x8) L050 L020 L015 L050 1,2&3 L016 L050 L020 L048 L044 L016 L016 L050 L020 L043 L015 L044 S3 (x6) L025 (x1) L026 (x1) L025 L026 L026 L025...
- Page 38 S3 (x4) L051 L051 L026 L049 L049 L025 L026 L025 L050 L048 L021 (x1) L022 (x1) A048 (x2) A049 (x2) A050 (x2) A048 A050 L021 A049 A048 L022 A050 A049...
- Page 39 S1 (x6) L022 L021 L039 (x5) S1 (x10) L039 L039 L039 L039 L039 L039...
- Page 40 S3 (x3) L052 (x1) PW (x7) S1 (x4) L052 L051 L049 L039 L053 (x1) S1 (x8) PW (x8) L052 L051 L053 L053 L039 L052 L053 L039...
- Page 41 L053 (x2) S1 (x16) PW (x16) L053 L053 L053 L053 L039 L053 L039 S1 (x6) L054 (x1) S3 (x3) PW (x9) L053 L054 L050 L053 L048...
- Page 42 PW (x4) S1 (x6) L027 (x1) L052 L027 L053 L053 L053 L054 PW (x4) L035 (x2) S1 (x4) L035 L027 L035 L052 L027 L053 L053 L053 L054 L035...
- Page 43 S3 (x4) PW (x4) L031 L050 L030 L050 L027 L031 L052 L027 L053 L053 L031 L053 L054 L028 (x2) L029 (x2) S1 (x4) S2 (x4) S3 (x2) L028 L028 L029 L029 L029 L028 L029 1&2 L029 L028 L028...
- Page 44 L060 (x1) L060 L030 L060 L031 L027 L053 L031 L053 L053 L032 (x1) S1 (x2) S3 (x4) L032 L051 L028 L060 L029 L030 L060 L032 L027 L032 L052 L053 L053...
- Page 45 L040 (x5) S1 (x10) L040 L040 L040 L040 L040 L032 L040 L050 L031 S3 (x3) S1 (x4) L055 (x1) PW (x7) L055 L040 L055 L050...
- Page 46 L056 (x1) S1 (x8) PW (x8) L056 L055 L056 L056 (x2) S1 (x16) PW (x16) L056 L056 L056 L056 L056...
- Page 47 S3 (x3) L057 (x1) PW (x9) S1 (x6) L057 L057 L056 L051 L056 PW (x4) S1 (x4) L036 (x2) L055 L036 L036 L057 L056 L056 L056 L055 L036...
- Page 48 L034 (x1) S1 (x4) PW (x4) L034 L057 L056 L056 L056 L055 L038 (x1) L037 (x1) PW (x4) S2 (x2) S1 (x2) L034 L037 L031 L038 L034 L038...
- Page 49 Montáž na dřevěnou plošinu Assembly on Wooden plarform Montaggio su piattaforma in legno Montáž na drevenej plošine Montaż na drewnianej platformies Ensemble sur plate-forme en bois Montaža na leseni plošči Montage auf Holzplattform Adunarea pe platforma de lemn Montaža na drvenoj platformi Сглобяване...
- Page 50 Assembly on Concrete Platform Montáž na betonové plošině Montaggio su piattaforma in calcestruzzo Assemblage sur plate-forme en béton Montáž na betónovú plošinu Montaż na betonowej platformie Montage auf Betonplattform Montaža na betonsko ploščad Adunarea pe platforma de beton Montaje sobre la base de hormigón Montaža na betonskoj platformi Монтаж...
- Page 51 Door Dveře Porta Porte Dvere Drzwi Die Tür Vrata Uşa La puerta Vrata Врата Porta Ajtó Kapı De deur Dörr Parts needed Potřebné součástí Parti occorrenti Pièces nécessaires Potrebné časti Niezbędne elementy Benötigte Teile Dele, ki jih boste potrebovali Elementele componente necesare Piezas necesitadas Dijelovi potreban Необходими...
- Page 52 DHT (x2) (x2) S1 (x6) S2 (x8) L058 L058 L058 L058 S1 (x6) PW (x6) L042 (x1) L058 L042 L058 L042...
- Page 53 S1 (x8) PW (x10) L059 (x1) S2 (x2) L041 (x2) L041 L041 L059 L041 L041 (x2) S2 (x8) L L R L059 L059...
- Page 54 (x1) L059 L059 L059 1,2&3 L059 S2 (x16) L059 L058...
- Page 55 H053 (x2) (x2) L007 L008 H053...
- Page 56 Fix the plastic screw cover (PC) to the screws and bolts edge from inside to prevent injury. Fixer le couvercle à vis en plastique (PC) à la pointe de vis et de boulons à l'intérieur pour prévenir les accidents. Befestigen Sie die Kunststoffschraubenbedeckung (PC) an das Ende der Schrauben und Bolzen von innen, um Verlezungen zu verhindern.
- Page 57 MA31 (x1) MA32 (x1) U.S. Polymers, Inc. 1057 S. Vail Ave Montebello, CA 90640, w w w . d u r a m a x b p . c o m United States of America SKU#01072 RD-1.0 25-07-2019...