
Manuels Connexes pour Golfomania Fairway Buddy Push


Sommaire des Matières pour Golfomania Fairway Buddy Push
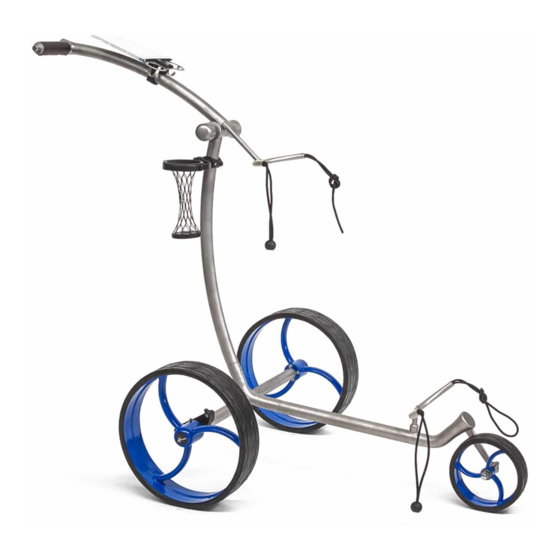
- Page 1 Fairway Buddy Push Bedienungsanleitung Manuel d’utilisation User manual Golfomania_User Manual_Fairway Buddy Push.indd 1 23.09.15 18:03...
- Page 2 Fairway Buddy Push: Golftrolley zum Schieben Inhalt und Bestandteile Transporttasche ■ 2 Hinterräder ■ Längsachse mit Vorderrad ■ Querachse mit Feststellbremse rechts (Fussbremse) ■ Faltbarer Caddyrahmen mit Steuergriff ■ Scorecardhalter mit Schrauben und Inbusschlüssel ■ Schirmhalter ■ Getränkehalter ■ Ersatzdichtungen ■ Schlüssel zum einfachen Lösen der Steckverbindungen (T-Tool) ■...
- Page 3 Erste Inbetriebnahme Zusammenfügen des Trolleys: Zusammenfügen von Längsachse und Querachse ■ (Abb. 1). Einsetzen der Hinterräder: dabei Stift an Radnabe ■ eindrücken und Rad einrasten. Das Profil der Pneus soll in die Laufrichtung zeigen (wie Vorderrad) (Abb. 2). Caddyrahmen einsetzen und auf persönliche Höhe ■ einstellen (Abb. 3). Baghalterung unten: hochziehen und in Fahrt- ■...
-
Page 4: Sicherheitshinweise
Einstellen Geradeauslauf Bei einer allfälligen Abweichung vom Geradeauslauf kann dies ganz einfach justiert werden (s. Abb.): 1. Lösen Sie die Mutter des Vorderrads leicht. 2. Führen Sie den mitgelieferten Inbusschlüssel in die kleine Justierschraube. Durch Drehen der Schraube wird die Position des Rades verändert. 3. -
Page 5: Le Chariot De Golf Qui Se Pousse
Fairway Buddy Push: Le chariot de golf qui se pousse Contenu et pièces Sac de transport ■ 2 roues arrière ■ Axe longitudinal avec roue avant ■ Axe transversal avec frein de stationnement à droite (frein à pédale) ■ Cadre pliable avec poignée de commande ■ Support de carte de score avec vis et clé Allen ■ Support de parapluie ■ Support de boissons ■ Joints de remplacement ■... -
Page 6: Première Mise En Route
Première mise en route Assemblage du chariot: Assemblage de l’axe longitudinal et de l’axe ■ transversal (ill. 1). Mise en place des roues arrière: appuyer sur la ■ broche du moyeu et enclencher la roue. Le profil des pneus doit être dans le sens de la marche (comme la roue avant) (ill. 2). Fixer le cadre du caddy et ajuster la hauteur (ill. 3). ■... -
Page 7: Réglage Du Déplacement En Ligne Droite
Réglage du déplacement en ligne droite Toute variation du déplacement en ligne droite est très simple à ajuster (v. ill.): 1. Dévisser légèrement l’écrou de la roue avant. 2. Insérer la clé Allen fournie dans la petite vis d’ajustage. La rotation de la vis permet de modifier la position de la roue. 3. L’ajustage terminé, resserrer l’écrou de la roue. Instructions de sécurité Actionnez toujours le frein à pédale lors de l’arrêt du chariot pour éviter tout déplace- ■ ment intempestif de celui-ci. Nettoyage/entretien/entreposage Nettoyez de préférence le chariot à l’aide d’un chiffon humide et/ou à l’air comprimé. ■ Évitez de l’asperger d’eau. Entreposez toujours votre chariot dans un endroit sec à température ambiante. ■... - Page 8 Fairway Buddy Push: Push golf trolley Contents and components Transport bag ■ 2 rear wheels ■ Longitudinal axis with front wheel ■ Transverse axis with locking brake (foot brake) on the right ■ Collapsible caddy frame with steering handle ■ Scorecard holder with screws and Allen key ■ Umbrella holder ■ Beverage holder ■...
-
Page 9: Initial Start-Up
Initial start-up Assembling the trolley: Fit the longitudinal axis to the transverse axis ■ (Fig. 1). Mount the rear wheels: push in the pin on the ■ wheel hub and click the wheel into place. The tire profiles should face the direction of travel (like front wheel) (Fig. 2). Attach the caddy frame and adjust to the desired ■... -
Page 10: Safety Information
Setting wheel alignment If the cart veers away when driving straight ahead, this can be easily adjusted (see Fig.): 1. Loosen the lug nut on the front wheel slightly. 2. Insert the Allen key supplied with the trolley into the small adjustment screw. Turn the screw to adjust the position of the wheel. - Page 11 Golfomania_User Manual_Fairway Buddy Push.indd 11 23.09.15 18:03...
- Page 12 GmbH Alte Landstrasse 32 CH-8800 Thalwil T +41 43 377 99 02 F + 41 43 377 99 05 info@golfomania.ch www.golfomania.ch Gültig ab/Valable dès le/Valid from: 1. 1. 2016 Änderungen vorbehalten/Sous réserve de modifications/Subject to change Golfomania_User Manual_Fairway Buddy Push.indd 12 23.09.15 18:03...