Table des Matières
Publicité
Les langues disponibles
Les langues disponibles
Liens rapides
Art.-Nr.: 16627
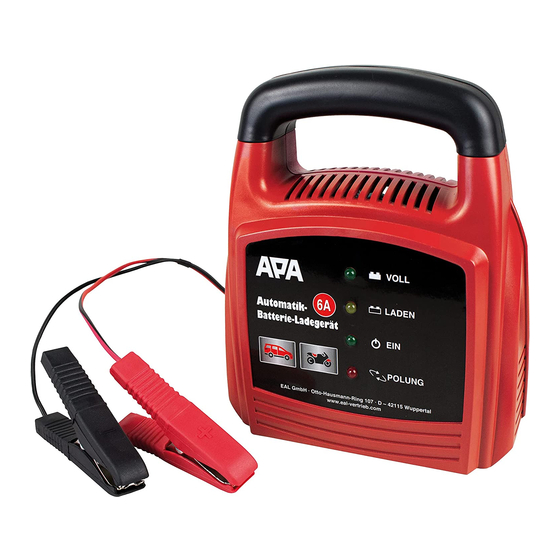
Automatik-Batterie-Ladegerät 12 V, 6 A
Bedienungsanleitung . . . . . . . . . . . . . . . . . . . . . . . . 2
Art. No. 16627
Battery charger 6 Amp. 12V
Operating instructions . . . . . . . . . . . . . . . . . . . . . . . . 7
Réf. art. 16627
Chargeur de batterie automatique 12 V, 6 A
Manuel de l'opérateur . . . . . . . . . . . . . . . . . . . . . . . 12
Art.nr. 16627
Automatische acculader 12V, 6 A
Gebruiksaanwijzing . . . . . . . . . . . . . . . . . . . . . . . . 17
Cod. art. 16627
Caricabatterie automatico 12 V, 6 A
Istruzioni per l'uso . . . . . . . . . . . . . . . . . . . . . . . . . 22
Publicité
Chapitres
Table des Matières

Manuels Connexes pour APA 16627

Sommaire des Matières pour APA 16627
- Page 1 Gebruiksaanwijzing ......17 Bedienungsanleitung ......2 Art. No. 16627 Cod. art. 16627 Caricabatterie automatico 12 V, 6 A Battery charger 6 Amp.
-
Page 2: Table Des Matières
Automatik-Batterie-Ladegerät 12 V, 6 A INHALT 1. BESTIMMUNGSGEMÄSSER GEBRAUCH 2. LIEFERUMFANG 3. SPEZIFIKATIONEN 4. SICHERHEITSHINWEISE 5. SYMBOLERKLÄRUNG 6. BEDIENUNGSANLEITUNG 6.1 ÜBERSICHT 6.2 EINSETZEN DER KABELHALTER 6.3 VORBEREITUNG 6.4 ANSCHLIESSEN DES BATTERIELADEGERÄTES 6.5 LADEN DER BATTERIE 6.6 ENTFERNEN DES LADEGERÄTS 7. WARTUNG UND PFLEGE 7.1 WARTUNG 7.2 PFLEGE 8. -
Page 3: Lieferumfang
2. LIEFERUMFANG • 1x Batterieladegerät • 4x Kabelhalter • 1x Bedienungsanleitung 3. SPEZIFIKATIONEN Abmessungen (L x B x H): 145 x 90 x 170 [mm] Gewicht: 1,710 kg Länge Netzkabel: 1,70 m Länge Ladekabel: 1,40 m Eingang: 220-240 V AC 50/60 Hz Ausgang: 12 V, 4 A (6 A RMS), DC Batteriekapazität:... -
Page 4: Symbolerklärung
• Setzen Sie das Ladegerät nicht der Nähe von Feuer, Hitze und lang andauernder Temperatureinwirkung über +40°C aus! • Bewahren Sie diese Anleitung auf und geben Sie sie an andere Benutzer weiter. 5. SYMBOLERKLÄRUNG Geräte mit diesem Zei- gekenntzeichnetes chen dürfen nur im Haus entspricht den Elektroprodukt darf nicht (trockene Umgebung) -
Page 5: Einsetzen Der Kabelhalter
6.2 EINSETZEN DER KABELHALTER Setzen Sie die Kabelhalter in die Aufnahmen (Position 6 in der Übersicht) auf der Rückseite des Ladegerätes so ein, dass die Öffnungen der übereinanderliegenden Kabelhalter von einander weg zeigen. 6.3 VORBEREITUNG Reinigen Sie die Batteriepole von Staub und Korrosionsrückständen. Nur für offene Batterien: Entfernen Sie die Verschlussstopfen der Batteriezellen. -
Page 6: Pflege
7.2 PFLEGE Reinigen Sie die Polzangen jedes mal nach einem Ladevorgang. Entfernen Sie jegliche Batteriesäure- spritzer von den Polzangen um Korrosion zu vermeiden. Reinigen Sie das Gerät vorsichtig mit einem trockenen Tuch. Benutzen Sie keine Flüssigkeiten oder chemi- sche Reinigungsmittel. Tauchen Sie das Gerät niemals in Flüssigkeiten ein. Lassen Sie niemals Flüssigkeiten über das Gerät laufen. Wickeln Sie die Kabel ordentlich auf den, dafür vorgesehenen Halterungen auf, bevor Sie das Gerät lagern, um Beschädigungen an den Kabeln und dem Gerät zu vermeiden. -
Page 7: Proper Use Of The Product
Battery charger 6 Amp. 12 V CONTENTS 1. PROPER USE OF THE PRODUCT 2. SCOPE OF DELIVERY 3. SPECIFICATIONS 4. SAFETY PRECAUTIONS 5. EXPLANATION OF SYMBOLS 6. OPERATING INSTRUCTIONS 6.1 OVERVIEW 6.2 INSERTING THE CABLE HOLDER 6.3 PREPARATION 6.4 CONNECTING THE BATTERY CHARGER 6.5 CHARGING THE BATTERY 6.6 REMOVING THE CHARGER 7. -
Page 8: Scope Of Delivery
2. SCOPE OF DELIVERY • 1x Battery charger • 1 x Operating instructions • 4 x Cable holders 3. SPECIFICATIONS Dimensions: 145 x 90 x 170 [mm] Weight: 1.710 kg Long of mains cable: 1.70 m Long charger cable: 1.40 m Input: 220-240 V AC 50/60 Hz Output:... -
Page 9: Explanation Of Symbols
read the manual of your vehicle or ask your specialist workshop. • To remove the battery charger, first pull the plug out of the socket and observe the sequence for disconnection. This prevents sparks from forming. Since charging generates a detonating gas, this is particularly important for the sake of your safety. -
Page 10: Inserting The Cable Holder
1 Carry handle 6 Mounts for cable holder 7 Type plate 8 Mains connection cable 9 Charging cable Figure 2: View of rear 6.2 INSERTING THE CABLE HOLDER Insert the cable holder into the mounts (Position 6 in the overview) on the rear of the charger so that the openings of the verti- cally aligned cable holders face away from each other. -
Page 11: Removing The Charger
6.6 REMOVING THE CHARGER Caution: First pull the plug out of the socket and observe the sequence for disconnection. This prevents sparks from forming. Since charging generates a detonating gas, this is particularly important for the sake of your safety. Disconnect the charger from the mains power supply. -
Page 12: Domaine D'application
Chargeur de batterie automatique 12 V, 6 A SOMMAIRE 1. DOMAINE D‘APPLICATION 2. CONTENU DE LA FOURNITURE 3. SPÉCIFICATIONS 4. CONSIGNES DE SÉCURITÉ 5. EXPLICATION DES SYMBOLES 6. MODE D‘EMPLOI 6.1 VUE D‘ENSEMBLE 6.2 PLACEMENT DU SUPPORT DE CÂBLE 6.3 PRÉPARATION 6.4 RACCORDEMENT DU CHARGEUR DE BATTERIE 6.5 CHARGEMENT DE LA BATTERIE 6.6 RETIRER L‘APPAREIL DE RECHARGE... -
Page 13: Contenu De La Fourniture
L‘article n‘est pas destiné à une utilisation industrielle ou commerciale. L‘utilisation conforme aux prescriptions implique également le respect de toutes les informations contenues dans ce mode d‘emploi, en particulier le respect des consignes de sécurité. Toute autre utilisation est considérée comme non conforme et peut entraîner des dommages matériels ou des blessures. -
Page 14: Explication Des Symboles
au moins 10 minutes et consulter un médecin. • Ne recouvrez pas l‘appareil de recharge car cela pourrait provoquer une surchauffe et conséquemment, un endommagement de l‘appareil. Ne mettez pas l‘appareil de recharge en marche sur un support isolant (par exemple, du polystyrène) - Risque de surchauffe ! •... -
Page 15: Placement Du Support De Câble
9 Possibilité de suspension 10 Consignes de sécurité 11 Plaque synoptique Illustration 2 : Vue arrière 6.2 PLACEMENT DU SUPPORT DE CÂBLE Placez le support de câble,dans l‘entrée (position 6 dans l‘aperçu) à l‘arrière de l‘appareil de chargement de façon à ce que les ouvertures des supports de câble superposés pointent dans une autre direction. -
Page 16: Retirer L'appareil De Recharge
6.6 RETIRER L‘APPAREIL DE RECHARGE Attention: Retirez d‘abord la fiche de contact de la prise et observez la procédure de branchement. Vous évitez ainsi la formation d‘étincelles. Ceci est particulièrement important pour votre sécurité car un mélange d‘hydrogène et d‘oxygène très explosif peut se former lors du chargement. Séparez l‘appareil de recharge du réseau d‘alimentation. -
Page 17: Reglementair Gebruik
Automatische acculader 12V, 4 A INHOUD 1. REGLEMENTAIR GEBRUIK 2. LEVERINGSOMVANG 3. SPECIFICATIES 4. VEILIGHEIDSINSTRUCTIES 5. UITLEG BIJ DE SYMBOLEN 6. GEBRUIKSAANWIJZING 6.1 OVERZICHT 6.2 DE KABELHOUDER PLAATSEN 6.3 VOORBEREIDING 6.4 DE ACCULADER AANSLUITEN 6.5 DE ACCU OPLADEN 6.6 DE OPLADER VERWIJDEREN 7. -
Page 18: Leveringsomvang
2. LEVERINGSOMVANG • 1 x acculader • 1 x Gebruiksaanwijzing • 4 x kabelhouder 3. SPECIFICATIES Afmetingen (L x B x H): 145 x 90 x 170 [mm] Gewicht: 1,710 kg Lengte stroomkabel: 1,70 m Lengte laadkabel: 1,40 m Ingang: 220-240 V AC 50/60 Hz Uitgang: 12 V, 4 A (6 A RMS), DC... -
Page 19: Uitleg Bij De Symbolen
van deze optie gebruik wilt maken, controleer dan eerst of uw voertuig hiervan geen schade kan ondervinden. Lees dit na in het handboek van uw voertuig of informeer bij uw garage. • Pak het netsnoer uitsluitend vast aan de stekker wanneer u deze uit het stopcontact trekt. •... -
Page 20: De Kabelhouder Plaatsen
1 Draaggreep 6 Opnamen voor kabelhouder 7 Typeplaatje 8 Stroomkabel 9 Laadkabel Afbeelding 2: achterzijde 6.2 DE KABELHOUDER PLAATSEN Plaats de kabelhouder zodanig in de opnamen (positie 6 in het overzicht) aan de achterzijde van de oplader, dat de openingen van de boven elkaar liggende kabelhouders van elkaar weg wijzen.eg wijzen. -
Page 21: Onderhoud En Verzorging
Uitsluitend voor open accu’s: vul de cellen bij met gedestilleerd water tot aan het door de accufabrikant genoemde vulpeil. Sluit de accucellen weer af met de doppen. 7. ONDERHOUD EN VERZORGING 7.1 ONDERHOUD Bij reglementair gebruik is de acculader onderhoudsvrij. 7.2 VERZORGING Reinig de pooltangen elke keer na het opladen. - Page 22 Caricabatterie automatico 12 V, 4 A INDICE 1. USO CONFORME 2. VOLUME DI CONSEGNA 3. SPECIFICHE 4. AVVERTENZE DI SICUREZZA 5. SPIEGAZIONE DEI SIMBOLI 6. ISTRUZIONI PER L‘USO 6.1 PANORAMICA 6.2 APPLICAZIONE DEI PORTACAVI 6.3 PREPARAZIONE 6.4 COLLEGAMENTO DEL CARICABATTERIE 6.5 RICARICA DELLA BATTERIA 6.6 RIMOZIONE DEL CARICABATTERIE 7.
-
Page 23: Volume Di Consegna
2. VOLUME DI CONSEGNA • 1x Caricabatterie • 1x Istruzioni per l‘uso • 4 x portacavi • 1 cavo di carica per adattatore con terminali ad anello 3. SPECIFICHE Dimensioni: 145 x 90 x 170 [mm] Peso: 1,710 kg Lunghezza del cavo di alimentazione: 1,70 m Lunghezza del cavo di carica: 1,40 m... -
Page 24: Spiegazione Dei Simboli
sione. Staccare la batteria dalla rete di bordo del veicolo. Leggere il manuale di istruzioni del veicolo o rivolgersi a un‘officina specializzata. • Questo dispositivo offre la possibilità di caricare la batteria senza bisogno di staccarla dalla rete di bordo. •... -
Page 25: Applicazione Dei Portacavi
1 Maniglia di trasporto 6 Vano per portacavi 7 Targhetta 8 Cavo di alimentazione 9 Cavo di ricarica Figura 2: Vista della parte posteriore 6.2 APPLICAZIONE DEI PORTACAVI Inserire i portacavi negli appositi vani (pos. 6 dello schema) sul retro del caricabatterie, in modo che le aperture dei portacavi sovrapposti siano rivolti verso lati opposti. -
Page 26: Manutenzione E Pulizia
Solo per le batterie a vaso aperto: riempire le celle con acqua distillata fino al livello raccomandato dal produttore. Richiu- dere le celle della batteria con gli appositi tappi. 7. MANUTENZIONE E PULIZIA 7.1 MANUTENZIONE Se utilizzato in modo conforme, il caricabatterie non richiede manutenzione. 7.2 PULIZIA Pulire i morsetti dopo ogni ciclo di ricarica. - Page 28 EAL GmbH +49 (0)202 42 92 83 0 info@eal-vertrieb.com Otto-Hausmann-Ring 107 42115 Wuppertal, Deutschland www.eal-vertrieb.com +49 (0) 202 42 92 83 – 160 © EAL GmbH, 16627, 07. 2020...