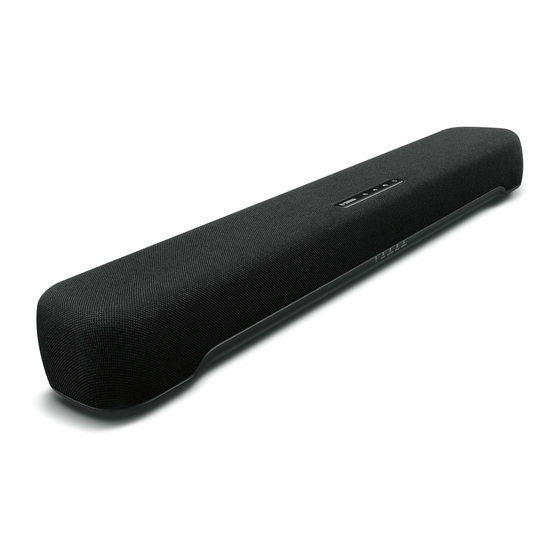
Sommaire des Matières pour Yamaha SR-C20A
- Page 1 Sound Bar Barre de son Quick Start Guide ........... 3 Guide de démarrage rapide ......11...
- Page 3 About this Quick Start Guide This document provides step-by-step instructions for installation and playback. Refer to the User Guide on the Yamaha website for more information. Visit the following website to see the latest User Guide. https://manual.yamaha.com/av/20/src20a/...
-
Page 4: Supplied Accessories
Supplied accessories Make sure you have received all of the following accessories: Use when mounting the sound bar on a wall. Sound bar (SR-C20A) Spacers (A: ×2, B: ×2 on 1 sheet) Remote control Digital optical audio cable Mounting template ... -
Page 5: Preparing The Remote Control
Preparing the remote control Installing the sound bar Remove the battery insulating strip before attempting to use the Installed on a TV stand remote control. Controls Battery insulating strip Wall-mounted NOTE A Lithium battery (CR2025) has already been inserted into the remote control. - Page 6 Connecting a TV Depending on the type of TV, connect the TV to the sound bar as follows: Is your TV equipped with an HDMI jack labeled as “ARC?” Connect the TV using an ARC-compatible HDMI cable (sold Connect the TV using an HDMI cable (sold separately) and digital separately).
- Page 7 Connecting the TV using only the digital NOTE • When the sound bar is connected to a TV via HDMI cable, confirm optical audio cable (supplied) that the TV’s settings are properly configured as follows: – The TV's HDMI Control function is enabled. –...
-
Page 8: Connecting To Power
Connecting to power Playing TV sound through the sound bar After all connections are complete, connect the sound bar to power as follows: Sound bar (rear) VOLUME (+/−) Turn on the TV. AC adaptor (supplied) When the TV is connected to the sound bar using an HDMI cable and the HDMI Control function of the TV is enabled, the Power cord (supplied) sound bar will also turn on. - Page 9 Adjusting the sound to your preference c Enjoying enhanced bass sound GAME This sound mode is the best suited (Bass Extension) for video games. Surround playback Bass sound is enhanced and becomes is performed. more powerful when the Bass Extension STEREO feature is enabled.
-
Page 10: Listening To Audio From A Bluetooth® Device
Select your product displayed within the list. NOTE “Yamaha SR-C20A” or “YamahaAV” is displayed within the list. • To control the sound bar using the app, configure the settings on your mobile device as follows: Play audio content on the Bluetooth device. - Page 11 Ce document fournit des instructions étape par étape pour l’installation et la lecture. Reportez-vous au Mode d'emploi sur le site Web de Yamaha pour de plus amples informations. Visitez le site Web suivant pour accéder au Mode d'emploi le plus récent.
-
Page 12: Accessoires Fournis
Vérifiez que vous disposez de tous les accessoires suivants : À utiliser lors de la fixation de la barre de son à un mur. Barre de son (SR-C20A) Entretoises (A : ×2, B : ×2, sur une 1 feuille) Télécommande Câble audio optique numérique... -
Page 13: Préparation De La Télécommande
Préparation de la télécommande Installation de la barre de son Retirez la languette isolante de la pile avant d’essayer d’utiliser la Installation sur un meuble de télévision télécommande. Commandes Languette isolante de la pile Montage mural NOTE Une pile au lithium (CR2025) a déjà été insérée dans la télécommande. -
Page 14: Raccordement D'un Téléviseur
Raccordement d’un téléviseur Selon le type de téléviseur, raccordez le téléviseur à la barre de son comme suit : Votre téléviseur est-il équipé d’une prise HDMI étiquetée « ARC » ? Raccordez le téléviseur à l’aide d’un câble HDMI compatible ARC Raccordez le téléviseur à... -
Page 15: Raccordement Du Téléviseur Au Moyen Du Câble Audio Optique Numérique Uniquement (Fourni)
Raccordement du téléviseur au moyen du NOTE • Lorsque la barre de son est raccordée à un téléviseur via un câble câble audio optique numérique HDMI, vérifiez que les réglages du téléviseur sont configurés correctement comme suit : uniquement (fourni) –... -
Page 16: Raccordement À L'alimentation
Raccordement à l’alimentation Lecture du son du téléviseur via la barre de son Une fois toutes les connexions terminées, raccordez la barre de son à l’alimentation comme suit : Barre de son (arrière) VOLUME (+/−) Allumez le téléviseur. Adaptateur secteur Cordon d’alimentation (fourni) Lorsque le téléviseur est raccordé... -
Page 17: Réglage Du Son Selon Vos Préférences
Réglage du son selon vos préférences c Profiter de sons graves de GAME Ce mode sonore est idéal pour les meilleure qualité (Accentuation jeux vidéo. Le son est lu en surround. des graves) STEREO Les sons graves sont de meilleure Lecture stéréo 2 canaux. -
Page 18: Contrôle De La Barre De Son Au Moyen De L'application
(Variateur) Sélectionnez votre produit affiché dans la liste. « Yamaha SR-C20A » ou « YamahaAV » est affiché dans la liste. NOTE • Pour contrôler la barre de son au moyen de l’application, configurez Lisez le contenu audio sur le dispositif Bluetooth. - Page 20 Yamaha Global Site https://www.yamaha.com/ Yamaha Downloads https://download.yamaha.com/ Manual Development Group © 2020 Yamaha Corporation Published 06/2020 KSOD-A0 AV19-0345 10-1 Nakazawa-cho, Naka-ku, Hamamatsu, 430-8650 Japan 10-1 Nakazawa-cho, Naka-ku, Hamamatsu, 430-8650 Japan...


