Se connecter
Télécharger
Manuels
Marques
Samsung Manuels
Caméscopes
Hi8 SCL903
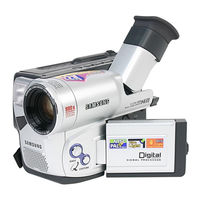
Samsung Hi8 SCL903 Manuels
Manuels et Guides d'utilisation pour Samsung Hi8 SCL903. Nous avons
1
Samsung Hi8 SCL903 manuel disponible en téléchargement PDF gratuit: Mode D'emploi
Samsung Hi8 SCL903 Mode D'emploi (72 pages)
Marque:
Samsung
| Catégorie:
Caméscopes
| Taille: 4.14 MB
Table des Matières
Table des Matières
2
English
4
Notices and Safety Instructions
4
Remarques et Consignes de Sécurité
4
Rotation de L'écran LCD
4
Formation de Condensation
5
Viseur Électronique
5
Bloc Batterie
6
Pile au Lithium
6
Désactivation Automatique en Mode Veille
7
Getting to Know Your Camcorder Features
8
Accessoires Fournis Avec Votre Caméscope
14
Remote Control (SCL906/L907 Only)
15
Self Timer Recording
15
Télécommande (SCL906/L907)
15
Enregistrement Automatique Avec la Télécommande
15
Familiarisez-Vous Avec le Caméscope
8
Fonctionnalités
8
Front View/Side View/Rear View
9
Vue Avant/Vue Latérale/Vue Arrière
9
Getting to Know Your Camcorder Familiarisez-Vous Avec le Caméscope
10
Side View
10
Vue Latérale
10
Affichage
12
OSD (on Screen Display)
12
Accessories Supplied with Camcorder
14
Preparing
16
Adjusting the Hand Strap and Shoulder Strap
16
Réglage du Caméscope
16
Mise en Place de la Poignée de Soutien et de la Bandoulière
16
Attaching the Lens Cover
17
Fixation du Couvre-Objectif
17
Installation de la Pile au Lithium
17
Lithium Battery Installation
17
Connecting the Power Source
18
To Use the AC Power Adapter
18
Connexion D'une Alimentation
18
Utilisation de L'adaptateur Secteur et du Câble DC
18
To Use the Battery Pack
19
Utilisation du Bloc Batterie
19
Tableau des Durées D'enregistrement
20
Affichage du Niveau de la Batterie
21
Battery Level Display
21
Using the Battery Pack
20
Utilisation du Bloc Batterie
20
Inserting and Ejecting a Cassette
22
Insertion et Éjection D'une Cassette
22
Basic Recording
23
Making Your First Recording
23
Effectuez un Enregistrement Simple
23
Votre Premier Enregistrement
23
Astuces pour la Stabilité de L'image
25
Utilisation de L'écran LCD
25
Utilisation du Viseur Électronique
25
Hints for Stable Image Recording
25
I Recording with LCD Screen
25
I Recording with Viewfinder
25
Adjusting the LCD
26
Réglage de L'écran LCD
26
Adjusting Focus of the VIEWFINDER
27
Réglage du Viseur
27
Lecture D'une Cassette à L'écran LCD
28
Playing Back a Tape on the LCD
28
I I I
29
Arrêt Sur Image
29
Controlling the Sound from the Speaker
29
Picture Search
29
Recherche D'une Image
29
Réglage du Volume du Haut-Parleur
29
Viewing a Still Picture
29
Advanced Recording
30
Perfectionnez Vos Enregistrements
30
Utilisation du Zoom Avant et Arrière
30
Zooming in and out
30
Digital Zoom
31
Utilisation du Zoom Numérique
31
EASY Mode (for Beginners)
33
Mode EASY (Enregistrement Simplifié)
33
CUSTOM-Creating Your Own Customized Recording Settings
34
Mode CUSTOM - Personnalisation des Réglages pour L'enregistrement
34
DIS (Digital Image Stabilizer, SCL903/L906/L907 Only)
35
MF/AF (Manual Focus/Auto Focus)
36
Mise au Point Manuelle/Automatique (MF/AF)
36
Blc
37
Fonctions BLC
37
Program AE (Automatic Exposure)
38
Sélection D'un Mode D'exposition Automatique
38
Remarques
39
DSE (Digital Special Effects) in CAMERA Mode
40
Effets Numériques Spéciaux en Mode Caméscope
40
Réglage et Enregistrement de la Date et de L'heure
42
Setting and Recording DATE/TIME
42
Selecting and Recording a Title
44
Sélection et Enregistrement D'un Titre
44
Fade in and out
46
Fondu en Ouverture ou en Fermeture
46
Snap Shot (SCL903/L906/L907 Only)
47
White Balance
48
Selecting the OSD LANGUAGE
49
Sélection de la LANGUE D'AFFICHAGE
49
Demonstration
50
Régler la Date/La Couleur du Titre
51
Setting the Date/Title Color
51
Lighting Techniques
52
Sources de Lumière
52
Playing Back a Tape
53
Lecture à L'écran de Votre Téléviseur
53
Lecture à L'écran LCD
53
To Watch with LCD
53
To Watch with TV
53
Visionnez une Cassette
53
Fonctions du Mode Magnétoscope
55
Various Functions in PLAYER Mode
55
Adjusting the LCD
56
Contrôle du Volume
56
DSE en Mode Magnétoscope
56
DSE in PLAYER Mode
56
Réglage de L'écran LCD
56
Réglage du Haut-Parleur
56
Setting the Speaker ON/OFF
56
Volume Control
56
Lecture Multiple (Avec le Système PAL60)
57
USB Interface (SCL907 Only)
58
Multi Playback (Using a PAL60 System)
57
Interface USB (SCL907 Uniquement)
58
Transferring a Digital Image through a USB Connection
58
Transfert D'images Numériques Avec L'interface USB
58
Installation du Programme USB Media 2.0
59
Maintenance
62
Installing USB Media 2.0 Program
59
Cleaning and Taking Care of the Camcorder
62
I Cleaning the LCD Panel
62
I Cleaning the Video Heads
62
I Cleaning the Viewfinder
62
I Storing the Camcorder
62
Conseils D'utilisation
62
Nettoyage et Entretien du Caméscope
62
I Nettoyage de L'écran LCD
62
I Nettoyage du Viseur
62
Using Your Camcorder Abroad
63
Utilisation du Caméscope à L'étranger
63
Diagnostic à L'écran
64
Self Diagnosis Display
64
Troubleshooting
64
Checking
65
Vérification
65
Condensation D'humidité
67
Dépannage
64
Specifications
68
Moisture Condensation
67
Spécifications Techniques
68
Index
69
Warranty (Canada Users Only)
71
Garantie pour le Canada
71
Publicité
Publicité
Produits Connexes
Samsung Hi8 SCL901
Samsung Hi8 SCL906
Samsung Hi8 SCL907
Samsung Hi8 SCL700
Samsung Hi8 SCL750
Samsung Hi8 SCL770
Samsung Hi8 SCL805
Samsung Hi8 SCL870
Samsung Hi8 SCL610
Samsung Hi8 SCL650
Samsung Catégories
Téléphones portables
Réfrigérateurs
Téléviseurs
Moniteurs
Four à micro-ondes
Plus Manuels Samsung
Connexion
Se connecter
OU
Se connecter avec Facebook
Se connecter avec Google
Télécharger le manuel
Télécharger depuis le disque dur
Télécharger depuis l'URL