Publicité
Les langues disponibles
Les langues disponibles
Liens rapides
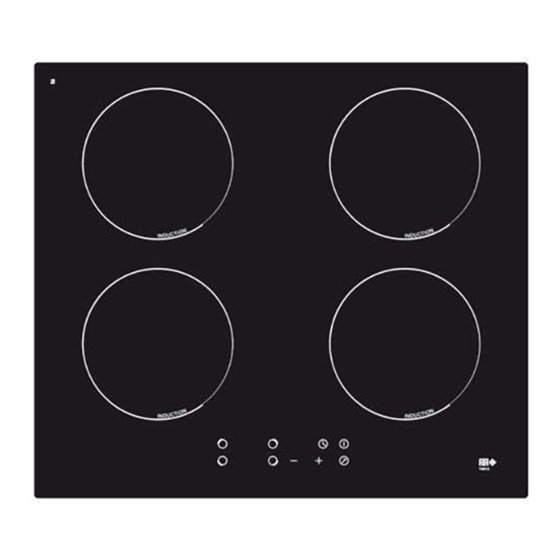
INDUCTION HOB
Instruction Manual / Installation Manual
FAR ref: TI6012
Congratulations on the purchase of your new Induction Hob.
We recommend that you spend some time to read this Instruction / Installation
Manual in order to fully understand how to install correctly and operate it.
For installation, please read the installation section.
Read all the safety instructions carefully before use and keep this Instruction /
Installation Manual for future reference.
Publicité

Manuels Connexes pour FAR TI6012


Sommaire des Matières pour FAR TI6012
- Page 1 INDUCTION HOB Instruction Manual / Installation Manual FAR ref: TI6012 Congratulations on the purchase of your new Induction Hob. We recommend that you spend some time to read this Instruction / Installation Manual in order to fully understand how to install correctly and operate it.
- Page 2 Safety Warnings Your safety is important to us. Please read this information before using your cooktop Electrical Shock Hazard • Disconnect the appliance from the mains electricity supply before carrying out any work or maintenance on it. • Connection to a good earth wiring system is essential and mandatory. •...
- Page 3 • This appliance is to be properly installed and earthed only by a suitably qualified person. • This appliance should be connected to a circuit which incorporates an isolating switch providing full disconnection from the power supply. • Failure to install the appliance correctly could invalidate any warranty or liability claims.
- Page 4 • Do not place or leave any magnetisable objects (e.g. credit cards, memory cards) or electronic devices (e.g. computers, MP3 players) near the appliance, as they may be affected by its electromagnetic field. • After use, always turn off the cooking zones and the cooktop as described in this manual (i.e.
- Page 5 Installation Cut out the work surface according to the sizes shown in the drawing. For the purpose of installation and use, a minimum of 5 cm space shall be preserved around the hole. Be sure the thickness of the work surface is at least 30 mm. Please select heat-resistant work surface material to avoid larger deformation caused by the heat radiation from the hotplate.
- Page 6 Before you install the hob, make sure that a) the work surface is square and level, and no structural members interfere with space requirements b) the work surface is made of a heat-resistant material c) if the hob is installed above an oven, the oven has a built-in cooling fan d) the installation will comply with all clearance requirements and applicable standards and regulations e) a suitable isolating switch providing full disconnection from the mains...
- Page 7 Adjusting the bracket position Fix the hob on the work surface by screw 2 brackets on the bottom of hob (see picture) after installation. Adjust the bracket position to suit for different table top thickness. bracket Cautions 1. The induction hotplate must be installed by qualified personnel or t echnicians.
- Page 8 Verify that the electric meter and fuses can withstand the intensity absorbed by the table, taking the other appliances plugged into account. Fuse rating of lines (one per phase): 32 amps. 400V~ 220-240V~ 220-240V~ 220-240V~ 220-240V~ 220-240V~ a) If the cable is damaged or to be replaced, the operation must be carried out the by after-sale agent with dedicated tools to avoid any accidents.
- Page 9 Control Panel 1. Cooking z one selection key 2. Timer key 3. keylock control 4. ON/OFF control 5. Power/T imer regulating key Using the Touch Controls 1. The controls respond to touch, so you don’t need to apply any pressure. 2.
- Page 10 Choosing the right Cookware 1. Only use cookware with a base suitable for induction cooking. Look for the induction symbol on the packaging or on the bottom of the pan. 2. You can check whether your cookware is suitable by carrying out a magnet test.
- Page 11 Do not use cookware with jagged edges or a curved base. Make sure that the base of your pan is smooth, sits flat against the glass, and is the same size as the cooking zone. Use pans whose diameter is as large as the graphic of the zone selected.Using a pot a slightly wider energy will be used at its maximum efficiency.If you use smaller pot...
- Page 12 If the display flashes alternately with the heat setting a) you have not placed a pan on the correct cooking zone or, b) the pan you’re using is not suitable for induction cooking or, c) the pan is too small or not properly centred on the cooking zone. No heating takes place unless there is a suitable pan on the cooking zone.
- Page 13 automatically go on to standby in 1 minute. The fan will keep cooking down the induction hob for a further 1 minute. Auto Shutdown Protection Auto shut down is a safety protection function for your induction hob. It shut down automatically if ever you forget to turn off your cooking. The default working times for various power levels are shown in the below table: .
- Page 14 Using the Timer You can use the timer in two different ways: 1. You can use it as a minute minder. In this case, the timer will not turn any cooking zone off when the set time is up. 2. You can set it to turn one cooking zone off after the set time is up. 3.
- Page 15 5. When the time is set, it will begin to count down immediately. The display will show the remaining time and the timer indicator will flash for 5 seconds. 6. Buzzer will bips for 30 seconds and the timer indicator shows “- - “...
- Page 16 6. When cooking timer expires, the corresponding cooking zone will be switch off automatically. Other cooking zone will keep operating if they are turned on previously. Cooking Guidelines Take care when frying as the oil and fat heat up very quickly, particularly if you’re using PowerBoost.
- Page 17 4. Turn the steak only once during cooking. The exact cooking time will depend on the thickness of the steak and how cooked you want it. Times may vary from about 2 – 8 minutes per side. Press the steak to gauge how cooked it is –...
- Page 18 7 – 8 a) sautéing b) cooking pasta a) stir-frying b) searing c) bringing soup to the boil d) boiling water Care and Cleaning What Important Everyday soiling 1. Switch the power to the 1. When the power to the on glass cooktop off.
- Page 19 Boilovers, melts, Remove these immediately 1. Remove stains left by and hot sugary with a fish slice, palette knife melts and sugary food spills on the or razor blade scraper or spillovers as soon as glass suitable for Induction glass possible.
- Page 20 Hints and Tips Problem Possible causes What to do The induction No power. Make sure the induction hob cannot be hob is connected to the turned on. power supply and that it is switched on. Check whether there is a power outage in your home or area.
- Page 21 The induction This is caused by the This is normal, but the hob makes a technology of induction noise should quieten low humming cooking. down or disappear noise when completely when you used on a high decrease the heat heat setting. setting.
- Page 22 E5 / E6 Bad induction hob heat Please restart after the radiation induction hob cools down. Technical Specification TI6012 Supply Voltage 220V-240V~ / 400V 3N~ 50/60Hz Product Size (L*P*H) 590 x 520 x 60 mm Building-in Dimensions (L*P) 560 x 490 mm N.W.
- Page 23 CORRECT DISPOSAL OF THIS PRODUCT This appliance is labeled in compliance with European directive 2002/96/EC for Waste Electrical and Electronic Equipment (WEEE). By ensuring that this appliance is disposed of correctly, you will help prevent any possible damage to the environment and to human health, which might otherwise be caused if it were disposed of in the wrong way.
- Page 24 TABLE DE CUISSON A INDUCTION NOTICE D’UTILISATION FAR ref : TI6012 Nous vous remercions d’avoir acheté cette plaque chauffante à induction. Veuillez lire attentivement cette notice d’instructions avant toute utilisation et conservez-la dans un lieu sûr pour toute future référence.
- Page 25 CONSIGNES DE SECURITE IMPORTANT ! LIRE TOUTES LES CONSIGNES AVANT UTILISATION MISE EN GARDE ! Pour éviter toute erreur ou accident, assurez-vous que les utilisateurs de cet appareil aient pris parfaitement connaissance de son fonctionnement et des mesures à observer en matière de sécurité. Conservez cette notice d’utilisation avec votre appareil.
- Page 26 polystyrènes) représentent un danger pour les enfants - risque d’asphyxie ! Conservez-les hors de portée des enfants (h) La température des surfaces accessibles peut être élevée lorsque l'appareil est en fonctionnement. 2. Utilisation a) Cet appareil doit être utilisé uniquement pour l’usage pour lequel il a été...
- Page 27 o) N’essayez jamais de réparer l'appareil vous-même. Les réparations effectuées par du personnel non qualifié peuvent provoquer des blessures ou le mauvais fonctionnement de l'appareil. Contactez le service après-vente de votre magasin vendeur. Exigez des pièces de rechange certifiées Constructeur. p) ATTENTION : les personnes possédant des objets métalliques dans le corps (pacemaker) ne doivent pas s’approcher de la table de cuisson en cours de fonctionnement ;...
- Page 28 MISE EN GARDE: Si la surface est fêlée, déconnecter l'appareil de l'alimentation pour éviter un risque de choc électrique. Cet appareil est destiné à être utilisé dans des applications domestiques et analogues telles que: – des coins cuisines réservés au personnel dans des magasins, bureaux et autres environnements professionnels;...
- Page 29 59cm 52cm 5cm mini 5cm mini 49cm 56cm 5cm mini 5cm mini Schéma (1) 2. Dans tous les cas, assurez-vous que la plaque de cuisson induction soit bien ventilée et que l’entrée et la sortie d’air ne soient pas obstruées. Schéma (2).
- Page 30 Branchements électriques Vérifiez que le compteur de l’abonné et les fusibles peuvent supporter l’intensité absorbée par la table, compte tenu des autres appareils électriques branchés. Calibre des fusibles de lignes (un par phase) : 32 ampères. L’appareil ne doit pas être raccordé à l’aide d’un prolongateur ou d’une prise multiple (risque d’incendie).
- Page 31 DESCRIPTION DE L’APPAREIL 1. Foyer 1500 W max 2. Foyer 2000 W max 3. Foyer 1500 W max 4. Foyer 2000 W max 5. Bandeau de commande 6. plaque en verre BANDEAU DE COMMANDE é 3. MARCHE/ARRET a l l é...
- Page 32 CONSEILS D’UTILISATION ET UTILISATION DE LA PLAQUE Principe de fonctionnent de l’induction La plaque de cuisson par induction est équipée d’une bobine composée d’un matériau ferromagnétique et d’un système de contrôle. Le courant électrique génère un puissant champ magnétique à travers la bobine. Cela produit un grand nombre de tourbillons qui produisent de la chaleur qui est ensuite transmise à...
- Page 33 3. A chaque pression, un ‘bip’ est émis pour indiquer la prise en compte de l’action demandée. 4. Veuillez vous assurer que les touches de contrôle sont tout le temps propres et sèches et qu’aucun objet ne perturbe leur fonctionnement. Note : même un léger film d’eau peut perturber le bon fonctionnement des touches.
- Page 34 Conseils d’utilisation Information avant utilisation Après avoir mis la plaque de cuisson sous tension, un signal sonore est émis, les indicateurs de puissance s’allument pendant une seconde puis s’éteignent, indiquant que la plaque de cuisson à induction est utilisable et entre en mode veille. Mise en fonctionnement 1.
- Page 35 Important : Ne jamais laisser un foyer en fonctionnement sans ustensile de cuisinière adapté posé dessus. Important : Ne jamais laisser une cuisson sans surveillance. Mise à l’arrêt 1a. Diminuer la puissance de chauffe du foyer en appuyant sur la touches ‘-‘ jusqu’à 0 ou 1b.
- Page 36 Sécurités automatiques Protection sur-température Un capteur installé dans la table de cuisson mesure en permanence la température à la surface de la table. Si une température top importante est détectée, la table de cuisson sera automatiquement mise à l’arrêt. Lorsque la température à la surface de la table de cuisson est redevenue normale, la table de cuisson à...
- Page 37 Options d’utilisations Verrouillage des touches (sécurité enfant) Cette table de cuisson à induction permet de bloquer l’utilisation des touches sensitives pour éviter des modifications involontaires. Lorsque le verrouillage est enclenché, toutes les touches sont inopérantes, à l’exception de la touche Marche/Arrêt (touche 6). 1.
- Page 38 Utilisation de la minuterie en minuteur de rappel 1. Assurez-vous que la table de cuisson induction est en fonctionnement 2 . Appuyer sur la touche minuterie (touche 2) 3. Ajuster la valeur de la minuterie en appuyant sur les touches ‘-‘ et ‘+’ L’indicateur se mettra à...
- Page 39 Utilisation de la minuterie en mode fin de cuisson 1. Sélectionner la zone de cuisson à programmer 2 . Appuyer sur la touche minuterie (touche 2) 3. Ajuster la valeur de la minuterie en appuyant sur les touches ‘-‘ et ‘+’ de la minuterie L’indicateur se mettra à...
- Page 40 Conseils de cuisson Les conseils de cuisson sont donnés à titre informatifs seulement ; les réglages dépendent de plusieurs facteurs comme par exemple les ustensiles de cuisine, l’aliment à cuisiner, … Seule l’expérience de cuisine avec cette table de cuisson à induction vous permettra de déterminer les bons ajustements de puissance.
- Page 41 ENTRETIEN ET NETTOYAGE Avant de commencer le nettoyage, assurez-vous que la plaque de cuisson est éteinte. Si vous le pouvez, il est conseillé de débrancher la plaque de cuisson avant de procéder au nettoyage. 1. Pour conserver l’éclat du verre en céramique, un nettoyage régulier est recommandé...
- Page 42 RESOLUTION DE PROBLEMES Nous vous recommandons vivement de faire les vérifications suivantes sur votre appareil avant d'appeler votre service après vente. Il se peut que le problème soit simple et que vous puissiez y remédier vous-même. En cours de fonctionnement, il est possible qu’un code apparaisse sur le bandeau de commande pour indiquer un problème de fonctionnement, si le cas se présente, notez-le afin de l’indiquer à...
- Page 43 La vitre se raye 1. Le mode ou les 1. Suivre les conseils du ustensiles de nettoyage paragraphe ‘Entretien et ne sont pas adaptés Nettoyage’ 2. Le fond des ustensiles 2. Utiliser des ustensiles de de cuisson est abîmé cuisson à fond plat et sans accroc, suivre les instructions du paragraphe ‘Conseils...
- Page 44 La table de Défaut technique Noter le code erreur cuisson s’est s’affichant (lettre + chiffre) éteinte Eteindre la table à induction subitement en et ne plus l’utiliser emmetant une Vérifier la signification du alarme sonore. code dans le tableau ci dessous Affichage d’erreur et inspection Si un problème se produit, la plaque chauffante par induction se mettra...
- Page 45 CARACTERISTIQUES TECHNIQUES TI6012 Alimentation 220V-240V~ / 400V 3N~ 50/60Hz Dimension (L*P*H) 590 x 520 x 60 mm Dimension d’encastrement (L*P) 560 x 490 mm Poids 10,0 kg Puissance maximale 6400-7200 W Puissance des foyers Avant gauche : 1500 W (180 mm) Arrière gauche : 2000 W (180 mm)
- Page 46 importé par CONFORAMA France SA 80 Boulevard du Mandinet LOGNES 77432 Marne la Vallée Cedex 2 FRANCE...