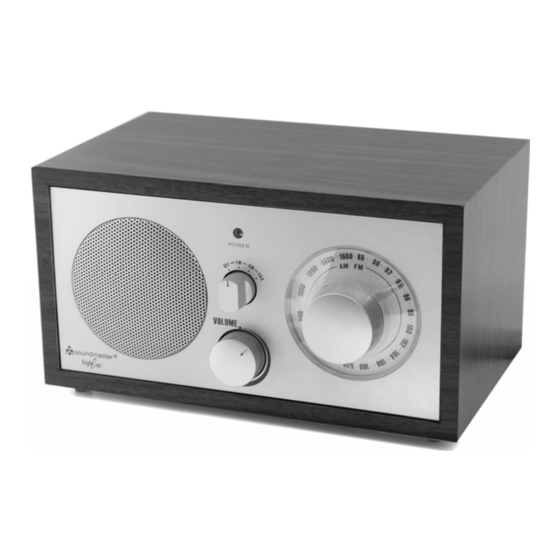
Sommaire des Matières pour SOUNDMASTER Highline TR 17
- Page 1 All manuals and user guides at all-guides.com DEUTSCH MAGYAR ENGLISH ITALIANO FRANÇAIS ESPAÑOL ČEŠTINA NEDERLANDS SLOVENČINA TR 17...
- Page 2 All manuals and user guides at all-guides.com Aufstellhinweise • Das Gerät sollte keiner direkten Sonnenbestrahlung ausgesetzt werden, sonst bleicht das Holz aus. • Das Gerät möglichst weit weg von Computern, Mikrowellengeräten entfernt aufstellen, sonst kann es zu Empfangsstörungen kommen. • Das Gerät ausnahmslos in trockenen Innenräumen betreiben •...
- Page 3 All manuals and user guides at all-guides.com Bedienelemente 1 Lautsprecher 4 Sender Einstellung 2 Betriebs LED 5 Lautstärkeregler 3 Aus / UKW / MW / AUX 6 Rating Label 9 12 Volt Netzteilanschlussbuchse 7 Netzkabel 10 Kopfhörerbuchse 8 UKW Wurfantenne 11 AUX-Anschluss 12 Hauptbetriebsschalter EIN/AUS Rating Label(6)
- Page 4 All manuals and user guides at all-guides.com Inbetriebnahme • Den Netzstecker (7) an eine 230V 50Hz Steckdose anschließen • Hauptbetriebsschalter (12) auf Pos. „I“ stellen Die UKW-Wurfantenne (8) vollständig ausziehen • Die Ferrit Antenne für MW ist im Gerät eingebaut. •...
- Page 5 All manuals and user guides at all-guides.com Mode d´emploi TR 17 Eléments de fonction haut-parleur indicateur LED Off/FM/AM/AUX bouton de syntonisation contrôle du volume Rating Label(6) Interrupte ur AUX-Anschluss (11) Marche/Arrét (12) Kopfhörerbuchse (10) 12 Volt Netzteilansch UKW-Wurfantenne Netzkabel(7) plaque signalétique de fiche jack adaptateur de l’appareil courant 12V...
- Page 6 All manuals and user guides at all-guides.com Installation • Evitez une exposition directe de l´appareil aux rayons du soleil, le bois risque de ternir. • Installez l´appareil le plus loin possible d´un ordinateur ou d´un micro-ondes, sinon il peut y avoir des interférences. •...
- Page 7 All manuals and user guides at all-guides.com Branchez le câble (7) sur une prise de 230V 50Hz. Interrupte ur Marche/Arrét (12) en positon « I » Déroulez complètement l´antenne (8). Une antenne Ferrit pour les MW (ondes moyennes) est intégrée dans l´appareil. Bouton Marche/Arrêt (3) sur position UKW ou MW ou AUX.
- Page 8 All manuals and user guides at all-guides.com Instruction manual TR 17 Bedienelemente 1 Loudspeaker 4 Frequency Tuning Knob 2 LED Indicator 5 Volume control 3 ON / OFF / FM / AM / AUX switch 6 Rating label 9 12 V power adaptor jack 7 Mains cable 10 Headphone jack 8 FM wire antenna...
- Page 9 All manuals and user guides at all-guides.com OPERATION 1. Be sure the power cable is connect with the power outlet. 2. Power ON/OFF switch (12) to position “I” 3. Replace the radio on flat and open area for best reception. 4.
- Page 10 All manuals and user guides at all-guides.com Návod k obsluze TR 17 Ovládací prvky 1 Reproduktor 4 Knoflík ladění frekvence 2 Indikátor LED napájení 5 Ovladač hlasitosti 3 Přepínač ZAP / VYP / FM / AM / AUX 6 Identifikační štítek 9 Konektor adaptéru 12V 7 Napájecí...
- Page 11 All manuals and user guides at all-guides.com ČINNOST 1. Ujistěte se, že je přívodní kabel připojen k elektrické zásuvce. 2. Vypínac do polohy „I“ 3. Umístěte rádio na rovný a otevřený prostor pro co nejlepší příjem. 4. Zapněte rádio a zvolte režim mezi AM/FM/AUX. Indikátor napájení se rozsvítí.
- Page 12 All manuals and user guides at all-guides.com Návod na použitie TR 17 Ovládacie prvky 1 Reproduktor 4 Otočný ovládač ladenia frekvencie 2 LED indikátor 5 Ovládač hlasitosti 3 ON (Zap.) / OFF (Vyp.) / FM / AM / AUX prepínač INDIKÁTOR NAPÁJANIA ON (ZAP.) / OFF (VYP.) / REPRODUKTOR...
- Page 13 All manuals and user guides at all-guides.com PREVÁDZKA 1. Uistite sa, že napájacia šnúra je zapojená do elektrického rozvodu. 2. Prepnút´ do polohy „I“ 3. Umiestnite rádio na rovné a otvorené miesto pre najlepší príjem. 4. Zapnite rádio a zvoľte jednu z možností AM/FM/AUX. Indikátor napájania sa rozsvieti.
- Page 14 All manuals and user guides at all-guides.com Használati útmutató TR 17 Kezelőszervek 1 Hangszóró 4 Frekvenciahangoló gomb 2 LED indikátor 5 Hangerőszabályozó 3 ON / OFF / FM / AM / AUX kapcsoló működést jelző indikátor ON / OFF / FM / AM / AUX hangszóró...
- Page 15 All manuals and user guides at all-guides.com HASZNÁLAT 1. Győződjön meg arról, hogy a hálózati kábel csatlakoztatva van-e az áramforráshoz. 2. kapcsoló ON/OFF “I” 3. A lehető legjobb vétel érdekében a rádiót vízszintes, tágas felületre helyezze. 4. Kapcsolja be a rádiót és válasszon az AM (középhullám) / FM (URH) / AUX (külső...
- Page 16 All manuals and user guides at all-guides.com Instruction Manual: Manuale d’Uso Wooden AM/FM radio: Art. H5004 – Radio Hi-Fi "Concerto" MDF finitura Legno Douglas Power indicator: Spia acceso/spento Speaker = altoparlante OFF/FM/AM/AUX switch = interruttore OFF/FM/AM/AUX Frequency tuning knob = manopola di sintonia Volume knob = manopola Volume AUX IN: AUX IN HEAD PHONES: PRESA CUFFIE...
- Page 17 All manuals and user guides at all-guides.com Manual de instrucciones TR 17 manual ON/OFF/FM/AM/AUX la tecla altoparlante La frecuencia tecla El volumen la tecla Placa de identificación ON/OFF interruptor AUX conexión Auricular conexión adaptador FM antena cable...
- Page 18 All manuals and user guides at all-guides.com OPERACIÓN 1. Asegúrese de que el cable esté en contacto con la toma de corriente. 2. Power ON / OFF en la posición "I" 3. Vuelva a colocar la radio en un terreno llano y abierto para una mejor recepción 4.
- Page 19 All manuals and user guides at all-guides.com Gebruiksaanwijzing TR 17 ON/OFF/FM/AM/AUX schakelaar Luidspreker Afstemschuif Volumeschuif Ratinglabel ON/OFF schuif Ingang AUX Ingang koptelefon 12V ingang FM antenne AC voedingskabel...
- Page 20 All manuals and user guides at all-guides.com OPERATIE 1. Zorg ervoor dat de voedingskabel is verbinding met het stopcontact. 2. Power ON / OFF-schakelaar in de stand "I" 3. Vervang de radio op vlakke en open gebied voor de beste ontvangst 4.


