Publicité
Les langues disponibles
Les langues disponibles
Liens rapides
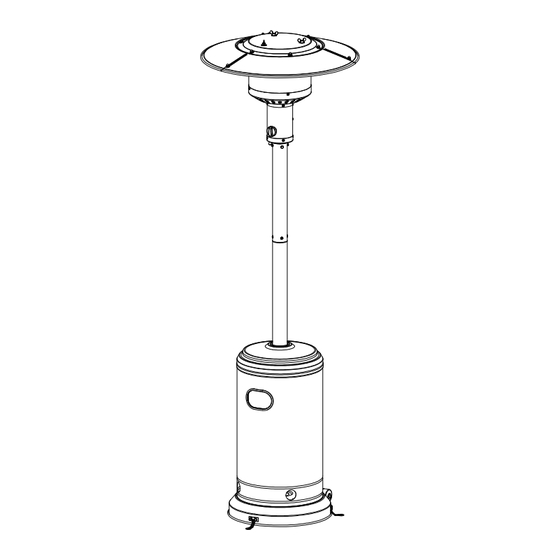
Patio Heater/Chauffe-terrasse
Item/Article #:N
Contact us at customer.care@sunjoygroup.com
Questions? Problèmes? Pièce manquante?Service
Contactez-nous à customer.care@sunjoygroup.com
Country of Origin: China
Pais d'origine: Chine
HSS-G-SJGPC(A306016800)
Questions? Issues? Missing Part? Professional
Installation Service?
d'installation professionnel?
Production Number: 2024100208
Numéro de fabrication: 2024100208
Publicité

Manuels Connexes pour Sunjoy NHSS-G-SJGPC

Sommaire des Matières pour Sunjoy NHSS-G-SJGPC
- Page 1 Patio Heater/Chauffe-terrasse Item/Article #:N HSS-G-SJGPC(A306016800) Questions? Issues? Missing Part? Professional Installation Service? Contact us at customer.care@sunjoygroup.com Questions? Problèmes? Pièce manquante?Service d'installation professionnel? Contactez-nous à customer.care@sunjoygroup.com Production Number: 2024100208 Country of Origin: China Pais d’origine: Chine Numéro de fabrication: 2024100208...
- Page 2 Owner’s Manual OUTDOOR PATIO HEATER MODEL #NHSS-G-SJGPC DANGER If you smell gas: 1. Shut off gas to the appliance. 2. Extinguish any open flame. 3. If odor continues, keep away from the appliance and immediately call your gas supplier or fire department.
- Page 3 Manuel de l'utilisateur CHAUFFAGE DE PATIO EXTÉRIEUR MODEL #NHSS-G-SJGPC DANGER Si vous sentez une odeur à gaz: 1.Fermez le gaz à l'appareil. 2.Éteignez toute flamme. 3.Si l'odeur persiste,après avoir quitté les lieux, faites appel à votre fournisseur de gaz ou au service d'incendie.
- Page 4 PACKAGE CONTENTS/Contenu d’emballage PART DESCRIPTION QUANTITY Reflector Panel/Panneau Réflecteur P00310015101 Center Reflector/Réflecteur central P00090022601 Head Assembly/Montage de la partie P00790021401 supérieure Gas Hose(pre-assembled in C)/Tuyau du P00790021401 Gaz(déjà assemblé sur C) Regulator( pre-assembled in C)/ P00790021401 Régulateur (déjà assemblé sur C) P00020093101 Post 1/Poste 1 P00690005501...
- Page 5 Hardware Pack/Pack Quincaillerie 3 / 17 Label Part Image/Numéro de la Part Number/ Description Pièce Diagramme Étiquette Numéro dela Pièce Bolt M8x15 H010010021 Boulon M8x15 M6 Flange nut H040020007 Écrou à bride Bolt M6x10 H010010019 Boulon M6x10 Bolt M6x30 H010010020 Boulon M6x30 Double End H020080002...
- Page 6 SAFETY INFORMATION Please read and understand this entire manual before attempting to assemble, operate or install the product. This manual contains important information about the assembly, operation and maintenance of this patio heater. General safety information is presented in these first few pages and is also located throughout the manual.
- Page 7 INFORMATION DE SÉCURITÉ Veuillez, SVP, lire et vous assurer de comprendre ce manuel entier avant d’essayer d’assembler, d’opérer ou d’installer cet article. Ce manuel contient des informations importantes sur le montage, le fonctionnement et l'entretien de ce chauffe-terrasse. Des indications générales de sécurité se présentent dans ces premières pages et sont également situés tout le long du manuel.
- Page 8 SAFETY INFORMATION DANGER DANGER • EXPLOSION - FIRE HAZARD • CARBON MONOXIDE HAZARD • Keep solid combustibles, such as building materials, • This heater is a combustion appliance. All paper or cardboard, a safe distance away from the combustion appliances produce carbon monoxide heater as recommended by the instructions.
- Page 9 SAFETY INFORMATION DANGER DANGER • RISQUE DE MONOXYDE DE CARBONE • EXPLOSION – RISQUE D’INCENDIE • Ce radiateur est un appareil à combustion. Tous les • Gardez les combustibles solides, tels que les matériaux de appareils à combustion produisent du monoxyde de carbone construction, le papier ou le carton, à...
- Page 10 SAFETY INFORMATION WARNING WARNING California Proposition 65 • This product is fueled by propane gas. Propane gas Combustion by-products produced when using is invisible, odorless, and flammable. An odorant is this product contain chemicals known to the State normally added to help detect leaks and can be of California to cause cancer, birth defects, and described as a “rotten egg”...
- Page 11 INFORMATION DE SÉCURITÉ AVERTISSEMENT AVERTISSEMENT • Ce produit est alimenté au gaz propane. Le gaz propane est Proposition 65 de Californie invisible, inodore et inflammable. Un odorant est Les sous-produits de combustion lors de l'utilisation de ce normalement ajouté pour aider à détecter les fuites et peut produit contiennent des produits chimiques reconnus par être décrit comme une odeur «...
- Page 12 ASSEMBLY INSTRUCTIONS WARNING This product contain sharp edges on the panels,cylinder housing and handle please install with care. 1. . Attach wheel kit (J) to base (K). Line up holes in heel bracket with corresponding holes in base, insert two bolts M8 x 15 (AA) through holes, and finger tighten two M8 flange nuts (NN).
- Page 13 ASSEMBLY INSTRUCTIONS AVERTISSEMENT Ce produit contient des bords tranchants sur les panneaux, le boitier de la bombonne et la poignée, veuillez installer soigneusement. 1. Fixez le jeu de roues (J) à la base (K). Alignez les trous du support en forme de talon avec les trous correspondants de la base, introduisez deux boulons M8 x 15 (AA) dans les trous et serrez à...
- Page 14 ASSEMBLY INSTRUCTIONS 4. Load cylinder housing (G) onto pole. Slide cylinder housing down. 5. Attach three reflector spacers (EE) and three washers Ø8 (FF) to the top of head assembly (C). Tighten the reflector spacers. Hardware Used Reflector Spacer 6. Unscrew stainless steel bolts M6 x 10 (CC) from head assembly.
- Page 15 ASSEMBLY INSTRUCTIONS 4. Posez le boîtier du cylindre (G) sur le poteau. Faites glisser le boîtier du cylindre vers le bas. 5. Fixez trois écarteurs de réflecteur (EE) et trois rondelles Ø8 (FF) au sommet de l'ensemble supérieur (C). Serrez les écarteurs du réflecteur. Quincaillerie Utilisée Entretoise de réflecteur...
- Page 16 ASSEMBLY INSTRUCTIONS 7-1. Insert hose of Head Assembly into Upper Pole (F). Secure Head Assembly to pole with Stainless Steel Bolts. 7-2.Put the Upper Pole ( F) onto the Lower Pole (H), using 4pcs Screw 3/16” (KK) to firmly secure 2pcs Pole. The warning label on the Upper Pole should be on the same side as the flat plate of the Lower Pole.
- Page 17 ASSEMBLY INSTRUCTIONS 7-1. Introduisez le tuyau de l’ensemble supérieur dans le poteau supérieur (F). Fixez l’ensemble supérieur au poteau avec des boulons en acier inoxydable. 7-2.Placez le poteau supérieur (F) sur le poteau inférieur (H), à l'aide de 4 vis 3/16" (KK) pour fixer fermement les 2 poteaux. L'étiquette d'avertissement sur le poteau supérieur doit être du même côté...
- Page 18 ASSEMBLY INSTRUCTIONS 10. Slide Reflector Plate onto Reflector Panels. Insert one Screw M6 x 10 (HH). Slide one Washer Φ6 (GG) over threaded end of Screw M6 x 10 (HH) and screw on Cap Nut (II) loosely. Repeat procedure to complete the assembly of all four sections.
- Page 19 ASSEMBLY INSTRUCTIONS 10. Glissez la plaque réflectrice sur les panneaux réflecteurs. Insérez une vis M6 x 10 (HH). Glissez une rondelle Φ6 (GG) sur l'extrémité filetée de la vis M6 x 10 (HH) et vissez l'écrou borgne (II) sans serrer. Répétez la procédure pour terminer le montage des quatre sections.
- Page 20 ASSEMBLY INSTRUCTIONS 12. Connect hose and regulator to cylinder. The propane gas and cylinder are sold separately. Every part of the heater shall be secure against displacement and shall be constructed to maintain a fixed relationship between essential parts under normal and reasonable conditions of handling and usage.
- Page 21 ASSEMBLY INSTRUCTIONS 12. Connectez le tuyau et le régulateur à la bombonne. Le gaz propane et la bombonne se vendent séparément. Chaque partie de l'appareil de chauffage doit être stabilisée contre tout déplacement et doit être construite pour maintenir une relation fixe entre les pièces essentielles dans des conditions normales et raisonnables de manipulation et d'utilisation.
- Page 22 ASSEMBLY INSTRUCTIONS A dented, rusted or damaged propane cylinder may be hazardous and should be checked by your cylinder supplier. Never use a propane cylinder with a damaged valve connection. The propane cylinder must be constructed and marked in accordance with the specifications for propane gas cylinders of the U.S.
- Page 23 ASSEMBLY INSTRUCTIONS Une bombonne de propane abîmée, rouillée ou endommagée peut être dangereuse et doit être vérifiée par votre fournisseur de bombonnes. N’utilisez jamais une bombonne de propane avec un raccord de vanne endommagé. La bombonne de propane doit être construite et marquée conformément aux spécifications pour les bombonnes de gaz propane du Département des transports des États- Unis (DOT) ou à...
- Page 24 OPERATION INSTRUCTIONS Leak Check WARNING • Perform all leak tests outdoors. • Extinguish all open flames. • NEVER leak test when smoking. • Do not use the heater until all connections have been leak tested and do not leak. Hose / Regulator Regulator / Cylinder connection connection...
- Page 25 INSTRUCTIONS D’UTILISATION Contrôle de Fuites AVERTISSEMENT • Effectuer tous les contrôles de fuites à l'extérieur • Éteignez toutes les flammes nues • NE JAMAIS faire le contrôle de fuites en fumant • N'utilisez pas le radiateur tant que toutes les connexions ne soient pas contrôlées et qu’elles ne fuient pas.
- Page 26 OPERATION INSTRUCTIONS DANGER • CARBON MONOXIDE HAZARD • For outdoor use only. Never use inside house, or other unventilated or enclosed areas. This heater consumes air (oxygen). Do not use in unventilated or enclosed areas to avoid endangering your life. Caution: Do not attempt to operate until you have read and understand all General Safety Information in this manual and all assembly is complete and leak checks have been performed.
- Page 27 INSTRUCTIONS D’UTILISATION DANGER • MONOXYDE DE CARBONE • Solo para uso en exteriores. Ne jamais utiliser à l'intérieur de la maison ou dans d'autres endroits non ventilés ou clos. Ce chauffage consomme de l'air (oxygène). Ne pas utiliser dans des endroits non ventilés ou clos pour éviter de mettre votre vie en danger.
- Page 28 OPERATION INSTRUCTIONS Lighting: 1. Turn on the valve on the gas cylinder. 2. Press and turn the control knob to HIGH (maximum) position (counter-clockwise 90º). (Figure 1) 3. Holding down the control knob, press the igniter button several times until the main flame is ignited. Release the control knob 10 seconds after the ignition.
- Page 29 OPERATION INSTRUCTIONS Allumage: 1. Ouvrez la vanne de la bombonne de gaz. 2. Appuyez et tournez le bouton de commande jusqu’à la position HIGH (maximale) (tournez 90º vers la gauche). (Figure 1) 3. En maintenant le bouton de commande enfoncé, appuyez plusieurs fois sur le bouton d'allumage jusqu'à ce que la flamme principale s'allume.
- Page 30 OPERATION INSTRUCTIONS WARNING FOR YOUR SAFETY Be careful when attempting to manually ignite this heater. Holding in the control know for more than 10 seconds before igniting the gas will cause a ball of flame upon ignition. When Heater is ON: Emitter screen will become bright red due to intense heat.
- Page 31 OPERATION INSTRUCTIONS AVERTISSEMENT POUR VOTRE SÉCURITÉ Soyez prudent lorsque vous essayez d'allumer ce radiateur manuellement. Si vous appuyez le bouton de commande pendant plus de 10 secondes avant d'allumer le gaz il se produira une boule de flammes lors de l'allumage. Pendant que le radiateur est allumé...
- Page 32 OPERATION INSTRUCTIONS 9. Heater is away from gasoline or other flammable liquids or vapors. 10. Heater is away from windows, air intake openings, sprinklers and other water sources. 11. Heater is at least 3 feet on top and at least 3.3 feet on sides from combustible materials. 12.
- Page 33 INSTRUCTIONS DE FONCTIONNEMENT Le radiateur est éloigné de l’essence ou d’autres liquides ou vapeurs inflammables. Le radiateur est éloigné des fenêtres, des ouvertures d’entrée d’air, des gicleurs et d’autres sources d’eau. Le radiateur est à au moins 3 pieds sur le dessus et à au moins 3,3 pieds sur les côtés des matériaux combustibles.
- Page 34 CARE AND MAINTENANCE Visually checking portions of the hose assembly located within the confines of the heater post. Inspect the entire hose assembly at least annually, disassembling the reflector and burner. Inspect the hose assembly for evidence of excessive abrasion, cuts, or wear. Suspected areas should be leak tested. Then assembling the reflector and burner again following with step 7 and 11.
- Page 35 CARE AND MAINTENANCE Vérifiez visuellement les parties de l'ensemble de tuyaux situées dans le poste de chauffage. Vérifiez l’ensemble du tuyau au moins une fois par an, en démontant le réflecteur et le brûleur. Vérifiez l’ensemble de tuyaux à la recherche de signes d’abrasion, de coupures ou d’érosion excessive.
- Page 36 TROUBLESHOOTING PROBLEM POSSIBLE CAUSE CORRECTIVE ACTION Wait until the propane cylinder Propane cylinder is frosted over warms up and is defrosted Burner won’t light Blockage in orifice Clear blockage Control knob is not in ON position Turn control knob to ON Turn cylinder valve OFF and replace Gas pressure is low cylinder...
- Page 37 TROUBLESHOOTING PROBLEM POSSIBLE CAUSE CORRECTIVE ACTION Attendez que la bombonne de La bombonne de propane est gelée propane se réchauffe et soit dégelée Le brûleur ne Obstruction dans l'orifice Supprimer le blocage s’allume pas. Le bouton de commande n’est pas sur la Tournez le bouton de commande vers la position ON (allumée) position ON (allumée)
- Page 38 ONE-YEAR LIMITED WARRANTY This product is inspected, tested and carefully packaged to minimize the chance of damage during shipment. If a part within one year from the date of purchase proves to be defective in material or fabrication under normal use, the part will be repaired or replaced. The Company's obligation under the warranty is to replace or repair defective parts at our discretion.
- Page 39 GARANTIE LIMITÉE D'UN AN Ce produit est inspecté, testé et soigneusement emballé pour minimiser les risques de dommages pendant le transport. Si une pièce dans un délai d'un an à compter de la date d'achat s'avère défectueuse en termes de matériau ou de fabrication dans des conditions normales d'utilisation, la pièce sera réparée ou remplacée.