Télécharger Imprimer la page

Publicité

Les langues disponibles

Les langues disponibles

Liens rapides

Vintage2-PH1
Barebone System
Quick Installation Guide

Publicité

loading

Sommaire des Matières pour Asus Vintage2-PH1

  • Page 1 Vintage2-PH1 Barebone System Quick Installation Guide...
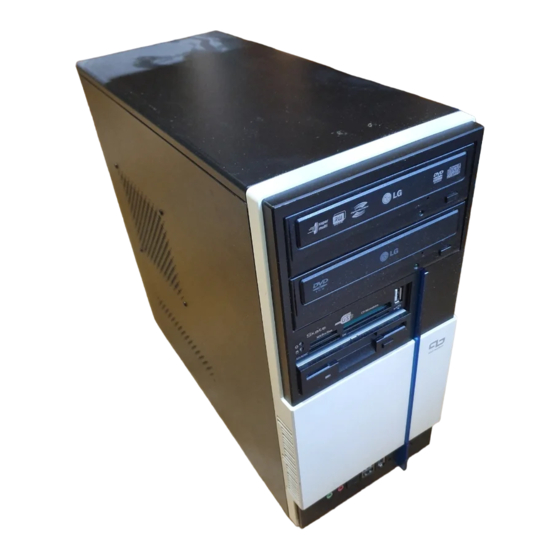
  • Page 2 Front panel features 5 . 2 5 - i n c h d r i v e 5 . 2 5 - i n c h d r i v e 5 . 2 5 - i n c h d r i v e 5 .
  • Page 3 BUZZ TSB43AB22A AAFP SPDIF_OUT IE1394_2 USB56 USB78 Front panel cover ASUS motherboard 5.25-inch optical drive bays Chassis fan Hard disk drive bay 10. PCI Express x16 slot Floppy disk drive bay 11. PCI slots Power supply unit 12. PCI Express x1 slot CPU socket 13.
  • Page 4 CPU socket and the socket contacts are not bent. Contact your retailer immediately if the PnP cap is missing, or if you see any damage to the PnP cap/socket contacts/motherboard components. ASUS will shoulder the cost of repair only if the damage is shipment/ transit-related. •...
  • Page 5 To install a CPU: Locate the CPU socket on the motherboard. Before installing the CPU, make sure that the socket box is facing towards you and the load lever is on your left. Press the load lever with your R e t e n t i o n t a b R e t e n t i o n t a b R e t e n t i o n t a b R e t e n t i o n t a b...
  • Page 6 Position the CPU over the C P U n o t c h C P U n o t c h C P U n o t c h C P U n o t c h C P U n o t c h socket, making sure that the gold triangle is on the bottom-left corner of the...
  • Page 7 Installing the CPU fan and heatsink assembly The Intel ® Pentium ® 4/Intel ® Pentium ® D LGA775 processor requires a specially designed heatsink and fan assembly to ensure optimum thermal condition and performance. • When you buy a boxed Intel ®...
  • Page 8 Installing a DIMM Locate the DIMM sockets in the motherboard. Unlock a DIMM socket by pressing the retaining clips outward. Align a DIMM on the socket such that the notch on the DIMM matches the break on the socket. Push the DIMM to the socket until the retaining clips snap inward. •...
  • Page 9 Installing storage drives Optical drive Optical drive Optical drive Optical drive Optical drive Place the chassis upright, then remove the upper 5.25” drive bay metal plate cover. Insert the optical drive to the bay, then carefully push the drive until its screw holes align with the holes on the bay.
  • Page 10 F o r S A T A H D D F o r S A T A H D D F o r S A T A H D D F o r S A T A H D D F o r S A T A H D D: Connect the S A T A S A T A...
  • Page 11 Vintage2-PH1 Système barebone Guide de démarrage rapide...
  • Page 12 Caractéristiques de la façade C a c h e p o u r C a c h e p o u r C a c h e p o u r C a c h e p o u r C a c h e p o u r b a i e s 5 .
  • Page 13 BUZZ TSB43AB22A AAFP SPDIF_OUT IE1394_2 USB56 USB78 Façade Carte mère ASUS Baie 5.25 pouces vide Ventilateur du châssis Baie pour disque dur 10. Slot PCI Express x16 Baie pour lecteur de disquette 11. Slots PCI Alimentation 12. Slot PCI Express x1 Socket du CPU 13.
  • Page 14 à l’envoi/l’acheminement. • Conservez le cache après l’installation de la carte mère, car ASUS n’accèdera à une requête RMA (Autorisation de Retour Marchandise) que si la carte mère est retournée avec ce cache sur le socket LGA775.
  • Page 15 Pour installer un CPU: Localisez le socket du CPU sur la carte mère. Avant d’installer le CPU, vérifiez que le socket vous fait face et que le levier du CPU est sur votre gauche. Pressez le levier avec votre L o q u e t d e L o q u e t d e L o q u e t d e L o q u e t d e...
  • Page 16 Placez le CPU au dessus du e n c o c h e d u C P U e n c o c h e d u C P U e n c o c h e d u C P U e n c o c h e d u C P U e n c o c h e d u C P U socket, en vous assurant que le...
  • Page 17 Installer l’ensemble dissipateur-ventilateur Les processeurs Intel ® Pentium ® 4/Intel ® Pentium ® D LGA775 nécessitent un dissipateur thermique et un ventilateur spécialement conçus pour assurer des performances et des conditions thermiques optimales. • Si vous achetez un processeur Intel ®...
  • Page 18 Installer un module DIMM Localisez les sockets DIMM de la carte mère. Déverrouillez un socket DIMM en pressant sur les clips de rétention vers l’extérieur. Alignez un module DIMM sur le socket de sorte que l’encoche sur la DIMM corresponde à l’ergot du socket. Enfoncez le module DIMM dans le socket jusqu’à...
  • Page 19 Installer des disques de stockage Installer un lecteur optique Installer un lecteur optique Installer un lecteur optique Installer un lecteur optique Installer un lecteur optique Mettez le châssis en position verticale, puis retirez le premier cache métallique pour baie 5.25”. Insérez le lecteur optique dans la baie, puis poussez-le délicatement jusqu’à...
  • Page 20 Pour un disque dur SATA: S A T A S A T A S A T A S A T A S A T A I D E I D E I D E I D E I D E connectez les câbles SATA et d’alimentation aux connecteurs à...
  • Page 21 Vintage2-PH1...
  • Page 22 5.25 USB 2.0 1394 Reset PS/2 PS/2 1394 USB 2.0 LAN (RJ-45) 2 2 2 2 2...
  • Page 23 CPU_FAN PS/2KBMS T: Mouse B: Keyboard COM1 ATX12V LGA775 Bottom: Top: COM2 USB1 1394 USB2 LAN_USB34 ® Intel GMCH 945G AUDIO CHA_FAN PCIEX16 Intel PCI1 82573L Intel FWH ® SB_PWR Intel ICH7 PCI2 SATA3 SATA4 CR2032 3V SATA1 SATA2 Lithium Cell PCIEX1_1 ALC882 CMOS Power...
  • Page 24 Air duct LGA775 LGA775 Return Merchandise Authorization RMA 4 4 4 4 4...
  • Page 25 5 5 5 5 5...
  • Page 26 6 6 6 6 6...
  • Page 27 Intel Pentium 4/Pentium D LGA775 ® ® ® Intel Pentium LGA775 Intel 4-pin Intel Pentium LGA775 CPU_FAN1 CPU_FAN1 Hardware monitoring errors 7 7 7 7 7...
  • Page 28 DDR DIMM 8 8 8 8 8...
  • Page 29 5.25 (A) IDE 9 9 9 9 9...
  • Page 30 SATA Serial ATA SATA Air duct...
  • Page 31 Vintage2-PH1...
  • Page 32 5.25 USB 2.0 1394 Reset PS/2 PS/2 1394 USB 2.0 LAN (RJ-45) 2 2 2 2 2...
  • Page 33 CPU_FAN PS/2KBMS T: Mouse B: Keyboard COM1 ATX12V LGA775 Bottom: Top: COM2 USB1 1394 USB2 LAN_USB34 ® Intel GMCH 945G AUDIO CHA_FAN PCIEX16 Intel PCI1 82573L Intel FWH ® SB_PWR Intel ICH7 PCI2 SATA3 SATA4 CR2032 3V SATA1 SATA2 Lithium Cell PCIEX1_1 ALC882 CMOS Power...
  • Page 34 Air duct LGA775 LGA775 Return Merchandise Authorization RMA 4 4 4 4 4...
  • Page 35 5 5 5 5 5...
  • Page 36 6 6 6 6 6...
  • Page 37 Intel Pentium 4/Pentium D LGA775 ® ® ® Intel Pentium 4 LGA775 Intel 4-pin Intel Pentium 4 LGA775 CPU_FAN1 CPU_FAN1 Hardware monitoring errors 7 7 7 7 7...
  • Page 38 DDR DIMM 8 8 8 8 8...
  • Page 39 5.25 (A) IDE 9 9 9 9 9...
  • Page 40 SATA Serial ATA SATA Air duct...
  • Page 41 Vintage2-PH1...
  • Page 42 2 2 2 2 2...
  • Page 43 5 5 5 5 5 2 2 2 2 2 3 3 3 3 3 CPU_FAN PS/2KBMS T: Mouse B: Keyboard COM1 ATX12V LGA775 1 1 1 1 1 6 6 6 6 6 4 4 4 4 4 7 7 7 7 7 9 9 9 9 9 8 8 8 8 8 Bottom:...
  • Page 44 ® ® 4 4 4 4 4...
  • Page 45 A A A A A B B B B B 3 3 3 3 3 B B B B B A A A A A 5 5 5 5 5...
  • Page 46 A A A A A B B B B B 6 6 6 6 6...
  • Page 47 ® ® ® ® ® ® ® ® A A A A A B B B B B B B B B B A A A A A 1 1 1 1 1 1 1 1 1 1 7 7 7 7 7...
  • Page 48 1 1 1 1 1 2 2 2 2 2 3 3 3 3 3 4 4 4 4 4 8 8 8 8 8...
  • Page 49 C C C C C A A A A A B B B B B B B B B B A A A A A 9 9 9 9 9...
  • Page 50 1 1 1 1 1 2 2 2 2 2 5 5 5 5 5 1 1 1 1 1 2 2 2 2 2 4 4 4 4 4 5 5 5 5 5 1 1 1 1 1 2 2 2 2 2 3 3 3 3 3 2 2 2 2 2...
  • Page 51 Vintage2-PH1...
  • Page 53 CPU_FAN PS/2KBMS T: Mouse B: Keyboard COM1 ATX12V LGA775 Bottom: COM2 Top: USB1 1394 USB2 LAN_USB34 ® Intel GMCH 945G AUDIO CHA_FAN PCIEX16 Intel PCI1 82573L Intel FWH ® Intel SB_PWR ICH7 PCI2 SATA3 SATA4 CR2032 3V Lithium Cell SATA1 SATA2 PCIEX1_1 ALC882...
  • Page 61 Vintage2-PH1 Barebone Sistemleri H›zl› Kurulum K›lavuzu...
  • Page 62 Ön panel özellikleri 5.25 inçlik sürücü yuvas› kapa¤› 3.5 inçlik sürücü yuvas› kapa¤› USB 2.0 portlar› Mikrofon girifli IEEE1394 girifli Güç dü¤mesi Kulakl›k girifli S›f›rlama dü¤mesi HDD LED Arka panel özellikleri Güç konektörü Voltaj seçici Güç besleme fan› Kapak vidas› PS/2 fare girifli PS/2 klavye girifli Seri girifl...
  • Page 63 BUZZ TSB43AB22A AAFP SPDIF_OUT IE1394_2 USB56 USB78 Ön panel kapa¤› ASUS anakart 5.25-inç bofl optik sürücü yuvas› fiase fan› Sabit disk sürücü yuvas› 10. PCI Express x16 yuva Floppy disk sürücü yuvas› 11. PCI yuvalar› Güç beslemesi ünitesi 12. PCI Express x1 yuva CPU soketi 13.
  • Page 64 PnP kapa¤› yoksa ya da PnP flapkas›nda/soket temas noktalar›nda/ anakart komponentlerinde bir hata görürseniz derhal bayiiniz ile temasa geçiniz. Hasar sadece nakliye/gönderi ile ilgili ise ASUS onar›m maliyetlerini karfl›layacakt›r. • Anakart› takt›ktan sonra flapkay› yerinde tutun. Anakart sadece LGA775 soketi ile birlikte gönderilirse ASUS ‹ade Ürün Yetkisi (RMA) taleplerini...
  • Page 65 CPU'yu kurmak için: CPU soketini anakarta yerlefltirin. CPU'yu kurmadan önce, soket kutusunun size do¤ru bakt›¤›ndan ve yük kolunun sol taraf›n›zda oldu¤undan emin olun. Yük koluna bafl parma¤›n›zla (A) Tutucu sekme bast›r›n ve tutucu sekmeden ç›k›ncaya kadar sola (B) kayd›r›n. Soket pimlerine zarar vermemek için, bir CPU kurmad›¤›n›z sürece PnP kapa¤›n›...
  • Page 66 CPU'yu soketin üzerine CPU girifli yerlefltirin, alt›n üçgenin soketin sol alt köflesinde oldu¤undan emin olun. Soket hizalama anahtar› CPU çenti¤ine oturmal›d›r. Alt›n üçgen iflareti Hizalama anahtar› Is› al›c›y› ve fan komplesini yeniden monte etmeden önce CPU'ya termal arayüz malzemesi uygulay›n. Termal Arayüz Malzemesini YEMEY‹N.
  • Page 67 CPU fan›n›n ve ›s› alma komplesinin tak›lmas› ® ® ® ® Intel Pentium 4/Intel Pentium D LGA775 ifllemcisi, optimum termal flart ve performans sa¤lanmas› için özel tasarlanm›fl ›s› al›c› ve fan komplesine ihtiyaç duymaktad›r. ® ® • Kutulu Intel Pentium 4 ifllemcisi sat›n ald›¤›n›zda, pakette CPU fan›...
  • Page 68 DIMM'in tak›lmas› DIMM soketlerini anakarta yerlefltirin. Tutucu klipsleri d›flar› do¤ru bast›rarak DIMM soketinin kilidini aç›n. DIMM üzerindeki çentik soket üzerindeki aç›kl›k ile eflleflecek flekilde DIMM'i soket üzerinde hizalay›n. Tutucu klipsler içeri do¤ru geçinceye kadar DIMM'i sokete do¤ru itin. • DIMM'leri eklemeden veya ç›karmadan önce güç beslemesini prizden çekin.
  • Page 69 Saklama sürücülerinin kurulmas› Optik sürücü fiaseyi yukar› do¤ru yerlefltirin, ard›ndan 5.25” lik üst sürücü yuvas› metal plaka kapa¤›n› ç›kar›n. Optik sürücüyü yuvaya tak›n, ard›ndan vida delikleri yuvadaki delikler ile eflleflinceye kadar sürücüyü dikkatlice itin. Optik sürücüyü yuvan›n her iki taraf›ndaki iki viday› kullanarak sabitleyin.
  • Page 70 SATA HDD için: SATA sinyal ve SATA güç fifllerini sürücünün arkas›nda bulunan konektörlere ba¤lay›n. IDE HDD için: IDE ve güç fifllerini sürücünün arkas›ndaki konektörlere ba¤lay›n. Yuva kapaklar›n›n ç›kar›lmas› ve ön panel komplesinin ve yan kapa¤›n yeniden tak›lmas› Bir optik ve/veya floppy disk sürücüsü kurmuflsan›z, flaseye yeniden kurmadan önce ön panel komplesindeki yuva kapak(lar)›n›...