Publicité
Les langues disponibles
Les langues disponibles
Liens rapides
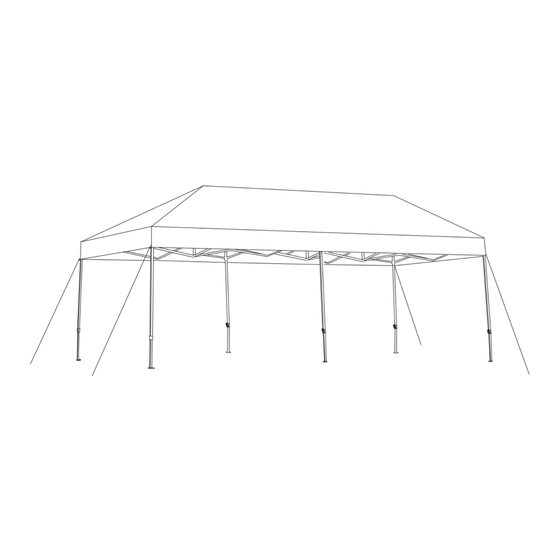
Canopy/Gartenüberdachung/
Auvent de Jardin/Pabellón/
Gazebo/Składany pawilon ogrodowy
USA office: Fontana
AUS office: Truganina
GBR office: Ipswich
ITA office: Milano
POL office: Gdańsk
NP10843
DEU office: FDS GmbH, Neuer Höltigbaum 36, 22143 Hamburg, Deutschland
FRA office: Saint Vigor d'Ymonville
If you're having difficulty, our friendly
customer team is always here to help.
THIS INSTRUCTION BOOKLET CONTAINS IMPORTANT SAFETY INFORMATION. PLEASE READ AND KEEP FOR FUTURE REFERENCE.
Publicité

Manuels Connexes pour Costway NP10843


Sommaire des Matières pour Costway NP10843
- Page 1 AUS office: Truganina GBR office: Ipswich ITA office: Milano POL office: Gdańsk NP10843 DEU office: FDS GmbH, Neuer Höltigbaum 36, 22143 Hamburg, Deutschland FRA office: Saint Vigor d'Ymonville If you're having difficulty, our friendly customer team is always here to help.
- Page 2 Before You Start Avant de Commencer Please read all instructions carefully. Veuillez lire attentivement toutes les instructions. Retain instructions for future reference. Conservez les instructions pour vous y référer ultérieurement. Separate and count all parts and hardware. Vérifiez toutes les pièces et les accessoires. Read through each step carefully and follow the proper order.
- Page 3 Spare Parts Prima di Iniziare Si prega di leggere attentamente tutte le istruzioni. Conservare le istruzioni per riferimento futuro. Separare e contare tutte le parti e gli accessori. Leggere attentamente ogni passo e seguire l'ordine corretto. Si consiglia, ove possibile, di assemblare tutti gli articoli vicino alla zona in cui verranno posti in uso, per evitare di spostare inutilmente il prodotto una volta assemblato.
- Page 4 Spare Parts Setting Up the Canopy Part Description OPENING THE CANOPY FRAME Central Tube With a partner, start on the narrow side and stand across from □ each other. Central Slider Grasp the middle trusses on the bottom marked "OPEN HERE". □...
- Page 5 Setting Up the Canopy Setting Up the Canopy ATTACHING THE CANOPY LOCKING THE FRAME Unfold the canopy (A) and place on top of the canopy frame (B). □ With a partner go under the canopy and push up the buttom hub □...
- Page 6 Setting Up the Canopy Setting Up the Canopy SECURING THE CANOPY IN PLACE ADJUSTING THE CANOPY HEIGHT With 1-2 partners at the long side to raise the canopy by sliding Insert a stake (C) into the foot of each canopy leg. □...
- Page 7 Taking Down the Canopy Taking Down the Canopy FOLDING THE FRAME REMOVING THE STAKES AND RETRACTING THE LEGS Release the push pin on the extension truss and slide it back □ Pull up all stakes from the ground. □ into the peak truss. Press the push button to lower all legs.
- Page 8 Ersatzteile Use and Care Guide PACKAGE CONTENTS A- Large canopy B - Canopy frame C - Stake x10 D- Hex wrench (for maintenance only) E - Rope x 4 F - Cover bag x1...
- Page 9 Ersatzteile Überdachungmontage Teile Beschreibung ÖFFNEN DES ÜBERDACHSRAHMENS Rohr zentral Beginnen Sie mit einem Partner an der schmalen Seite und □ stellen Sie sich gegenüber. Zentraler Schieberegler Fassen Sie die mittleren Traversen auf der Unterseite, die mit □ Beinkappe-30 "OPEN HERE" gekennzeichnet sind. Heben Sie sich leicht vom Boden ab und gehen Sie zurück, wobei Sie die Traversen Schieber-30 öffnen.
- Page 10 Überdachungmontage Überdachungmontage BEFESTIGUNG DES ÜBERDACHS VERRIEGELUNG DES RAHMENS Entfalten Sie das Verdeck (A) und legen Sie es auf den □ Gehen Sie mit einem Partner unter die Kappe und drücken Sie □ Verdeckrahmen (B). die untere Nabe nach oben, bis das "Klicken" zu hören ist und der rote Knopf in der Mittelstange einrastet.
- Page 11 Überdachungmontage Überdachungmontage SICHERUNG DER ÜBERDACHUNG AN DER STELLE EINSTELLEN DER HÖHE DES ÜBERDACHS Mit 1-2 Partnern an der langen Seite zum Anheben der Kappe Setzen Sie einen Pfahl (C) in den Fuß jedes Baldachinbeins ein. □ □ durch Verschieben des unteren inneren Beins, bis der Messen Sie jedes Bein auf einen angemessenen Abstand und □...
- Page 12 Abnehmen des Überdacks Abnehmen des Überdacks FALTEN DES RAHMENS ENTFERNEN DER STANGEN UND EINZIEHEN DER BEINE Heben Sie die Überdachung 5cm-7,6cm vom Boden ab und □ Ziehen Sie alle Pfähle aus dem Boden. □ gehen Sie von beiden Seiten hinein, bis der Rahmen vollständig Drücken Sie den Druckknopf, um alle Beine abzusenken.
- Page 13 Pièces de Rechange Gebrauchs- & Pflegeanleitung PAKET INHALT A- Große Überdachung Überdachungsrahmen C- Einsatz x10 D- Sechskantschlüssel (nur für Wartungszwecke) E- Seil x 4 F- Schutztasche x1...
- Page 14 Pièces de Rechange Installation de l’Auvent Pièce Description OUVERTURE DU CADRE DE L'AUVENT Tube central Avec un partenaire, commencez par le côté étroit et tenez-vous □ en face l'un de l'autre. Curseur central Saisissez les fermes du milieu en bas marquées « OUVRIR ICI ». □...
- Page 15 Installation de l’Auvent Installation de l’Auvent FIXATION DE L'AUVENT VERROUILLAGE DU CADRE Dépliez l'auvent (A) et placez-le sur le cadre de l'auvent (B). □ Avec un partenaire, passez sous l'auvent et poussez le moyeu □ d'extrémité vers le haut jusqu'à ce que le « clic » soit entendu et Fixez l'auvent (A) aux coins du cadre de l'auvent (B) à...
- Page 16 Installation de l’Auvent Installation de l’Auvent FIXATION DE L'AUVENT EN PLACE RÉGLAGE DE LA HAUTEUR DE L'AUVENT Avec 1 ou 2 partenaires du côté long, relevez l'auvent en faisant Insérez un piquet (C) dans chaque jambe de l'auvent. □ □ glisser le pied intérieur inférieur jusqu'à...
- Page 17 Démonter l’Auvent Démonter l’Auvent PLIAGE DU CADRE RETIRER LES PIQUETS ET RÉTRACTION DES PIEDS Soulevez l'auvent de 5 cm à 7,6 cm du sol et rentrez-le des deux □ Retirez tous les piquets du sol. □ côtés jusqu'à ce que le cadre soit complètement fermé. Appuyez sur le bouton-poussoir pour abaisser toutes les pieds.
- Page 18 Piezas Guide d’Utilisation et d’Entretien CONTENU DU PAQUET A- Grande B- Cadre de verrière l'auvent C- Piquet x10 D- Clé hexagonale (pour l'entretien uniquement) E- Corde x 4 F- Sac de protection x1...
- Page 19 Piezas Montar el Pabellón Pieza Descripción ABRIR EL MARCO DEL PABELLÓN Tubo central Con un compañero, comience en el lado estrecho y colóquese □ enfrente del otro. Deslizador central Agarre las cerchas del medio en la parte inferior marcadas con □...
- Page 20 Montar el Pabellón Montar el Pabellón FIJAR EL PABELLÓN BLOQUEAR EL MARCO Despliegue el pabellón (A) y colóquelo sobre el marco del □ Con un compañero, pase por debajo del pabellón y empuje □ pabellón (B). hacia arriba el cubo inferior hasta que oiga un "clic" y el botón rojo se bloquee en el poste central.
- Page 21 Montar el Pabellón Montar el Pabellón ASEGURAR EL PABELLÓN EN SU LUGAR AJUSTAR LA ALTURA DEL PABELLÓN Con 1 o 2 compañeros en el lado largo para elevar el pabellón Inserte una estaca (C) en el pie de cada pata del pabellón. □...
- Page 22 Desmontar el Pabellón Desmontar el Pabellón PLEGAR EL MARCO RETIRAR LAS ESTACAS Y RETRAER LAS PATAS Levante el pabellón del suelo entre 5 cm y 7,6 cm y acérquelo □ Levante todas las estacas del suelo. □ por ambos lados hasta que el marco esté completamente Presione el botón para bajar todas las patas.
- Page 23 Parte Guía de Uso y Cuidado CONTENIDO DEL PAQUETE A - Pabellón B - Marco del grande pabellón C - Estaca x10 D - Llave hexagonal (solo para mantenimiento) E - Cuerda x4 F - Bolsa de almacenamiento...
- Page 24 Parte Installazione del Gazebo Parte Descrizione APRIRE LA CORNICE DEL GAZEBO Polo centrale Con un partner, iniziare dal lato stretto e mettere uno di fronte □ all'altro. Cursore centrale Afferra le capriate centrali sul fondo contrassegnate "OPEN □ Coprigambe-30 HERE". Sollevare leggermente da terra e tornare indietro allargando le capriate.
- Page 25 Installazione del Gazebo Installazione del Gazebo ATTACCARE LA COPERTINA BLOCCARE IL TELAIO Aprire la parte superiore del gazebo (A) e posizionarla sul telaio □ Con un partner andare sotto il gazebo e spingere verso l'alto il □ del gazebo (B). mozzo del bottone finché...
- Page 26 Installazione del Gazebo Installazione del Gazebo FISSARE IL GAZEBO IN POSIZIONE REGOLAZIONE DELL'ALTEZZA DEL GAZEBO Con 1-2 partner sul lato lungo per sollevare il gazebo facendo Inserire un picchetto (C) nel piede di ciascuna gamba del □ □ scorrere la gamba interna inferiore fino a quando il perno di gazebo.
- Page 27 Smontare il Gazebo Smontare il Gazebo PIEGARE IL TELAIO RIMUOVERE I PICCHETTI E RETRARE LE GAMBE Sollevare il gazebo a 5-7,6 cm da terra e tirarlo più vicino su □ Tirare fuori tutti i paletti da terra. □ entrambi i lati fino a quando il telaio non è completamente Premere il pulsante per abbassare tutte le gambe.
- Page 28 Lista części Guida all'Uso e alla Cura CONTENUTO DEL PACCO A- Baldacchino B- Cornice per grande x1 tettuccio x1 C- Picchetti a D- Chiave esagonale (solo terra x10 per manutenzione) x1 E- Corde x4 F- Borsa protettiva x1...
- Page 29 Lista części Rozkładanie pawilonu ogrodowego Część Nazwa ROZKŁADANIE RAMY Główny drążek Wraz z drugą osobą złapcie ramę z obu jej stron. □ □ Złapcie ramę w miejscu oznaczonym „OPEN HERE”. Następnie Główna prowadnica lekko unieście i pociągnijcie ramę na zewnątrz, aby ją rozłożyć. Nasadka na nogę...
- Page 30 Rozkładanie pawilonu ogrodowego Rozkładanie pawilonu ogrodowego MONTAŻ ZADASZENIA BLOKOWANIE RAMY Rozłóż zadaszenie (A) pawilonu ogrodowego, a następnie □ Wraz z drugą osobą wejdźcie pod zadaszenie. Pchnijcie □ umieść je w górnej części ramy (B). elementy rozporowe w górę, aż zablokują się na głównych drążkach.
- Page 31 Rozkładanie pawilonu ogrodowego Rozkładanie pawilonu ogrodowego MOCOWANIE PAWILONU DO PODŁOŻA REGULACJA WYSOKOŚCI Wraz z pomocą 1-2 osób unieś dłuższą stronę pawilonu Zamocuj kotwę (C) na każdej nodze pawilonu. □ □ ogrodowego. Chwyć jedną ręką górną część, a drugą ręką dolną Odmierz odpowiednią...
- Page 32 Składanie pawilonu ogrodowego Składanie pawilonu ogrodowego SKŁADANIE RAMY DEMONTAŻ KOTEW I SKŁADANIE NÓG Wraz z drugą osobą unieście ramę na ok. 5-7,5 cm. Stańcie po □ Wyciągnij wszystkie kotwy z ziemi. □ obu stronach ramy i złóżcie ramę do wewnątrz. Wciśnij zatrzask sprężynowy na każdej nodze i wsuń...
- Page 33 Return / Damage Claim Instructions DO NOT discard the box / original packaging. In case a return is required, the item must be returned in original box. Without this your return will not be accepted. Take a photo of the box markings. A photo of the markings (text) on the side of the box is required in case a part is needed for replacement.
- Page 34 Instructions De Retour / Réclamation De Dommages Istruzioni Per La Restituzione / Reclamo Per Danni NE PAS jeter la boîte/l'emballage d'origine. NON scartare la scatola / confezione originale. Dans le cas où un retour est requis, l'article doit être retourné dans sa boîte Nel caso in cui sia richiesto un reso, l'articolo deve essere restituito nella scatola d'origine.