Beko GNE 60520 DX Mode D'emploi
Masquer les pouces
Voir aussi pour GNE 60520 DX:
- Mode d'emploi (226 pages) ,
- Notice d'utilisation (36 pages)

Manuels Connexes pour Beko GNE 60520 DX


Sommaire des Matières pour Beko GNE 60520 DX
- Page 1 All manuals and user guides at all-guides.com GNE 60520 DX Refrigerator Réfrigérateur Frigorífico Frižider Ладилник Hladnjak Kühlschrank...
-
Page 2: This Manual
For further information, please contact your local or regional authorities. Electronic products not included in the selective sorting process are potentially dangerous for the environment and human health due to the presence of hazardous substances. www.beko.com This product was manufactured using the latest technology in environmentally friendly conditions. -
Page 3: Table Des Matières
All manuals and user guides at all-guides.com CONTENTS 1 The refrigerator 4 Preparation 2 Important Safety 5 Using your refrigerator 19 Warnings Indicator Panel ......... 19 Intended use ........4 Door Open Alarm: ......21 For products with a water dispenser; . 6 Things to do to have the filter usage Child safety ........ -
Page 4: The Refrigerator
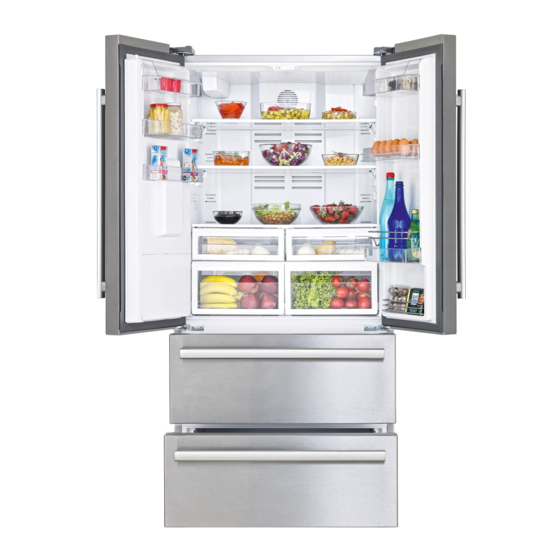
All manuals and user guides at all-guides.com The refrigerator A- Fridge compartment B- Freezer compartment 1- Butter & Cheese shelf 2- Fridge compartment door shelves 3- Fridge compartment glass shelves 4- Diffuser cover 5- Illumination lens 6- Movable middle section 7- Chiller compartment 8- Bottle shelf 9- Crisper... -
Page 5: Important Safety Warnings
All manuals and user guides at all-guides.com Important Safety Warnings Please review the following • Do not touch frozen food by hand; information. Failure to observe this they may stick to your hand. information may cause injuries or • Unplug your refrigerator before material damage. - Page 6 All manuals and user guides at all-guides.com • Avoid causing damage on power • Do not use mechanical devices cable when transporting the or other means to accelerate the refrigerator. Bending cable may defrosting process, other than those cause fire. Never place heavy objects recommended by the manufacturer.
-
Page 7: For Products With A Water Dispenser
All manuals and user guides at all-guides.com possible problem in power cable may HCA Warning cause fire. • The plug's tip should be regularly If your product's cooling system cleaned; otherwise, it may cause fire. contains R600a: • Refrigerator may move if adjustable This gas is flammable. -
Page 8: Things To Be Done For Energy Saving
All manuals and user guides at all-guides.com Reccomendations for Things to be done for energy freshfood compartment saving * OPTIONAL • Do not leave the doors of your • Please do not let any foodstuff to refrigerator open for a long time. come to contact with the temperature •... -
Page 9: Installation
All manuals and user guides at all-guides.com Installation 2. You can install the 2 plastic wedges C Please remember that the as illustrated in the figure. Plastic manufacturer shall not be held liable if wedges will provide the required the information given in the instruction distance between your refrigerator manual is not observed. -
Page 10: Electric Connection
All manuals and user guides at all-guides.com Electric connection Disposing of your old refrigerator Connect your refrigerator to a grounded socket which is being Dispose of your old machine without protected by a fuse with the giving any harm to the environment. appropriate capacity. -
Page 11: Placing And Installation
All manuals and user guides at all-guides.com Placing and Installation Floor balance adjustment A Caution: Never plug the refrigerator into the wall outlet during installation. A If your refrigerator is unbalanced; Otherwise, risk of death or serious 1- Ventilation cover is removed by injury may arise. -
Page 12: Adjusting The Gap Between The Upper Door
All manuals and user guides at all-guides.com Adjusting the gap between the upper door C Adjust the door appropriately as you desire by loosing the screws. C Fix the door you have adjusted by tightening the screws without changing the position of the door. C You can adjust the gap between the fridge compartment doors as illustrated in the figures. -
Page 13: Installing Water Filter
All manuals and user guides at all-guides.com Installing Water Filter used outside the refrigerator.) Then, (in some models) determine the distance between the Two different water sources may filter and the refrigerator and required be connected to the refrigerator for hose lengths from the filter to the water supply: the mains cold water refrigerator water inlet. -
Page 14: Connection Of Water Hose To The Jug
All manuals and user guides at all-guides.com Connection of Water Hose to To provide an efficient operation of the pump, wait for 2-3 minutes after the Jug starting the pump. (in some models) You may refer to the user manual To connect water to the refrigerator of the pump while making the water from a jug, a pump is needed. -
Page 15: Connection Of The Water Pipe To The Cold Water Mains Line
All manuals and user guides at all-guides.com Connection of the Water Pipe to the Cold Water Mains Line (in some models) If you want to use your refrigerator by connecting it to the cold water mains line, you will have to connect a standard 1/2"... - Page 16 All manuals and user guides at all-guides.com 3. Take out the water filter by-pass Caution: Make sure that standard cover by rotating it downwards. 1/2" valve fitting fed by cold mains water supply is available and is turned off fully. To fit the water filter follow the instructions below referring to figures supplied:...
-
Page 17: Prior To First Use Of Water Dispenser
All manuals and user guides at all-guides.com Prior to first use of Water The water filter must be removed as shown in the figure when it is going to Dispenser be replaced or when it will no longer Water mains pressure must not be be used and by-pass cover must be below 1 bar. -
Page 18: Using The Water Spring
All manuals and user guides at all-guides.com Using the water spring Spillage Tray Water drops that drip during use, Warnings It is normal for the first few glasses of accumulates in the spillage tray. You water taken from the dispenser to be can remove spillage tray by pulling warm. -
Page 19: Preparation
All manuals and user guides at all-guides.com Preparation Your refrigerator should be installed at least 30 cm away from heat sources such as hobs, ovens, central heater and stoves and at least 5 cm away from electrical ovens and should not be located under direct sunlight. -
Page 20: Using Your Refrigerator
All manuals and user guides at all-guides.com Using your refrigerator Indicator Panel This touch-control indicator panel allows you to set the temperature without opening the door of your refrigerator. Just touch the relevant button with your finger to set the temperature. 8 17 1. - Page 21 All manuals and user guides at all-guides.com 1- Fridge Compartment 9- Freezer Compartment Temperature Setting Button Temperature Indicator Press this button to set the It indicates the temperature set for temperature of the fridge compartment Freezer Compartment. to 8, 6, 4, 2, 8... respectively. 10- Quick Cool Function Indicator Press this button to set the Indicates that the Quick Cool function...
-
Page 22: Door Open Alarm
All manuals and user guides at all-guides.com 14- Error Status Indicator 19-Ice Machine ON/OFF Button If your refrigerator does not cool To stop ice formation, ice machine ON/ adequately or if there is a sensor OFF button is pressed for 3 seconds. failure, this indicator will be activated. -
Page 23: Things To Do To Have The Filter Usage Time Calculated Automatically
All manuals and user guides at all-guides.com Things to do to have the filter usage time calculated automatically (For products connected to the mains water line and equipped with filter) 1- After plugging the refrigerator in, press A and B buttons together to activate the key lock. -
Page 24: Egg Tray
All manuals and user guides at all-guides.com Egg tray Chiller compartment You can install the egg holder to the Chiller compartments enable the desired door or body shelf. foods to be frozen become ready for freezing. You can also use these Never store the egg holder in the compartments to store your food at a freezer compartment... -
Page 25: Crisper
All manuals and user guides at all-guides.com Crisper Crisper of your refrigerator is designed specially to keep your vegetables freshly without loosing their humidity. For this purpose, cool air circulation occurs around the crisper in general. Remove the door shelves that align with the crisper before removing the crispers. -
Page 26: Movable Middle Section
All manuals and user guides at all-guides.com Movable Middle Section Movable middle section is intended to prevent the cold air inside your refrigerator from escaping outside. 1- Sealing is provided when the gaskets on the door presses on the surface of the movable middle section while the fridge compartment doors are closed. -
Page 27: Telescopic Drawer
All manuals and user guides at all-guides.com Telescopic Drawer Dual cooling system: Your refrigerator is equipped with two separate cooling systems to Pay attention not to squeeze any parts cool the fresh food compartment and of your body such as hands, feet and freezer compartment. -
Page 28: Ice Maker
All manuals and user guides at all-guides.com Ice maker Ice box The ice machine is nonremovable. Please read the warnings carefully on There must be ice container at the the ice container. The ice container bottom of the ice machine. is used for ice collection poured ice machine. -
Page 29: Freezing Fresh Food
All manuals and user guides at all-guides.com Fridge Freezer Compartment Compartment Explanations Adjustment Adjustment -18°C 4°C This is the normal recommended setting. These settings are recommended when the ambient -20,-22 or -24°C 4°C temperature exceeds 30°C. Use when you wish to freeze your food in a short Quick Freeze 4°C time. -
Page 30: Placing The Food
All manuals and user guides at all-guides.com Deep-freeze information Defrosting The freezer compartment defrosts Food must be frozen as rapidly as automatically. possible when they are put in a Placing the food refrigerator in order to keep them in good quality. Various frozen food The TSE norm requires (according to Freezer... -
Page 31: Maintenance And Cleaning
All manuals and user guides at all-guides.com Maintenance and cleaning Protection of plastic A Never use gasoline, benzene or surfaces similar substances for cleaning purposes. C Do not put the liquid oils or oil-cooked B We recommend that you unplug the meals in your refrigerator in unsealed appliance before cleaning. -
Page 32: Recommended Solutions For The Problems
All manuals and user guides at all-guides.com Recommended solutions for the problems Please review this list before calling the service. It might save you time and money. This list includes frequent complaints that are not arising from defective workmanship or material usage. Some of the features described here may not exist in your product. - Page 33 All manuals and user guides at all-guides.com The fridge is running frequently or for a long time. • Your new product may be wider than the previous one. This is quite normal. Large refrigerators operate for a longer period of time. •...
- Page 34 All manuals and user guides at all-guides.com Vibrations or noise. • The floor is not even or it is weak. The refrigerator rocks when moved slowly. Make sure that the floor is strong enough to carry the refrigerator, and level. •...
- Page 35 All manuals and user guides at all-guides.com Veuillez d’abord lire la notice d’utilisation ! Chère cliente, cher client, Nous espérons que votre produit, qui a été fabriqué dans des usines modernes et vérifié au terme des procédures de contrôle de qualité les plus méticuleuses, vous aidera efficacement.
- Page 36 All manuals and user guides at all-guides.com TABLE DES MATIÈRES 1 Le Réfrigérateur 4 Préparation 2 Précautions de sécurité 5 Utilisation du réfrigérateur 19 importantes Bandeau indicateur .........19 Utilisation prévue ........4 Alarme d'ouverture de porte : ....21 Sécurité générale ........4 Pour que le calcul de la durée d'utilisation Sécurité...
-
Page 37: Le Réfrigérateur
All manuals and user guides at all-guides.com Le Réfrigérateur A- Compartiment réfrigérateur B- Compartiment congélateur 1- Etagère à Beurre et Fromages 2- Balconnets de la porte du compartiment de réfrigération 3- Clayettes en verre du compartiment de réfrigération 4- Couvercle du diffuseur 5- Lentilles d'illumination 6- Section centrale modulable 7- Compartiment Zone fraîche... -
Page 38: Précautions De Sécurité Importantes
All manuals and user guides at all-guides.com Précautions de sécurité importantes Veuillez examiner les informations suivantes: • Ne placez pas de boissons en bouteilles Si elles ne sont pas respectées, des ou en cannettes dans le congélateur. Cela blessures personnelles ou un dommage peut entraîner leur éclatement. - Page 39 All manuals and user guides at all-guides.com • Ne conservez pas de substances • Si l'alimentation électrique est coupée explosives comme des aérosols avec un dans un réfrigérateur à commande liquide inflammable dans cet appareil. manuelle, veuillez patienter pendant • N’utilisez pas d'outils mécaniques ou au moins 5 minutes avant de rétablir la autres dispositifs pour accélérer le...
-
Page 40: Sécurité Enfants
All manuals and user guides at all-guides.com Avertissement HCA • Les objets nécessitant certaines conditions de conservation comme le Si votre appareil est équipé d’un vaccin, les médicaments sensibles à la système de refroidissement contenant température, les matériels scientifiques, R600a : etc., ne doivent pas être conservés dans Ce gaz est inflammable. -
Page 41: Mesures D'économie D'énergie
All manuals and user guides at all-guides.com Mesures d’économie d’énergie Recommandations pour le • Ne laissez pas les portes du réfrigérateur compartiment produits frais ouvertes pendant une durée prolongée. *EN OPTION • N’introduisez pas de denrées ou de • Ne laissez aucun aliment entrer en boissons chaudes dans le réfrigérateur. -
Page 42: Installation
All manuals and user guides at all-guides.com Installation 2. Vous pouvez installer les 2 cales en Veuillez noter que le fabricant ne pourra plastique comme illustré dans le schéma. être tenu responsable si les informations Les cales en plastique maintiendront fournies dans cette notice d’utilisation ne la distance nécessaire entre votre sont pas respectées. -
Page 43: Branchement Électrique
All manuals and user guides at all-guides.com Branchement électrique Mise au rebut de votre ancien réfrigérateur Branchez votre réfrigérateur à une prise de mise à la terre protégée par un fusible Débarrassez-vous de votre ancien ayant une capacité appropriée. réfrigérateur sans nuire à l’environnement. Important: Vous pouvez consulter le service après- vente agrée ou le centre chargé... -
Page 44: Disposition Et Installation
All manuals and user guides at all-guides.com Disposition et Installation Réglage de la stabilité au sol Attention: Ne branchez jamais le Si le réfrigérateur n’est pas stable; réfrigérateur à la prise murale au cours de 1- Le cache de ventilation est retiré en l’installation. -
Page 45: Réglage Du Jeu Entre Les Portes Supérieures
All manuals and user guides at all-guides.com Réglage du jeu entre les portes Ajustez la porte de manière appropriée à supérieures votre gré en desserrant les vis. Fixez la porte que vous avez réglée en serrant les vis sans modifier la position de Vous pouvez régler le jeu entre les la porte. -
Page 46: Installation Du Filtre À Eau
All manuals and user guides at all-guides.com Installation du filtre à eau L'endroit où le filtre externe sera fixé doit être déterminé au préalable. (Pour les filtres (Dans certains modèles) utilisés hors du réfrigérateur.) Ensuite, Deux différentes sources d'eau déterminez la distance entre le filtre et le peuvent être connectées au réfrigérateur, ainsi que les longueurs de réfrigérateur pour l'alimentation en... -
Page 47: Raccordement Du Tuyau De Vidange À La Carafe
All manuals and user guides at all-guides.com Raccordement du tuyau de 2. Mettez et fixez le tuyau à pompe dans la vidange à la carafe carafe comme illustré dans le schéma. 3. À la fin du raccordement, branchez et (Dans certains modèles) utilisez la pompe. -
Page 48: Raccordement Du Tuyau D'alimentation En Eau À L'arrivée D'eau
All manuals and user guides at all-guides.com Raccordement du tuyau d'alimentation en eau à l'arrivée d'eau (Dans certains modèles) Si vous voulez utiliser votre réfrigérateur en le raccordant au tuyau d'alimentation en eau principal, Vous aurez à raccorder une installation de valve standard ½... - Page 49 All manuals and user guides at all-guides.com Pour installer le filtre à eau, suivez les 3. Retirez le couvercle de dérivation du filtre instructions ci-dessous, renvoyant aux à eau en le faisant pivoter vers le bas. schémas fournis : 1. Appuyez sur le bouton d'annulation de glace à...
-
Page 50: Avant Toute Première Utilisation Du Distributeur D'eau
All manuals and user guides at all-guides.com Le filtre à eau doit être retiré tel qu’illustré Avant toute première utilisation sur le schéma lorsqu'il sera remplacé du distributeur d'eau ou ne sera plus utilisé et le couvercle La pression des tuyaux d'alimentation de dérivation doit être fixé. -
Page 51: Utilisation De La Fontaine
All manuals and user guides at all-guides.com Utilisation de la fontaine Socle du distributeur Avertissements Les gouttes d'eau qui tombent au cours de Il est tout à fait normal que les premiers leur utilisation, s'accumulent dans le socle verres d'eau tirés du distributeur soient du distributeur. -
Page 52: Préparation
All manuals and user guides at all-guides.com Préparation Votre réfrigérateur doit être installé à au moins 30 cm des sources de chaleur telles que les plaques de cuisson, les fours, appareils de chauffage ou cuisinières, et à au moins 5 cm des fours électriques. -
Page 53: Utilisation Du Réfrigérateur
All manuals and user guides at all-guides.com Utilisation du réfrigérateur Bandeau indicateur Le bandeau indicateur à commande tactile vous permet de régler la température sans ouvrir la porte de votre réfrigérateur. Vous n'avez qu'à appuyer sur le bouton correspondant avec un doigt pour régler la température. 8 17 1. - Page 54 All manuals and user guides at all-guides.com 1- Bouton de réglage de température 9- Indicateur de température du du compartiment de réfrigération compartiment de congélation Appuyez sur ce bouton pour régler la Indique le réglage de température pour le température du compartiment réfrigérateur compartiment réfrigérateur.
-
Page 55: Alarme D'ouverture De Porte
All manuals and user guides at all-guides.com 14- Indicateur d'état de 19- Bouton Marche/Arrêt de la dysfonctionnement machine à glaçons Si votre réfrigérateur ne refroidit Pour empêcher la formation de glace, pas correctement ou s'il y a un appuyez sur le bouton Marche/Arrêt de la dysfonctionnement dans un capteur, machine à... -
Page 56: Pour Que Le Calcul De La Durée D'utilisation Du Filtre Se Fasse Automatiquement
All manuals and user guides at all-guides.com Pour que le calcul de la durée d'utilisation du filtre se fasse automatiquement (Pour les appareils connectés au tuyau d'alimentation en eau principal et dotés d'un filtre) 1- Après avoir branché le réfrigérateur, appuyez simultanément sur les boutons A et B pour activer le verrouillage des commandes. -
Page 57: Casier À Œufs
All manuals and user guides at all-guides.com Casier à œufs Vous pouvez augmenter le volume interne de votre réfrigérateur en enlevant le Vous pouvez installer le support à oeufs sur compartiment Zone fraîche souhaité. Pour un balconnet de la porte ou de l'intérieur ce faire, tirez le compartiment vers vous ;... -
Page 58: Machine À Glaçons
All manuals and user guides at all-guides.com Machine à glaçons Bac à glace La machine à glaçons n'est pas amovible. Un bac à glace doit être Veuillez lire attentivement les placé au bas de la machine à glaçons. précautions d'utilisation sur le bac à... -
Page 59: Congélation Des Produits Frais
All manuals and user guides at all-guides.com Réglage du Réglage du compartiment de compartiment Explications congélation de réfrigération -18°C 4°C Voici le réglage normal recommandé. Ces réglages sont recommandés lorsque la -20,-22 ou -24°C 4°C température ambiante dépasse 30 °C Cet indicateur est utilisé... -
Page 60: Disposition Des Denrées
All manuals and user guides at all-guides.com 1. Mettre les emballages dans le congélateur La norme TSE exige (sous certaines aussi rapidement que possible après conditions de mesures) que le réfrigérateur achat. congèle au moins 4,5 kg de denrées par 2. -
Page 61: Bac À Légumes
All manuals and user guides at all-guides.com Bac à légumes Le bac à légumes de votre réfrigérateur a été spécialement conçu pour vous aider à conserver vos denrées au frais sans que celles-ci n'aient à perdre de leur humidité. Dans cet objectif, l’air frais circule tout autour du bac à... -
Page 62: Section Centrale Modulable
All manuals and user guides at all-guides.com Section centrale modulable La section modulable centrale est destinée à empêcher l'air froid à l'intérieur de réfrigérateur de s'échapper. 1- Un scèllement est fourni lorsque les joints d'étanchéité qui se trouvent sur la porte se retrouvent à la surface de la section centrale modulable quand les portes du compartiment réfrigérateur sont fermées. -
Page 63: Tiroir Télescopique
All manuals and user guides at all-guides.com Tiroir télescopique Veillez à ne pas mettre une partie de votre corps (mains, pieds, etc.) entre les parties amovibles pendant l’utilisation du tiroir afin d’éviter d’éventuelles blessures. Il est possible d'enlever la cloison qui se trouve dans le tiroir en procédant comme dans l'illustration afin de Vous pouvez enlever les tiroirs uniquement... -
Page 64: Entretien Et Nettoyage
All manuals and user guides at all-guides.com Entretien et nettoyage Protection des surfaces en N’utilisez jamais d’essence, de benzène plastique. ou de matériaux similaires pour le nettoyage. Ne placez pas d’huiles ou de plats gras Nous vous recommandons de dans le réfrigérateur dans des récipients débrancher l’appareil avant de procéder non fermés, car les graisses peuvent au nettoyage. -
Page 65: Solutions Recommandées Aux Problèmes
All manuals and user guides at all-guides.com Solutions recommandées aux problèmes Veuillez vérifier la liste suivante avant d’appeler le service après-vente. Cela peut vous faire économiser du temps et de l'argent. Cette liste regroupe les problèmes les plus fréquents ne provenant pas d’un défaut de fabrication ou d’utilisation du matériel. Il se peut que certaines des fonctions décrites ne soient pas présentes sur votre produit. - Page 66 All manuals and user guides at all-guides.com Le réfrigérateur fonctionne fréquemment ou pendant de longue périodes. • Votre nouveau réfrigérateur est peut être plus large que l’ancien. Ceci est tout à fait normal. Les grands réfrigérateurs fonctionnent pendant une période de temps plus longue.
- Page 67 All manuals and user guides at all-guides.com Le niveau sonore augmente lorsque le réfrigérateur est en marche. • Les caractéristiques de performance du réfrigérateur peuvent changer en raison des variations de la température ambiante. Cela est normal et n’est pas un défaut. Vibrations ou bruits •...
- Page 68 All manuals and user guides at all-guides.com Lea este manual antes de utilizar el frigorífico. Estimado cliente: Esperamos que este aparato, que ha sido fabricado en plantas dotadas de la más avanzada tecnología y sometido a los más estrictos procedimientos de control de calidad, le preste un servicio eficaz.
- Page 69 All manuals and user guides at all-guides.com ÍNDICE 1 El frigorífico 4 Preparación 2 Información importante 5 Uso del frigorífico sobre seguridad Panel indicador ........ 19 Finalidad prevista ....... 4 Alarma de puerta abierta: ....21 Productos equipados con dispensador Cómo hacer que el tiempo de uso del de agua: ..........
-
Page 70: El Frigorífico
All manuals and user guides at all-guides.com El frigorífico A- Compartimento frigorífico B- Compartimento congelador 1- Estante para mantequilla y quesos 2- Estantes de la puerta del compartimento refrigerador 3- Estantes de vidrio del compartimento frigorífico 4- Cubierta del difusor 5 - Lentes de iluminación 6- Sección central móvil 7- Compartimento de enfriamiento... -
Page 71: Información Importante Sobre Seguridad
All manuals and user guides at all-guides.com Información importante sobre seguridad Lea con atención la siguiente información. • No toque con la mano los alimentos No tener en cuenta dicha información congelados, ya que podrían adherirse a podría acarrear lesiones o daños ella. - Page 72 All manuals and user guides at all-guides.com • No utilice dispositivos mecánicos u otros • Cuando entregue este aparato a un nuevo medios para acelerar el proceso de propietario, asegúrese de entregar también deshielo distintos de los recomendados este manual de instrucciones. por el fabricante.
-
Page 73: Productos Equipados Con Dispensador De Agua
All manuals and user guides at all-guides.com • Desenchufe el frigorífico si no lo va a utilizar Advertencia sobre la durante un periodo prolongado de tiempo. seguridad de la salud Un problema en el cable de alimentación podría causar un incendio. Si el sistema de refrigeración de su •... -
Page 74: Consejos Para El Ahorro De Energía
All manuals and user guides at all-guides.com Consejos para el ahorro de Recomendaciones para el energía compartimento de alimentos • No deje las puertas del frigorífico abiertas frescos durante periodos largos de tiempo. • No introduzca alimentos o bebidas * OPCIONAL calientes en el frigorífico. -
Page 75: Instalación
All manuals and user guides at all-guides.com Instalación Recuerde que el fabricante declina toda responsabilidad en caso de incumplimiento de las instrucciones de este manual. Cuestiones a considerar a la hora de transportar el frigorífico 1. El frigorífico debe estar vacío y limpio antes de proceder a su transporte. -
Page 76: Conexiones Eléctricas
All manuals and user guides at all-guides.com Conexiones eléctricas Eliminación de su viejo frigorífico Conecte el frigorífico a una toma de corriente provista de conexión a tierra y Deshágase de su viejo congelador de protegida por un fusible de la capacidad manera respetuosa con el medio ambiente. -
Page 77: Colocación E Instalación
All manuals and user guides at all-guides.com Colocación e instalación Ajuste del equilibrio Precaución: Nunca enchufe el frigorífico Si su frigorífico no está equilibrado: en la toma de corriente durante su 1- Retire la cubierta de ventilación instalación. Existe peligro de lesiones aflojando sus tornillos, tal como se muestra graves e incluso de muerte. -
Page 78: Ajuste De La Separación Entre La Puerta Superior
All manuals and user guides at all-guides.com Ajuste de la separación entre la puerta superior Ajuste la puerta según precise aflojando los tornillos. Fije la puerta que acaba de ajustar apretando los tornillos sin cambiar la Se puede ajustar la separación entre posición de la puerta. -
Page 79: Instalación Del Filtro De Agua
All manuals and user guides at all-guides.com Instalación del filtro de agua Determine en primer lugar el punto de colocación del filtro externo. (Se aplica (en algunos modelos) al filtro que se va a utilizar fuera del Se pueden conectar al refrigerador frigorífico.) A continuación, determine la dos tipos de fuentes de suministro distancia entre el filtro y el frigorífico y las... -
Page 80: Conexión De La Manguera De Agua Al Depósito
All manuals and user guides at all-guides.com 1. Finalice la conexión insertando el otro Importante: No debería ser necesario extremo de la tubería de agua en la toma apretar la pieza de conexión con una de agua de la bomba, tal y como se herramienta para lograr un acople muestra en la figura. -
Page 81: Conexión De La Tubería De Agua A La Red De Suministro De Agua Fría
All manuals and user guides at all-guides.com Conexión de la tubería de agua a la red de suministro de agua fría (en algunos modelos) Si desea utilizar el frigorífico conectándolo a la red de suministro de agua fría, deberá conectar un racor de válvula estándar de 1/2"... - Page 82 All manuals and user guides at all-guides.com 1. Pulse el botón de cancelación de hielo en Nota: Es normal que tras retirar la cubierta la pantalla. se produzca un ligero goteo. 2. Retire la cubierta del filtro del compartimento frigorífico tirando de ella hacia delante.
-
Page 83: Antes Del Primer Uso Del Dispensador De Agua
All manuals and user guides at all-guides.com Antes del primer uso del Debe asegurarse de que el modo de cancelación de hielo está activado antes dispensador de agua de retirar el filtro. La presión del suministro de agua no Precaución: El filtro de agua sirve debe ser inferior a 1 bar. -
Page 84: Uso De La Fuente De Agua
All manuals and user guides at all-guides.com Uso de la fuente de agua Bandeja de derramamiento Avisos Las gotas de agua que se desprenden Es normal que los primeros vasos de durante el uso del dispensador se recogen agua servidos por el dispensador estén en la bandeja de derramamiento. -
Page 85: Preparación
All manuals and user guides at all-guides.com Preparación El frigorífico debe instalarse dejando una separación no inferior a 30 cm respecto a fuentes de calor tales como quemadores, hornos, calefacciones o estufas y no inferior a 5 cm con respecto a hornos eléctricos, evitando asimismo su exposición directa a la luz solar. -
Page 86: Uso Del Frigorífico
All manuals and user guides at all-guides.com Uso del frigorífico Panel indicador Este panel indicador de control táctil le permite ajustar la temperatura sin necesidad de abrir la puerta del frigorífico. Basta con que pulse el botón pertinente. 8 17 1. - Page 87 All manuals and user guides at all-guides.com 1- Botón de ajuste de temperatura del 8- Indicador de la función Eco Extra compartimento frigorífico Indica que la función Eco Extra está Pulse este botón para ajustar la activa. Cuando esta función está activa, su temperatura del compartimento frigorífico a frigorífico detectará...
-
Page 88: Alarma De Puerta Abierta
All manuals and user guides at all-guides.com 13- Indicador del modo ahorro 18-Indicador de cancelación de la Indica que el frigorífico está funcionando formación de hielo en modo de eficiencia energética. Este Si no desea obtener hielo del frigorífico, debe utilizar esta función. Puede utilizar indicador estará... -
Page 89: Cómo Hacer Que El Tiempo De Uso Del Filtro Se Calcule Automáticamente
All manuals and user guides at all-guides.com Cómo hacer que el tiempo de uso del filtro se calcule automáticamente (Para aparatos conectados a la red de suministro de agua y dotados de filtro) 1- Tras enchufar el frigorífico, pulse los botones A y B a la vez para activar el bloqueo de las teclas. -
Page 90: Huevera
All manuals and user guides at all-guides.com Huevera Compartimento de enfriamiento Puede instalar la huevera en la puerta o el estante que desee. Los compartimentos de enfriamiento Nunca deposite la huevera en el preparan para la congelación los alimentos que van a congelarse. También pude usar compartimento congelador. -
Page 91: Cajón De Frutas Y Verduras
All manuals and user guides at all-guides.com Cajón de frutas y verduras El cajón de frutas y verduras de su frigorífico está especialmente diseñado para mantener la frescura de sus vegetales sin que pierdan su humedad natural. Con este fin, alrededor del cajón de frutas y verduras circula aire frío. -
Page 92: Sección Central Móvil
All manuals and user guides at all-guides.com Sección central móvil La sección central móvil tiene la función de evitar que el aire frío del interior de su frigorífico salga al exterior. 1- Las juntas de la puerta cuando, al cerrar puertas del compartimento frigorífico, crean un sello al hacer presión contra la superficie de la sección central móvil. -
Page 93: Cajón Telescópico
All manuals and user guides at all-guides.com Cajón telescópico Doble sistema de enfriamiento: Este frigorífico está equipado con dos Procure que ninguna parte de su cuerpo (manos, pies, etc.) quede atrapada entre sistemas de enfriamiento separados para las partes móviles cuando el cajón esté en enfriar el compartimento de alimentos movimiento con el fin de evitar cualquier frescos y el compartimento del congelador. -
Page 94: Dispensador De Cubitos
All manuals and user guides at all-guides.com Dispensador de cubitos Cubitera Lea atentamente las advertencias que se El dispensador de cubitos no puede indican en la cubitera. La cubitera se usa extraerse. La cubitera debe estar situada para recoger los cubitos fabricados por el en la parte inferior del dispensador de dispensador. -
Page 95: Congelación De Alimentos Frescos
All manuals and user guides at all-guides.com Ajuste del Ajuste del compartimento compartimento Explicaciones congelador frigorífico -18°C 4°C Estos son los valores de uso recomendados. Se recomiendan estos valores cuando la temperatura -20, -22 o -24 °C 4°C ambiente rebase los 30 ºC. Se utiliza para congelar los alimentos rápidamente. -
Page 96: Colocación De Los Alimentos
All manuals and user guides at all-guides.com Información sobre la 1. Coloque los paquetes de alimentos congelados en el congelador lo antes congelación posible tras su compra. Los alimentos deben congelarse lo más 2. Asegúrese de que todos los contenidos rápido posible con el fin de mantenerlos en tengan etiqueta y fecha. -
Page 97: Mantenimiento Y Limpieza
All manuals and user guides at all-guides.com Mantenimiento y limpieza Protección de las superficies No utilice nunca gasolina, benceno o de plástico sustancias similares para la limpieza. Le recomendamos desenchufar el No deposite aceites líquidos o alimentos aparato antes de proceder a su limpieza. aceitosos en recipientes no cerrados ya No utilice para la limpieza instrumentos que dañarán las superficies de plástico... -
Page 98: Sugerencias Para La Solución De Problemas
All manuals and user guides at all-guides.com Sugerencias para la solución de problemas Le rogamos compruebe la siguiente lista antes de llamar al servicio técnico. Ello puede ayudarle a ahorrar tiempo y dinero. Esta lista incluye problemas frecuentes no achacables a defectos en materiales o manufactura. - Page 99 All manuals and user guides at all-guides.com El frigorífico está en funcionamiento con frecuencia o durante periodos prolongados. • Puede que su nuevo congelador sea más grande que el que tenía anteriormente. Esto es perfectamente normal. Los frigoríficos de mayor tamaño funcionan durante más tiempo. •...
- Page 100 All manuals and user guides at all-guides.com El nivel de ruidos propios del funcionamiento se incrementa cuando el frigorífico está en marcha. • El rendimiento del frigorífico puede cambiar en función de las variaciones en la temperatura ambiente. Esto es perfectamente normal, no es ninguna avería. Vibraciones o ruidos.
- Page 101 All manuals and user guides at all-guides.com Molimo da prvo pročitate ovo uputstva za upotrebu! Poštovani kupci, Nadamo se da će vam ovaj proizvod, koji je proizveden u savremenim fabrikama i koji je prošao najstrože kontrole kvaliteta, dugo i efikasno služiti. Zato vam preporučujemo da pažljivo pročitate kompletno uputstvo za upotrebu vašeg proizvoda pre nego što počnete da ga koristite, a uputstvo sačuvajte tako da vam uvek bude pri ruci ako vam zatreba.
- Page 102 All manuals and user guides at all-guides.com SADRŽAJ 1 Frižider 4 Priprema 2 Važna bezbednosna 5 Upotreba Vašeg frižidera 19 upozorenja Tabla sa indikatorima ....... 19 Namena ..........4 Alarm za otvorena vrata: ....21 Za proizvode sa dozatorom za vodu; . 6 Šta treba uraditi da bi se vreme trajanja Bezbednost dece ......
-
Page 103: Frižider
All manuals and user guides at all-guides.com Frižider A- Odeljak frižidera B- Odeljak zamrzivača 1- Polica za puter i sir 2- Police na vratima odeljka frižidera 3- Staklene police odeljka frižidera 4- Poklopac za svetlo 5- Staklo za svetlo 6- Pokretan srednji deo 7- Odeljak za hlađenje 8- Polica za flaše 9- Odeljak za povrće... -
Page 104: Važna Bezbednosna Upozorenja
All manuals and user guides at all-guides.com Važna bezbednosna upozorenja Pročitajte sledeće informacije. • Za proizvode sa odeljkom Nepoštovanje ovih informacija može zamrzivača: ne stavljajte pića u dovesti do povreda ili materijalnih flašama i limenkama u odeljak šteta. U suprotnom se gubi pravo na zamrzivača. - Page 105 All manuals and user guides at all-guides.com • Nikad ne čuvajte sprejove koji sadrže • Ovo uputstvo za upotrebu treba zapaljive i eksplozivne supstance u predati novom vlasniku proizvoda, frižideru. kao i sledećem vlasniku kada se • Nemojte da koristite mehanička menja vlasnik.
-
Page 106: Za Proizvode Sa Dozatorom Za Vodu
All manuals and user guides at all-guides.com • Ako frižider nećete da koristite duže Ignorišite ovo upozorenje ako vreme, isključite ga iz struje. Mogući rashladni sistem proizvoda sadrži problem u kablu za napajanje može R134a. prouzrokovati požar. Vrsta gasa koji je korišćen u proizvodu •... -
Page 107: Preporuke Za Odeljak Za Svežu Hranu
All manuals and user guides at all-guides.com Preporuke za odeljak za svežu hranu • Pazite da hrana ne dođe u dodir sa senzorom temperature u odeljku za svežu hranu. Da bi se u odeljku za svežu hranu održača idealna temperatura skladištenja, hrana ne sme da blokira senzor. -
Page 108: Instalacija
All manuals and user guides at all-guides.com Instalacija C Molimo da imate na umu da proizvođač neće biti odgovoran ako se ne pridržavate informacija iz priručnika. Šta treba da se ima na umu prilikom ponovnog transporta frižidera 1. Vaš frižider mora da se isprazni i očisti pre bilo kakvog transporta. -
Page 109: Odlaganje Pakovanja
All manuals and user guides at all-guides.com Odlaganje dotrajalog B Specificirani napon mora da bude frižidera u otpad jednak naponu vaše elektro mreže. B Produžni kablovi i višestruke utičnice Vaš dotrajali uređaj odložite tako da ne ne smeju se koristiti za priključivanje. štetite životnoj sredini. -
Page 110: Postavljanje I Instalacija
All manuals and user guides at all-guides.com Postavljanje i instalacija Podešavanje ravnoteže poda A Oprez: Nikad ne uključujte frižider A Ako je vaš frižider neuravnotežen; u zidnu utičnicu za vreme instalacije. 1- Ventilacioni poklopac se uklanja Inače može da dođe do rizika od smrti odvijanjem šrafova kako je pokazano ili ozbiljne povrede. -
Page 111: Podešavanje Praznine Između Gornjih Vrata
All manuals and user guides at all-guides.com Podešavanje praznine između gornjih vrata C Podesite vrata po vašoj želji otpuštanjem šrafova. C Pričvrstite vrata koja ste podesili zatezanjem šrafova bez menjanja C Možete podesiti prazninu između položaja vrata. vrata odeljka frižidera kao što je prikazano na slikama. -
Page 112: Instalacija Filtera Za Vodu
All manuals and user guides at all-guides.com Instalacija filtera za vodu Najpre treba odrediti mesto gde će biti spojen eksterni filter. (Važi za filter (kod nekih modela) koji se nalazi izvan frižidera.) Zatim, Na frižider se mogu povezati odredite rastojanje između filtera i dva različita izvora vode radi frižidera i potrebne dužine creva od snabdevanja vodom: hladna voda iz... -
Page 113: Spajanje Creva Za Vodu Sa Bocom
All manuals and user guides at all-guides.com 3. Kada završite priključivanje, uključite Napomena 1: Ne smete da aparat u struju i pokrenite pumpu. zavrćete spojnicu alatom da biste Da biste obezbedili efikasan rad zatvorili vodu. U slučaju isticanja, pumpe, sačekajte 2-3 minuta nakon koristite ključ... -
Page 114: Spajanje Cevi Za Vodu Na Instalaciju Hladne Vode
All manuals and user guides at all-guides.com Spajanje cevi za vodu na instalaciju hladne vode (kod nekih modela) Ako želite da koristite frižider koji se priključuje na vodovodnu cev, moraćete da povežete standardni 1/2-inčni ventil na vodovodnu cev u kući. U slučaju da ventil nije prisutan ili ako niste sigurni, javite se kvalifikovanom vodoinstalateru. - Page 115 All manuals and user guides at all-guides.com 1. Pritisnite taster za otkazivanje leda na Napomena: Normalno je da nekoliko displeju. kapi vode padne kad se izvadi 2. Skinite poklopac filtera u odeljku poklopac. frižidera tako što ćete ga povući prema sebi. 3.
-
Page 116: Pre Prve Upotrebe Dozatora Vode
All manuals and user guides at all-guides.com Oprez: Filter za vodu služi za U slučaju da pritisak vode padne čišćenje stranih tela u vodi. On ispod 1 bara ili ako se koristi boca, ne može da pročisti vodu od onda mora da se koristi pumpa. mikroorganizama. -
Page 117: Upotreba Izvora Vode
All manuals and user guides at all-guides.com Upotreba izvora vode Tacna za proliveno Kapi vode koje padaju za vreme Upozorenja upotrebe se sakupljaju u tacni za Normalno je da prvih nekoliko čaša proliveno. Možete ukloniti posudu vode uzetih iz dozatora bude toplo. za prikupljanje vode tako što ćete je U slučajevima kad se dozator vode povući prema sebi ili pritisnuti njenu... -
Page 118: Priprema
All manuals and user guides at all-guides.com Priprema Vaš frižider treba da se ugradi najmanje 30 cm dalje od izvora toplote kao što su ringle, rerne, centralno grejanje i šporeti i bar 5 cm dalje od električnih rerna i ne treba da se stavi tamo gde je izložen direktnoj sunčevoj svetlosti. -
Page 119: Upotreba Vašeg Frižidera
All manuals and user guides at all-guides.com Upotreba Vašeg frižidera Tabla sa indikatorima Ovaj senzorski kontrolni indikator vam omogućava podešavanje temperature bez otvaranja vrata frižidera. Samo dodirnite prstom odgovarajući taster da biste podesili temperaturu. 8 17 1. Taster za podešavanje temperature 11. - Page 120 All manuals and user guides at all-guides.com 1. Taster za podešavanje 9. Indikator temperature odeljka temperature odeljka frižidera zamrzivača Pritiskajte ovo dugme da biste podesili On pokazuje podešenu temperaturu za temperaturu u odeljku frižidera na 8, odeljak zamrzivača. 6, 4, 2, 8..Pritiskajte ovo dugme da 10.
-
Page 121: Alarm Za Otvorena Vrata
All manuals and user guides at all-guides.com 14. Indikator statusa greške 19. Taster za UKLJUČIVANJE/ Ako vaš frižider ne hladi na ISKLJUČIVANJE ledomata odgovarajući način ili ako je senzor u Da biste zaustavili stvaranje leda, taster kvaru, ovaj indikator će se aktivirati. za UKLJUČIVANJE/ISKLJUČIVANJE Kada je ovaj indikator aktivan, indikator ledomata držite pritisnutim 3 sekunde. -
Page 122: Šta Treba Uraditi Da Bi Se Vreme Trajanja Filtera Automatski Izračunavalo
All manuals and user guides at all-guides.com Šta treba uraditi da bi se vreme trajanja filtera automatski izračunavalo (Za proizvode povezane na vodovodnu cev i opremljene filterom) 1- Nakon uključivanja frižidera, pritisnite tastere A i B istovremeno da biste aktivirali zaključavanje tastera. 2- Zatim pritisnite tastere Eco-Extra (1), podešavanje temperature odeljka frižidera (2), brzo hlađenje (3) i podešavanje temperature odeljka zamrzivača (4). -
Page 123: Stalak Za Jaja
All manuals and user guides at all-guides.com Stalak za jaja Odeljak za hlađenje Možete da stavite držač na jaja u Odeljci za hlađenje omogućavaju željenu policu vrata ili tela. da se hrana koju treba zamrznuti pripremi za zamrzavanje. Ove odeljke Nikad ne stavljajte držač... -
Page 124: Odeljak Za Povrće
All manuals and user guides at all-guides.com Odeljak za povrće Odeljak za voće i povrće vašeg frižidera je specijalno dizajniran za održavanje svežine vašeg povrća bez gubljenja vlage. Za ovu namenu, dolazi do cirkulacije hladnog vazduha oko odeljka za povrće. Uklonite police vrata koje su poravnate sa odeljkom za povrće pre nego što uklonite odeljke za povrće. -
Page 125: Pokretan Srednji Deo
All manuals and user guides at all-guides.com Pokretan srednji deo Pokretni srednji deo ima namenu da sprečava izlazak hladnog vazduha iz frižidera napolje. 1- Obezbeđena je izolacija kada zaptivači na vratima naležu na površinu pokretnog srednjeg dela dok su vrata odeljka frižidera zatvorena. -
Page 126: Teleskopska Fioka
All manuals and user guides at all-guides.com Teleskopska fioka Dvostruki rashladni sistem: Vaš frižider ima dva posebna rashladna sistema za hlađenje odeljka za svežu Obratite pažnju da ne uvučete delove hranu i odeljka zamrzivača. Na taj tela kao što su ruke, noge i sl. između način se vazduh u odeljku za svežu pokretnih delova dok je fioka u hranu ne meša sa vazduhom u odeljku... -
Page 127: Ledomat
All manuals and user guides at all-guides.com Ledomat Posuda za led Ledomat se ne može skidati. Mora Pažljivo pročitajte upozorenja na postojati posuda za led na dnu posudi za led. Posuda za led se koristi ledomata. za prikupljanje leda iz ledomata. Ne sipajte vodu u nju da bi se stvorio led jer se može polomiti. -
Page 128: Zamrzavanje Sveže Hrane
All manuals and user guides at all-guides.com Podešavanje Podešavanje odeljka odeljka Objašnjenja zamrzivača frižidera -18°C 4°C Ovo je normalno preporučeno podešenje. Ova podešenja su preporučena kad temperatura -20,-22 ili -24°C 4°C okoline pređe 30°C. Koristite kada želite da zamrznete hranu za kratko Brzo zamrzavanje 4°C vreme. -
Page 129: Stavljanje Hrane
All manuals and user guides at all-guides.com Informacije o dubokom Odmrzavanje Odeljak frižidera se odmrzava smrzavanju automatski. Hrana mora da se zamrzne što je brže Stavljanje hrane moguće kad se stavi u frižider da bi se sačuvao dobar kvalitet. TSE norma zahteva (prema Razna smrznuta hrana Police odeljka određenom uslovima merenja) da... -
Page 130: Čišćenje I Održavanje
All manuals and user guides at all-guides.com Čišćenje i održavanje Zaštita plastičnih površina A Nikada ne koristite naftu, benzen ili slične materijale u svrhu čišćenja. C Ne stavljajte tekuća ulja ili B Preporučujemo da pre čišćenja hranu kuvanu s uljem u frižider isključite uređaj iz struje. -
Page 131: Preporučena Rešenja Problema
All manuals and user guides at all-guides.com Preporučena rešenja problema Pregledajte ovu listu pre zvanja servisa. To može da Vam uštedi vreme i novac. Ova lista uključuje česte probleme do kojih ne dolazi zbog neadekvatne izrade ili upotrebe materijala. Neke funkcije, koje su ovde opisane, možda ne postoje kod vašeg proizvoda. - Page 132 All manuals and user guides at all-guides.com Frižider radi stalno ili dugo. • Vaš novi proizvod je možda širi od prethodnog. To je potpuno normalno. Veliki frižideri rade duže vreme. • Temperatura okoline u sobi može da bude visoka. To je potpuno normalno. •...
- Page 133 All manuals and user guides at all-guides.com Buka u toku rada se povećava kad frižider radi. • Radne karakteristike frižidera se mogu menjati u skladu sa promenama temperature okoline. To je normalno i nije greška. Vibracije ili buka. • Pod nije ravan ili je slab. Frižider se ljulja kad se polako pomera. Pobrinite se da je pod ravan i dovoljno jak da može da nosi frižider.
- Page 134 All manuals and user guides at all-guides.com Прочитајте го ова упатство прво! Почитуван кориснику, Се надеваме дека овој производ којшто е произведен во модерна фабрика и проверен според многу прецизни процедури за проверка на квалитетот, ќе ви овозможи ефективна услуга. Затоа, препорачуваме...
- Page 135 All manuals and user guides at all-guides.com СОДРЖИНА 1 Ладилник 4 Подготовка 2 Важни безбедносни 5 Употреба на предупредувања ладилникот Наменета употреба ......4 Панел со индикатори ....19 Кај производи со диспензер за Аларм за отворена врата: ... 21 вода...
- Page 136 All manuals and user guides at all-guides.com Ладилник A- Оддел на ладилникот Б- Оддел на замрзнувачот 1- Полица за путер и сирење 2- Полици на вратата во одделот на ладилникот 3- Стаклени полици во одделот на ладилникот 4- Капак на дифузерот 5- Леќа...
-
Page 137: Важни Безбедносни Предупредувања
All manuals and user guides at all-guides.com Важни безбедносни предупредувања Прочитајте ги следните информации. • За производите во одделот на Непочитувањето на овие информации замрзнувачот - не ставајте пијалаци може да предизвика повреди или во шише или конзерва во одделот материјална... - Page 138 All manuals and user guides at all-guides.com • Не влечете го кабелот кога го вадите • Почекајте најмалку 5 минути за да го приклучокот. вклучите ладилникот откако снемало • Поставете ги пијалаците со повисоки струја кај ладилниците што се затворувачи вертикално и убаво контролираат...
-
Page 139: Кај Производи Со Диспензер За Вода
All manuals and user guides at all-guides.com HCA-Предупредување • Вакцините, лековите што се осетливи на топлина, истражувачките материјали Ако системот за разладување на и слично не смее да се чуваат во производот содржи R600a: ладилникот бидејќи бараат прецизна Овој гас е запалив. Затоа, треба са се температура. - Page 140 All manuals and user guides at all-guides.com Работи што треба да ги Препораки за одделот за направите за штедење свежа храна енергија • Не држете ги вратите на ладилникот • Не дозволувајте храна да дојде во отворени подолг период. контакт со сензорот за температура во •...
-
Page 141: Работи Што Треба Да Се Имаат Во Предвид Кога Го Транспортирате Ладилникот
All manuals and user guides at all-guides.com Поставување Имајте предвид дека производителот нема да биде одговорен ако не се почитуваат информациите коишто се дадени во упатството за работа. Работи што треба да се имаат во предвид кога го транспортирате ладилникот 1. - Page 142 All manuals and user guides at all-guides.com Фрлање на стариот Поврзувањето мора да биде ладилник усогласено со државните регулативи. Приклучокот на кабелот за Фрлете го стариот ладилник без напојување мора да биде лесно да направите штета за животната достапен по приклучувањето. средина.
- Page 143 All manuals and user guides at all-guides.com Поставување и поврзување Прилагодување на подната рамнотежа Внимание: Никогаш не вклучувајте го ладилникот на ѕиден приклучок за Ако ладилникот не е избалансиран време на поставувањето. Инаку, може 1- Капакот за вентилација е изваден да...
- Page 144 All manuals and user guides at all-guides.com Прилагодување на процепот меѓу горната врата Прилагодете ја вратата соодветно како што сакате со разлабавување на шрафовите. Фиксирајте ја вратата што ја прилагодивте со затегнување на Може да го прилагодите процепот шрафовите без да ја менувате меѓу...
- Page 145 All manuals and user guides at all-guides.com Поставување филтер за Прво треба да се одреди местото вода каде што треба да се намести надворешниот филтер. (Се однесува (кај некои модели) на филтер што ќе се користи надвор Два различни видови извори од...
- Page 146 All manuals and user guides at all-guides.com 2. Ставете и фиксирајте го цревото Забелешка 1: Не треба да ја од пумпата на бокалот како што е затегнувате спојката со алатка за прикажано на сликата. да постигнете цврсто поврзување. 3. По завршување со поврзувањето, Употребете...
- Page 147 All manuals and user guides at all-guides.com Поврзување на водоводното црево за довод на ладна вода (кај некои модели) Ако сакате да го користите ладилникот со поврзување со довод на ладна вода, мора да поврзете стандарден дихтунг од 1/2“ за поврзување на вентилот за...
- Page 148 All manuals and user guides at all-guides.com 3. Извадете го капакот на филтерот за Внимание: Проверете дали има премостување на водата со вртење стандарден вентил 1/2” поврзан за надолу. довод на ладна вода и е затворен докрај. Следете ги инструкциите подолу следејќи...
- Page 149 All manuals and user guides at all-guides.com Пред првото користење на Филтерот за вода мора да се извади како што е прикажано на сликата кога диспенсерот за вода ќе треба да се смени или кога повеќе Притисокот на доводната вода не нема...
- Page 150 All manuals and user guides at all-guides.com Употреба на фонтаната за Тацна за истурање вода Капките вода што капат при употреба се акумулираат во тацната за Предупредувања истурање. Може да ја извадите Нормално е првите неколку чаши вода табаката за пролевање со повлекување што...
- Page 151 All manuals and user guides at all-guides.com Подготовка Ладилникот треба да се постави на најмалку 30 цм. оддалеченост од извори на топлина, како што се камини, фурни, централно греење и печки и најмалку 5 цм. оддалеченост од електрични печки и не смее да се...
- Page 152 All manuals and user guides at all-guides.com Употреба на ладилникот Панел со индикатори Панелот со индикаторите за контролата на допир ви овозможува да ја поставите температурата без да ја отворате вратата на ладилникот. Само допрете го соодветното копче со прстот за да ја поставите температурата. 8 17 1.
- Page 153 All manuals and user guides at all-guides.com 1. Копче за поставување на периоди на употреба и во текот на овие температурата во одделот на периоди ќе се активира ладење коешто ќе ладилникот биде енергетски ефикасно. Индикаторот Притиснете го ова копче и поставете за...
- Page 154 All manuals and user guides at all-guides.com 13. Индикатор за режимот за 18. Индикатор за исклучена машина економичност за мраз Посочува дека ладилникот работи во Треба да ја исклучите оваа функција режим за економичност. Овој индикатор ако не сакате да добивате мраз од ќе...
- Page 155 All manuals and user guides at all-guides.com Постапки што треба да ги направите за да може автоматски да се пресметува времето за употреба на филтерот (За производи поврзани со главниот довод на вода и опремени со филтер) 1- По вклучување на ладилникот, притиснете ги копчињата А и Б истовремено за да...
- Page 156 All manuals and user guides at all-guides.com Тацна за јајца Оддел за разладување Може да го ставите држачот за јајца Поладните оддели овозможуваат на саканата полица на вратата или во храната што треба да се замрзне, да се внатрешноста. подготви за замрзнување. Може да се служите...
- Page 157 All manuals and user guides at all-guides.com Свежа храна Фиоката за свежа храна во ладилникот е специјално дизајнирана за да го одржува зеленчукот свеж без да се загуби влажноста. За таа цел, ладен воздух циркулира околу фиоката. Извадете ги полиците на вратата што се...
- Page 158 All manuals and user guides at all-guides.com Менлива средна секција Менливата средна секција е наменета да спечи ладниот воздух во ладилникот да излегува надвор. 1- Гумата на вратата се залепува кога ќе ја допре површината на менливата средба секција при затворање на вратата.
- Page 159 All manuals and user guides at all-guides.com Телескопска фиока Двоен систем за ладење: Ладилникот е опремен со два засебни системи за ладење за да се Обратете внимание да не зафатите разладуваат одделот за свежа храна ниеден дел на телото, како рацете, и...
- Page 160 All manuals and user guides at all-guides.com Создавач за мраз Кутија за мраз Машината за мраз не може да се Прочитајте ги предупредувањата за извади. Мора да има сад за мраз долу садот за мраз внимателно. Садот кај машината за мраз. за...
-
Page 161: Замрзнување Свежа Храна
All manuals and user guides at all-guides.com Прилагодување Прилагодување на одделот на на одделот на Објаснувања замрзнувачот ладилникот -18°C 4°C Ова е нормална, препорачана поставка. Овие поставки се препорачуваат кога -20-22 или -24°C 4°C амбиенталната температура надминува 30°C. Кога сакате да ја замрзнете храната за кратко Брзо... - Page 162 All manuals and user guides at all-guides.com Информации за длабоко 1. Ставете ги пакувањата во ладилникот колку што е можно побргу по замрзнување купување. Храната мора да се замрзне што е 2. Проверете дали пакувањето е можно поскоро кога ќе се стави во обележано...
- Page 163 All manuals and user guides at all-guides.com Одржување и чистење Заштита на пластичните Никогаш не користете бензин, нафта површини или слични средства за чистење. Препорачуваме да го исклучите Не ставајте течни масла или храна апаратот пред чистење. зготвена со масло во незатворени Никогаш...
- Page 164 All manuals and user guides at all-guides.com Препорачани решенија за проблемите Прочитајте го овој список пред да повикате сервис. Ќе ви заштеди време и пари. Овој список ги опфаќа честите поплаки што не произлегуваат од неправилна работа или употреба на материјали. Некои од одликите што се опишани тука веројатно...
- Page 165 All manuals and user guides at all-guides.com Ладилникот често или долго работи. • Новиот ладилник веројатно е поширок од претходниот. Тоа е сосема нормално. Големите ладилници работат подолг период. • Амбиенталната температура во просторијата е висока. Тоа е сосема нормално. •...
- Page 166 All manuals and user guides at all-guides.com Бучавата при работа се зголемува кога работи ладилникот. • Работата на ладилникот се менува соодветно со промените во амбиенталната температура. Тоа е нормално и не е грешка. Вибрации или бучава. • Подот не е рамен или е многу слаб. Ладилникот се ниша кога ќе се помести малку.
- Page 167 All manuals and user guides at all-guides.com Molimo prvo pročitajte ovaj priručnik! Poštovani kupci, Nadamo se da će vam naš proizvod, proizveden u suvremenim postrojenjima i provjeren po strogim procedurama kontrole kvalitete, pružiti učinkovit rad. Zbog toga vam preporučujemo da pažljivo pročitate cijeli priručnik proizvoda prije uporabe te da ga čuvate na pristupačnom mjestu zbog buduće uporabe.
- Page 168 All manuals and user guides at all-guides.com SADRŽAJ 1 Hladnjak 5 Uporaba vašeg hladnjaka 2 Važna sigurnosna Ploča indikatora ....... 19 upozorenja Alarm za otvorena vrata: ....21 Predviđena namjena ......4 Što trebate uraditi da se vrijeme uporabe filtra računa automatski ..22 Za proizvode s raspršivačem za vodu;...
-
Page 169: Hladnjak
All manuals and user guides at all-guides.com Hladnjak A- Odjeljak hladnjaka B- Odjeljak škrinje 1- Polica za maslac i sir 2- Police vrata odjeljka hladnjaka 3- Staklene police odjeljka hladnjaka 4- Poklopac raspršivača 5- Leća za osvjetljenje 6- Pomični središnji dio 7- Odjeljak za hlađenje 8- Police za boce 9- Odjeljak za povrće... -
Page 170: Važna Sigurnosna Upozorenja
All manuals and user guides at all-guides.com Važna sigurnosna upozorenja Molimo pregledajte sljedeće • Za proizvode s odjeljkom sa škrinjom; ne stavljajte tekućinu u bocama i informacije. Nepridržavanje ovih informacija može uzrokovati ozljede ili konzervama u odjeljak škrinje. U materijalnu štetu. U suprotnom će sva suprotnom bi mogli puknuti. - Page 171 All manuals and user guides at all-guides.com • Kod isključivanja utikača, nemojte • Za hladnjake kojima se upravlja povlačiti za kabel. manualno, sačekajte bar 5 minuta da • Stavite jača pića čvrsto zatvorena i biste uključili hladnjak nakon nestanka uspravno. el.
-
Page 172: Za Proizvode S Raspršivačem Za Vodu
All manuals and user guides at all-guides.com Upozorenje za HCA • Proizvodi za koje je potrebna precizna kontrola temperature, cjepiva, lijekovi Ako rashladni sustav vašeg osjetljivi na toplinu, znanstveni materijali, uređaja sadrži R600a: itd. se ne smiju držati u hladnjaku. Ovaj plin je zapaljiv. -
Page 173: Stvari Koje Se Trebaju Uraditi Za Uštedu Energije
All manuals and user guides at all-guides.com Stvari koje se trebaju uraditi Preporuke za odjeljak za za uštedu energije svježu hranu * Izborni • Ne ostavljajte vrata vašeg hladnjaka otvorena dulje vrijeme. • Ne stavljajte toplu hranu ili pića u •... -
Page 174: Instalacija
All manuals and user guides at all-guides.com Instalacija B Molimo imajte na umu da se proizvođač neće smatrati odgovornim ukoliko se ne budete pridržavali informacija navedenih u korisničkom priručniku. Stvari kojih se treba pridržavati kod ponovnog transporta vašeg hladnjaka 1. Vaš hladnjak mora biti ispražnjen i očišćen prije bilo kakvog transporta. -
Page 175: Odlaganje Pakiranja
All manuals and user guides at all-guides.com Postavljanje i instalacija B Navedeni napon mora biti jednak naponu el. energije. B Produžni kabeli i razvodnici se ne A Pažnja: Nikada ne uključujte smiju koristiti za spajanje. hladnjak u zidnu utičnicu tijekom B Oštećeni kabel napajanja mora instalacije. -
Page 176: Prilagođavanje Ravnoteže Prema Podu
All manuals and user guides at all-guides.com 1. Instalirajte vaš hladnjak na mjesto 2. Kad se riješi problem s ravnotežom, koje dopušta laku uporabu. vratite nazad poklopac ventilacije i zavijte vijke. 2. Držite vaš hladnjak podalje od izvora topline, vlažnih mjesta i direktne sunčeve svjetlosti. - Page 177 All manuals and user guides at all-guides.com C Možete prilagoditi razmak između vrata odjeljaka hladnjaka kako je prikazano na slici. Police vrata moraju biti prazne kad prilagođavate visinu vrata. C Pomoću odvijača uklonite vijak poklopca gornje šarke vrata koja želite podesiti.
-
Page 178: Instaliranje Filtra Za Vodu
All manuals and user guides at all-guides.com Instaliranje filtra za vodu Prvo se treba odrediti mjesto gdje će biti postavljen vanjski filtar. (Odnosi se (Kod nekih modela) na filtar koji se koristi izvan hladnjaka.) Za dovod vode mogu na hladnjak Zatim odredite udaljenost između filtra biti spojena dva različita izvora vode: i hladnjaka i potrebnu duljinu crijeva... -
Page 179: Spajanje Crijeva Za Vodu Na Vrč
All manuals and user guides at all-guides.com Spajanje crijeva za vodu na Tijekom spajanja vode, možete vrč pogledati u korisnički priručnik pumpe. (Kod nekih modela) Da biste spojili vodu na hladnjak iz Ako se koristi vrč, nema potrebe vrča, potrebna je pumpa. Slijedite koristiti filtar za vodu. - Page 180 All manuals and user guides at all-guides.com spajanjem na dovod hladne vode, morat ćete spojiti standardni 1/2" fiting za spajanje ventila na dovod hladne vode u vašoj kući. U slučaju da nema ventila ili u slučaju da niste sigurni, konzultirajte se s kvalificiranim vodoinstalaterom.
- Page 181 All manuals and user guides at all-guides.com 1. Pritisnite na zaslonu tipku za opoziv Napomena: Normalno je da nekoliko leda. kapljica vode kaplje nakon skidanja 2. Uklonite poklopac filtra u odjeljku poklopca. hladnjaka tako da ga povučete naprijed. 3. Izvadite poklopac odjeljka za zaobilaženje filtra za vodu okretanjem prema dolje.
-
Page 182: Prije Prve Uporabe Raspršivača Za Vodu
All manuals and user guides at all-guides.com Pažnja: Filtar za vodu pročišćava Pumpe se moraju koristiti u slučaju neke od stranih čestica u vodi. On ne da tlak vode padne ispod 1 bara ili ako pročišćava vodu od mikroorganizama. će se koristiti vrč s vodom. Pažnja: Tipka za isključivanje sustav za vodu u hladnjaku mora leda se uvijek mora pritisnuti tijekom... -
Page 183: Uporaba Pipe Za Vodu
All manuals and user guides at all-guides.com Uporaba pipe za vodu Posuda za proliveno Kapljice vode koje padaju tijekom Upozorenja uporabe se sakupljaju u posudi za Normalno je da će prvih nekoliko čaša proliveno. Možete izvaditi podlogu vode uzetih s raspršivača biti toplo. za proliveno tako da je povučete U slučajevima gdje se raspršivač... -
Page 184: Priprema
All manuals and user guides at all-guides.com Priprema Vaš hladnjak se treba postaviti najmanje 30 cm od izvora topline kao što su plamenici, pećnice, grijalice i štednjaci i najmanje 5 cm dalje od električnih pećnica te se ne smiju stavljati na direktnu sunčevu svjetlost. Sobna temperatura u prostoriji u koju postavite hladnjak treba biti najmanje 10°C. -
Page 185: Uporaba Vašeg Hladnjaka
All manuals and user guides at all-guides.com Uporaba vašeg hladnjaka Ploča indikatora Ova ploča indikatora s upravljanjem dodirom vam omogućava postavljanje temperature bez otvaranja vrata hladnjaka. Samo prstom dodirnite odgovarajuću tipku da biste postavili temperaturu. 8 17 1. Tipka postavke temperature odjeljka 11. - Page 186 All manuals and user guides at all-guides.com 1. Tipka postavke temperature 9. Oznaka postavke temperature odjeljka hladnjaka odjeljka škrinje Pritisnite ovu tipku da biste postavili Označava temperaturu postavljenu za temperaturu odjeljka hladnjaka na odjeljak škrinje. 8, 6, 4, 2, 8... Pritisnite ovu tipku da 10.
-
Page 187: Alarm Za Otvorena Vrata
All manuals and user guides at all-guides.com 14. Oznaka statusa greške 19. Oznaka funkcije uključivanja/ Ako vaš hladnjak ne hladi pravilno ili isključivanja ledomata ako je senzor u kvaru, ova oznaka Da zaustavite stvaranje leda, tipka za neće biti uključena. Kad je ova oznaka uključivanje/isključivanje ledomata se uključena, oznaka temperature pritisne na 3 sekunde. -
Page 188: Što Trebate Uraditi Da Se Vrijeme Uporabe Filtra Računa Automatski
All manuals and user guides at all-guides.com Što trebate uraditi da se vrijeme uporabe filtra računa automatski (Za proizvode spojene na vodovod i opremljene filtrom). 1- Nakon uključivanja hladnjaka, pritisnite skupa tipke A i B da biste uključili zaključavanje tipki. 2- Zatim pritisnite tipke Eco-Extra (1), Postavku temperature odjeljka hladnjaka (4), Brzo hlađenje (5) i postavke temperature odjeljka škrinje (3). -
Page 189: Polica Za Jaja
All manuals and user guides at all-guides.com Polica za jaja Odjeljak za hlađenje Možete instalirati držač za jaja na Odjeljci za hlađenje omogućavaju da željenu policu vrata ili kućišta. hrana koja će se zamrzavati bude spremna za zamrzavanje. Možete Nikada ne držite držač za jaja u također koristiti ove odjeljke ako želite odjeljku hladnjaka držati hranu na temperaturi nekoliko... -
Page 190: Odjeljak Za Povrće
All manuals and user guides at all-guides.com Odjeljak za povrće Odjeljak za voće i povrće vašeg hladnjaka je napravljen posebno tako da vaše povrće održava svježim a da ne izgube svoju vlagu. U tu svrhu se cirkulacija zraka vrši oko odjeljka za povrće općenito. -
Page 191: Pomični Središnji Dio
All manuals and user guides at all-guides.com Pomični središnji dio Pomični središnji dio je namijenjen sprječavanju da hladni zrak iz vašeg hladnjaka izlazi van. 1- Brtvljenje se ostvaruje kad brtve na vratima pritisnu površinu pomičnog središnjeg dijela dok su vrata odjeljka hladnjaka zatvorena. -
Page 192: Teleskopska Ladica
All manuals and user guides at all-guides.com Teleskopska ladica Dvostruki sustav hlađenja: Vaš hladnjak je opremljen s dva odvojena sustava za hlađenje da bi Pazite da ne zgnječite bilo kakve se hladio odjeljak za svježu hranu i dijelove vašeg tijela, kao što su ruke, odjeljak škrinje. -
Page 193: Ledomat
All manuals and user guides at all-guides.com Ledomat Kutija za led Ledomat se ne može izvaditi. Na dnu Molimo, pažljivo pročitajte upozorenja ledomata mora biti spremnik za led. na spremniku za led. Spremnik za led se koristi za sakupljanje leda iz ledomata. -
Page 194: Pohrana Svježe Hrane
All manuals and user guides at all-guides.com Prilagođavanje Prilagođavanje odjeljka Objašnjenja odjeljka škrinje hladnjaka - 18°C 4°C To je normalna preporučena postavka. Ove postavke su preporučene kad sobna - 20,- 22 ili -24°C 4°C temperatura prelazi 30°C. Koristite kad želite zamrznuti svoju hranu u kratkom Brzo zamrzavanje 4°C vremenu. -
Page 195: Stavljanje Hrane
All manuals and user guides at all-guides.com Stavljanje hrane Odjeljak za duboko zamrzavanje Različita zamrznuta Hrana se mora zamrznuti što brže Police odjeljka za hrana kao što je meso, kad se stavi u hladnjak da bi zadržala zamrzavanje riba, sladoled, povrće kvalitetu. -
Page 196: Održavanje I Čišćenje
All manuals and user guides at all-guides.com Održavanje i čišćenje Zaštita plastičnih površina A Nikada za čišćenje nemojte koristiti benzin ili slične materijale. C Ne stavljajte tekuće ulje ili jela kuhana B Savjetujemo da isključite uređaj iz na ulju u vaš hladnjak u nezatvorenim struje prije čišćenja. -
Page 197: Preporučena Rješenja Za Probleme
All manuals and user guides at all-guides.com Preporučena rješenja za probleme Molimo provjerite popis prije zvanja servisa. To vam može uštedjeti vrijeme i novac. Popis sadrži česte reklamacije koje nisu posljedica oštećenja u proizvodnji ili uporabi. Neke od opisanih mogućnosti možda ne postoje na vašem proizvodu. Hladnjak ne radi. - Page 198 All manuals and user guides at all-guides.com Hladnjak radi često ili dugotrajno. • Vaš novi hladnjak je možda širi od prethodnog. To je u potpunosti normalno. Veći hladnjaci rade dulje. • Sobna temperatura je možda visoka. To je u potpunosti normalno. •...
- Page 199 All manuals and user guides at all-guides.com Buka tijekom rada se povećava kad hladnjak radi. • Radne performanse hladnjaka se mogu promijeniti ovisno o promjenama sobne temperature. To je normalno i ne predstavlja kvar. Vibracije ili buka. • Pod nije ravan ili je slab. Hladnjak se njiše kad se polako pomiče. Pazite da je pod ravan i da je dovoljno jak da može nositi hladnjak.
- Page 200 All manuals and user guides at all-guides.com Bitte lesen Sie zuerst diese Anleitung! Lieber Kunde, Wir sind sicher, dass Ihnen dieses Produkt, das in modernsten Fertigungsstätten hergestellt und den strengsten Qualitätsprüfungen unterzogen wurde, lange Zeit gute Dienste leisten wird. Wir empfehlen Ihnen, vor Inbetriebnahme des Gerätes das gesamte Handbuch durchzulesen und es anschließend aufzubewahren.
- Page 201 All manuals and user guides at all-guides.com INHALT 1 Der Kühlschrank 4 Vorbereitung 2 Wichtige Hinweise zu Ihrer 5 Kühlschrank verwenden 19 Sicherheit Anzeigefeld ........19 Bestimmungsgemäßer Gebrauch ..4 Tür offen-Alarm: ......21 Bei Geräten mit Wasserspender: ..6 So lassen Sie die Zeit bis zum Kinder –...
-
Page 202: Der Kühlschrank
All manuals and user guides at all-guides.com Der Kühlschrank A: Kühlbereich B: Tiefkühlbereich 1- Butter- & Käsefach 2- Kühlbereich-Türablagen 3- Kühlbereich-Glasablagen 4- Leuchtenabdeckung 5- Beleuchtung 6- Beweglicher Mittelbereich 7- Kühlfach 8- Flaschenablage 9- Gemüsefach 10- Eisfach 11- Bewegliche Separatoren 12- Eismaschine Abbildungen und Angaben in dieser Anleitung sind schematisch und können etwas von Ihrem Gerät abweichen. -
Page 203: Wichtige Hinweise Zu Ihrer Sicherheit
All manuals and user guides at all-guides.com Wichtige Hinweise zu Ihrer Sicherheit Bitte lesen Sie die folgenden Hinweise • Berühren Sie gefrorene Lebensmittel nicht aufmerksam durch. Bei Nichtbeachtung mit der Hand; sie können festfrieren. kann es zu Verletzungen und Sachschäden •... - Page 204 All manuals and user guides at all-guides.com • Achten Sie beim Transportieren des • Dieses Gerät darf nicht von Personen Kühlschranks darauf, dass das Netzkabel (einschließlich Kindern) benutzt werden, nicht beschädigt wird. Geknickte Kabel die unter körperlichen oder geistigen können sich entzünden. Stellen Sie Einschränkungen leiden oder denen es niemals schwere Gegenstände auf an der nötigen Erfahrung im Umgang...
-
Page 205: Bei Geräten Mit Wasserspender
All manuals and user guides at all-guides.com • Die Kontakte des Netzsteckers sollten HCA-Warnung regelmäßig gereinigt werden; andernfalls besteht Brandgefahr. Falls Ihr Gerät mit dem Kühlmittel • Die Steckerkontakte sollten regelmäßig R600a arbeitet: gereinigt werden; andernfalls besteht Dieses Gas ist leicht entflammbar. Brandgefahr. -
Page 206: Tipps Zum Energiesparen
All manuals and user guides at all-guides.com Tipps zum Energiesparen Empfehlungen zum • Halten Sie die Kühlschranktüren nur Kühlbereich möglichst kurz geöffnet. * FAKULTATIV • Lagern Sie keine warmen Speisen oder Getränke im Kühlschrank ein. • Überladen Sie den Kühlschrank nicht; die •... -
Page 207: Installation
All manuals and user guides at all-guides.com Installation 2. Sie können die beiden Kunststoffkeile Bitte beachten Sie, dass der Hersteller wie in der Abbildung gezeigt anbringen. nicht haftet, wenn Sie sich nicht an die Die Kunststoffkeile sorgen für den Informationen und Anweisungen der richtigen Abstand zwischen Kühlschrank Bedienungsanleitung halten. -
Page 208: Elektrischer Anschluss
All manuals and user guides at all-guides.com Elektrischer Anschluss Aufstellung und Installation Schließen Sie Ihren Kühlschrank an eine geerdete (Schuko-) Steckdose an. Diese Steckdose muss mit einer passenden Achtung: Stecken Sie während der Sicherung abgesichert werden. Installation niemals den Netzstecker ein. Wichtig: Andernfalls kann es zu schweren bis tödlichen Verletzungen kommen. -
Page 209: Gerade, Ausbalancierte Aufstellung
All manuals and user guides at all-guides.com Gerade, ausbalancierte Spalt zwischen den Türen Aufstellung anpassen Wenn Ihr Kühlschrank nicht absolut gerade steht: 1. Drehen Sie zunächst die Schrauben an der Belüftungsöffnungabdeckung wie in der Abbildung gezeigt heraus. Sie können den Kühlschrank – wie in der Abbildung gezeigt –... - Page 210 All manuals and user guides at all-guides.com Stellen Sie die Tür nach Lösen der Schrauben nach Wunsch ein. Fixieren Sie die eingestellte Tür durch Anziehen der Schrauben; ändern Sie die Türposition dabei nicht. Setzen Sie die Scharnierabdeckung wieder auf, ziehen Sie die Schraube an.
-
Page 211: Wasserfilter Installieren
All manuals and user guides at all-guides.com Wasserfilter installieren Abstand zwischen Filter und Kühlschrank und legen die erforderliche Schlauchlänge (bei bestimmten Modellen) vom Filter bis zum Wassereinlass des Ihr Kühlgerät kann über zwei Kühlschranks fest. unterschiedliche Wasseranschlüsse Der Wasserfilter muss wie in der Abbildung mit Frischwasser versorgt werden: gezeigt aufrecht gehalten werden. -
Page 212: Wasserleitung Mit Dem Wasserbehälter Verbinden
All manuals and user guides at all-guides.com Wasserleitung mit dem 2. Fixieren Sie das Ende des Wasserschlauches wie in der Abbildung Wasserbehälter verbinden gezeigt im Behälter. (bei bestimmten Modellen) 3. Nach dem Anschluss stellen Sie die Wenn Sie den Kühlschrank über einen Stromversorgung her und schalten die Wasserbehälter mit Wasser versorgen Pumpe ein. -
Page 213: Wasserschlauch An Den Kaltwasseranschluss Anschließen
All manuals and user guides at all-guides.com Wasserschlauch an den Kaltwasseranschluss anschließen (bei bestimmten Modellen) Wenn Sie Ihren Kühlschrank an die Wasserleitung anschließen möchten, müssen Sie ein handelsübliches 1/2 Zoll- Ventilstück an die Kaltwasserleitung ihres Hauses anschließen. Falls dieser Anschluss nicht vorhanden oder Sie sich nicht sicher sein sollten, ziehen Sie bitte einen versierten Klempner hinzu. - Page 214 All manuals and user guides at all-guides.com 1. Drücken Sie die Kein Eis-Taste am 3. Lösen Sie die Verzweigungsabdeckung Display. durch Drehen nach unten. 2. Nehmen Sie die Filterabdeckung im Kühlbereich durch Ziehen nach vorne heraus. Achtung: Achten Sie darauf, dass der Kein Eis-Modus aktiv ist, bevor Sie die Verzweigungsabdeckung abnehmen.
-
Page 215: Vor Dem Ersten Wasserspendereinsatz
All manuals and user guides at all-guides.com Vor dem ersten Wenn Sie den Wasserfilter austauschen oder nicht weiter verwenden Wasserspendereinsatz: möchten, müssen Sie ihn wie in der Der Wasserdruck muss mindestens 1 Abbildung gezeigt entfernen; die bar betragen. Verzweigungsabdeckung muss angebracht Der Wasserdruck darf 8 bar nicht werden. -
Page 216: So Benutzen Sie Den Wasserspender
All manuals and user guides at all-guides.com So benutzen Sie den Tropfschale Wasserspender In der Tropfschale sammelt sich Wasser, das bei der Nutzung nach unten tropft. Warnungen Sie können die Tropfschale entnehmen, Das erste Wasser, das aus dem Spender indem Sie sie zu sich heranziehen oder fließt, kann noch etwas warm sein. -
Page 217: Vorbereitung
All manuals and user guides at all-guides.com Vorbereitung Ihr Kühlschrank sollte mindestens 30 cm von Hitzequellen wie Kochstellen, Öfen, Heizungen, Herden und ähnlichen Einrichtungen aufgestellt werden. Halten Sie mindestens 5 cm Abstand zu Elektroöfen ein, vermeiden Sie die Aufstellung im direkten Sonnenlicht. Die Zimmertemperatur des Raumes, in dem der Kühlschrank aufgestellt wird, sollte mindestens 10 °C betragen. -
Page 218: Kühlschrank Verwenden
All manuals and user guides at all-guides.com Kühlschrank verwenden Anzeigefeld Über das Sensor-Anzeigefeld können Sie die Temperatur einstellen, ohne die Tür Ihres Kühlgerätes öffnen zu müssen. Zur Temperaturauswahl berühren Sie die passenden Tasten einfach mit dem Finger. 8 17 1. Kühlbereichtemperatureinstelltaste 12. - Page 219 All manuals and user guides at all-guides.com 1- Kühlbereichtemperatureinstelltaste 10- Schnellkühlanzeige Durch mehrmaliges Drücken dieser Taste Zeigt an, dass die Schnellkühlfunktion aktiv stellen Sie die Kühlbereichtemperatur auf ist. Diese Funktion nutzen Sie, wenn Sie 8 °, 6 °, 4° oder 2 ° ein Stellen Sie die frische Lebensmittel in das Kühlfach geben Temperatur des Kühlbereiches mit dieser oder Ihre Lebensmittel besonders schnell...
-
Page 220: Tür Offen-Alarm
All manuals and user guides at all-guides.com 15- Tastensperre-Anzeige 20- Filterwechselanzeige Diese Funktion nutzen Sie, wenn Die Filterwechselanzeige leuchtet auf, die Temperatureinstellungen Ihres wenn der Filter gewechselt werden muss. Kühlgerätes unverändert bleiben sollen. 21- Filterstatus rücksetzen-Taste Zum Einschalten dieser Funktion Der Filter Ihres Kühlschranks muss alle 6 halten Sie die Öko-Extra-Taste und die Monate ausgetauscht werden. -
Page 221: So Lassen Sie Die Zeit Bis Zum Filterwechsel Automatisch Berechnen
All manuals and user guides at all-guides.com So lassen Sie die Zeit bis zum Filterwechsel automatisch berechnen (Bei Geräten, die mit der Wasserleitung verbunden und mit einem Filter ausgestattet sind.) 1: Bei eingeschaltetem Kühlgerät: Schalten Sie die Tastensperre durch Gedrückthalten der Tasten A und B ein. -
Page 222: Eierbehälter
All manuals and user guides at all-guides.com Eierbehälter Kühlfach Sie können den Eierhalter in der Tür oder Im Kühlfach können Sie Lebensmittel auf einer Ablage platzieren. auf das Einfrieren vorbereiten. Legen Sie den Eierhalter niemals in den Ebenso eignet sich dieser Bereich Tiefkühlbereich. -
Page 223: Gemüsefach
All manuals and user guides at all-guides.com Gemüsefach Im Gemüsefach Ihres Kühlgerätes bleibt Gemüse länger frisch und behält seine natürliche Feuchtigkeit. Dazu wird ständig kühle Luft zum Gemüsefach geleitet. Nehmen Sie die Türablagen in der Höhe des Gemüsefaches heraus, bevor Sie das Gemüsefach entnehmen. -
Page 224: Beweglicher Mittelbereich
All manuals and user guides at all-guides.com Beweglicher Mittelbereich Der bewegliche Mittelbereich sorgt dafür, dass die kühle Luft im Inneren Ihres Kühlgerätes nicht nach außen entweichen kann. 1: Die Türdichtungen liegen bei geschlossener Tür am beweglichen Mittelbereich an und sorgen für Dichtigkeit. 2: Ein weiterer Vorteil des beweglichen Mittelbereiches besteht darin, dass sich dadurch das Nettovolumen des... -
Page 225: Teleskopschublade
All manuals and user guides at all-guides.com Teleskopschublade Tür-offen-Warnung Ein Tonsignal erklingt, wenn die Tür des Kühlbereiches länger als 1 Minute lang Achten Sie darauf, keine Körperteile offen steht. Dieses Tonsignal verstummt, zwischen beweglichen Teilen der sobald Sie eine beliebige Taste drücken Schublade einzuklemmen. -
Page 226: Eisbereiter
All manuals and user guides at all-guides.com Eisbereiter Eisfach Der Eisbereiter ist fest eingebaut und kann Bitte lesen Sie die Warnhinweise am nicht entnommen werden. Achten Sie Eisbehälter aufmerksam durch. Im unbedingt darauf, dass der Eisbehälter Eisbehälter sammelt sich das vom stets unter dem Eisbereiter sitzt. -
Page 227: Frische Lebensmittel Tiefkühlen
All manuals and user guides at all-guides.com Frische Lebensmittel Bitte beachten Sie die folgenden Hinweise, um beste Resultate zu erzielen. tiefkühlen 1.Frieren Sie nicht zu große Mengen auf Es ist ratsam, die Lebensmittel einmal ein. Die Qualität der Lebensmittel einzuwickeln oder abzudecken, bevor sie bleibt am besten erhalten, wenn sie im Kühlschrank gelagert werden. -
Page 228: Lebensmittel Einlagern
All manuals and user guides at all-guides.com Hinweise zum Tiefkühlen 2.Sorgen Sie dafür, dass sämtliche Lebensmittel beschriftet und mit einem Lebensmittel sollten schnellstmöglich Datum versehen werden. eingefroren werden, damit sie nicht an 3.Achten Sie darauf, dass das Qualität verlieren. Mindesthaltbarkeitsdatum auf der Die TSE-Norm schreibt (je nach Verpackung nicht überschritten wird. -
Page 229: Wartung Und Reinigung
All manuals and user guides at all-guides.com Wartung und Reinigung Verwenden Sie zu Reinigungszwecken Schutz der Kunststoffflächen niemals Benzin oder ähnliche Geben Sie keine Öle oder stark fetthaltige Substanzen. Speisen offen in Ihren Kühlschrank – Wir empfehlen, vor dem Reinigen den dadurch können die Kunststoffflächen Netzstecker zu ziehen. -
Page 230: Empfehlungen Zur Problemlösung
All manuals and user guides at all-guides.com Empfehlungen zur Problemlösung Bitte arbeiten Sie diese Liste durch, bevor Sie den Kundendienst anrufen. Das kann Ihnen Zeit und Geld sparen. In der Liste finden Sie häufiger auftretende Probleme, die nicht auf Verarbeitungs- oder Materialfehler zurückzuführen sind. Nicht alle hier beschriebenen Funktionen sind bei jedem Modell verfügbar. - Page 231 All manuals and user guides at all-guides.com Der Kühlschrank arbeitet sehr intensiv oder über eine sehr lange Zeit. • Ihr neues Gerät ist vielleicht etwas breiter als sein Vorgänger. Dies ist völlig normal. Große Kühlgeräte arbeiten oft längere Zeit. • Die Umgebungstemperatur ist eventuell sehr hoch.
- Page 232 All manuals and user guides at all-guides.com Das Betriebsgeräusch nimmt zu, wenn der Kühlschrank arbeitet. • Das Leistungsverhalten des Kühlgerätes kann sich je nach Umgebungstemperatur ändern. Dies ist völlig normal und keine Fehlfunktion. Vibrationen oder Betriebsgeräusche. • Der Boden ist nicht eben oder nicht fest. Der Kühlschrank wackelt, wenn er etwas bewegt wird.
- Page 233 All manuals and user guides at all-guides.com 57 0206 0000/AD en-fr-es-sb-mk- www.beko.com hr-de...