Publicité
Liens rapides
Publicité

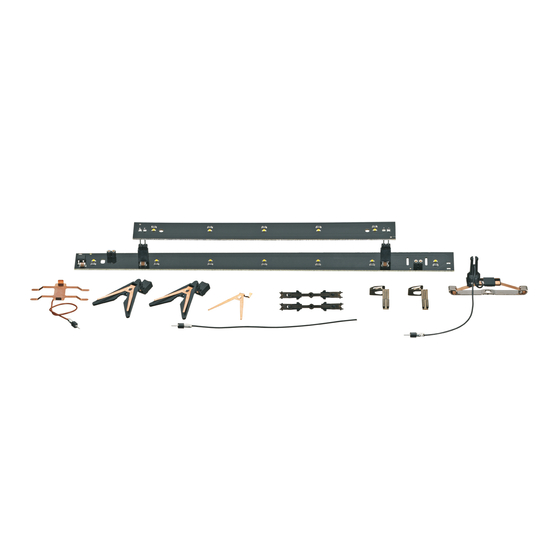
Sommaire des Matières pour marklin 73141
- Page 1 Innenbeleuchtung 73141...
- Page 2 Gehäuse abnehmen Removing the body Enlever le boîtier Huis afnemen Retirar la carsasa Smontare il mantello Kåpan tas av Overdel tages af...
- Page 3 Inneneinrichtung abnehmen Remove the interior Enlever l‘aménagement intêrieur Interieur verwijderen Retirar el equipo interior Smontare l‘arredamento interno Ta av inrednigen Indvendig indretning udtages...
- Page 4 Die Arbeitsschritte auf Seite 4 und 5 sind nur bei Einbau der beiliegenden stromführenden Kupplung notwendig. The work steps shown on pages 4 and 5 are only necessary when installing the current-conducting coupler included with this kit. Les opérations des pages 4 et 5 ne sont nécessaires que pour la mise en place de l‘attelage sous tension joint. De stappen op de blz.
- Page 5 Neue Kupplungsdeichsel (mit Kontaktfeder) einbauen Kontaktblech aufschieben Install new coupling drawbar (with contact spring) Push the contact strip open Fixer le nouveau timon d‘attelage (avec ressort de contact) Insêr la tôle de contact Monteer de nieuwe koppeldissel (met contactveer) Contactmetaal opschuiven Montar la barra de tracción del enganche nueva (con Colocar la chapa de contacto encima muelle de contacto)
- Page 6 Massefeder einsetzen Schleifer einklipsen Install grounding spring Clip on pickup shoe Mise en place du ressort de masse Encliqueter le frotteur Massaveer aanbrengen Sleepcontact inhaken Introducir el muelle Encajar el patin Inserire le molla di massa Agganciare il pattio Montera jordledningsfjädern Tryck fast släpskon Stelfjederen sættes ind Slæbesko klipses ind...
- Page 7 Inneneinrichtung einsetzen Kontaktblech aufschieben Insert interior Push the contact strip open Mettre en place l‘aménagement intêrieur Insêr la tôle de contact Interieur plaatsen Contactmetaal opschuiven Volver a colocar el equipo interior Colocar la chapa de contacto encima Installare l‘arredamento interno Far scorrere sopra la lamina di contatto Sätt in inredningen Skjut på...
- Page 8 Kabel einstecken Untere Beleuchtungsplatine montieren Plug in the wire Mounting the lower circuit board for lighting Enficher le câble Monter la platine d’eclairage inférieure Draden insteken Onderste verlichtingsprint monteren Introducir el cablecillo Montar la platina inferior del alumbrado Innestare i cavetti Montaggio della piastrina di illuminazione inferiore Stick på...
- Page 9 Kabel einstecken Untere Beleuchtungsplatine montieren Plug in the wire Mounting the lower circuit board for lighting Enficher le câble Monter la platine d’eclairage inférieure Draden insteken Onderste verlichtingsprint monteren Introducir el cablecillo Montar la platina inferior del alumbrado Innestare i cavetti Montaggio della piastrina di illuminazione inferiore Stick på...
- Page 10 Stromführende Kurzkupplung anschließen (optional) Conectar el enganche corto porta-corriente (opcional) Connecting the current-conducting close coupler (optional) Collegamento del gancio corto conduttore di corrente Raccoder l’attelage court conducteur de courant (en option) (opzionale) Stroom-voerende kortkoppeling aansluiten (optie) Anslut det strömledande kortkopplet (optional) Strømførende kortkobling tilsluttes (optimal) ...
- Page 11 Gehäuse aufsetzen Put the body back on Mettre le boîtier en place Huis plaatsen Poner la carcasa Montare la sovrastruttura Sätt på kåpan Huset (overdel) sættes på...
-
Page 12: Sicherheitshinweise
Sicherheitshinweise: Verbaute LED`s entsprechen der Laserklasse 1 nach Norm EN 60825-1. Safety Notes: The LEDs in this item correspond to Laser Class 1 according to Standard EN 60825-1. Remarques sur la sécurité : Les DEL installées correspondent à la classe laser 1 selon la norme EN 60825-1. Veiligheidsvoorschriften: Ingebouwde LED’s komen overeen met de laserklasse 1 volgens de norm EN 60825-1.


