Publicité
Les langues disponibles
Les langues disponibles
Liens rapides
DESCRIPTION
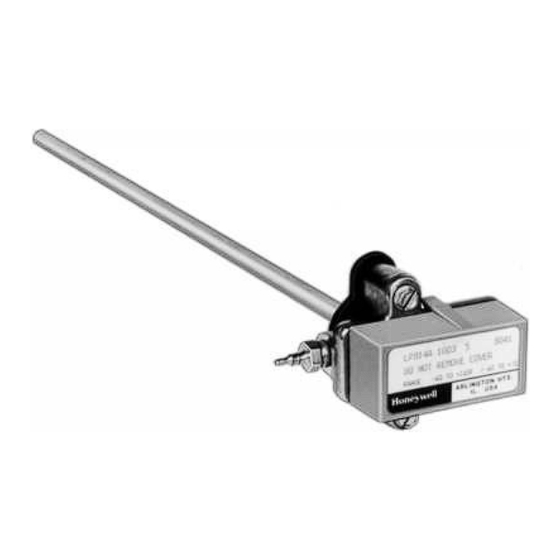
The LP914A and LP915A Pneumatic Temperature Sensors
are used with the RP908 or RP920 controllers to provide
proportional control of pneumatic valve or damper actuators.
CAUTION
Equipment Damage Hazard.
• Do not remove the cover of the sensor or tamper
with the sensor.
• Be careful not to dent or damage the sensor.
• Do not mount the LP914A or LP915A Pneumatic
Temperature Sensor on surfaces that overlap.
INSTALLATION
LP914A Rod and Tube
Duct Mount
Two no. 10 sheet metal screws and a gasket are furnished to
mount the LP914A in the duct. See Fig. 1 and 2. The sensing
element needs a 1 in. (25mm) hole.
GASKET 315182
Fig. 1. LP914A duct mounted.
® U.S. Registered Trademark
Copyright © 2002 Honeywell • All Rights Reserved
Pneumatic Temperature Sensors
M18351
LP914A and LP915A
INSTALLATION INSTRUCTIONS
2-29/32
(74)
2-1/2 (64)
Fig. 2. LP914A dimensions in In. (mm).
Through Wall Mount
The master version of the LP914A can be mounted in any wall
up to 12 in. (305mm) thick. See Fig. 3 and 4.
1. Prepare a 5/8 in. (16mm) hole for the sensing element.
2. Insert the sensing element.
3. Attach the sun shade from the opposite side of the wall.
4. Use the small set screw to fix the position of the sensing
element through the wall.
5. Check the sun shade position and tighten the set screw
on the mounting bracket.
NOTE: The sensor mounting bracket has two 1/4 in. (6mm)
holes for fastening to the wall. When the wall in thin,
the head of the sensor can protrude slightly into the
room.
2-1/2
(64)
1/2 (13) DIA.
3 (76)
Fig. 3. LP914A wall model mounting bracket.
11/32
2
1
7 or 15
(51)
(25)
(178 or 381)
M18352
7/16
(11)
1-1/2
(38)
1/4 (6) DIA.
M18353
95-5527EF
(9)
Publicité

Sommaire des Matières pour Honeywell LP914A
- Page 1 Two no. 10 sheet metal screws and a gasket are furnished to mount the LP914A in the duct. See Fig. 1 and 2. The sensing NOTE: The sensor mounting bracket has two 1/4 in. (6mm) element needs a 1 in. (25mm) hole.
-
Page 2: Before Installing
A bracket, two speed nuts and two no. 10-24 screws are furnished for mounting a water model. See Fig. 5. Fig. 6. LP914A mounted in an existing LP902 well. 1. Loosen the screws of the mounting bracket. LP915A Liquid Filled 2. Remove one screw completely and swivel the bracket... -
Page 3: Duct Mounting
LP914A AND LP915A PNEUMATIC TEMPERATURE SENSORS 3. Run the sensing element into the duct. See Fig. 10. 4. Fasten the device to the duct with the three sheet metal 13/64 (5) screws provided. 5. Form the element in the duct so that air samples throughout the duct are sensed. - Page 4 �������������������������������� ��������� ����������������������������������� ������������������������ ���������������� ������������������������ �������������������� ������� Printed in U.S.A. on recycled 95-5527EF J.H. Rev. 2-02 customer.honeywell.com paper containing at least 10% post-consumer paper fibers.
-
Page 5: Capteurs De Température Pneumatiques
10 et un joint d'étanchéité sont fournis pour retenue sur le support de montage. le montage en gaine du LP914A. Voir les Fig. 1 et 2. Il faut percer un trou de 25 mm (1 po) pour l'élément sensible. REMARQUE : Le support de montage du capteur comprend deux trous de 6 mm (1/4 po) pour l«installation... - Page 6 2. Ajouter la bague de raccordement en laiton de 1/2 x 3/8 po (pièce 1697). 3. Fermer hermétiquement la gaine d'immersion au moyen du produit à conductibilité thermique (pièce 107408). 4. Monter le LP914A. Voir la Fig. 6 BAGUE DE RACCORDEMENT EN LAITON 1/2 X 3/8 PO (NO 1697) GAINE...
- Page 7 CAPTEURS DE TEMPÉRATURE PNEUMATIQUES LP914A ET LP915A 4. Fixer l'appareil à la gaine à l'aide des trois vis à tôle fournies. 5 (13/64) 5. Placer l'élément dans la gaine de manière à permettre la lecture de la température de l'air dans la gaine. Se reporter aux Fig.
- Page 8 By using this Honeywell literature, you agree that Honeywell will have no liability for any damages arising out of your use or modification to, the literature. You will defend and indemnify Honeywell, its affiliates and subsidiaries, from and against any liability, cost, or damages, including attorneys’ fees, arising out of, or resulting from, any modification to the literature by you.


