Table des Matières
Publicité
Les langues disponibles
Les langues disponibles
Liens rapides
DETECTEUR BI-TECHNOLOGIE KAPIRIS III
FR
Notice d'installation -
KAPIRIS III DUAL-TECHNOLOGY SENSOR
EN
Installation instructions -
1, rue du Dauphiné - 69120 VAULX-EN-VELIN - FRANCE
Tél. : +33(0) 4.78.03.06.10 - Fax : +33(0) 4.78.68.24.61
KAPIRIS III
Pages 1-29
Pages 30-58
Site web :
www.sorhea.fr
Email :
commercial@sorhea.fr
NT263 / V1.3 / 06.14
Publicité
Chapitres
Table des Matières

Sommaire des Matières pour SORHEA KAPIRIS III
- Page 1 KAPIRIS III DETECTEUR BI-TECHNOLOGIE KAPIRIS III Notice d’installation - Pages 1-29 KAPIRIS III DUAL-TECHNOLOGY SENSOR Installation instructions - Pages 30-58 1, rue du Dauphiné - 69120 VAULX-EN-VELIN - FRANCE Tél. : +33(0) 4.78.03.06.10 - Fax : +33(0) 4.78.68.24.61 Site web : www.sorhea.fr...
-
Page 2: Table Des Matières
Réglage du KAPIRIS III ....................... 13 Alarme anti-masquage ......................18 Réglage de l’horloge ......................19 Configuration du réseau du KAPIRIS III pour connexion au réseau MAXIBUS III ....19 MAINTENANCE ET PARAMETRAGE ..............20 Utilisation de l’entrée auxiliaire..................... 20 Ejection automatique du capteur MW .................. 21 Ejection manuelle des capteurs ................... -
Page 3: Generalites
KAPIRIS III GENERALITES KAPIRIS III est un détecteur composé de 2 types de technologie : Un infrarouge passif constitué d’un capteur pyroelectric infrared (PIR) qui capte, à l’aide d’un miroir, les rayonnements du corps humain émis dans la bande infrarouge. -
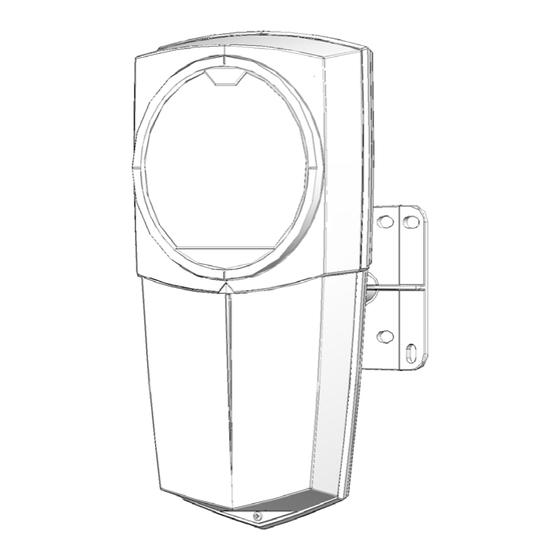
Page 4: Description
SORHEA KAPIRIS III DESCRIPTION Filtre PIR Capot Vue de face Vue de dos Vue de dessus Vue de côté - 3 -... -
Page 5: Fonctionnement
SORHEA KAPIRIS III FONCTIONNEMENT Le détecteur réagit à tout objet en mouvement. Un individu immobile dans la zone de détection ne déclenchera pas d’alarme. Pour déclencher une alarme, la zone de détection doit être entièrement franchie. Zone de détection du Détecteur : vue de coté... -
Page 6: Precautions De Mise En Oeuvre
Sens de passage > 10° Zone à protéger Installation recommandée pour le fonctionnement du KAPIRIS III Installer le détecteur avec un angle d’environ 10° par rapport au sens de passage. Eviter d’installer le détecteur en direction d’une route. - 5 -... -
Page 7: Installation
SORHEA KAPIRIS III INSTALLATION Pour un fonctionnement optimal, le détecteur KAPIRIS III doit être installé à une hauteur comprise entre 2 et 3m. Portée Hauteur d’installation optimum < 30m Entre 2 et 3 m > 30m Entre 2 m et 2,3 m maximum Gabarit de perçage pour fixation murale :... -
Page 8: Raccordement
SORHEA KAPIRIS III RACCORDEMENT 6.1 Raccordement du KAPIRIS III 1 : 12V DC alimentation 2 : 0V DC alimentation 3 : A bus RS485 4 : B bus RS485 5 : A bus RS485 6 : B bus RS485 7 : Contact alarme intrusion NO... -
Page 9: Connexion
SORHEA KAPIRIS III CONNEXION 7.1 Configuration du PC de l’utilisateur Par défaut, les paramètres de connexion du KAPIRIS III sont les suivants : Adresse IP 192.168.105.202 Masque 255.255.255.0 sous réseau La procédure qui suit permet de configurer le PC de l’utilisateur pour pouvoir se connecter au KAPIRIS III. -
Page 10: Raccordement Au Détecteur
SORHEA KAPIRIS III 7.2 Raccordement au détecteur Le raccordement entre le PC et le détecteur se fait à l’aide d’un câble RJ45 croisé (liaison directe) ou avec un câble RJ45 droits en utilisant un switch. Etape 1 : La reconnaissance d’un câble RJ45 croisé se fait de la manière suivante : Prendre les 2 bouts du câble, ergots vers le bas :... -
Page 11: Connexion Au Kapiris Iii
Positionner le switch 2 sur ON pour activer la liaison Ethernet. Switch 1 sur OFF et Switch 2 sur ON 7.3 Connexion au KAPIRIS III Etape 1 : Vérifier que votre ordinateur soit connecté au réseau local - 10 -... - Page 12 SORHEA KAPIRIS III Etape 2 : Ouvrir votre navigateur Internet (Configuration minimum Internet Explorer 7*) Taper l’adresse IP du KAPIRIS III dans l’url du navigateur. Par défaut : http://192.168.105.202 *Internet explorer est une marque Microsoft Corporation Etape 3 : Saisir le login et le mot de passe de l’utilisateur.
-
Page 13: Modification Des Mots De Passe
Pour modification des mots de passe « admin » et/ou « user », suivre la procédure ci-dessous : 1. Se connecter au KAPIRIS III en « admin ». 2. Sur l’écran d’accueil se trouve la gestion des mots de passe. -
Page 14: Mise En Oeuvre
SORHEA KAPIRIS III MISE EN OEUVRE 8.1 Réglage du KAPIRIS III 1) Basculer le switch 1 en position ON pour passer en mode réglage. Switch 1 et 2 sur ON 2) Sélectionner l’onglet « Visualisation » Onglet « Visualisation »... -
Page 15: Réglage Du Pir
SORHEA KAPIRIS III Le réglage se fait en 2 étapes : 1. Réglage du PIR 2. Réglage de l’Hyperfréquence (MW) 3.1) Réglage du PIR Ejecter le MW en cochant « Ejection Capteur MW » puis sélectionner « Envoyer ». Ejection du MW... - Page 16 SORHEA KAPIRIS III Si aucun déclenchement ne se produit dans la zone de détection, il faut : Agir sur l’orientation du capteur Puis agir sur la sensibilité. Réglage de 1 (peu sensible) à 10 (très sensible) Vérifier que le capteur PIR ne détecte pas au-delà de la zone déterminée en effectuant des passages hors de cette zone.
- Page 17 SORHEA KAPIRIS III 3.2) Réglage du MW Basculer le switch 1 en position ON pour repasser en mode réglage. Switch 1 et 2 sur ON Ejecter le PIR en cochant « Ejection Capteur PIR » puis sélectionner « Envoyer ».
- Page 18 SORHEA KAPIRIS III S’il n’y a toujours pas d’alarme, agir sur la sensibilité en baissant le seuil du MW en déplaçant le curseur de la souris sur la zone de réglage du seuil MW. Zone de réglage du seuil MW Distance du détecteur...
-
Page 19: Alarme Anti-Masquage
SORHEA KAPIRIS III Revalider les 2 capteurs (PIR et MW) en décochant « Ejection Capteur PIR » puis sélectionner « Envoyer ». Effectuer des passages dans la zone déterminée. Indication sonore et visuelle Etat de la détection Pas de bip Pas de détection... -
Page 20: Réglage De L'horloge
Sélectionner « Envoyer » dans la fenêtre « Mise à l’heure ». Le KAPIRIS III sera mis à l’heure du PC. Réglage de l’heure du KAPIRIS IIII 8.4 Configuration du réseau du KAPIRIS III pour connexion au réseau MAXIBUS III Sélectionner l’onglet « KAPIRIS ». Configuration du réseau Sélectionner «... -
Page 21: Maintenance Et Parametrage
1. Fonction alarme externe Permet de rapatrier un contact d’alarme d’un autre système sur le réseau MAXIBUS III via le KAPIRIS III. Une alarme est générée sur le relais d’intrusion du KAPIRIS III et un événement est enregistré dans l’historique. -
Page 22: Ejection Automatique Du Capteur Mw
KAPIRIS III 2. Fonction validation de l’historique Permet de valider ou non l’enregistrement des évènements dans l’historique du KAPIRIS III. Valider ce fonctionnement en décochant « Entrée alarme externe » sur la page web de visualisation puis sélectionner « Envoyer ». -
Page 23: Ejection Manuelle Des Capteurs
SORHEA KAPIRIS III 9.3 Ejection manuelle des capteurs Les capteurs PIR et MW peuvent être éjectés manuellement lors du réglage du KAPIRIS III ou lors d’un disfonctionnement de l’un d’eux. Les 2 capteurs ne peuvent être éjectés en même temps. -
Page 24: Recherche Et Résolutions Des Problèmes Constatés
SORHEA KAPIRIS III 9.4 Recherche et résolutions des problèmes constatés 1. Alarme intrusion en alarme permanente Cas n°1 : le mode réglage est activé Mode réglage activé Solution : Basculer le switch 1 en position OFF Switch 1 sur OFF ... - Page 25 SORHEA KAPIRIS III Cas n°3 : les relais sont désactivés Les relais alarme et anti-masquage sont désactivés Les relais alarme et anti-masquage sont forcés en alarme Solution : Cocher « Activation sorties relais » sur la page web visualisation pour réactivés les relais alarme et anti-masquage 2.
- Page 26 SORHEA KAPIRIS III Cas n°2 : l’alarme anti-masquage est désactivée L’alarme anti- masquage est désactivée Le relais anti-masquage est forcé en alarme Solution : Cocher « Activation anti-masquage » sur la page web visualisation pour réactivés l’alarme anti-masquage.
- Page 27 SORHEA KAPIRIS III Cas n°2 : le voyant rouge de l’état de l’AP suit l’état physique de l’AP L’AP est mise en réseau et reliée au concentrateur Image de l’état physique de l’AP Solution : l’AP doit être utilisée en local, basculer les switchs vers le haut et se raccorder sur les bornes 13 et 14.
-
Page 28: Types D'évènements Enregistrés Dans L'historique
SORHEA KAPIRIS III 9.5 Types d’évènements enregistrés dans l’historique Pour visualiser l’historique, sélectionner l’onglet « Historique ». Modification du seuil MW Activation de l’alarme entrée auxiliaire Activation de l’alarme anti-masquage Activation de l’alarme AP Activation de l’alarme intrusion Ejection automatique du MW Pour effacer l’historique, sélectionner «... -
Page 29: Caracteristiques Techniques
SORHEA KAPIRIS III 11 CARACTERISTIQUES TECHNIQUES KAPIRIS III Distance maximum de protection en utilisation extérieure Type de détection Capteur PIR et antenne Hyperfréquence Alimentation électronique 9.5 à 14.5V DC 260 mA avec Ethernet validé Consommation 120 mA sans Ethernet validé... -
Page 30: References Du Produit
SORHEA KAPIRIS III 12 REFERENCES DU PRODUIT Détecteur KAPIRIS III réf : 60520200 Conformément aux directives européennes sur l’environnement, ce produit ne doit pas être jeté mais recyclé dans une filiale appropriée. - 29 -... - Page 31 Adjusting KAPIRIS III ......................42 Anti-masking alarm ......................47 Adjusting the clock ....................... 48 Network configuration of KAPIRIS III for connexion to the MAXIBUS III network....48 MAINTENANCE AND CONFIGURATION ............49 Using the auxiliary input....................... 49 Automatic deactivation of the MW sensor ................50 Manual deactivation of the sensors..................
-
Page 32: General
KAPIRIS III GENERAL KAPIRIS III is a sensor composed of 2 types of technology: A passive infrared unit composed of a pyroelectric infrared (PIR) sensor, using a mirror, that detects radiation emitted by the human body in the infrared spectrum. -
Page 33: Description
SORHEA KAPIRIS III DESCRIPTION PIR Filter Cover Front view Back view Top view Side view - 32 -... -
Page 34: Operation
SORHEA KAPIRIS III OPERATION The sensor is activated by any moving object. A non-moving individual in the detection zone will not trigger the alarm. To trigger an alarm, the perimeter curtain of the detection zone must be entirely passed through. -
Page 35: Installation Precautions
Use a stable mounting support Direction of passage Zone to be protected POOR Installation that impairs the KAPIRIS III performance Direction of passage > 10° Zone to be protected GOOD Recommended Installation for optimum performance of the KAPIRIS II Install the sensor with a 10°... -
Page 36: Installation
SORHEA KAPIRIS III INSTALLATION For optimum performance, the KAPIRIS III must be installed at a height between 2 and 3 meters. Range Height of optimize installation < 30m Between 2m and 3m > 30m Between 2m and 2m30 maximum Drill template for wall mounting:... -
Page 37: Wiring
SORHEA KAPIRIS III WIRING 6.1 Wiring the KAPIRIS III 1: 12V dc power 2: 0V dc power 3: A bus RS485 4: B bus RS485 5: A bus RS485 6: B bus RS485 7: Intrusion alarm contact NO 8: Intrusion alarm contact COM... -
Page 38: Connection
192.168.105.202 Subnet mask 255.255.255.0 The following procedure allows for the configuration and connection of the user’s PC to KAPIRIS III. Under WINDOWS* XP: Go to Control Panel , double-click on Network connections , then on Local Area Connection and select Properties . -
Page 39: Connecting To The Sensor
SORHEA KAPIRIS III 7.2 Connecting to the sensor The wiring between the PC and the sensor is done using an RJ45 crossover cable (direct link) or with an RJ45 straight cable using a switch. Step 1: To identify an RJ45 crossover cable, perform the following steps: Take the 2 ends of the cable, pins downwards : Green: terminal n°2... -
Page 40: Connection To Kapiris Iii
Put switch 2 into the ON position to activate the Ethernet connection. Switch 1 is OFF and Switch 2 is ON 7.3 Connection to KAPIRIS III Step 1: Check to make sure that your computer is connected to the local area network... - Page 41 SORHEA KAPIRIS III Step 2: Open the browser URL (Minimum configuration Internet Explorer 7*) Enter the IP address of KAPIRIS III into the browser URL. By default : http://192.168.105.202 *Internet Explorer is a registered trademark of Microsoft Corporation Step 3: Enter login and password of the user.
-
Page 42: Modification Of Passwords
SORHEA KAPIRIS III 7.4 Modification of passwords To modify the passwords “admin” and/or “user,” do as follows : 1. Connect to KAPIRIS III in “admin.” 2. On the first page, there are the Password settings. Password settings 3. Select the login whose password should be modified. (“admin“ or “user“) 4. -
Page 43: Implementation
SORHEA KAPIRIS III IMPLEMENTATION 8.1 Adjusting KAPIRIS III 1) Turn switch 1 to the ON position to enter adjustment mode. Switches 1 and 2 ON 2) Select the “View” tab. “View” Tab 3) Set the MW threshold above the ambient noise by moving the mouse cursor over the adjustment zone for the MW threshold. - Page 44 SORHEA KAPIRIS III Adjustment requires 2 steps: 1. Adjusting PIR 2. Adjusting the Microwave (MW) 3.1) Adjusting PIR Deactivate MW by checking “Deactivate MW sensor,” then select (“Send”). Deactivation of MW Send Establish the desired detection zone for the PIR sensor by making passages in this zone. Adjust the sensor vertically and horizontally until the correct position is obtained.
- Page 45 Ex: For a zone established for 20m, pass by at a distance of 30m. If the passage is detected, the sensor's position must be changed. Before blocking the KAPIRIS III sensor, turn switch 1 to OFF to deactivate the buzzer. Tighten the adjustment screw to secure the orientation of the sensor.
- Page 46 SORHEA KAPIRIS III 3.2) Adjusting MW Turn switch 1 to the ON position to enter adjustment mode. Switches 1 and 2 are ON Deactivate PIR by checking “Deactivate PIR sensor,” then select (“Send”). Note: the MW sensor is reactivated when deactivation of the PIR sensor is selected.
- Page 47 SORHEA KAPIRIS III If the alarm continues not to trigger, adjust the sensitivity by lowering the MW threshold by moving the mouse cursor over the adjustment zone for the MW threshold. MW threshold adjustment zone Detection distance adjusted using potentiometer In the event that a MW sensor detects bodies beyond the distance set for the PIR, turn the distance potentiometer in a counter-clockwise direction.
-
Page 48: Anti-Masking Alarm
SORHEA KAPIRIS III Reactivate the 2 sensors (PIR and MW) by unchecking “Deactivate PIR sensor,” then select “Send.” Re-conduct the passages in the established zone. Audio and visual indicators Detection status No beep No detection Red LED not on Slow beeping... -
Page 49: Adjusting The Clock
Click on “Send” in the “Set Time” window. KAPIRIS III time will be set to that of the PC. Setting the time for KAPIRIS III 8.4 Network configuration of KAPIRIS III for connexion to the MAXIBUS III network. Click on “KAPIRIS”. Network configuration Check “ModBus 485”... -
Page 50: Maintenance And Configuration
Allows rerouting an alarm switch from another system on the MAXIBUS III network via KAPIRIS III. An alarm is generated on the KAPIRIS III intrusion relay and an event is entered in the log. Activate this function by clicking “External alarm input” on the view web page, then select “Send.”... -
Page 51: Automatic Deactivation Of The Mw Sensor
SORHEA KAPIRIS III 1. Activate logging function Allows activation or deactivation of event logging for KAPIRIS III. Activate this function by clicking “External alarm input” on the view web page, then select “Apply.” 2. Wiring for auxiliary input: Polarization principle for auxiliary input:... -
Page 52: Manual Deactivation Of The Sensors
KAPIRIS III 9.3 Manual deactivation of the sensors The PIR and MW sensors can be manually deactivated when adjusting KAPIRIS III or in the event of an operating failure of one or the other. The two sensors cannot be deactivated at the same time. -
Page 53: Locating And Resolving Observed Problems
SORHEA KAPIRIS III 9.4 Locating and resolving observed problems 1. Intrusion alarm continually on Ex. n°1: adjustment mode is activated Adjustment mode is activated Solution: Turn switch 1 to the OFF position Switch 1 is OFF Ex. n°2: the auxiliary input is activated in the external alarm function and is not polarized... - Page 54 SORHEA KAPIRIS III Ex. n°3: the relays are deactivated The alarm and anti- masking relays are deactivated The alarm and anti-masking relays are forced to alarm status Solution: Check “Activation output relays” on the view web page to reactivate the alarm and anti-masking relays 2.
- Page 55 SORHEA KAPIRIS III Ex. n°2: anti-masking alarm is deactivated The anti-masking alarm is deactivated The anti-masking relay is forced to alarm status Solution: Check “Activation anti-masking” on the view web page to reactivate the anti- masking alarm. 3. Status of Tamper switches ...
- Page 56 SORHEA KAPIRIS III Ex. n°2: The red indicator light for Tamper always matches the physical status of the Tamper The Tamper is networked and routed to the hub Image of the physical status of AP Solution: The Tamper must be used on the sensor. Turn the switches toward the top and wire them to terminals 13 and 14.
-
Page 57: Types Of Events Recorded In The Log
SORHEA KAPIRIS III 9.5 Types of events recorded in the log To view the log, selected the “Log” tab Change of MW threshold Activation of the auxiliary alarm input Activation of the anti-masking alarm Activation of the AP alarm Activation of the intrusion alarm Automatic deactivation of the MW To delete the log entries, select “Delete.”... -
Page 58: Technical Specifications
SORHEA KAPIRIS III 11 TECHNICAL SPECIFICATIONS KAPIRIS III Maximum outdoor range 50 m Detection mode PIR sensor and Microwave antenna Power supply 9.5 to 14.5V DC 260 mA with Ethernet activated Power consumption 120 mA with Ethernet deactivated Intrusion alarm typical duration... -
Page 59: Product References
SORHEA KAPIRIS III 12 PRODUCT REFERENCES KAPIRIS III Sensor ref: 60520200 In compliance with the European environmental directives, this product must not be thrown away but recycled through an appropriate subsidiary. - 58 -...