Table des Matières
Publicité
Les langues disponibles
Les langues disponibles
Liens rapides
Publicité
Table des Matières

Sommaire des Matières pour Stagnoli CHRONOS
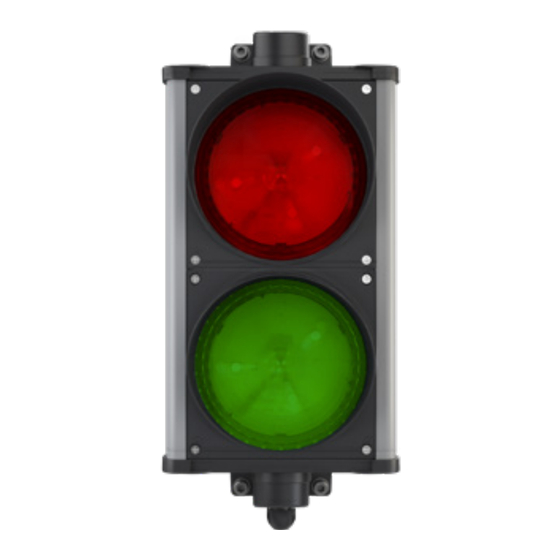
- Page 1 CHRONOS ISTRUZIONI LANTERNA SEMAFORICA CHRONOS INSTRUCTIONS CHRONOS TRAFFIC LIGHT INSTRUCTIONS FEU DE CIRCULATION CHRONOS Moving Ideas. Stagnoli s.r.l. - Via Mantova Traversa 1, 105 a/b 25017 Lonato - Brescia - Italia tel (+39) 030.9139511 fax (+39) 030.9139580 www.stagnoli.com...
-
Page 2: Finalità D'utilizzo
* Il dato si riferisce alla singola luce, supponendo che in un semaforo si accende una sola luce alla volta. FINALITÀ D’UTILIZZO Chronos è una lanterna semaforica orientabile progettata esclusivamente per ambiti residenziali e industriali. Poi- chè è dotato di un’elettronica multitensione, sarà necessario solamente cablare il semaforo (come da schema di pagina 4). -
Page 3: Informazioni Utili
>100 mt : 1 - 1,5 mm 1. PASSAGGIO CAVO Il semaforo CHRONOS dà la possibilità di far passare il cavo in due modi: 1.A: dal muro all’apertura sul retro della staffa [A] e poi dentro al corpo 1.B: utilizzando l’apposito preforo, praticare un foro sulla staffa, e montare un passacavo standard PG12 [B], facendo attenzione a montare il pressacavo prima di fissare la staffa al muro Una volta definito il passaggio del cavo fissare la staffa al muro tramite le apposite viti e tasselli. - Page 4 Semaforo a 1 luci, rosso CHR1LG GIALLO 24V AC/DC - 230 AC Semaforo a 1 luci, giallo GIALLO 24V AC/DC - 230 AC CHR1LV VERDE 24V AC/DC - 230 AC VERDE 24V AC/DC - 230 AC Semaforo a 1 luci, verde www.stagnoli.com...
- Page 5 4. CHIUSURA COPERCHIO INFERIORE Terminato il cablaggio richiudere il coperchio fa- cendo attenzione al riposizionamento dell’anello OR [D] 5. FISSAGGIO CORPO SU STAFFA Chiuso il coperchio inferiore fissare il corpo sulla staffa inferiore, precedentemente fissata (Pag. 3), tramite l’apposita vite autofilettante[E], facendo attenzione al riposizionamento dell’anello OR [F] 6.
-
Page 6: Smaltimento
è stato effettuato l’acquisto. DICHIARAZIONE DI CONFORMITÀ Dichiarazione CE: Stagnoli dichiara che questo prodotto è conforme ai requisiti essenziali della direttive vigenti. Su richiesta è disponibile la copia conforme all’originale della dichiarazione di conformità. X61Axxx REV. 19-04 2019... -
Page 7: Technical Data
* The figure refers to the individual light, assuming that only one light is switched on at a time in a traffic light. PURPOSES OF USE Chronos is an adjustable traffic light designed exclusively for residential and industrial environments. Since it is equipped with multi-voltage electronics, it will only be necessary to wire the traffic light (as shown in the diagram at page 4). -
Page 8: Useful Advice
>100 mt : 1 - 1,5 mm 1. CABLE MANAGEMENT The CHRONOS traffic light allows the cable to be routed in two ways: 1.A: from the wall to the opening at the back of the bracket [A] and then into the casing 1.B: by using the dedicated pre-hole, cut a hole in the bracket, and mount a standard PG12 cable duct [B], ensu-... - Page 9 3. WIRING Once the bottom cover is open, wire according to the reference pattern 24V AC/DC - 230 AC CHR3LRGV YELLOW 24V AC/DC - 230 AC GREEN 24V AC/DC - 230 AC 3 lights traffic light, red yellow and green SHARED 24V AC/DC - 230 AC 24V AC/DC - 230 AC...
- Page 10 [G] and then proceed with the fixing to the wall. USEFUL ADVICE To have complete access to all 4 holes of the upper bracket, simply loosen the self-tapping screws at the top and bottom and turn the traffic light casing. www.stagnoli.com...
-
Page 11: Declaration Of Conformity
DECLARATION OF CONFORMITY EC Declaration: Stagnoli declares that this product complies with the essential requirements of the directi- ves in force. A certified copy of the original declaration of conformity is available upon request. X61Axxx REV. 19-04 2019... -
Page 12: Données Techniques
4). Il est possible de l’alimenter à un voltage allent de 24 à 230 V AC/DC sans avoir besoin de faire la moindre configuration à cet effet. Chronos est isolé selon la classe IP66. -
Page 13: Gestion Des Câble
>100 m: 1 - 1,5 mm 1. GESTION DES CÂBLE Le feu de circulation CHRONOS permet au câble d’être connecté de deux façons : 1.A: depuis le mur via l’ouverture au dos du support [A] et puis dans le boîtier. - Page 14 JAUNE 24V AC/DC - 230 AC Feu de circulation à 1 lumière JAUNE 24V AC/DC - 230 AC jaune CHR1LV VERT 24V AC/DC - 230 AC VERT 24V AC/DC - 230 AC Feu de circulation à 1 lumière verte www.stagnoli.com...
-
Page 15: Fermer Le Couvercle Du Bas
4. FERMER LE COUVERCLE DU BAS Lorsque le câblage est terminé, fermez le couver- cle en vous assurant que l’anneau OR est bien repositionné.[D] 5. FIXER LE BOÎTIER AU SUPPORT Lorsque le couvercle du bas est refermé, attachez le boîtier au support inférieur déjà attaché (page 15), via la vis auto-taraudeuse spéciale [E], en portant attention au repositionnement de l’anneau OR [F]. -
Page 16: Déclaration De Conformité
DÉCLARATION DE CONFORMITÉ Déclaration CE : Stagnoli déclare que ce produit est conforme aux exigences essentielles des directives en vigueur. Une copie certifiée de la déclaration originale de conformité est disponible sur demande.