Table des Matières
Publicité
Les langues disponibles
Les langues disponibles
Liens rapides
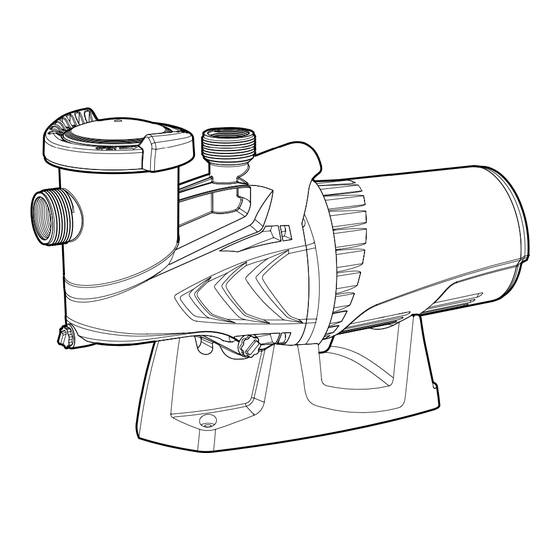
Pompe de Piscine Hors-Terre
Manuel du Propriétaire
Utiliser les pièces de remplacement originales seulement
ATTENTION -
LIRE CE MANUEL ATTENTIVEMENT AVANT D'INSTALLER, D'OPÉRER LA POMPE SHARKJET. IL
CONTIENT DES INFORMATIONS IMPORTANTES RELIÉES À UNE UTILISATION SÉCURITAIRE DE CE PRODUIT
WWW.CARVINPOOL.COM
M22904240B
Publicité
Table des Matières

Sommaire des Matières pour CARVIN SHARK JET 1SHJ-5-S1
- Page 1 Pompe de Piscine Hors-Terre Manuel du Propriétaire Utiliser les pièces de remplacement originales seulement ATTENTION - LIRE CE MANUEL ATTENTIVEMENT AVANT D’INSTALLER, D’OPÉRER LA POMPE SHARKJET. IL CONTIENT DES INFORMATIONS IMPORTANTES RELIÉES À UNE UTILISATION SÉCURITAIRE DE CE PRODUIT WWW.CARVINPOOL.COM M22904240B...
-
Page 2: Lire Ce Manuel Avant D'installer La Pompe Sharkjet
S.V.P. Lire ce manuel avant d’installer la Pompe SHARKJET Avant de procéder à l’installation, lisez soigneusement toutes les instructions et consignes de sécurité. Consultez les étiquettes des produits pour des rensei- gnements supplémentaires sur le mode d’emploi et les spécifications du produit. Consignes de Sécurité... -
Page 3: Fonctionnement
GÉNÉRAL (HIGH SPEED) pour obtenir une filtration maximale aux périodes d'affluence Ce modèle de pompe auto-amorçant peut aspirer l'eau directement d'un tuyau ou quand la clarté de l'eau est déficiente. En d'autres temps, opérer à basse vide sans vanne pourvu que la coquille de pompe assemblée soit vitesse (LOW SPEED) 1725 rpm env. - Page 4 POUR DÉMONTER LA POMPE REMARQUE: ASSUREZ-VOUS QUE L’ALIMENTATION ÉLECTRIQUE EST l’arbre de tourner. Visser l’impulseur (9) sur l’arbre et serrer à la main DÉBRANCHÉE AVANT DE POURSUIVRE. seulement. Un fonctionnement normal les serrera ensemble. Remettre le Remarque - Les références entre parenthèses renvoient aux numéros de repérage de la figure 5.
-
Page 5: Fermeture De La Crépine
FERMETURE DE LA CRÉPINE (Fig. 2) TOURNEZ 1/4 DE TOUR DANS LE SENS HORAIRE 1.INSERTION 2.ROTATION POUR VERROUILLER ALIGNEZ LES MARQUEURS DE LA NOIX DE SERRAGE ET DU CORPS PRINCIPAL PUIS INSÉREZ. OUVERTURE DU COUVERCLE ANTI-ÉCLABOUSSURES (Fig. 3) 1. DÉMONTAGE DE LA BASE 2. -
Page 6: Pièces De Remplacement
été installé initialement. L’obligation de garantie de "Carvin " concernant l’équipement que l’entreprise ne fabrique pas elle-même est limitée à la garantie offerte à "Carvin" par ses fournisseurs (i.e. moteurs). Cette garantie ne s’applique qu’aux produits utilisés pour les FIG NO. -
Page 7: Télécommande (Optionnel)
Télécommande (Optionnel) FONCTIONS DE LA TÉLÉCOMMANDE Veuillez vous référer au tableau ci-dessous pour tous les détails concernant les fonctions de la télécommande. TÉLÉCOMMANDE POMPE AFFICHAGE SU R TÉLÉCOMMANDE Bouton Action Programme Text a ché Appuyer Fonctionne à High pendant 6H puis High >... - Page 8 Above Ground Pool Pump Owner’s Manual Use Only Genuine Replacement Parts WARNING - READ THIS MANUAL BEFORE INSTALLING AND OPERATING SHARKJET PUMP. IT INCLUDES IMPORT- ANT INFORMATION ABOUT SAFE USE OF THIS PRODUCT. WWW.CARVINPOOL.COM M22904240B...
-
Page 9: Important Safety Instructions
PLEASE read this manual before installing the pump Before installation, be sure to read all instructions and warnings carefully. Refer to product dataplate(s) for additionnal operation instruction and specifications Important Safety Instructions When installing and using this electrical equipment, basic safety precautions should always be followed , including the following: RISK OF SUCTION ENTRAPMENT HAZARD To reduce risk of injury, do not permit WARNING! -
Page 10: Frequently Asked Questions
TO DISMANTLE PUMP screw the impeller (9) to the shaft by hand. Put the diffuser back into NOTE: VERIFY THE ELECTRICAL POWER IS DISCONNECTED place by snapping the Motor Bracket (12) and the diffuser (7) back BEFORE YOU CONTINUE. Note: Numbers in brackets refer to together . - Page 11 GENERAL This is a self-priming pump, which means that it can raise water to itself backwashing and vacuuming, HIGH SPEED is required. If the pump is through a dry suction line without using valves, provided the pump case supplied as part of a complete filter system, follow the starting-up proce- and strainer body are full of water before the motor is started.
- Page 12 STRAINER NUT INSTALLATION (fig. 2) TURN STRAINER NUT 1/4 TURN CLOCKWISE 1.INSERTION 2.TIGHTENING TO TIGHTEN ALIGN MARKERS OF THE STRAIN- ER NUT AND BODY AND INSERT. REMOVING SPLASH COVER (fig. 3) 1. REMOVING THE PUMP BASE 2. REMOVING THE SPLASH COVER. A.
-
Page 13: Warranty Claim Procedure
05-3759-02-R Impeller 1 HP and 1.5 HP with the sale of its products. ‘’CARVIN’’ will not be responsible 10-0802-08-R Shaft mechanical seal for any statements that are made or published, written or oral, 47-0361-08-R Joint torique corps de la crépine... -
Page 14: Remote Control (Optional)
Remote Control (Optional) REMOTE FUNCTIONS Please refer to the table below for details about the wireless remote functions. PUMP REMOTE REMOTE LCD Text to Display Button ID Action Program Single Pump runs on High speed for 6H then High > Press Pump runs on speed for unde ned time...

