Publicité
Liens rapides
Model / Modèle / Modelo: C7SQ-SS-RN / C7SQ-BL-RN
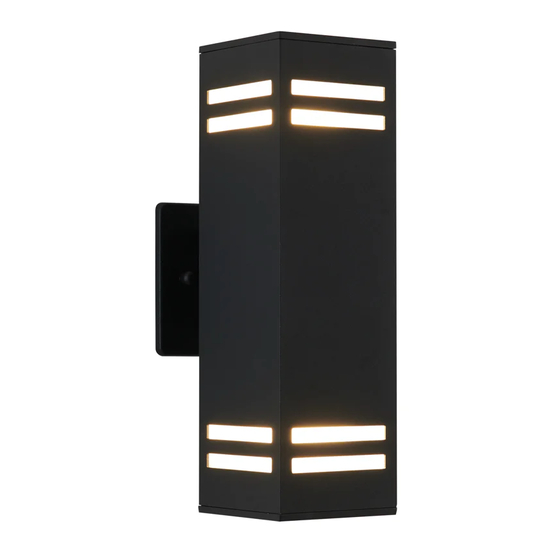
Outdoor / indoor wall mounted light fixture - Strike
INSTRUCTION MANUAL
IMPORTANT, KEEP FOR
FUTURE REFERENCE:
PLEASE READ CAREFULLY.
Luminaire mural extérieur / intérieur - Strike
MANUEL D'INSTRUCTION
IMPORTANT : À LIRE
ATTENTIVEMENT ET
CONSERVER.
Luminario de pared para exterior / interior - Strike
MANUAL DE INSTRUCCIONES
IMPORTANTE, LEER PARA
FUTURA REFERENCIA :
POR FAVOR, LEER
DETENIDAMENTE.
Made in China
Residential use only
Indoor and outdoor use
TM
MC
MR
Fabriqué en Chine
Usage résidentiel seulement
Usage intérieur et extérieur
Rev. 24-08-2020
Hecho en China
Uso residencial solamente
Uso interior and exterior
Publicité

Sommaire des Matières pour Artika C7SQ-SS-RN
- Page 1 Model / Modèle / Modelo: C7SQ-SS-RN / C7SQ-BL-RN Outdoor / indoor wall mounted light fixture - Strike INSTRUCTION MANUAL IMPORTANT, KEEP FOR FUTURE REFERENCE: PLEASE READ CAREFULLY. Luminaire mural extérieur / intérieur - Strike MANUEL D’INSTRUCTION IMPORTANT : À LIRE ATTENTIVEMENT ET CONSERVER.
- Page 2 INSTRUCTION MANUAL / MANUEL D’INSTRUCTIONS / MANUAL DE INSTRUCCIONES INCLUDED INCLUS INCLUíDO Item Description Quantity Pièce Description Quantité Pieza Descripción Cantidad Wire connector Capuchon de connexion × 3 Conector de cable Junction box screw Vis de boitier de raccordement × 2 Tornillo de caja de conexiones Decorative nut Écrou décoratif...
- Page 3 IMPORTANT IMPORTANT IMPORTANTE The installer and/or user must Avant l’installation de ce produit, El instalador o usuario debe leer read, understand and follow these l’utilisateur et/ou l’installateur doit detenidamente las instrucciones instructions before installing the avoir lu et compris ces instructions. antes de instalar el producto y product.
- Page 4 INSTRUCTION MANUAL / MANUEL D’INSTRUCTIONS / MANUAL DE INSTRUCCIONES MINIMUM CLEARANCE: ESPACE MINIMUM : ESPACIO MÍNIMO: Please ensure there is a minimum S’assurer qu’il y ait un dégagement Asegúrese de que hay una clearance of 1.2 m between the minimum de 1,2 m entre le distancia mínima de 1,2 m entre floor and the bottom of the light plancher et le bas du luminaire...
- Page 5 4. Connect the white wire (N) from 4. Connecter le fil blanc (N) du 4. Conectar el cable blanco (N) de the light fixture to the white supply luminaire au fil blanc (N) du boitier la lámpara con el cable blanco (N) wire (N) from the junction box de raccordement à...
- Page 6 INSTRUCTION MANUAL / MANUEL D’INSTRUCTIONS / MANUAL DE INSTRUCCIONES 6. Apply sealant to seal the sides 6. Appliquer du scellant sur les 6. Aplique sellant para sellar los and top of the light fixture to the côtés et au-dessus du luminaire lados y fijar la lámpara a la pared wall (fig.
- Page 7 BULB INSTALLATION INSTALLATION DES AMPOULES BOMBILLA INSTALACIÓN 1. Pull end cap off the light fixture. 1. Retirer le couvercle. 1. Retire la tapa inferior de la lámpara. 2. Place the light bulb into place. 2. Mettre l’ampoule à l’intérieur. 2. Lugar la bombilla. Use 2 ×...
- Page 8 INSTRUCTION MANUAL / MANUEL D’INSTRUCTIONS / MANUAL DE INSTRUCCIONES WATER EVACUATION EVACUATION D’EAU EVACUACIÓN DE AGUA 1. Remove the sticker from the 1. Enlever l’étiquette de la vitre 1. Retire la etiqueta de vidrio glass (fig (fig 5). (fig 5). 2.
- Page 9 REPLACEMENT PARTS PIÈCES DE RECHANGE PIEZAS DE REPUESTO Artika # Artika # Numéro Artika Numéro Artika Item Description Artika # Artika # Pièce Description Black / Stainless steel / Pieza Descripción Noir / Acier inoxydable / Negro Acero inoxidable Top end cap...
- Page 10 INSTRUCTION MANUAL / MANUEL D’INSTRUCTIONS / MANUAL DE INSTRUCCIONES WARRANTY GARANTIE GARANTÍA Artika For Living Inc. is proud to offer Artika For Living Inc. est fière de vous Artika For Living Inc. se enorgullece de you a one (1) year limited warranty on offrir une garantie limitée d’un (1) an contre...
- Page 12 INSTRUCTION MANUAL / MANUEL D’INSTRUCTIONS / MANUAL DE INSTRUCCIONES Artika For Living Inc. 1756, 50th Avenue 1-866-661-9606 Montréal (Lachine), Quebec support@artika.com Canada H8T 2V5 www.artika.com Customer Service Service à la clientèle Atención al cliente Monday to Friday du lundi au vendredi Lunes a viernes 9 a.m.
