
Manuels Connexes pour Broan Elite E12000 Serie


Sommaire des Matières pour Broan Elite E12000 Serie
- Page 1 E12000 Series ENGLISH........2 FRANÇAIS.........12 ESPAÑOL........22 Venmar Ventilation ULC, 550 Lemire Blvd., Drummondville, QC J2C 7W9...
- Page 2 READ AND SAVE THESE INSTRUCTIONS INTENDED FOR DOMESTIC COOKING ONLY WARNING TO REDUCE THE RISK OF FIRE, ELECTRIC SHOCK, OR INJURY TO PERSONS, OBSERVE THE FOLLOWING: 1. Use this unit only in the manner intended by the manufacturer. If you have questions, contact the manufacturer at the address or telephone number listed in the warranty.
- Page 3 CAUTION 1. For indoor use only. 2. To reduce risk of fi re and to properly exhaust air, be sure to duct air outside. Do not vent exhaust air into spaces within walls or ceilings or into attics, crawl spaces, or garages.
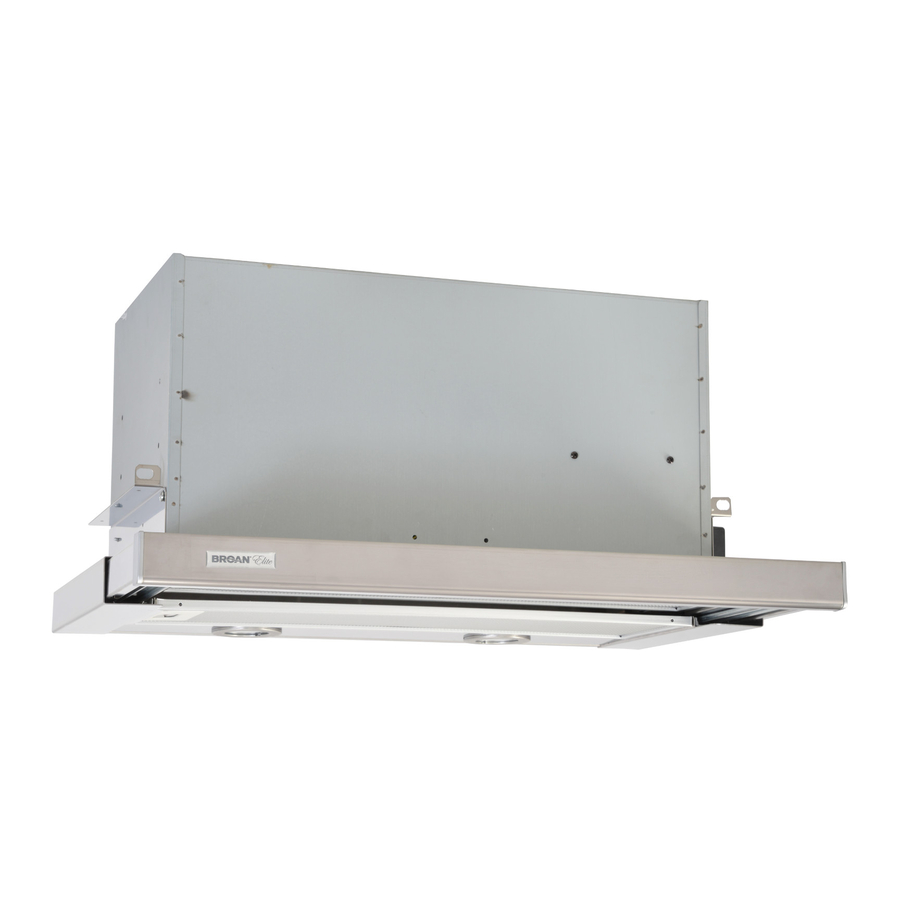
- Page 4 PREPARE THE HOOD Unpack hood and check contents. You should receive: 1 - Hood 1 - Parts Bag (B080810359) containing: 3 - Mounting Screws (3.9 x 6 mm Flat Head) 1 - Parts Bag (B080810871) containing: 1 - Right Bracket 1 - Left Bracket Mounting Screws (M4 x 8 mm) Washers...
- Page 5 INSTALL THE DUCTWORK FIGURE 1 (DUCTED HOODS ONLY) NOTE: To reduce the risk of fi re, use only ROOF CAP metal ductwork. 6” ROUND DUCT 1. Decide where the ductwork will run between the hood and the outside. 2. A straight, short duct run will allow the hood to perform most effi...
- Page 6 WIRING FIGURE 3 Note: This range hood must be properly grounded. The unit should be installed by a qualifi ed electrician in accordance with 33-7/16” all applicable national and local electrical codes. GROUNDING INSTRUCTIONS This appliance must be grounded. In the event of an electrical short circuit, grounding redu- ces the risk of electric shock by providing an escape wire for the electric current.
- Page 7 INSTALLATION FIGURE 4 1-3/4” x 1-3/4” 12-3/16” The hood must be installed inside a cabinet. ATTENTION: 2 persons are required for proper installation; the unit should be installed by a qualifi ed operator. For the cabinet measurements, refer to Figure 4. Installation directly to cabinet Refer to Figure 5.
- Page 8 CONNECT DUCTWORK FIGURE 7 DISCHARGE COLLAR (DUCTED HOODS ONLY) 1. Install the discharge collar into the duct connector of the range hood. Fig. 7 2. Use 6” round metal duct to connect the discharge collar on the hood to the duct- work above.
- Page 9 MAINTENANCE FIGURE 10 Proper maintenance of the Range Hood will assure proper performance of the unit. BEFORE SERVICING OR CLEANING UNIT, SWITCH POWER OFF AT SER- VICE PANEL AND LOCK SERVICE DI- SCONNECTING MEANS TO PREVENT POWER FROM BEING SWITCHED ON ACCIDENTALLY.
- Page 10 OPERATION FIGURE 11 Note: Avoid using food products that produce fl ames under the range hood. Controls 1. Blower Switch Left position (0) - blower is turned off Right position (1) - blower is turned BLOWER on and off automatically by opening and LIGHT SWITCH closing the canopy hood/control.
- Page 11 TWO-YEAR LIMITED WARRANTY FOR BROAN PRODUCTS Venmar Ventilation ULC (Venmar Ventilation) warrants to the original consumer purchaser of Broan Elite products that such products will be free from defects in materials or workmanship for a period of two years from the date of original purchase.
- Page 12 LISEZ ET CONSERVEZ CES INSTRUCTIONS POUR USAGE DOMESTIQUE SEULEMENT AVERTISSEMENT POUR RÉDUIRE LES RISQUES D’INCENDIE, D’ÉLECTROCUTION OU DE BLESSURES CORPORELLES, OBSERVEZ LES INSTRUCTIONS SUIVANTES : 1. N’utilisez cet appareil que de la façon prévue par le manufacturier. Si vous avez des que- stions, contactez le manufacturier à...
- Page 13 ATTENTION 1. Pour usage intérieur seulement. 2. Pour réduire tout risque d’incendie et évacuer correctement l’air, assurez-vous d’évacuez l’air à l’extérieur. N’évacuez pas l’air dans des espaces clos comme l’intérieur des murs ou un plafond, dans le grenier, faux-plafond ou garage. 3.
- Page 14 PRÉPARATION DE LA HOTTE Retirer la hotte de l’emballage, puis vérifi er le contenu. Vous devez avoir: 1 - Hotte 1 - Sachet de pièces (B080810359) comprenant : 3 - Vis de montage (3,9 mm x 6 mm tête fraisée) 1 - Sachet de pièces (B080810871) comprenant : 1 - Bride de montage droite 1 - Bride de montage gauche...
- Page 15 INSTALLATION DU SYSTÈME FIGURE 1 DE CONDUITS HOTTES À ÉVACUATION EXTÉRIEURE CAPUCHON DE TOIT SEULEMENT NOTE : Pour réduire le risque d’incendie, CONDUIT ROND DE 6 n’utilisez que des conduits en métal. 1. Déterminer par où passera le conduit, entre votre hotte et l’extérieur.
- Page 16 BRANCHEMENT ÉLECTRI- FIGURE 3 AVERTISSEMENT : Cette hotte de cui- sinière doit être correctement reliée à une mise à la terre. L’installation doit être ef- 33-7/16 PO fectuée par du personnel qualifi é en vertu (85 CM) des codes électriques nationaux et locaux en vigueur.
- Page 17 INSTALLATION 1-3/4 po x 1-3/4 po FIGURE 4 (4,5 cm x 4,5 cm) 12-3/16 po La hotte doit être encastrée dans (31 cm) une armoire. ATTENTION: Il faut au moins 2 personnes pour monter cet appareil; il est conseillé de confi...
- Page 18 RACCORDEMENT FIGURE 7 COLLIER D’ÉVACUATION DES CONDUITS (HOTTES À ÉVACUATION EXTÉRIEURE SEULEMENT) 1. Installer le collier d’évacuation dans le raccord de conduit de la hotte (Fig. 7). 2. Utiliser un conduit circulaire en métal de 6 po pour relier le raccord de conduit de la hotte au conduit menant à...
- Page 19 ENTRETIEN FIGURE 10 Un entretien adéquat de votre hotte de cui- sinière garantira une excellente performance. AVANT DE RÉPARER OU DE NETTOYER L’APPAREIL, COUPEZ L’ALIMENTATION ELECTRIQUE EN VERROUILLANT LE PANNEAU DE SERVICE AFINE D’ÉVITER SA REMISE EN MARCHE ACCIDEN- TELLE. SI LE PANNEAU DE SERVICE NE PEUT ÉTRE VERROUILLÉ, Y FIXER UN AV- FILTRES À...
- Page 20 FONCTIONNEMENT FIGURE 11 NOTE : Eviter d’utiliser des produits alimen- taires qui produisent des fl ammes sous la hotte. Commandes 1. Bouton du ventilateur En position gauche (0) – Ventilateur arrêté En position droite (1) – fonctionnement et arrêt BOUTON BOUTON DU automatiques du ventilateur en ouvrant et en ÉCLAIRA-...
- Page 21 Venmar Ventilation ULC (Venmar Ventilation) garantit à l’acheteur original que les produits BROAN Elite vendus en vertu de la présente sont libres de tout vice de matériau ou de fabrication pour une période de deux ans à compter de la date d’achat originale.
- Page 22 LEA Y CONSERVE ESTAS INSTRUCCIONES INDICADO PARA EL USO EN COCINAS DOMESTICAS ADVERTENCIA PARA EVITAR EL RIESGO DE INCENDIO, CORTOCIRCUITO O DAÑO PARA LAS PERSONAS, OBSERVE ATENTAMENTE LAS SIGUIENTES NORMAS: 1. Use esta unidad solamente de la manera indicada por el fabricante; si tiene dudas, póngase en contacto con éste a la dirección o teléfono indicados en la garantía.
- Page 23 ADVERTENCIA 1. Para uso en interiores. 2. Para reducir el riesgo de incendios y para evacuar correctamente los humos, ase- gurarse de haber realizado una conducción del aire hasta el exterior. No expulsar los humos en espacios cerrados por paredes o techos, áticos, espacios angostos o garajes.
- Page 24 PREPARE LA CAMPANA Sacar la campana de l’embalaje y controlar el contenido. Recivireis: 1 - Campana 1 - Bolsita (B080810359) con: 3 - Tornillos de montaje (3,9 x 6 mm cabeza plano) 1 - Bolsita (B080810871) con: 1 - Estribo derecho 1 - Etrier izquierdo Tornillos de montaje (M4 x 8 mm) Arandelas...
- Page 25 INSTALACION DEL TUBO DE FIGURE 1 EXTRACCION UBIERTA DEL (SÓLO CAMPANAS CON CONDUC- TEJADO TUBO DE 6” NOTA: para evitar el riesgo de incendio, use solamente material de metal. 1. Decida donde va a colocar el tubo de extracción entre la campana y la parte exterior.
- Page 26 INSTALACIÓN ELECTRICA FIGURE 3 Nota: Este tipo de campana tiene que ser conectada a tierra cuidadosamente. La uni- dad debe instalarla un técnico electricista 33-7/16“ (85 siguiendo las normas nacionales y locales. INSTRUCCIONES DE CONEXIÓN A TIERRA Este aparato se debe conectar a tierra. En caso de cortocircuito, la conexión a tierra re- duce el riego de electrocución ya que posee un hilo de descarga a tierra para la corriente.
- Page 27 FIJACIÓN 1-3/4” x 1-3/4” FIGURE 4 (4,5 cm x 4,5 cm) 12-3/16” Este dispositivo debe instalarse dentro de (31 cm) un armario de pared. CUIDADO: para montar este aparato se necesitan al menos 2 personas; le acon- sejamos que lo haga instalar a personal especializado.
- Page 28 CONEXIÓN DE LOS TUBOS FIGURE 7 CASQUILLO (CONFIGURACIÓN CON CONDUCTO) 1. Instale el cuello de descarga en el conec- tor de conducto de la campana de cocina (Fig. 7). 2. Utilice un conducto de metal redondo de 6” (150 mm) para conectar la brida de descarga de la campana con el tubo de arriba Fig.
- Page 29 MANTENIMIENTO FIGURE 10 Un mantenimiento adecuado de la campa- na asegura el funcionamiento correcto del aparato. ANTES DE REALIZAR OPERACIONES DE MANTENIMIENTO O LIMPIEZA DE LA UNIDAD, DESCONECTE LA ALIMEN- TACIÓN EN EL PANEL DE SERVICIO Y CIERRE EL MISMO CON UN CANDADO. DESCONECTAR EL SERVICIO SIGNIFI- CA EVITAR LA CONEXIÓN ACCIDENTAL FILTROS ANTIGRASA...
- Page 30 FUNCIONAMIENTO FIGURE 11 Note: Evite utilizar productos que pro- duzcan llamas debajo de la campana. Controles 1. Interruptor del ventilador Posición izquierda (0) – se apaga el ven- tilador Posición derecha (1) – el ventilador se INTERRUPTOR DEL enciende y apaga automáticamente al VENTILADOR abrir y cerrar el mando de la riostra de la campana.
- Page 31 GARANTÍA DE DOS AÑOS DE LOS PRODUCTOS BROAN Venmar Ventilation ULC (Venmar Ventilation) garantiza al consumidor-comprador de sus productos BROAN Elite que dichos productos no tendrán defectos en los materiales o fabricación, durante un periodo de dos años a partir de la fecha de la compra. NO...
- Page 32 SERVICE PARTS E12000 Series KEY NO. PART NO. DESCRIPTION B08087508 No.1 Grease fi lter (for models E1230SS, E1230SSLS) B08087584 No.1 Grease fi lter (for model E1224SSLS) BE3353935 Halogen Lamp Support (for models E1230SS, E1230SSLS) BE3353936 Halogen Lamp Support (for model E1224SSLS) BE3351155 Control Cover (for models E1230SS, E1230SSLS)
- Page 33 PIECES DE RECHANGE Série E12000 REPÈRE N° de PIÈCE DESCRIPTION B08087508 N°1 Filtre à graisse (modèles E1230SS, E1230SSLS) B08087584 N°1 Filtre à graisse (modèle E1224SSLS) BE3353935 Support de lampe halogène (modèles E1230SS, E1230SSLS) BE3353936 Support de lampe halogène (modèle E1224SSLS) BE3351155 Couvercle de commandes (modèles E1230SS,...
- Page 34 PIEZAS DE REPUESTO Série E12000 CLAVE N.° PIEZA N.° DESCRIPCIÓN B08087508 N°1 Filtro de grasa (modelos E1230SS, E1230SSLS) B08087584 N°1 Filtro de grasa (modelo E1224SSLS) BE3353935 Cuello soporte lámpara halógena (modelos E1230SS, E1230SSLS) BE3353936 Cuello soporte lámpara halógena (modelo E1224SSLS) BE3351155 Cubierta de control (modelos E1230SS,...
- Page 35 SERVICE PARTS E12000 Series...
- Page 36 0430xxxx - 36 -...