Table des Matières
Publicité
Les langues disponibles
Les langues disponibles
Liens rapides
Publicité
Table des Matières

Manuels Connexes pour Lacor CookingMe 69561


Sommaire des Matières pour Lacor CookingMe 69561
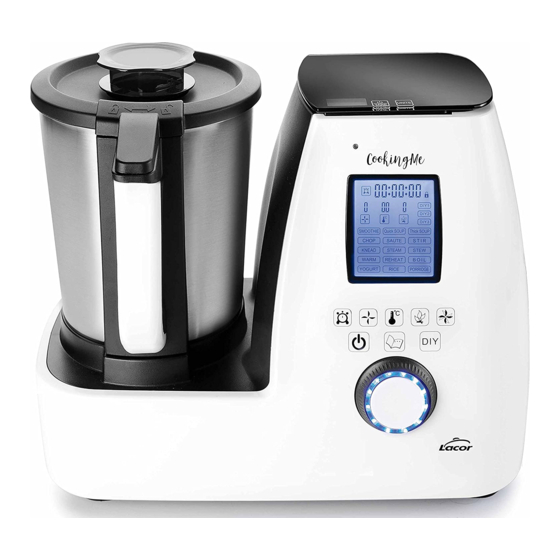
- Page 1 CookingMe INSTRUCCIONES DE USO Y MANTENIMIENTO CONSEILS D'UTILISATION ET D'ENTRETIEN GEBRAUCHS UND INSTANDHALTUNGSANLEITUNG INSTRUCTIONS FOR USE AND MAINTENANCE ISTRUZIONI PER L'USO E LA MANUTENZIONE INSTRUÇÕES DE USO E MANUTENÇÃO GEBRUIKS- EN ONDERHOUDSAANWIJZINGEN...
-
Page 2: Table Des Matières
ÍNDICE PÁG INDICE Importantes Medidas de Seguridad Importanti misure di sicurezza Principales especificaciones técnicas Principali specificazioni tecniche Información Relevante Informazioni importanti Función principal Funzione principale Instalación Installazione Descripción de las partes Descrizione delle parti Funcionamiento Funzionamento Menú Menu Consejos de uso Consigli per l'utilizzo Guía para el uso de los accesorios Guida per l'utilizzo degli accessori... -
Page 3: Importantes Medidas De Seguridad
GUARDE ESTAS INSTRUCCIONES Este manual contiene información de seguridad relevante para el mantenimiento, uso y manejo de este producto. Cualquier omis- ión al seguir estas instrucciones puede resultar en un daño serio. Si no entiende el contenido de este manual, comuníqueselo a su supervisor. - Page 4 8.- Evite el contacto con las partes en movimiento. Extreme la atención durante la limpieza. 9.- Desconecte siempre el artículo eléctrico de la toma de corriente si lo deja sin atención, antes del montaje y desmontaje o la limpieza. 10.- Evite el contacto con las partes calientes. 11.- No abra la tapa mientras el agua en el interior este hirviendo.
- Page 5 21.- Este aparato puede ser utilizado por niños de 8 años o más y personas con discapacidades físicas, sensoriales o mentales o con falta de experiencia y conocimientos si han sido supervisados o formados acerca del uso seguro del aparato y si entienden los riesgos involucrados. Los niños no deben jugar con el aparato.
- Page 6 DESHACERSE DEL ELECTRODOMESTICO 28.- : No se deshaga de este producto como basura municipal no clasificada. Debido al uso de elementos eléctricos y electrónicos es necesaria la recogida selectiva del mismo, tal y como ordena el RD 208/2005 de recogida selectiva de productos eléctricos.
-
Page 7: Principales Especificaciones Técnicas
PRINCIPALES ESPECIFICACIONES TÉCNICAS MODELO: 69561 VOLTAJE: 220-240V / 50 Hz POTENCIA MOTOR: 1.000W POTENCIA CALENTAMIENTO: 1.000W VELOCIDAD: 60 - 10.000 r.p.m. RANGO DE TEMPERATURA: 37ºC - 120ºC CAPACIDAD: 2,00 L FUNCIONES PREESTABLECIDAS: MEMORIAS: BÁSCULA: 5 Kg (División 1 g) PILAS BÁSCULA: 2 x AAA MEDIDAS: 38x25x32 cm... - Page 8 2.- Para evitar cualquier lesión, apague el interruptor eléctrico, desenchufe la unidad de la fuente de alimentación eléctrica y deje que se enfríe antes de realizar cualquier tarea de mantenimiento. 3.- Para un funcionamiento adecuado y seguro, la unidad debe estar colocada a una distancia razonable de las paredes y materiales inflamables.
-
Page 9: Función Principal
4.- Para evitar daños en el robot de cocina o lesiones personales, ponga en funcionamiento el robot de cocina siempre con producto. 5.- La unidad no es impermeable. Para un funcionamiento seguro y adecuado coloque la unidad en el interior donde la temperatura ambiente sea de al menos 21ºC (70ºF) y como máximo 29ºC (85ºF). - Page 10 MONTAJE DE LA CUCHILLA 1.- Con la tapa desmontada, sitúe la jarra verticalmente sobre una mesa. 2.- Coja la cuchilla desde su eje e insértela por el orificio de forma que la junta de silicona haga contacto con la superficie en acero inoxidable (Figura 1 - 2). 3.- Fije la cuchilla girando la llave de bloqueo en sentido horario (Figura 3).
- Page 11 3.- Deposite la báscula de manera que esta encaje en su orificio (Figura2). 4.- El funcionamiento de la báscula es totalmente independiente e la máquina. Los valores de las mediciones solamente se podrán visualizar en su display. INSTALACIÓN DE LA JARRA 1.- Coloque la jarra (sin tapa) en su posición tal y como se indica en la figura 1 -2.
- Page 12 CESTILLO El cestillo de vapor, está diseñad0 para varias funciones: 1.- Sirve para la elaboración de todo tipo de recetas, relacionadas con la cocina al vapor (Pasta, Noodles, verduras al vapor, etc). 2- Se puede utilizar como filtro o colador. Basta con colocar el cestillo en su posición, cerrar la tapa y verter el zumo en un vaso.
-
Page 13: Descripción De Las Partes
DESCRIPCIÓN DE LAS PARTES 1.- Vaso medidor 2.- Tapa jarra 3.- Jarra 4.- Micro de seguridad 5.- Cuerpo 6.- Báscula 7.- Display 8.- Panel de control 9.- Patas antideslizantes PANEL DE CONTROL 1.- Botón START / PAUSE / OFF 2.- REGULADOR multifunción 3.- Botón ON / STOP / CANCEL 4.- Botón MENU 5.- Botón DIY (memorias) - Page 14 ACCESORIOS 1.- Jarra completa 2.- Conjunto de vapor (NO INCLUIDO) 3.- Cestillo 4.- Anilla fijación / bloqueo 5.- Cuchilla 6.- Amasador 7.- Batidor mariposa 8.- Espátula 9.- Báscula...
-
Page 15: Funcionamiento
FUNCIONAMIENTO ON/START - PAUSE/OFF (1) 1.- Pulse el botón para encender la unidad. (función ON) 2.- Tras el ajuste previo de las funciones de MENU, pulse este botón para activar el ciclo de trabajo. (función START). 3.- Pulse el botón durante cualquier proceso de trabajo para detener la unidad. En la pantalla LCD podrá... - Page 16 2.- Para grabar en cualquiera de las memorias disponible debe seguir los siguientes pasos: 1.- Pulse el botón DIY una vez, en el display la memoria DIY1 parpadeara. 2.- Mantenga pulsado el botón DIY durante 5 segundos hasta que en el display se muestre “STEP:01) 3.- Ahora seleccione el tiempo, temperatura de trabajo y la velocidad deseada para el primer paso.
- Page 17 Botón TEMPERATURA (8) 1.- Pulse el botón “TEMPERATURA” y regule la temperatura entre 37-120°C utilizando el REGULADOR multifunción. Botón POTENCIA CALENTAMIENTO (9) 1.- Pulse el botón “POTENCIA CALENTAMIENTO” para ajustar la velocidad de giro de las cuchillas. 2.- Existen 10 niveles de potencia. a.- Los niveles 1-5 están orientados a alimentos sensibles, cocciones a baja temperatura, etc.
- Page 18 EJEMPLO DE USO SOPA DE ZANAHORIA Y CILANTRO Ingredientes: 1 cucharada de arroz 1 cucharada de azúcar 1 tira gruesa de piel de naranja (pelada con el pelador de verduras) Un trozo de jengibre pelado de 2 cm 300 g de zanahorias, sin hojas y partidas en trozos 1 cebolla pequeña pelada y partida en cuatro 300 g de caldo 300 g de leche...
-
Page 19: Menú
MENÚ Programa Descripción A. Predeterminados Ajustes Consejos 1.- El tamaño aconsejado SMOOTHIE Sirve para realizar batidos Velocidad: 10 1.- No se puede cambiar la para los trozos de de frutas, con una Temperatura: 0 configuración, vuelva a alimentos duros, como la consistencia algo más densa Pot. - Page 20 1.- Masa para pan: 330 g KNEAD Sirve para la elaboración de Etapa 1: 1.- La velocidad se regula de agua + 500 g de harina masas de pan, galletas, Velocidad:3 entre los niveles 2-3 + otros ingredientes; bizcochos, etc. Temperatura: 0 2.- La temperatura se regula amase 10 min con los...
- Page 21 1.- Volumen aconsejado: 1 Velocidad: 1 durante 1.- El tiempo se regula entre YOGURT Sirve para la elaboración de taza de yogur + 1 l de yogurt los primeros 30 min, 3 y 12 h leche fresca + azúcar, luego párelo 2.- La máquina se apagará...
-
Page 22: Consejos De Uso
CONSEJOS DE USO SOUP Es mejor utilizar el accesorio mariposa cuando haya terminado la mezcla. La velocidad máxima de uso es 4 y se cocina con el vaso medidor retirado. Coloque el cestillo boca abajo sobre este para reducir las salpicaduras CHOP Para triturar o picar alimentos duros, carne o un volumen grande de ingredientes, se recomienda seleccio- nar primero la velocidad 5 y luego pasar a la 10 para evitar la vibración y lograr un resultado óptimo... -
Page 23: Tablade Soluciones De Problemas
TABLA DE SOLUCIONES DE PROBLEMAS Códi. de error Descripción Causas posibles Solución El interruptor de La jarra o la tapa de la jarra no están Vuelva a montar la jarra y la tapa; seguridad no está fijado bien fijadas cerciórese de que todas las piezas están bien colocadas y fijadas Falta el sensor de La jarra no está... -
Page 24: Limpieza / Mantenimiento
LIMPIEZA / MANTENIMIENTO Una vez finalizado su uso, apague y desconecte el enchufe, desmonte las piezas para lavarlas, secarlas y montarlas otra vez. NOTA : Algunos ingredientes como el curry, los cítricos, tomates o zanahorias pueden causar manchas. Para evitarlo, limpie lo antes posible los residuos de estos ingredientes. Liempieza jarra/cuchilla 1.- La jarra es totalmente sumergible en agua, por lo que podrá... - Page 25 CONSERVEZ CES INSTRUCTIONS Ce manuel contient une importante information de sécurité concernant la maintenance, l'utilisation et la manipulation de ce produit. Ne pas suivre les instructions contenues dans ce manuel peut provoquer de sérieuses blessures. Si vous ne comprenez pas les contenus de ce manuel, veuillez le soumettre à...
- Page 26 7.- Ne le laissez pas fonctionner sans surveillance. Débranchez-le avant toute utilisation. 8.- Évitez tout contact avec les parties mobiles. Faites particulièrement attention pendant le nettoyage. 9.- Débranchez toujours l'appareil de l'alimentation si elle est laissée sans surveillance et avant l'assemblage, le démontage ou nettoyage.
- Page 27 20.- Utilisez uniquement des pièces de rechange d'origine. 21.- Cet appareil peut être utilisé par des enfants âgés de 8 ans ou plus et par des personnes avec des handicaps physiques, sensoriels ou mentaux ou des personnes ayant un manque d’expérience et de connaissances, à condition que celles-ci aient été...
- Page 28 27.- Le Fabricant et le Vendeur ne se considèrent responsable quant à la sécurité, la fiabilité et les performances que si; A.- La machine est utilisée conformément aux instructions d'utilisation B.- Le système électrique de l'environnement dans lequel la machine est utilisée, est conforme aux lois en vigueur.
-
Page 29: Specifications Techniques Principales
SPÉCIFICATIONS TECHNIQUES PRINCIPALES MODELE : 69561 TENSION : 220-240V / 50 Hz PUISSANCE MOTOUR : 1.000W PUISSANCE DE CHAUFFAGE : 1.000W VITESSE : 60 - 10.000 r.p.m. GAMME DE TEMPÉRATUR : 37ºC - 120ºC CAPACITÉ : 2,00 L FONCTIONS PRÉCÉDENTES : MEMOIRES : ÉCHELLE : 5 Kg (División 1 g) - Page 30 2.- Pour éviter toute blessure, tournez le contact sur OFF, débranchez l'appareil de la source d'énergie et laissez refroidir avant de commencer tout entretien. 3.- Pour votre sécurité et une correcte manipulation, l'appareil doit être situé à une distance raisonnable des murs et des matériaux combustibles.
-
Page 31: Fonction Principale
5.- L'appareil n'est pas à l'épreuve des intempéries. Pour votre sécurité et une manipulation correcte, placez-le à l'intérieur, où la température ambiante devrait être au minimum de 21ºC et au maximum de 29ºC. 6.- Ne placez pas la table de Robot de cuisine dans une zone sujette à... - Page 32 MONTAGE DE LA LAME 1.- Retirez le couvercle et situez le bol verticalement sur une table. 2.- Prenez la lame à partir de l’axe et introduisez-la dans l’orifice de manière à ce que le joint en silicone entre en contact avec la surface en acier inoxydable (Figure 1 -2). 3.- Fixez la lame en tournant le sélecteur de verrouillage dans le sens des aiguilles d’une montre (Figure 3).
- Page 33 3.- Déposez la balance de manière à ce qu’elle s’encastre dans l’orifice (Figure 2). 4.- Le fonctionnement de la balance est totalement indépendant de la machine. Les valeurs de mesure ne pourront être visualisées que sur l’écran d’affichage. INSTALLATION DU BOL 1.- Situez le bol (sans couvercle) en position, tel qu’indiqué...
- Page 34 PANIER Le panier vapeur est conçu pour plusieurs fonctions : 1.- Il sert à élaborer tout type de recettes en relation avec la cuisine à la vapeur (pâte, nouilles, légumes à la vapeur, etc.). 2- Il peut être utilisé en tant que filtre ou passoire. Il suffit de positionner le panier correctement, fermer le couvercle et verser le jus dans un verre.
-
Page 35: Descriptions Des Parties
DESCRIPTION DES PARTIES 1.- Gobelet doseur 2.- Couvercle du bol 3.- Bol 4.- Micro de sécurité 5.- Unité principale 6.- Balance 7.- Écran d’affichage 8.- Panneau de contrôle 9.- Pieds antidérapants PANNEAU DE CONTRÔLE 1.- Bouton START/PAUSE/OFF 2.- RÉGULATEUR multifonction 3.- Bouton ON/STOP/CANCEL 4.- Bouton MENU 5.- Bouton DIY (mémoires) - Page 36 ACCESSOIRES 1.- Bol complet 2.- Ensemble vapeur (NON FOURNI) 3.- Panier 4.- Anneau de fixation/verrouillage 5.- Couteaux 6.- Accessoire à pétrir 7.- Fouet 8.- Spatule 9.- Balance...
-
Page 37: Fonctionement
FONCTIONEMENT ON/START - PAUSE/OFF (1) 1.- Appuyez sur le bouton pour allumer l’unité. (fonction ON) 2.- Après avoir réglé les fonctions du MENU, appuyez sur le bouton pour activer le cycle de fonctionnement. (fonction START) 3.- Appuyez sur le bouton durant n’importe quel processus de fonctionnement pour arrêter l’unité. Sur l’écran LCD le mot «... - Page 38 2.- Pour sauvegarder les réglages dans n’importe quelles mémoires disponibles, vous devez suivre les étapes suivantes 1.- Appuyez sur le bouton DIY une fois, sur l’écran d’affichage la mémoire DIY1 clignote. 2.- Maintenez enfoncé le bouton DIY durant 5 secondes jusqu’à ce que l’écran d’affichage affiche «...
- Page 39 Bouton TEMPÉRATURE (8) 1.- Appuyez sur le bouton « TEMPÉRATURE » et réglez la température entre 37-120 ºC en utilisant le RÉGULATEUR multifonction. Bouton PUISSANCE DE CHAUFFE (9) 1.- Appuyez sur le bouton « PUISSANCE DE CHAUFFE » pour régler la vitesse de rotation des couteaux 2.- Il existe 10 niveaux de puissance.
- Page 40 EXEMPLE D’UTILISATION SOUPE DE CAROTTES À LA CORIANDRE Ingrédients : 1 cuillère à soupe de riz 1 cuillère à soupe de sucre 1 morceau de peau d’orange épais (pelée avec l’éplucheur à légumes) Un morceau de gingembre pelé de 2 cm 300 g de carottes, sans feuilles et coupées en morceaux 1 petit oignon pelé...
-
Page 41: Menu
MENU Programme Description Prédéfinis Réglage Conseils 1.- La taille hachée SMOOTHIE Il sert à réaliser des Vitesse: 10 1.- Les paramètres ne conseillée des ingrédients peuvent pas être réglés, boissons (milk-shake) aux Température: 0 avec des aliments durs faites-les fonctionner une fruits, avec une consistance Pot. - Page 42 1.- Pétrir le pain : 330 g KNEAD Il sert à élaborer des pâtes à Etape 1: 1.- Vitesse réglable du d’eau + 500 g de farine + pain, biscuits, gâteaux, etc. Vitesse: 3 niveau 2 à 3. autres ingrédients ; pétrir (Accessoire à...
- Page 43 1.- Volume conseillé : 1 pot Vitesse : 1 les 30 YOGURT Il sert à élaborer des yaourts 1.- Temps réglable de 3 à de yaourt + 1 L de lait premières minutes puis (Accessoire à pétrir) frais + sucre, 6-12h arrêtez 2.- Si vous laissez en veille selon la consistance...
-
Page 44: Guide D'utilisation Des Accessoires
CONSEILS D’UTILISATION SOUP Il est plus approprié d’utiliser le fouet une fois que le mélange est terminé, la vitesse maximale pour l’utiliser est 4 et il est conseillé de cuire avec le gobelet doseur sur off, placez le panier de cuisson à l’envers sur le gobelet doseur ouvert pour minimiser les éclaboussures CHOP Pour broyer ou hacher des aliments durs, de la viande ou de gros volumes d’aliments, il est conseillé... -
Page 45: Tableau De Solutions Des Problèmes
TABLEAU DE SOLUTIONS DES PROBLÈMES Code d’erreur Description Raisons possibles Solution Interrupteur de sécurité Bol ou couvercle du bol n’est pas Réassemblez le bol et le couvercle du bol, assurez-vous que toutes les parties clignote positionné correctement sont assemblées correctement et minutieusement Capteur de température Le bol n’est pas en position ou la... -
Page 46: Nettoyage / Maintenance
NETTOYAGE / MAINTENANCE Une fois l’utilisation terminée, éteignez et débranchez le robot, démontez les pièces pour les laver, les sécher et le remonter. ATTENTION : Certains ingrédients comme le curry, les citriques, les tomates ou les carottes peuvent faire des taches. Afin d’éviter cela, nettoyer aussi vite que possible les restes de ces ingrédients. -
Page 47: Wichtige Sicherheitsvorkehrungen
BEDIENUNGSANLEITUNG GUT AUFBEWAHREN Diese Anleitung enthält wichtige Sicherheitshinweise zu Wartung, Benutzung und Bedienung des Gerätes. Das Nicht-Beachten der Anweisungen kann zu schweren Verletzungen führen. Falls Sie den Inhalt dieser Anleitung nicht verstehen, wenden Sie sich bitte an Ihren Vorgesetzten. Vor Inbetriebnahme des Gerätes muss die Bedienungsanleitung unbedingt gelesen und verstanden werden. - Page 48 7.- Lassen Sie das Gerät nicht ohne Aufsicht in Betrieb. Ziehen Sie nach jedem Gebrauch den Stecker. 8.- Vermeiden Sie Kontakt mit den beweglichen Teilen. Seien Sie bei der Reinigung besonders vorsichtig. 9.- Immer das gerät von der versorgung zu trennen, wenn es unbeaufsichtigt gelassen wird und vor der Montage, Demontage und Reinigung.
- Page 49 21.- Dieses Gerät kann von Kindern ab 8 Jahren und von Personen mit körperlichen, sensoriellen und mentalen Behinderungen benutzt werden oder solchen mit mangelnder Erfahrung und wenig Kenntnissen, sofern sie beaufsichtigt und über den sicheren Gebrauch des Gerätes informiert werden und sie die damit verbundenen Risiken verstehen.
- Page 50 ENTSORGUNG VON ELEKTROGERÄTEN 27.- : Entsorgen Sie dieses Gerät nicht in den ungetrennten Restmüll. Durch den Einsatz von elektrischen und elektronischen Elementen ist eine separate Entsorgung gemäß den gesetzlichen Vorschriften Spaniens 208/2005 für getrennte Entsorgung von Elektrogeräten erforderlich.
-
Page 51: Wichgste Technische Daten
WICHGSTE TECHNISCHE DATEN MODELL: 69561 SPANNUNG: 220-240V / 50 Hz MOTORKRAFT: 1.000W HEIZUNG: 1.000W GESCHWINDIGKEIT: 60 - 10.000 r.p.m. TEMPERATURBEREICH: 37ºC - 120ºC KAPAZITÄT: 2,00 L PRESET FUNKTIONEN: ERINNERUNGEN: SCALE: 5 Kg (División 1 g) BATTERIEBATTERIEN: 2 x AAA MAßE: 38x25x32 cm GEWICHT: 8,00 Kg... - Page 52 2.- Zur Vermeidung von Verletzungen drehen Sie den An-/Ausschalter aus, ziehen Sie den Netzstecker und lassen Sie das Gerät abkühlen, bevor Sie Wartungsarbeiten vornehmen. 3.- Aus Sicherheitsgründen ist das Gerät in einem ausreichenden Abstand zu entflammbaren Wänden und Materialien aufzustellen. Wenn der Sicherheitsabstand nicht eingehalten wird, können Verfärbungen und Verbrennungen auftreten.
-
Page 53: Hauptfunktion
5.- Das Gerät ist nicht wasserdicht. Zum sicheren und geeigneten Bedienen sollte das Gerät in Innenräumen aufgestellt werden und die Raumtemperatur mindestens 21ºC (70ºF) und höchstens 29ºC (85ºF) betragen. 6.- Halten Sie den Küchenmaschine von Hitzequellen fern und achten Sie darauf, dass er nicht von Fett von Grills, Fritteusen usw. - Page 54 EINSATZ DER KLINGE 1.- Mixbehälter ohne Deckel auf eine waagrechte Arbeitsfläche stellen 2.- Klinge an der Achse fassen und so in die Halterung einsetzen, dass die Silikondichtung mit der Edelstahlfläche in Kontakt kommt (Abb. 1 und 2). 3.- Klinge durch Rechtsdrehung festschrauben (Abb. 3). 4.- Zum Entnehmen die Klinge nach links drehen.
- Page 55 3.- Waage richtig in die hierfür vorgesehene Öffnung einsetzen (Abb. 2). 4.- Waage und Küchenmaschine funktionieren vollkommen unabhängig voneinander. Nur die Messwerte werden auf dem Display angezeigt. EINSATZ DES KOCHGEFÄSSES 1.- Mixbehälter (ohne Deckel) gemäß Abbildung 1 und 2 einsetzen. Die Öffnungen am Sockel müssen mit den Verbindungsstücken am Behälterboden übereinstimmen.
- Page 56 GARSIEB Das Garsieb ist vielseitig einsetzbar: 1.- Bereiten aller möglichen Rezepte (Pasta, Nudeln, Gemüse usw.). 2- Kann als Sieb oder Filter verwendet werden. Einfach das Garsieb einsetzen, Deckel schließen und Saft in ein Glas gießen. (Davor Obst und Gemüse mit der Klinge zerkleinern) (Abb. 2). RÜHRAUFSATZ (Schmetterling) Mit diesem Einsatz lässt sich mischen und rühren.
-
Page 57: Beschreibung Der Maschinenteile
BESCHREIBUNG DER MASCHINENTEILE 1.- Messbecher 2.- Deckel Mixbehälter 3.- Mixbehälter 4.- Sicherheitsschalter 5.- Gerätesockel 6.- Waage 7.- Display 8.- Bedienfeld 9.- Antirutschfüße KNÖPFE AM BEDIENFELD 1.- START / PAUSE / OFF 2.- FUNKTIONSREGLER 3.- ON / STOP / CANCEL 4.- MENÜ 5.- DIY (Speicher) 6.- ZEIT 7.- GESCHWINDIGKEIT... - Page 58 ZUBEHÖR 1.- Kompletter Mixbehälter 2.- Dampfeinsätze (NICHT INBEGRIFFEN) 3.- Garsieb 4.- Dichtungsring / Arretierung 5.- Klinge 6.- Kneteinsatz 7.- Rühraufsatz (Schmetterling) 8.- Kelle 9.- Waage...
-
Page 59: Funktionsweise
FUNKTIONSWEISE ON/START - PAUSE/OFF (1)) 1.- Zum Einschalten des Geräts auf ON drücken. 2.- Nach Wahl des Menüs auf START drücken, um den Arbeitsgang einzuleiten. 3.- Zum Unterbrechen des Arbeitsgangs auf PAUSE drücken. Die Arbeitsunterbrechung wird auf dem LCD-Bildschirm als PAUSE angezeigt. Der Deckel lässt sich nun öffnen. Weitere Zutaten können hinzugefügt oder der Inhalt umgerührt werden usw. - Page 60 2.- Anleitung zum Speichern eigener Einstellungen: 1.- Einmal auf DIY drücken. Das Display zeigt den Speicherplatz DIY1 an. 2.- DIY fünf Sekunden gedrückt halten bis das Display STEP:01 anzeigt. 3.- Nun können Zeit, Temperatur und Geschwindigkeit für den ersten Arbeitsgang gewählt werden.
- Page 61 TEMPERATUR (8) 1.- Durch Drücken auf TEMPERATUR lässt sich diese am DREHREGLER auf einen Wert zwischen 37-120°C einstellen. WÄRMELEISTUNG (9) 1.- Durch Drücken auf WÄRMELEISTUNG lässt sich die Drehzahl der Klingen einstellen. 2.- Das Gerät hat 10 Leistungsstufen a.- Die Stufen 1 bis 5 sind auf empfindliche Nahrungsmittel und das Köcheln auf niedriger Temperatur ausgerichtet (u.
- Page 62 VERWENDUNGSBEISPIEL MÖHRENSUPPE MIT KORIANDER Zutaten: 1 Esslöffel Reis 1 Esslöffel Zucker 1 dickes Stück Orangenschale (Außenhaut mit Gemüseschäler entfernen) Ein 2 cm langes Stück geschälten Ingwer 300 g Möhren, zerkleinert und ohne Stiele 1 kleine Zwiebel, geschält und geviertelt 300 g Brühe 300 g Milch Schwarzer Pfeffer (nach Geschmack) Ein Büschel frischen Koriander...
-
Page 63: Menü
MENÜ Programm Beschreibung Voreinstellungen Setting Tipps 1.- Härtere Zutaten wie SMOOTHIE Mit dieser Klinge lassen sich Geschwindigkeit: 10 1.- Einstellungen sind nicht Möhren, Fleisch usw. etwas dickflüssigere und Temperatur: 0 anpassbar. Funktion sollten auf bis zu 1-2 cm reichhaltigere Fruchtsäfte Wärmeleistung: 10 wenn nötig mehrmals zerkleinert werden... - Page 64 1.- Brotteig: 330 g Wasser + KNEAD Zum Herstellen von Brotteig, Schritt 1: 1.- Geschwindigkeit 500g Mehl + weitere Keksen, Biskuits usw. Geschwindigkeit: 3 zwischen 2 und 3 Zutaten; Knetfunktion auf (Kneteinsatz) Temperatur: 0 einstellbar; 10 min einstellen Wärmeleistung: 0 2.- Temperatur auf 0 oder 2.- Nudelteig: 200 g Wasser Zeit: 3 min...
- Page 65 1.- Empfohlene Menge: 1 Geschwindigkeit: Stufe YOGURT Zum Herstellen von Joghurt 1.- Zeiteinstellung zwischen Joghurtbecher + 1 l 1 für 30 min und dann 3 und 12 Std. (Rühraufsatz frische Milch + Zucker, 6 stoppen (Schmetterling)) 2.- Nach 10 Minuten ohne bis 12 Std., je nach Temperatur: 37ºC Eingabe schaltet sich das...
-
Page 66: Anwendungshinweise
ANWENDUNGSHINWEISE SOUP Der Rühraufsatz (Schmetterling) sollte erst nach Beendigung des Mischvorgangs eingesetzt werden, Verwendung max. bis Geschwindigkeitsstufe 4, ohne eingesetzten Messbecher kochen, Garsieb als Spritzschutz umgekehrt auf der Öffnung für den Messbecher platzieren. CHOP Zum Crushen oder Zerkleinern härterer Zutaten oder größerer Mengen am besten mit Geschwindigkeit 5 anfangen und dann auf Geschwindigkeit 10 schalten (weniger Vibration und bessere Leistung). -
Page 67: Tabelle Problebehebung
TABELLE PROBLEMBEHEBUNG Fehlercode Beschreibung Mögliche Ursachen Lösung Sicherheitsschalter nicht Fehlposition von Mixbehälter oder Festen Sitz von Mixbehälter und aktiviert Deckel Deckel überprüfen und ggf. korrigieren Keine Temperaturanzeige Fehlposition von Mixbehälter, Festen Sitz von Mixbehälter Temperatursensor am Sockel überprüfen und ggf. korrigieren beschädigt Motor blockiert Überfüllter Mixbehälter... -
Page 68: Reinigung / Wartung
REINIGUNG / WARTUNG Gerät nach Gebrauch ausschalten und Netzstecker ziehen. Bestandteile abnehmen, waschen, trocknen und dann wieder einsetzen. BITTE BEACHTEN : Zutaten wie Curry, Zitrusfrüchte, Tomaten oder Karotten können Flecken verursachen. Entfernen Sie Reste dieser Zutaten möglichst bald, um dies zu verhindern. Reinigung von Mixbehälter und Klinge 1.- Der Mixbehälter ist absolut wasserfest und spülmaschinengeeignet 2.- Reinigung ohne Spülmaschine: a) etwas Reinigungsmittel und Wasser in den Mixbehälter... -
Page 69: Important Safety Measures
SAVE THESE INSTRUCTIONS This manual contains important safety information concerning the maintenance, use and operation of this product. Failure to follow the instructions contained in this manual may result in serious injury. If you are unable to understand the contents of this manual, please bring it to the attention of your supervisor. - Page 70 8.- Avoid contact with moving parts. Take special care when cleaning appliances. 9.- Always disconnect the appliance from the supply if it is left unattended and before assembling, disassembling or cleaning 10.- Avoid contact with hot parts 11.- Do not open the lid while the water inside is boiling. 12.- The measuring cup is the only accessory that can be safely used to cover the hole in the centre of the lid.
- Page 71 21.- This appliance may be used by children of 8 years old and above and by persons with reduced physical, sensory or mental capabilities or lack of experience and knowledge if they have been supervised or trained on the safe use of the appliance and if they understand the risks involved.
-
Page 72: Worthy Information
MAIN TECHNICAL SPECIFICATIONS MODEL: 69561 VOLTAGE: 220-240V / 50 Hz MOTOR POWER: 1.000W HEATING POWER: 1.000W SPEED: 60 - 10.000 r.p.m. TEMPERATURE RANGE: 37ºC - 120ºC CAPACITY: 2,00 L PRESET FUNCTIONS: MEMOIRS: SCALE: 5 Kg (División 1 g) SCALE BATTERIES: 2 x AAA SIZE: 38x25x32 cm... - Page 73 3.- For safe and proper operation, the unit must be located at a reasonable distance from combustible walls and materials. If safe distances are not maintained, discoloration or combustion could occur. Do not locate toaster under shelving or closer than 12" (31 cm) from the ceiling. 4.- Allow a minimum of 12"...
-
Page 74: Main Function
7.- Do not place food processor in an area that restrict air flow around the front or rear of the unit. 8.- Some exterior surfaces on the unit will get hot. Use caution when touching these areas to avoid injury. MAIN FUNCTION Food processor with multiple functions including cutting, mixing, kneading, slow cooking, boiling, steaming, baking, weighing, etc. - Page 75 ASSEMBLING THE KNEADING BLADE 1.- With the lid removed, place the work bowl vertically on a table 2.- Pick up the kneading blade and insert it through the hole making sure the silicon seal makes contact with the stainless steel surface (figure 1-2). 3.- Secure the accessory by turning the locking lever clockwise (figure 3).
- Page 76 INSTALLING THE WORK BOWL 1.- Place the work bowl (without the lid) in position as shown in figure 1-2. The holes in the base and the connectors on the base of the work bowl must fit together. 2.- After that, put the measuring cup on the lid. 3.- Then, put on the lid with a 45º...
- Page 77 BUTTERFLY This accessory is designed for mixing and stirring and keeping food from sticking to the base of the work bowl and protect it from being cut by the blades. Because of that, it shouldn't be used at speeds above level 4 (figure 1). To install it, just insert it into the top of the blades, push down and turn counter-clockwise to prop- erly secure it (figure 2).
-
Page 78: Parts List
PARTS LIST 1 - Measuring cup 2 - Work bowl lid 3 - Work bowl 4 - Safety switch 5 - Body 6 - Scale 7 - Display 8 - Control panel 9 - Non-slip feet CONTROL PANEL 1 - START / PAUSE / OFF Button 2 - Multifunction REGULATOR 3 - ON / STOP / CANCEL Button 4 - MENU Button... - Page 79 ACCESSORIES 1 - Complete work bowl 2 - Steamer assembly (NOT INCLUDED) 3 - Basket 4 - Lock / fastener ring 5 - Blades 6 - Kneading blade 7 - Butterfly 8 - Spatula 9 - Scale...
-
Page 80: Operation
OPERATION ON/START - PAUSE/OFF (1) 1.- Push the button to turn the unit on. (ON function) 2.- After you have already set the MENU functions, push this button to activate the work cycle. (START function) 3.- Push the button during any work process to stop the unit. You will see the word “PAUSE” appear on the LCD screen. - Page 81 2.- To save to any memory available, follow the steps below: 1.- Push the DIY button once and the DIY1 memory will start blinking on the display. 2 - Hold the DIY button down for 5 seconds until the display shows “STEP:01”. 3 - Now, select the time, operating temperature and speed for the first step.
- Page 82 HEAT LEVEL Button (9 1.- Push the “HEAT LEVEL BUTTON” to adjust the blade rotation speed 2.- There are 10 power levels a. - Levels 1-5 are intended for delicate foods, low-temperature cooking, etc. b. - Levels 6-10 can be used for frying, steamer function, etc. PULSE button (10) 1.- When you hold down the “PULSE”...
- Page 83 USAGE EXAMPLE CILANTRO AND CARROT SOUP Ingredients: 1 table spoon of rice 1 tablespoon of sugar 1 thick strip of orange peel (peeled with a vegetable peeler) A 2 cm piece of peeled ginger 300 g of carrots without leaves cut into pieces 1 small peeled onion cut into four pieces 300 g broth 300 g milk...
-
Page 84: Menu
MENU Program Description Pre-set Setting Tips 1.- Suggested chopped size SMOOTHIE Used for making fruit Speed: 10 1.- All setting non-adjustable, of the ingredients with smoothies that are a bit Temperature: 0 run once more if not fine hard articles like carrot, denser and thicker than Pot. - Page 85 1.- Knead for bread: 330 g KNEAD Used for making bread Stage 1: 1.- Speed adjustable from water + 500g flour + dough, biscuits, sponge Speed: 3 level 2-3; other ingredients; knead cake, etc. Temperature: 0 2.- Temperature adjustable 10 min by default setting (kneading blade) Pot.
- Page 86 1.- Suggested volume: 1 Speed: 1 at the first 1.- Time adjustable from YOGURT Used for making yoghurt cup yogurt + 1L fresh 30min, and (kneading blade) 3-12h milk + sugar, 6-12h then stop 2.- If left idle for 10 minutes according to desired Temperature: 37ºC after program completion,...
-
Page 87: Suggestions For Use
SUGGESTIONS FOR USE SOUP It’s better to use butterfly after blending stopped, the Maximum speed for using it is 4 and cooking with the measuring cup off, place the cooking basket upside down over the measuring cup opening to minimize food splatter CHOP For crushing or chopping hard food, meat or big volume of food, it is suggested to select speed 5 first and then turn to speed 10, to avoid vibration and achieve perfect performance... -
Page 88: Problems And Solutions
PROBLEMS AND SOLUTIONS Error Code Description Possible reasons Solution Safety switch not fixed Jar or jar lid is not fixed properly Re-assemble the jar and jar lid, make sure all the parts are assembled properly and tightly Temperature sensor The jar is not in place, or connection Re-assemble the jar and make sure it missing of the temperature sensor at the jar... -
Page 89: Cleaning / Maintenance
CLEANING / MAINTENANCE After using, turn off and unplug, disassemble the pieces then wash, dry and re-assemble. NOTE : Some ingredients, like curry, citrus, tomatoes or carrots, may cause stains. To avoid staining, clean off any traces of those ingredients as quickly as possible. Work bowl/blades Cleaning 1.- The work bowl can be completely submerged in water so it can be put in the dishwasher without any problems. - Page 90 CONSERVARE QUESTE ISTRUZIONI Il presente manuale contiene importanti informazioni di sicurezza per la manutenzione, l'uso e la manipolazione di questo prodotto. Qualsiasi inosservanza di queste istruzioni può dare origine a gravi danni. In caso di mancata comprensione del contenuto del presente manuale, comunicarlo al supervisore.
- Page 91 8.- Evitare il contatto con le parti in movimento. Prestare estrema attenzione durante la pulizia. 9.- Staecare sempre la spina della rete se viene lasciato incustodito e prima del montaggio, smontaggio o puliza. 10.- Evitare il contatto con le parti calde. 11.- Non aprire il coperchio mentre sta bollendo l'acqua all'interno.
- Page 92 21.- Questo dispositivo può essere utilizzato da bambini con un'età minima di 8 anni e da persone con disabilità fisiche, sensoriali o mentali o prive di esperienza e competenza, purché si trovino sotto la supervisione di un adulto o abbiano ricevuto formazione in merito all'utilizzo sicuro del dispositivo e siano in grado di comprendere i rischi ad esso associati.
- Page 93 SMALTIMENTO DELL'ELECTRODOMESTICO: 27.- gettare questo prodotto come spazzatura comunale non differenziata. Dato l'utilizzo di elementi elettrici ed elettronici, è necessaria la raccolta differenziata dello stesso, come stabilito dal DR 208/2005 riguardante la raccolta differenziata di prodotti elettrici.
- Page 94 PRINCIPALI SPECIFICAZIONI TECNICHE MODELLO: 69561 TENSIONE 220-240V / 50 Hz POTENZA MOTORE: 1.000W POTENZA DI RISCALDAMENTO: 1.000W VELOCITÁ: 60 - 10.000 r.p.m. GAMMA DI TEMPERATURA: 37ºC - 120ºC CAPACITÁ: 2,00 L FINZIONI PRESET: MEMORIE: SCALE: 5 Kg (División 1 g) SCALE BATTERIE: 2 x AAA MISURE...
- Page 95 2.- Per evitare qualsiasi lesione, spegnere l'interruttore elettrico, scollegare l'unità dalla fonte di alimentazione elettrica e lasciare che si raffreddi prima di eseguire qualsiasi operazione di manutenzione. 3.- Per un funzionamento adeguato e sicuro, l'unità deve essere collocata a una distanza ragionevole dalle pareti e da materiali infiammabili.
- Page 96 6.- Non collocare il robot da cucina in un'area esposta a temperature eccessive o a grasso di piastre, friggitrici, ecc. Una temperatura eccessiva può causare danni all'unità. 7.- Non collocare il robot da cucina in un'area senza ventilazione nella parte anteriore e posteriore dell'unità. 8.- Alcune superfici esterne dell'unità...
- Page 97 MONTAGGIO DELLA LAMA 1.- Posizionare la caraffa su un tavolo in posizione verticale con il coperchio smontato. 2.- Prendere la lama dall'asse e inserirla attraverso il foro in modo che la giuntura in silicone sia in contatto con la superficie in acciaio inox (Figura 1 - 2). 3.- Fissare la lama ruotando la chiave di blocco in senso orario (Figura 3).
- Page 98 3.- Posizionare la bilancia in modo che vada a incastrarsi nell'apposito foro (Figura2). 4.- La bilancia funziona con modalità totalmente indipendente dalla macchina. I valori di misurazione compaiono esclusivamente sul display della bilancia INSTALLAZIONE DELLA CARAFFA 1.- Posizionare la caraffa (senza coperchio) nella sua posizione come indicato in figura 1 -2. I fori e i connettori della base della caraffa devono coincidere.
- Page 99 CESTELLO Il cestello per la cottura a vapore è stato progettato per assolvere a diverse funzioni: 1.- Consente di preparare tutti i tipi di ricette che richiedono la cottura al vapore (Pasta, Noodles, verdure al vapore, ecc). 2.- Può essere utilizzato come filtro o colino. Basta collocarlo nella sua posizione, chiudere il coperchio e versare il succo in un bicchiere.
- Page 100 DESCRIZIONE DELLE PARTI 1.- Bicchiere misuratore 2.- Coperchio caraffa 3.- Caraffa 4.- Micro di sicurezza 5.- Corpo 6.- Bilancia 7.- Display 8.- Pannello di controllo 9.- Piedini antiscivolo PANNELLO DI CONTROLLO 1.- Pulsante START / PAUSE / OFF 2.- REGOLATORE multifunzione 3.- Pulsante ON/ STOP / CANCEL 4.- Pulsante MENU 5.- Pulsante DIY (memorie)
- Page 101 ACCESSORI 1.- Caraffa completa 2.- Sistema per la cottura a vapore (NON INCLUSO) 3.- Cestello 4.- Anello di fissaggio / blocco 5.- Lama 6.- Accessorio per impastare 7.- Sbattitore a farfalla 8.- Spatola 9.- Bilancia...
- Page 102 FUNZIONAMENTO ON/START - PAUSE/OFF (1) 1.- Premere il pulsante per accendere l'unità. (funzione ON) 2.- Dopo la regolazione preliminare delle funzioni del MENU, premere questo pulsante per attivare il ciclo di lavoro. (funzione START). 3.- Premere il pulsante durante qualsiasi processo di lavorazione per spegnere l'unità. Nella schermata LCD comparirà...
- Page 103 2.- Per salvare dati sulle memorie disponibili seguire i passaggi riportati a continuazione: 1.- Premere una volta il pulsante DIY, sul display lampeggerà la memoria DIY1. 2.- Mantenere premuto il pulsante DIY per 5 secondi finché sul display non compare “STEP:01 3.- Selezionare per prima cosa il tempo, la temperatura di esercizio e la velocità...
- Page 104 4.- Se si modifica la velocità dal livello 5 al 6 o dal 6 al 5, la macchina emetterà un suono relativo alla scatola del cambio ingranaggi. a.- Tra i livelli 1-5 il motore girerà a una velocità ridotta trasmettendo tuttavia molta forza.
- Page 105 UNITÁ EQUIVALENZE (g/ml) 1 lb 453,6 g 1 oz 28,35 g 1 lb.7 oz 652,05 g 1 lb.oz (USA) 29,57 ml 1 lb.oz (ENG) 28,41 ml ESEMPIO DI UTILIZZO ZUPPA DI CAROTA E CORIANDOLO Ingredienti: 1 cucchiaio di riso 1 cucchiaio di zucchero 1 grossa striscia di buccia di arancia (sbucciata con pelaverdure) Un pezzetto di 2 cm di zenzero pelato 300 g di carote prive di foglie e tagliate a pezzetti...
- Page 106 MENU Programma Descrizione Predefiniti Impostazioni Tips 1.- Si consiglia di tritare gli SMOOTHIE Consente di preparare frullati Velocità: 10 1.- Impostazioni non alimenti duri come la di frutta dalla consistenza Temperatura: 0 regolabili, ripetere la carota e la carne a densa rispetto a quelli Pot.
- Page 107 1.- Impasto per pane: 330 g di KNEAD Consente di preparare Fase 1: 1.- Velocità regolabile su acqua + 500g di farina + altri intervalli compresi tra 2-3; impasti per pane, biscotti, Velocità:3 ingredienti; impastare per 10 2.- Temperatura regolabile torte ecc.
- Page 108 1.- Volume consigliato: 1 Velocità': 1 nei primi 1.- Tempo regolabile su YOGURT Consente di preparare lo intervalli compresi tra tazza di yogurt + 1L latte 30min e poi yogurt 3-12h. fresco + zucchero, 6-12h si arresta (Accessorio per impastare) 2.- Se la macchina viene in base alla consistenza Temperatura: 37ºC...
- Page 109 CONSIGLI PER L'UTILIZZO SOUP E' meglio utilizzare l'accessorio a farfalla dopo l'arresto delle lame, la velocità massima da utilizzare è la 4 e occorre rimuovere il bicchiere misuratore, posizionare il cestello di cottura capovolto sul bicch- iere di cottura per minimizzare gli schizzi CHOP Per tritare o sminuzzare cibi duri, carne o grossi pezzi di cibo, si consiglia di selezionare prima la velocità...
- Page 110 TABELLA CON LE SOLUZIONI AI PROBLEMI Codice errore Descrizione Possibili motivi Soluzione Interruttore di sicurezza La caraffa o il coperchio non sono Riposizionarli e assicurarsi che tutti i non fissato fissati correttamente componenti siano correttamente fissati e ben saldi Manca il sensore di La caraffa non è...
- Page 111 PULIZIA / MANUTENZIONE Dopo aver terminato di utilizzare la macchina, spegnerla, scollegarla dalla presa, smontare i pezzi per lavarli asciugarli e rimontarli nuovamente NOTA : Alcuni ingredienti come il curry, gli agrumi, i pomodori o le carote possono macchiare. Per evitare che accada pulire al più presto i residui di questi ingredienti. Pulizia caraffa/lama 1.- La caraffa può...
- Page 112 GUARDE ESTAS INSTRUÇÕES Este manual contém informação sobre segurança relevante para a manutenção, utilização e manipulação deste aparelho. A não observação destas instruções poderia resultar em lesões pessoais graves. Se não compreender o conteúdo deste manual, comunique-o ao seu supervisor. Não ponha este equipamento a funcionar até...
- Page 113 7.- Não deixe o electrodoméstico a funcionar sem vigilância. Desligue o aparelho da tomada de corrente eléctrica depois de cada utilização. 8.- Evite o contacto do corpo com as partes em movimento do aparelho. Extreme as precauções durante a limpeza do aparelho.
- Page 114 20.- Utilize somente peças originais 21.- Este aparelho pode ser utilizado por crianças com idades superiores a 8 anos, e por pessoas portadoras de qualquer deficiência física, sensorial ou psíquica, ou com falta de experiência e conhecimentos, desde que sob supervisão ou quando tenham recebido formação sobre a utilização segura do aparelho, e compreendam os riscos envolvidos.
- Page 115 ELIMINAÇÃO DO ELECTRODOMÉSTICO: 27.- Não se desfaça deste aparelho junto com o lixo doméstico não classificado. Devido aos elementos eléctricos e electrónicos que incorpora, é necessária a recolha selectiva do mesmo, tal como ordena a legislação vigente sobre a recolha selectiva de produtos eléctricos.
- Page 116 PRINCIPAIS CARACTERÍSTICAS TÉCNICAS MODELO: 69561 VOLTAGEM: 220-240V / 50 Hz POTÊNCIA MOTOR: 1.000W POTÊNCIA DE AQUECIMENTO: 1.000W VELOCIDADE: 60 - 10.000 r.p.m. GAMA DE TEMPERATURA: 37ºC - 120ºC CAPACIDADE: 2,00 L FUNÇÕES DE PREPARAÇÃO: 16 MEMÓRIA: BALANÇA: 5 Kg (División 1 g) BATERIAS DE BALANÇA: 2 x AAA MEDIDAS:...
- Page 117 2.- Para evitar lesões, apague o interruptor eléctrico, desconecte a unidade da rede de alimentação eléctrica e deixe-a arrefecer completamente antes de realizar qualquer tarefa de manutenção. 3.- Para um funcionamento adequado e seguro, a unidade deverá estar colocada a uma distância razoável das paredes e dos materiais inflamáveis.
- Page 118 6.- Não coloque o robot de cozinha numa área exposta a temperaturas excessivas ou a gorduras de placas, fritadeiras, etc. Uma temperatura excessiva poderia danificar a unidade. 7.- Não coloque o robot de cozinha numa área sem ventilação pela parte dianteira da unidade. 8.- Algumas superfícies exteriores da unidade podem alcançar temperaturas elevadas.
- Page 119 MONTAGEM DA LÂMINA 1.- Com a tampa desmontada, situe a jarra verticalmente sobre uma mesa. 2.- Sujeite a lâmina pelo seu eixo, e insira-a no orifício, de forma a que a junta de silicone esteja em contacto com a superfície em aço inoxidável (Figura 1 - 2). 3.- Fixe a lâmina girando a chave de bloqueio no sentido horário (Figura 3).
- Page 120 3.- Situe a balança de maneira a que esta encaixe corretamente no orifício (Figura 2). 4.- O funcionamento da balança é totalmente independente do robot de cozinha. Os valores das medições só serão visíveis no visor da balança. INSTALAÇÃO DA JARRA 1.- Coloque a jarra (sem tampa) na sua posição, tal como se indica na figura 1 -2.
- Page 121 CESTO O cesto de vapor foi concebido para realizar várias funções: 1.- Serve para a elaboração de todo o tipo de receitas relacionadas com a cozinha a vapor (Massa, Noodles, vegetais ao vapor, etc). 2.- Pode utilizar-se como filtro ou coador. Basta colocar o cesto na sua posição, fechar a tampa e verter o sumo num recipiente.
- Page 122 DESCRIÇÃO DOS COMPONENTES 1.- Copo medidor 2.- Tampa da jarra 3.- Jarra 4.- Micro de segurança 5.- Corpo 6.- Balança 7.- Ecrã 8.- Painel de controlo 9.- Patas antideslizantes PAINEL DE CONTROLO 1.- Botão START / PAUSE / OFF 2.- REGULADOR multifunção 3.- Botão ON / STOP / CANCEL 4.- Botão MENU 5.- Botão DIY (memórias)
- Page 123 ACESSÓRIOS 1.- Jarra completa 2.- Conjunto de vapor (NÃO INCLUÍDO) 3.- Cesto 4.- Anilla de fixação / bloqueio 5.- Lâmina 6.- Acessório para amassar 7.- Batedor de borboleta 8.- Espátula 9.- Balança...
- Page 124 FUNCIOMAMENTO ON/START - PAUSE/OFF (1) 1.- Prima o botão para ligar o robot de cozinha. (função ON) 2.- Depois de ajustar previamente as funções do MENU, prima este botão para ativar o ciclo de trabalho. (função START). 3.- Prima o botão durante qualquer processo de trabalho para deter o funcionamento do robot de cozinha.
- Page 125 2.- Para armazenar os parâmetros selecionados em qualquer das memórias disponíveis, proceda da seguinte maneira: 1.- Prima o botão DIY uma vez. A memória DIY1 piscará no ecrã. 2.- Mantenha premido o botão DIY durante 5 segundos, até que no ecrã apareça a indicação “STEP:01) 3.- Selecione o tempo, a temperatura de funcionamento e a velocidade desejada.
- Page 126 Botão TEMPERATURA (8)) 1.- Prima o botão “TEMPERATURA”, e regule a temperatura entre 37-120°C utilizando o REGULADOR multifunção. Botão POTÊNCIA DE AQUECIMENTO (9) 1.- Prima o botão “POTÊNCIA AQUECIMENTO” para ajustar a velocidade de rotação das lâminas. 2.- Existem 10 níveis de potência. a.- Os níveis 1-5 são recomendados para alimentos sensíveis, cocção a baixa temperatura, etc.
- Page 127 EXEMPLO DE USO SOPA DE CENOURA E COENTROS Ingredientes: 1 colher de arroz 1 colher de açúcar 1 tira grossa de casca de laranja (descascada com o descascador de verduras) Um pedaço de gengibre sem casca de 2 cm 300 g de cenouras, sem folhas e partidas aos pedaços 1 cebola pequena sem casca e partida em quatro 300 g de caldo 300 g de leite...
- Page 128 MENU Programa Descrição Predeterminados Setting Tips 1.- Tamanho sugerido dos SMOOTHIE Para preparar batidos de Velocidade: 10 1.- Função não programável. pedaços de ingredientes frutas, com uma consistên- Temperatura: 0 Repita a operação até cortados, para cia mais densa e espessa, Pot.
- Page 129 1.- Massa de pão: 330 g de KNEAD Para elaborar massas de Fase 1: 1.- Velocidade programável água + 500 g de farinha + pão, bolachas, bolos, etc. Velocidade:3 para os níveis 2-3; outros ingredientes. (Acessório para amassar) Temperatura: 0 2.- Temperatura programável Amassar durante 10 m com P.
- Page 130 1.- Volume sugerido: 1 copo Velocidade: 1 durante 1.- Intervalo de tempo YOGURT Para elaborar iogurtes de iogurte + 1 litro de os 30 m programável entre 3-12h (Acessório para amassar) leite gordo + açúcar. Temperatura: 37ºC 2.- Decorridos 10 minutos 6-12 h em função da P.
- Page 131 CONSELHOS DE UTILIZAÇÃO SOUP É recomendável utilizar o utensílio de borboleta depois de finalizar a mistura. A velocidade máxima para utilizar este acessório é 4. Ao cozinhar sem o copo medidor no orifício, colocar o cesto de cozer virado ao contrário sobre o orifício, para reduzir ao mínimo as salpicaduras de comida CHOP Para triturar ou cortar alimentos duros, carne, ou grandes quantidades de alimentos, é...
- Page 132 TABELA DE SOLUÇÕES DE PROBLEMAS Código de erro Descrição Possíveis causas Solução Interruptor de segurança Jarra ou tampa da jarra mal colocada Volte a colocar a jarra e a tampa da jarra, assegurando-se de que todas as partes se não acionado encontram bem colocadas e na posição correta Falta sensor de...
- Page 133 LIMPEZA / MANUTENÇAO Quando terminar de utilizar o robot de cozinha, desligue-o e desconecte-o da tomada de cor- rente. Desmonte as peças e lave-as, seque-as e monte-as novamente. NOTA : Alguns ingredientes como o curry, cítricos, tomates ou cenouras podem causar o aparecimento de manchas.
-
Page 134: Belangrijke Veiligheidsvoorschriften
BEWAAR DEZE GEBRUIKSAANWIJZING Deze handleiding bevat belangrijke veiligheidsinstructies voor het onderhoud, het gebruik en de bediening van het apparaat. Het niet naleven van deze aanwijzingen kan ernstige schade tot gevolg hebben. Indien men de inhoud van deze gebruiksaanwi- jzing niet verstaat, gelieve dit te melden aan de opzichter. Stel dit apparaat niet in werking voordat men de inhoud van deze gebruiksaanwijzing heeft gelezen en begrepen. - Page 135 7.- Laat het apparaat nooit zonder toezicht werken. Koppel het toestel na elk gebruik los. 8.- Vermijd het contact met de bewegende onderdelen. Wees zeer aandachtig tijdens de reiniging. 9.- Het apparaat van het net loskoppelen altijd als het onbeheerd wordt achtergelaten en vóór montage, demontage of reiniging.
- Page 136 21.- Dit apparaat kan worden gebruikt door kinderen van 8 jaar of ouder en personen met een lichamelijk, zintuiglijke of mentale handicap, of met een gebrek aan kennis en ervaring wanneer het onder toezicht gebeurt en zijn geïnstrueerd over het veilige gebruik van het apparaat en zij begrijpen wat de risico’s inhouden.
- Page 137 WEGWERPEN VAN HET TOESTEL: 27.- Dit produkt mag niet worden weggeworpen als niet geklasseerd gemeentelijk afval. Omdat dit apparaat elektrische en elektronische elementen bevat, moet het selectief worden ingezameld volgens het Koninklijk Besluit 208/2005 betreffende selectieve inzameling van elektrische produkten.
-
Page 138: Voornaamste Technische Gegevens
VOORNAAMSTE TECHINISCHE GEGEVENS MODEL: 69561 SPANNING 220-240V / 50 Hz POTÊNCIA MOTOR: 1.000W POTÊNCIA DE AQUECIMENTO: 1.000W SPEED: 60 - 10.000 r.p.m. TEMPERATUURBEREIK: 37ºC - 120ºC CAPACITEIT: 2,00 L VOORBEREIDINGSFUNCTIES: GEHEUGEN: BALANCE: 5 Kg (División 1 g) BATTERIJ BATTERIJEN: 2 x AAA AFMETINGEN 38x25x32 cm GEWICHT... - Page 139 2.- Om verwondingen te vermijden moet men de elektrische schakelaar uitzetten, de eenheid van de elektrische voeding loskoppelen en wachten totdat het apparaat is afgekoeld alvorens eenderwelke onderhoudsoperatie uit te voeren. 3.- Om een aangepaste en veilige werking te bekomen moet men het apparaat om een redelijke afstand plaatsen van muren en ontvlambare produkten.
-
Page 140: Hoofdfunctie
6.- Plaats de Keukenrobot niet in een zone die onderhevig is aan hoge temperaturen of aan vetten van grills, frituurpannen, enz. Een te hoge temperatuur kan schade aan de eenheid berokkenen. 7.- Plaats de Keukenrobot aan de voorkant niet in een ongeventileerde zone. - Page 141 MONTEREN VAN HET MES 1.- Plaats de karaf waarvan het deksel is verwijderd verticaal op een tafel. 2.- Neem het mes uit de as en steek hem op zo'n wijze in het gat dat de siliconen pakking contact maakt met het roestvrijstalen oppervlak (Afbeelding 1 - 2). 3.- Bevestig het mes door de vergrendeling rechtsom vast te draaien (Afbeelding 3)..
- Page 142 3.- Plaats de weegschaal zodanig dat deze op zijn plek valt (Afbeelding Figura2) 4.- De werking van de weegschaal is totaal onafhankelijk van het apparaat. De gewogen waarden kunnen enkel worden afgelezen op het display van de weegschaal zelf. PLAATSEN VAN DE KAN 1.- Plaats de kan (zonder deksel) op zijn plaats zoals wordt aangegeven in afbeeldingen 1 -2.
- Page 143 MANDJE Dit stoommandje is bedoelt voor meerdere functies: 1.- Het dient voor de bereiding van allerlei soorten recepten voor het koken met stoom (pasta, noodles, gestoomde groenten, etc). 2- Kan als filter of zeef gebruikt worden gebruikt. Het is voldoende om de mand eenvoudigweg op zijn plak te zetten, het deksel te sluiten en het sap in de kan te gieten.
-
Page 144: Beschrijving Van De Onderdelen
BESCHRIJVING VAN DE ONDERDELEN 1.- Maatbeker 2.- Deksel kan 3.- Kan 4.- Veiligheidsschakelaar 5.- Body 6.- Weegschaal 7.- Display 8.- Bedieningspaneel 9.- Antislipvoetjes BEDIENINGSPANEEL 1.- Knop START / PAUSE / OFF 2.- INSTELKNOP multifunctie 3.- Knop ON / STOP / CANCEL 4.- Knop MENU 5.- Knop DIY (geheugens) 6.- Knop TIJD... - Page 145 ACCESSOIRES 1.- Kan compleet 2.- Stoom set (NIET INBEGREPEN) 3.- Mandje 4.- Vergrendeling / blokkering 5.- Mes 6.- Kneedaccessoire 7.- Vlinderklopper 8.- Spatel 9.- Weegschaal...
-
Page 146: Werking
WERKING ON/START - PAUSE/OFF (1) 1.- Druk op de knop om de unit aan te zetten (functie ON) 2.- Na de voorgaande aanpassing van de MENU-functies, druk op deze knop om de werkcyclus te activeren. (functie START). 3.- Deze knop kan tijdens elk werkingsproces worden ingedrukt om het apparaat te laten stoppen. Op het LCD-scherm is nu het woord "PAUSE"... - Page 147 2.- Om iets op te slaan in een van de geheugens, moeten de volgende stappen worden uitgevoerd: 1.- Druk eenmaal op de knop DIY waarna geheugen DIY1 op het scherm gaat knipperen. 2.- Houd de knop DIY gedurende 5 seconden ingedrukt, totdat het display "STEP:01" toont. 3.- Nu kunnen de gewenste tijd, de werktemperatuur en de snelheid voor de eerste stap worden geselecteerd.
- Page 148 Knop TEMPERATUUR (8)) 1.- Druk op de knop "TEMPERATUUR" en stel de temperatuur in tussen 37-120°C waarbij u gebruik maakt van de multifunctie-instelknop. Knop VERMOGEN VERWARMINGSELEMENT (9) 1.- Druk op de knop "VERMOGEN VERWARMINGSELEMENT" om de snelheid van het draaien van de messen in te stellen.
- Page 149 VOORBEELD VOOR GEBRUIK SOEP VAN WORTELS EN KORIANDER Ingrediënten: 1 eetlepel rijst 1 eetlepel suiker 1 dikke strip sinaasappelschil (geschild met een groente) Een stukje verse, gepelde gember van 2 cm 300 g wortels, zonder bladgroen en in stukjes gesneden 1 kleine gepelde ui die in 4 stukken is gesneden 300 g bouillon 300 g melk...
-
Page 150: Menu
MENU Programma Omschrijving Instelling Tips Voorgeprogrammeerd 1.- Voorgestelde gehakte SMOOTHIE Deze functie wordt gebruikt Snelheid 10 1.- Alle instellingen zijn niet grootte van ingrediënten voor het maken van Temperatuur: 0 aanpasbaar, proces die bestaan uit harde herhalen als het resultaat smoothies met groente en Verm. - Page 151 1.- Deeg voor brood: 330 g water KNEAD Deze zijn bedoeld voor het Stap 1: 1.- Snelheid instelbaar + 500g meel + andere bewerken van deeg of Snelheid:3 tussen stand 2-3; ingrediënten; 10 min kneden beslag voor brood, koekjes, Temperatuur: 0 2.- Temperatuur instelbaar op standaard instelling biscuit, etc.
- Page 152 1.- Aanbevolen hoeveelheid: Snelheid: 1 gedurende 1.- Tijd instelbaar tussen YOGURT Dient voor de bereiding van 1 beker yoghurt + 1L de eerste 30min, en 3-12u yoghurt verse melk (+ suiker), dan stoppen 2.- Als het apparaat (Kneedaccessoire) 6-12u afhankelijk van de Temperatura: 37ºC gedurende 10 minuten gewenste dikte...
-
Page 153: Tips Voor Het Gebruik
TIPS VOOR HET GEBRUIK SOUP Het is beter om het vlinderklopper te gebruiken nadat het mixen is gestopt, de maximale snelheid voor het gebruik ervan is 4 en koken gebeurt met de maatbeker eraf, plaats de kookmand onderste- boven over de maatbekeropening om spetteren te minimaliseren CHOP Voor het vermalen of hakken van harde voedingsmiddelen, vlees of een groot voedselvolume, wordt aangeraden om eerst snelheid 5 te kiezen en daarna over te schakelen naar snelheid 10, om trillingen te vermijden en voor een perfect... -
Page 154: Tabel Met Oplossingen Voor Problemen
TABEL MET OPLOSSINGEN VOOR PROBLEMEN Foutmelding Beschrijving Mogelijke oorzaken Oplossing Veiligheidsschakelaar niet Kan of deksel van de kan is niet goed Zet de kan en het deksel van de kan opnieuw vergrendeld vastgezet in elkaar, zorg ervoor dat alle delen op de juiste manier en strak in elkaar worden gezet Temperatuursensor Zet de kan opnieuw in elkaar en zorg... -
Page 155: Reiniging / Onderhoud
REINIGING / ONDERHOUD Als u klaar bent met het gebruik, zet u het apparaat uit en haalt u het uit het stopcontact, haalt u de onderdelen los om ze af te wassen, te drogen en ze opnieuw te monteren. LET OP : Sommige ingrediënten, zoals kerrie, citrusvruchten, tomaten en wortels kunnen vlekken veroorzaken. - Page 156 L'intervention technique par le client ou par du personnel non autorisé rendra immédiatement non valise la garantie. LACOR MENAJE PROFESIONAL, S.L. ne se rend pas responsable des pannes produites par une installA tion ou une utilisation incorrecte de l'appareil.
- Page 157 Consult with your sales person. Technical intervention by the client or by unautho- rized personnel will render the guarantee immediately invalidated. LACOR MENAJE PROFESIONAL, S.L. does not hold itself responsible for those damages caused by incorrect installa- tion or use of the device.
- Page 158 LACOR MENAJE PROFESIONAL S.L Bº San Juan, s/n - Apdo. 18 Telf.: 943 769030 - Fax: 943 765387 Telf. Export: +34 943 769174 - Fax Export: +34 943 769222 comercial@lacor.es - www.lacor.es 20570 BERGARA (Gipuzkoa) - SPAIN GRUPO MARCOS LARRAÑAGA Y CIA...